









.png)
 简体中文
简体中文 
Getting background music volume right in CapCut is one of the simplest ways to make your videos sound professional. Set it too high and your voiceover disappears. Set it too low and the mood falls flat. The good news: there is a reliable starting range for every content type, and CapCut’s volume slider makes the adjustment take less than 30 seconds.

Best Volume for Background Music in CapCut (by Content Type)
Quick Answer: What Volume Should Background Music Be in CapCut?
CapCut’s volume slider runs from 0% to 200%, with 100% matching the original source level of the audio file. For most creators, background music should sit between 10–25% when voiceover or dialogue is present, and between 50–80% for music-only or aesthetic content with no speaking.
Rule of thumb: If someone is talking, the music should support the voice, not compete with it. If no one is talking, the music can drive the emotion.
Quick Reference – Voiceover or dialogue present: 10–25% – Music-only / aesthetic reel: 50–80%
Why the Default Volume Is Usually Too High
CapCut imports audio tracks at 100% by default, which mirrors the full source level of the file. For most commercially mastered music, that is already loud. When you layer it under a voiceover recorded on a phone microphone, the music almost always overtakes the speech. Adjusting the slider down is not optional — it is the starting point of every mix.
Recommended CapCut Background Music Volume by Content Type
Use this table as your baseline. Adjust from here based on how the audio sounds on playback.
| Content Type | Recommended Volume Range | Notes |
|---|---|---|
| Voiceover / talking-head video | 10–20% | Speech clarity is the priority; music sets tone only |
| Tutorial or narrated video | 15–25% | Slightly higher is fine during b-roll with no narration |
| Aesthetic / mood reel (no speech) | 50–80% | Music carries the video; aim for 60–70% as a midpoint |
| Interview or podcast-style | 8–15% | Dialogue must stay dominant; keep music barely audible |
| Intro / outro segments | 40–60% | No dialogue in these moments; music can breathe |
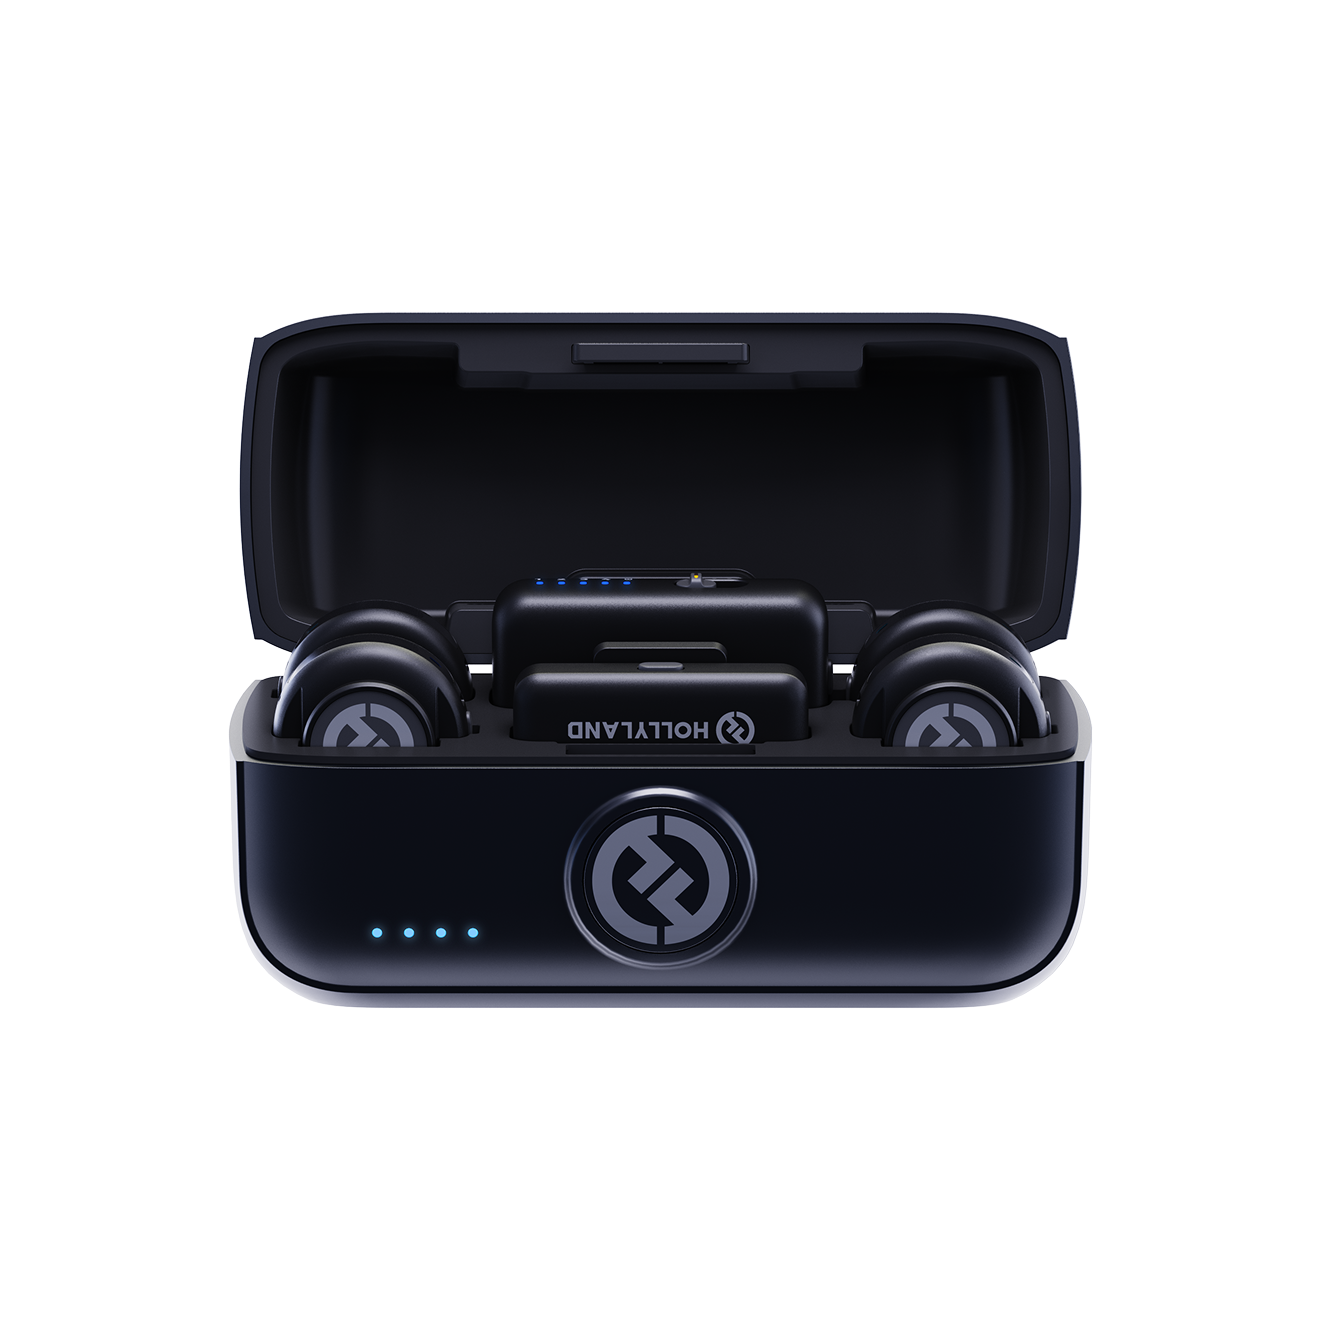
A clean voiceover recording makes these lower percentages feel balanced rather than thin. When you capture audio with a quality wireless mic like the Hollyland LARK M2, the voice retains presence and warmth even at 15–20% background volume, so the lower setting sounds intentional rather than empty.

Hollyland LARK M2 - Mini Lavalier Microphone
An incredibly lightweight and compact wireless button microphone that captures high-fidelity audio.
Key Features: 9g Button Size | 48 kHz/24-bit | 40 Hours Battery
How to Adjust Background Music Volume in CapCut (Step-by-Step)
These steps apply to the CapCut mobile app. On desktop, the interface differs slightly, but the Volume control is located in the same audio panel on the right side of the screen.
- Open your project and tap the audio or music clip in the timeline.The clip will highlight when selected.
- Show the volume icon in Mobile by going to the bottom screen and tapping the “Volume” button (usually beside the “Split” icon).

- In CapCut Desktop, you can change the volume by going to the Audio panel located in the right side of the screen.
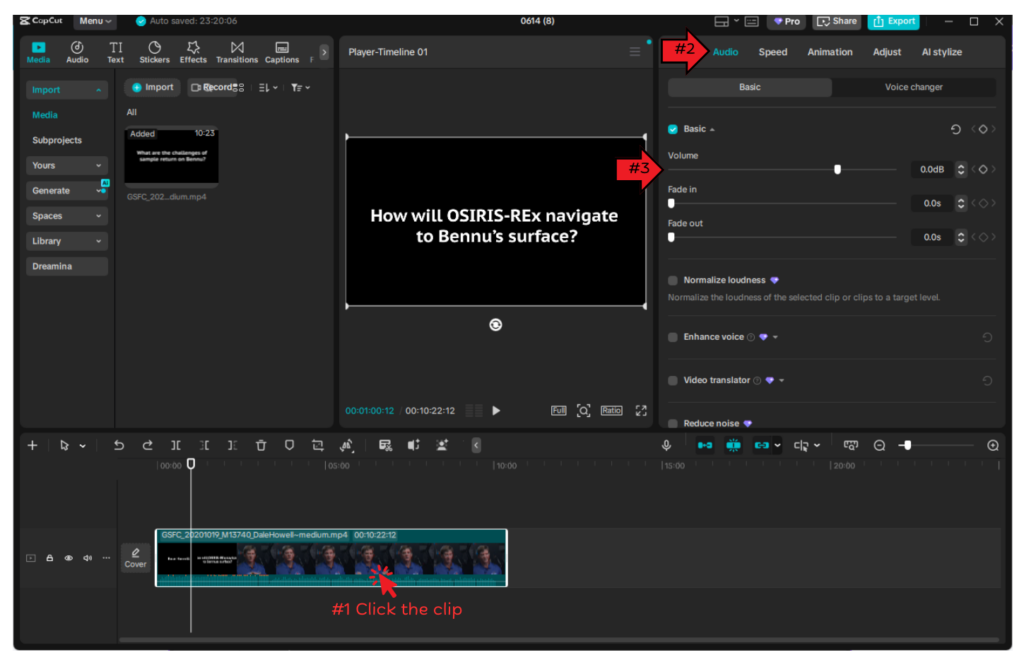
- Drag the slider left to reduce the percentage. Use the table above as your starting point based on your content type.
- Preview the clip with headphones before making any final decisions. Headphones reveal balance issues that phone speakers can mask.
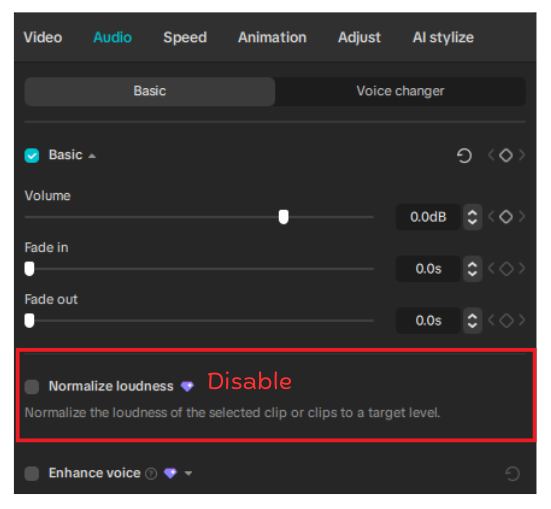
- Check for auto-normalization in CapCut’s audio settings if your export still sounds louder or quieter than expected. Disabling this gives you more direct control over the final output level.
Tips to Balance Background Music and Voiceover in CapCut
Hitting the right percentage is the first step. These techniques help you maintain that balance throughout the video:

Tips to Balance Background Music and Voiceover in CapCut
- Use fade in and fade out handles. Tap the audio clip and drag the fade handles at either end. A short fade-in (0.5–1 second) prevents the music from punching in abruptly against your opening words.
- Use keyframe volume for manual audio ducking. Tap the audio clip, select the keyframe tool (the diamond icon), and add volume keyframes where your voiceover starts and ends. Lower the volume during speech segments and raise it back during b-roll or transitions. This mimics professional audio ducking without needing a DAW.
- Split the audio clip for section-level control. If your video has distinct segments — intro, main content, outro — split the music clip at those points and set a different volume level for each section. This is faster than keyframing the entire track.

- Preview on both headphones and phone speakers. A mix that sounds balanced on headphones can turn muddy or boomy on small mobile speakers. Always do a final listen on the same device your audience is likely using.
Platform-Specific Considerations
Each platform processes audio after upload, which affects how your CapCut export actually sounds on playback:

Platform-Specific Considerations
- TikTok normalizes audio to approximately –14 LUFS. Loud background music gets compressed down, which can make the overall mix sound squashed. Keeping background music at 15–20% in CapCut helps avoid this.
- YouTube Shorts applies similar normalization. The 15–20% range for voiceover content produces consistent results here as well.
- Instagram Reels handles normalization similarly to TikTok. Treat it the same way and test playback in-app after uploading.
- All platforms: Export and watch the actual upload before posting. Normalization behavior can shift perceived loudness in ways that the CapCut preview does not always reflect.
FAQ
Q: Why does my background music sound too loud even at 20% in CapCut?
The source audio file is likely mastered at a high loudness level, which is common with commercial and trending music. Try lowering the slider to 10–15%. If it still sounds overpowering, consider normalizing the audio file before importing it into CapCut, or use a quieter version of the track.
Q: Should I use the same volume for background music throughout the whole video?
No. A flat volume level rarely works well across an entire video. Use CapCut’s keyframe tool to duck the music lower during voiceover segments and bring it back up during transitions or b-roll moments where no one is speaking. This creates a natural, professional-sounding mix.
Q: What is the best volume for background music in CapCut with no voiceover?
For aesthetic or mood content with no dialogue, 50–80% is a solid starting range. Aim for around 60–70% as your midpoint, then adjust based on how energetic or subtle you want the track to feel. Avoid pushing past 80% unless the track is intentionally quiet by design.
Final Takeaway
For voiceover and dialogue-heavy content, start your background music between 10–25% and adjust from there. For music-only or aesthetic videos, 50–80% gives the track enough presence to carry the mood. Before you export, preview on both headphones and phone speakers to catch any balance issues. For more ways to improve your audio, explore guides on keyframe editing in CapCut and voiceover recording techniques.