.png)
Struggling to hear dialogue over your background music, or recording audio that sounds too quiet no matter what you do? CapCut mobile gives you precise volume control over every track in your project – you just need to know where to find it. This guide walks you through adjusting clip audio, background music, and voiceover, plus how to create smooth fades using keyframes.

How to Adjust Volume in CapCut Mobile (Step-by-Step)
Understanding CapCut’s Audio Layers Before You Adjust Volume
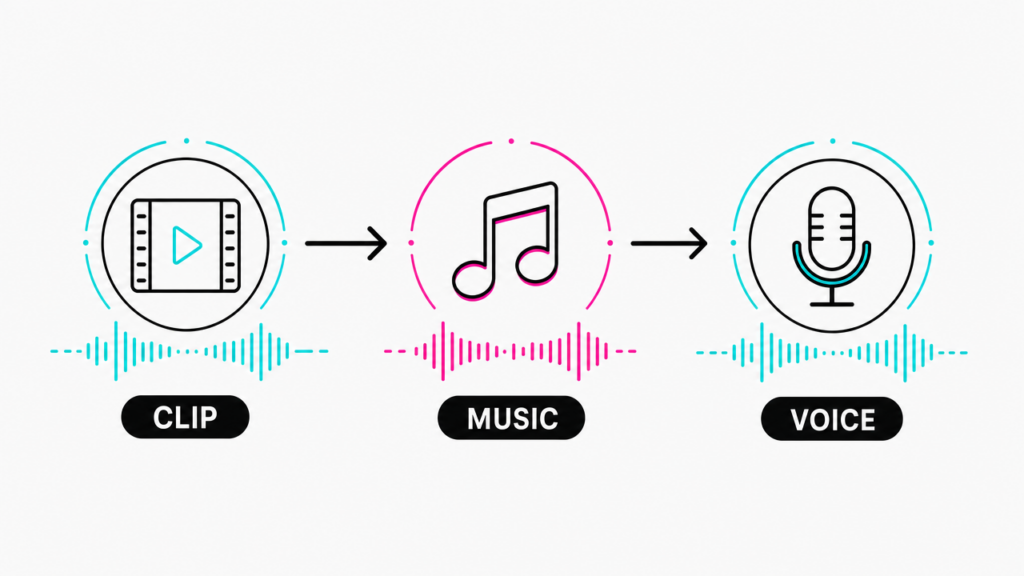
CapCut separates your project audio into three independent layers. Each layer has its own volume slider, and adjusting one has no effect on the others. Getting familiar with this structure before you start editing will save you a lot of guesswork.
Understanding CapCut’s Audio Layers Before You Adjust Volume
Here is where each layer lives:
- Original clip audio: The sound recorded with your video. Accessed by tapping a video clip on the main timeline.
- Background music / sound effects: Audio added from CapCut’s library or your device. Appears in its own lane below the video timeline.
- Voiceover: Audio recorded within CapCut using the Voiceover tool. Lives in a dedicated audio lane, separate from both clip audio and music.
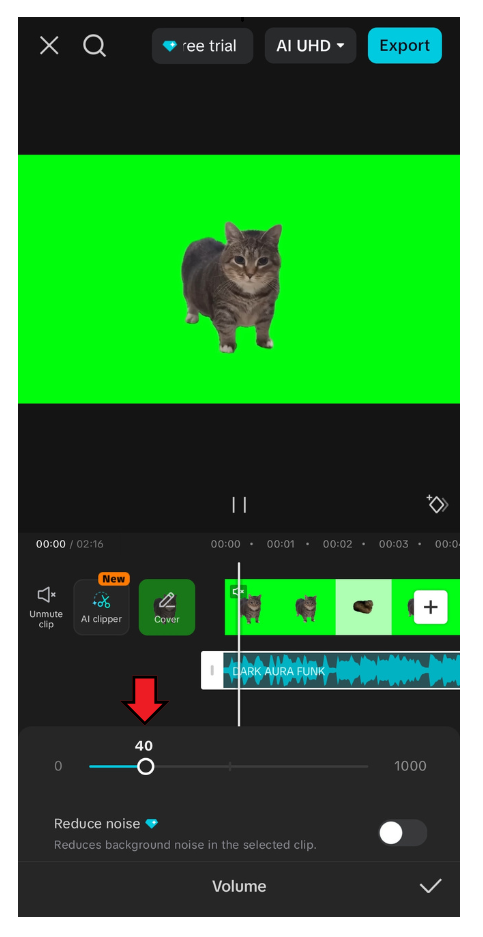
How to Adjust the Volume of a Video Clip (Original Audio)
This is the most common task beginners need. When you tap a video clip, CapCut surfaces a volume slider that lets you bring the level anywhere from completely silent to 200% of the original recording level.
- Open your project and locate the clip on the timeline.
- Tap the clip to select it. It will highlight with a white border.
- In the bottom toolbar, scroll left or right until you see Volume.
- Tap Volume to open the slider.

- Drag left to lower the volume or right to raise it. The range runs from 0 to 1000.
- Tap the checkmark to confirm.
Note: Boosting the volume in large amounts can introduce distortion if the source audio was already captured at high gain.
How to Quickly Mute a Clip’s Original Audio in CapCut
Muting original audio is useful when you want to replace the camera sound with a clean voiceover or a music track.
- Tap the video clip on the timeline, then the Volume icon in the bottom toolbar.
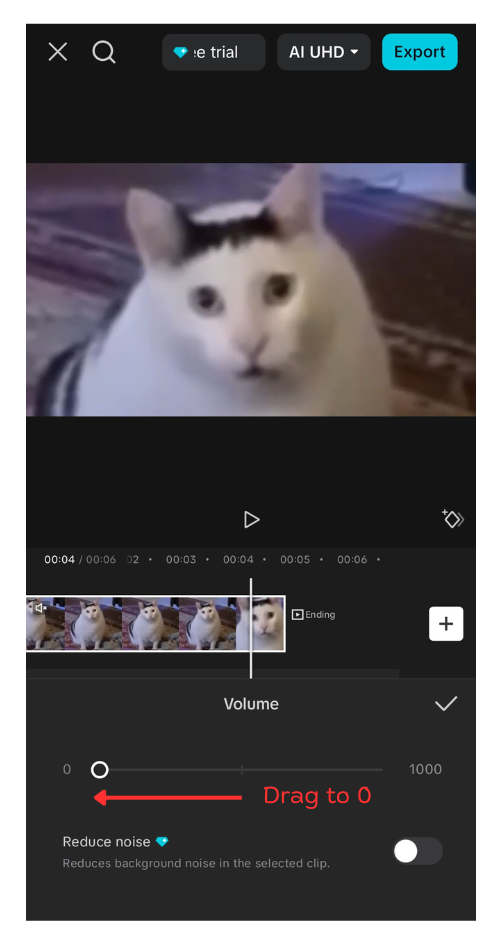
- Drag the slider all the way to the left until it reads.
- Tap the checkmark to save.
Some versions of CapCut also display a speaker icon that toggles mute directly. If yours shows one, tap it for a one-step shortcut.
How to Adjust Background Music Volume in CapCut Mobile
Background music drowning out speech is one of the most common audio complaints from CapCut users. The fix is straightforward once you know that music lives on its own track beneath the video layer.
- Scroll down slightly on the timeline to find the audio lane. It appears as a separate colored bar below your video clips.
- Tap the music or sound effect clip you want to adjust.
- Tap Volume in the bottom toolbar.
- Drag the slider down. For music supporting a voiceover, a level of 20 to 40% often works well.
- Tap the checkmark to confirm.
Pro Tip: If you added music directly through CapCut’s built-in library, some app versions surface a Reduce Original Sound toggle in the audio settings panel. This lowers your clip’s original audio relative to the added music without requiring you to touch the manual slider.
How to Adjust Voiceover Volume in CapCut Mobile
Voiceover volume is controlled independently of your clip audio and background music. Adjusting one does not affect the others.
- Tap Audio in the main editing toolbar at the bottom of the screen.
- Locate your recorded voiceover clip in the dedicated voiceover lane. It typically appears as a pink or purple bar on the timeline.
- Tap the voiceover clip to select it.
- Tap Volume in the toolbar.
- Drag the slider to your preferred level.
- Tap the checkmark to save.
If the balance still feels off after adjusting your voiceover, return to the music track and lower its slider as a separate step.
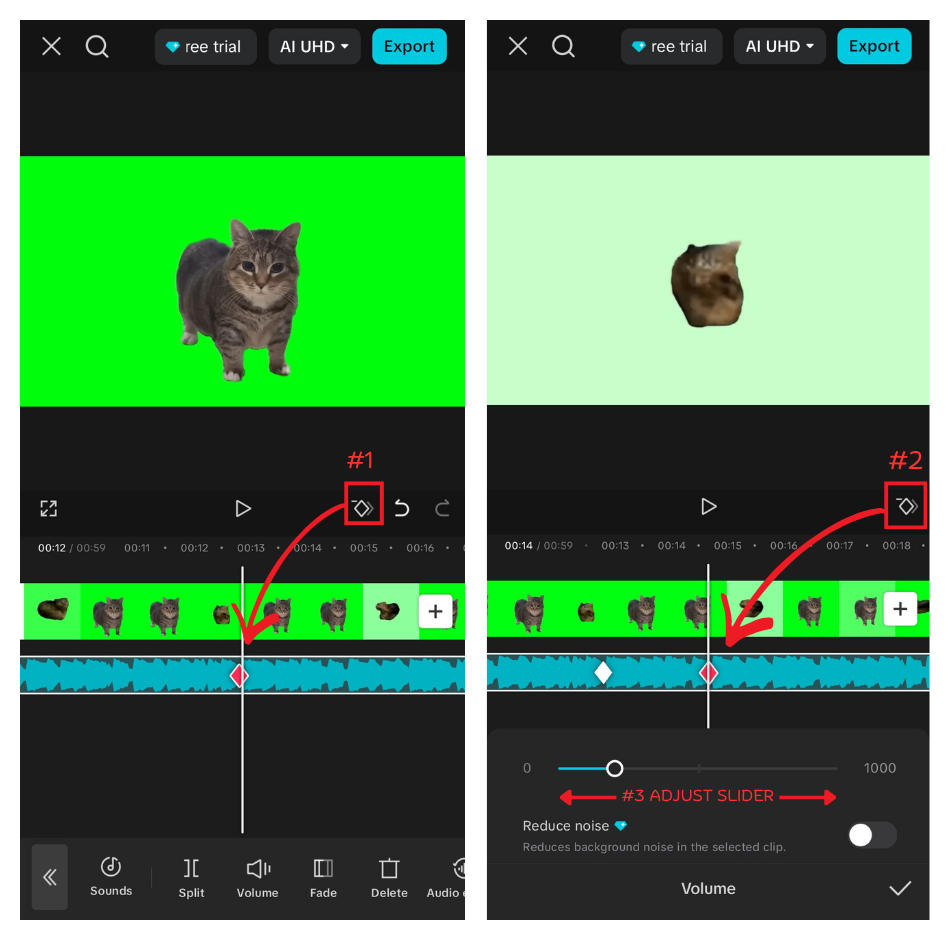
How to Use Volume Keyframes for Fades and Dynamic Volume Changes
Keyframes let you set different volume levels at specific timestamps on a single audio clip. CapCut interpolates smoothly between them, creating fades or music dips without manual cuts.
- Tap the audio clip you want to automate.
- Position the playhead at the point where you want the volume change to begin.
- Tap the Keyframe icon (the diamond shape) in the toolbar.
- Drag the Volume slider to the level you want at this point.
- Move the playhead to the next point where the volume should change.
- Tap the Keyframe icon again and set the new volume level.
- Tap the checkmark when finished.
Three practical uses to get you started:
- Fade in: Set volume to 0 at the clip’s start, then add a keyframe at full level a few seconds in.
- Fade out: Set a keyframe at normal volume partway through, then drop to 0 near the end.
- Music dip: Lower music volume during spoken sections using keyframes, then raise it again when speech ends.
Quick Tips for Better Audio Before You Edit
Heavy volume adjustments in post are often a sign of a recording problem upstream. These habits reduce the need for aggressive fixes in CapCut:

Quick Tips for Better Audio Before You Edit
- Record in a quiet environment. Background noise competes with your voice and cannot be fully removed later.
- Keep the microphone close to your subject. Distance reduces signal strength significantly.
- Use an external microphone. For beginners recording straight to their phone, the Hollyland LARK A1 (plug-and-play via USB-C or Lightning, no app setup needed) delivers noticeably cleaner input levels. Vloggers shooting on the move may prefer the Hollyland LARK M2, a 9g wireless mic with up to 40 hours of battery life.
Frequently Asked Questions
Why is my volume at 100% in CapCut but still too quiet?
100% reflects the original recording level. If the source audio was captured at low gain – for example, with a phone mic held far from the speaker – the signal itself is weak. Boost up to 200% in CapCut as a short-term fix. Longer term, record with the microphone closer to the subject or switch to a higher-quality external mic.
Can I adjust the volume for just one section of a clip, not the whole thing?
Yes. Use keyframes to set different volume levels at different timestamps within the same clip. Place the playhead where you want the change to begin, add a keyframe, and set your target volume. Add a second keyframe where the section ends and return it to the original level.
Is there a way to adjust volume for multiple clips at the same time in CapCut mobile?
CapCut mobile does not currently support batch volume adjustment. Each clip must be edited individually. To reduce the workload, try to capture all footage at a consistent distance from the microphone so your levels start closer to uniform before editing.
Will changing the volume affect my video quality or resolution?
No. Volume adjustments only modify the audio data in your export. Video resolution, frame rate, bit rate, and overall visual quality are completely unaffected by any audio slider change you make in CapCut.
How do I fade out music at the end of my video in CapCut?
Tap your music clip on the timeline and add a keyframe at normal volume at the point where you want the fade to begin. Move the playhead close to the end of the clip, add a second keyframe, and drag the volume to 0. CapCut fades the music smoothly between those two points.
Wrapping Up
CapCut mobile puts independent volume control at your fingertips for every audio layer – clip audio, background music, and voiceover – all through the same simple slider. Keyframes extend that control across time, letting you build fades and dynamic dips without leaving the app.