.png)
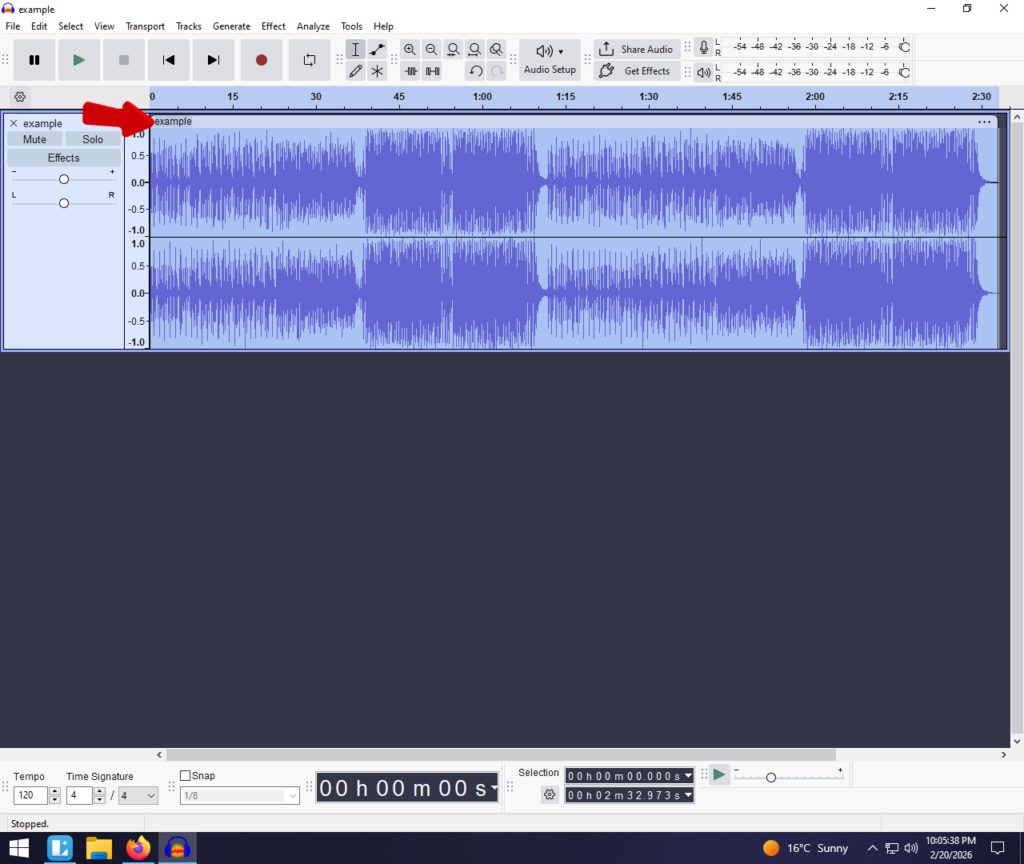
Nothing makes a listener click “stop” faster than blown-out, distorted audio. If your waveform in Audacity looks like a solid block of blue, or your playback meters are constantly hitting the red, you have a volume problem.
Simply turning down your computer speakers won’t fix the issue. To save your podcast or video, you need to alter the actual file.
In this guide, we will cover how to decrease volume and gain in Audacity using four proven methods, ensuring your audio is loud enough to be heard but clean enough to be professional.
Introduction: Why Volume Management Matters
Before we start moving sliders, it is critical to understand the difference between “Gain” and “Volume,” as beginners often confuse them.
- Gain (Input): This is the sensitivity of your microphone before the audio is recorded. Think of it as water pressure entering a hose. If the gain is too high during recording, the audio will be distorted from the start.
- Volume (Output): This is the loudness of the audio after it has been processed.
If you recorded your audio with the gain set too high, you likely have Clipping.
What is Clipping?
Clipping is digital distortion that occurs when an audio signal exceeds 0 decibels (dB). Because digital audio cannot go above 0dB, the tops of the sound waves are “clipped” off, turning smooth waves into square ones. In Audacity, this appears as red vertical lines and sounds like harsh crackling or static.
If your audio is clipping, or just uncomfortably loud, here is how to fix it.
Method 1: Using the Amplify Effect (The Precision Method)
Don’t let the name fool you. While “Amplify” sounds like it’s only for making things louder, it is actually the most precise tool for decreasing volume. This method applies a mathematical calculation to lower the decibel (dB) level evenly across your selection.
Use this method if the entire track is consistently too loud, or if you need to lower a specific clip by an exact amount (e.g., exactly -3 dB).
Steps to Decrease Volume:
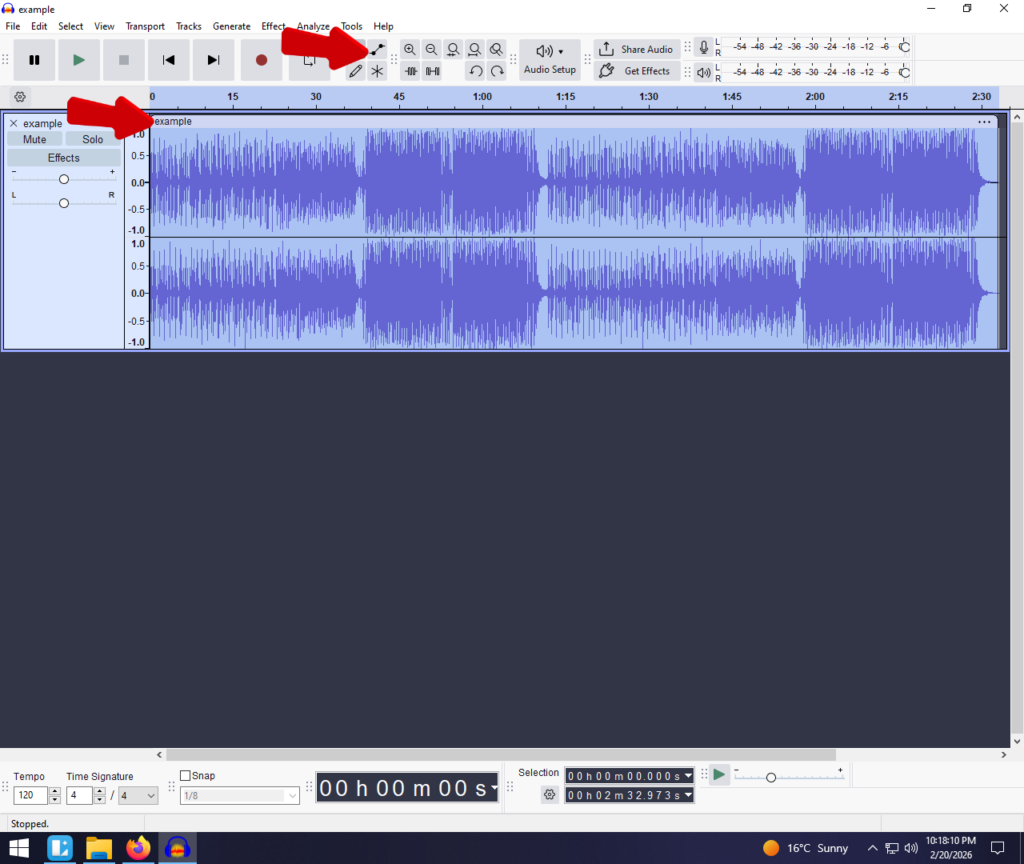
- Select your audio: Press Ctrl + A (Windows) or Cmd + A (Mac) to select the track, or click and drag to highlight a specific section.

- Open the Effect: Go to Effect > Volume and Compression > Amplify.
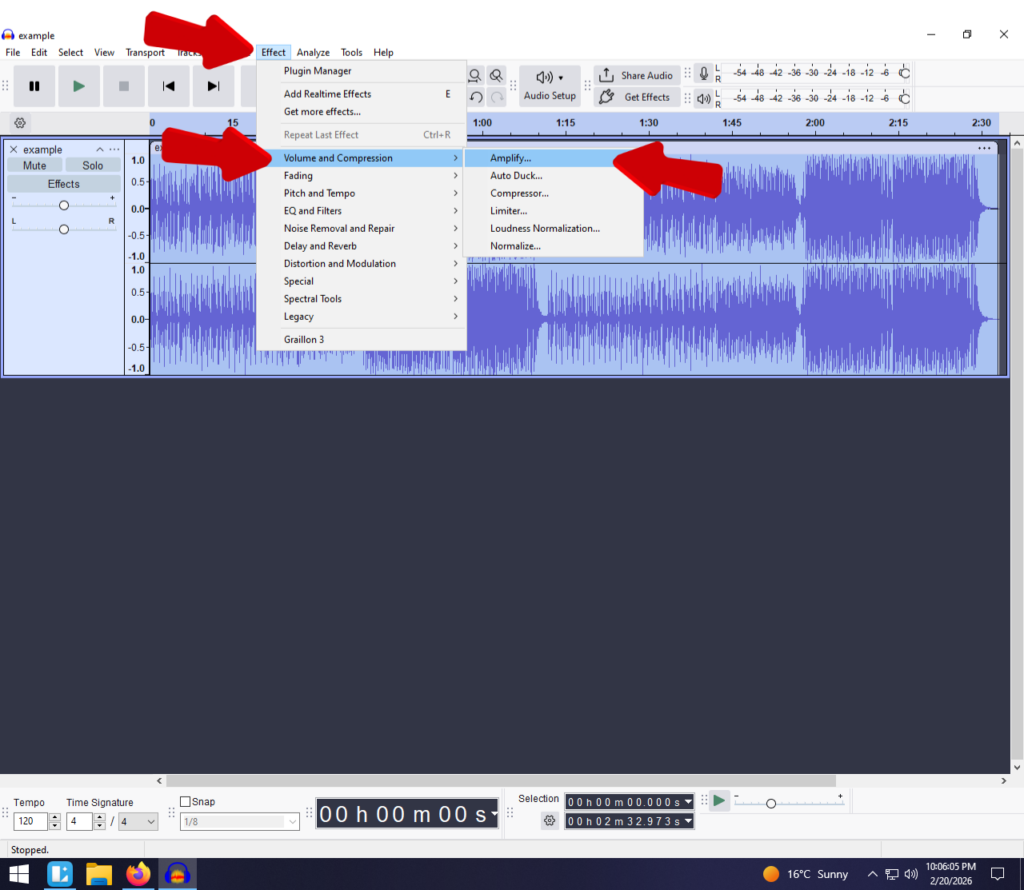
- Enter a Negative Value: In the “Amplification (dB)” box, type a negative number.
- Example: -3.0 will lower the volume by 3 decibels.
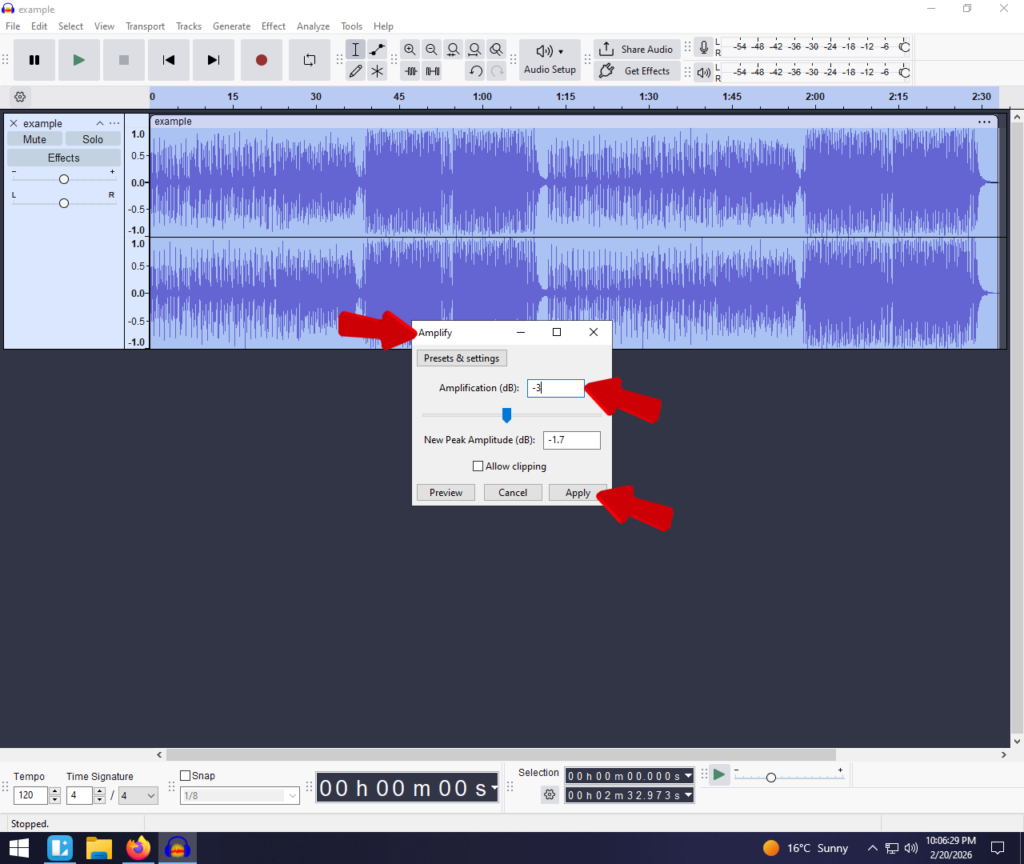
Note: You will see the blue waveform shrink vertically. This confirms the volume has been reduced.
Method 2: Using Normalize (The Safety Standard)
While Amplify changes volume by a specific amount (e.g., “go down by 3dB”), Normalize changes volume based on a target “ceiling.”
Think of Amplify as a blind volume knob—it turns the volume down regardless of where it started. Normalize is smarter. It scans your audio to find the loudest peak, then adjusts the entire clip so that the loudest point hits a specific target.
This is generally the preferred method for finalizing audio because it ensures your loudest peak hits a safe level without distorting.
How to Normalize Your Audio:
- Select your track (Ctrl + A).

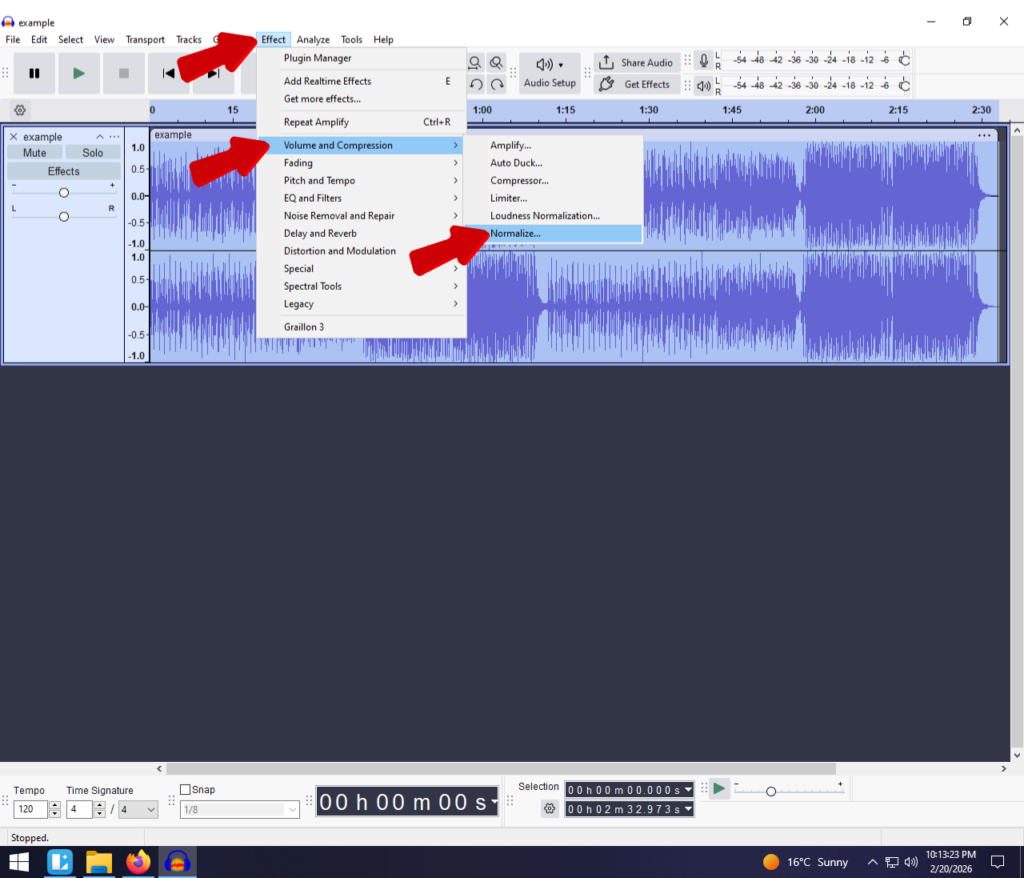
- Check the box for “Normalize peak amplitude to”.
- Set the value to -1.0 dB.
- Click Apply.
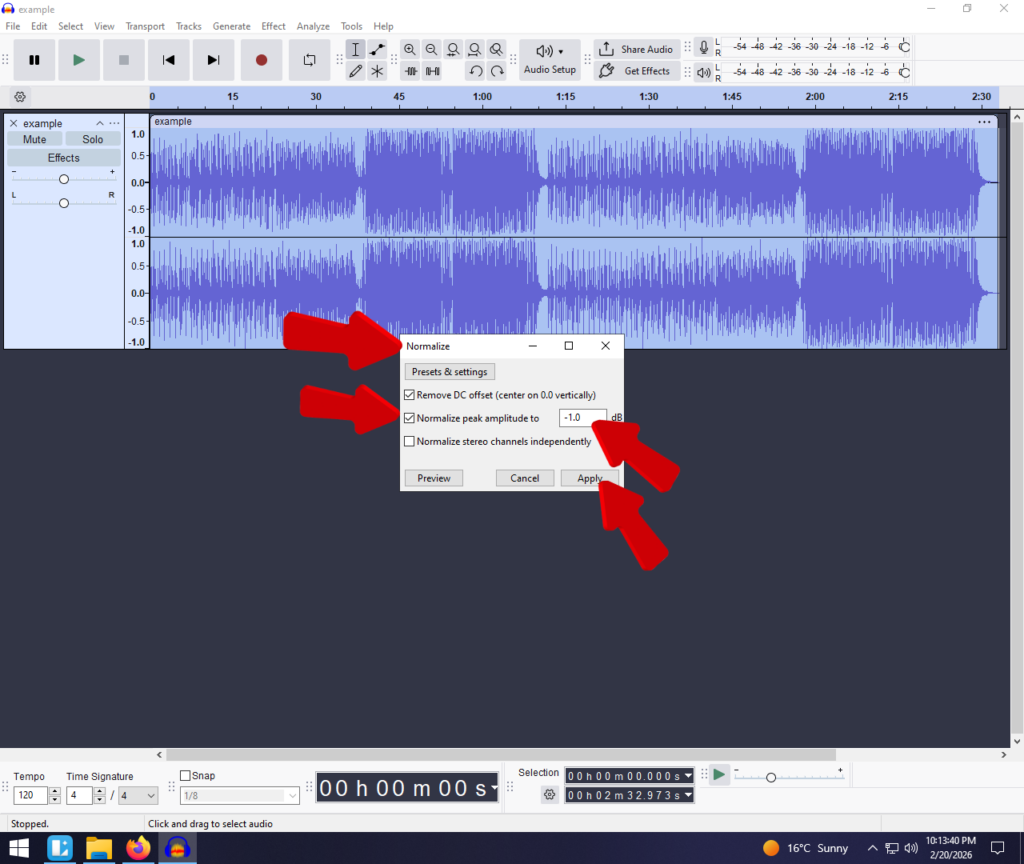
Why -1.0 dB?
Setting your ceiling to 0.0 dB is technically the maximum, but it leaves no room for error. When converting files to MP3 for Spotify or YouTube, the compression process can slightly shift volume levels, pushing 0.0 dB audio into distortion. A ceiling of -1.0 dB provides a safety buffer.
Method 3: The Envelope Tool (For Specific Sections)
Sometimes the overall track volume is fine, but you have one specific section—like a cough, a laugh, or a slammed door—that is way too loud. Using Amplify on the whole track would make the quiet parts inaudible.
For these surgical edits, use the Envelope Tool. It allows you to “draw” volume changes directly onto the waveform, ducking the volume only when needed.
How to Use the Envelope Tool:
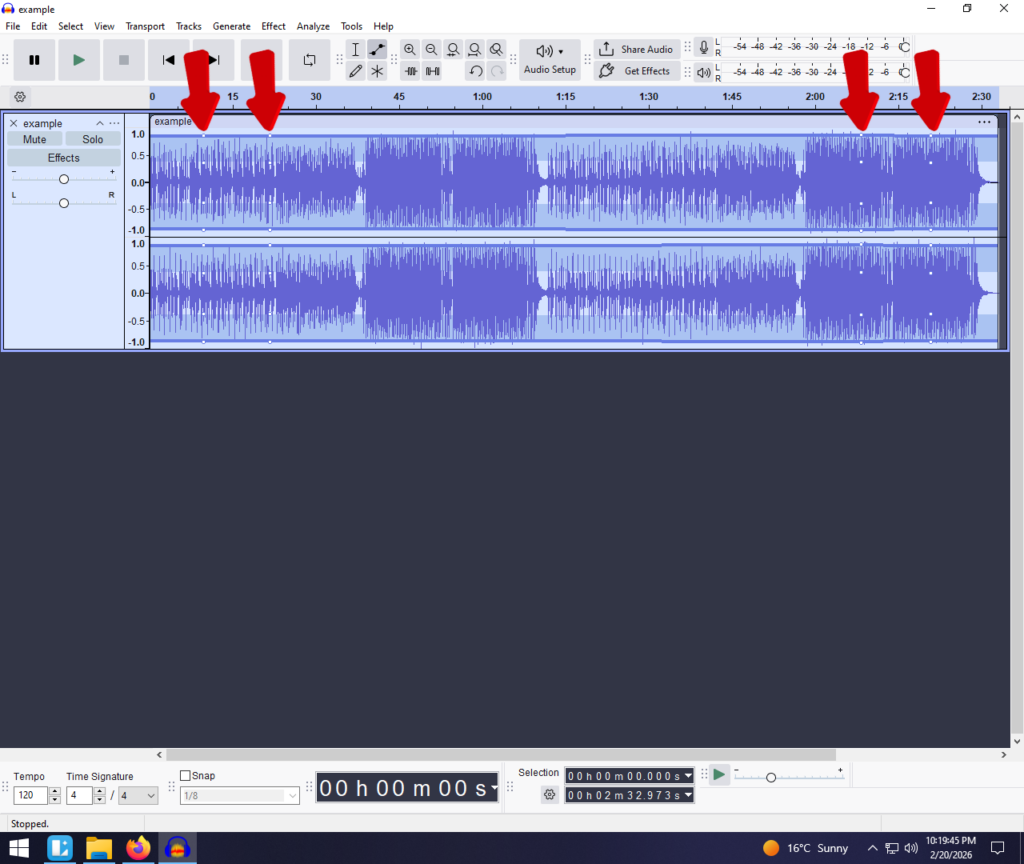
- Create Control Points: Click on the blue line to create “dots” (control points). To lower the volume of a specific sound, you usually need four dots:
- Two dots to start the volume drop.
- Two dots to end it.
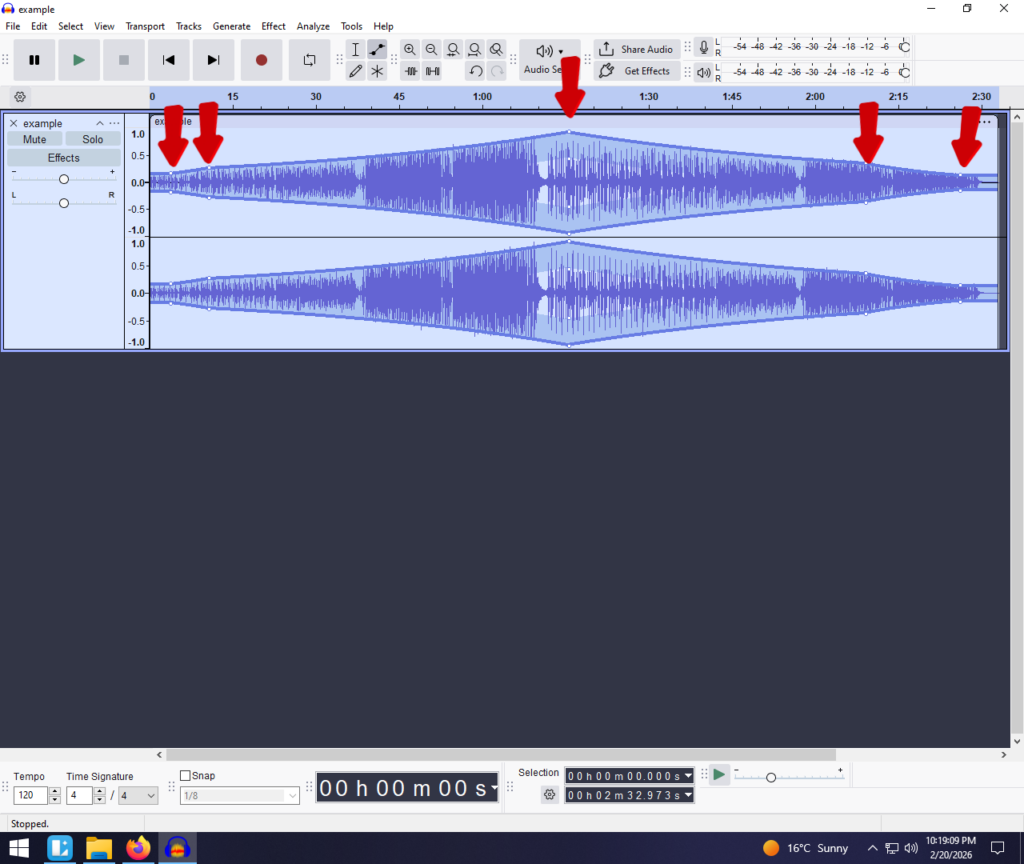
This visually “squeezes” the waveform, lowering the volume for just that specific moment without affecting the rest of your recording.
Method 4: Compressor (Advanced Dynamic Control)
If your audio has a wide Dynamic Range—meaning the whispers are too quiet and the shouting is too loud—simply lowering the volume isn’t enough. You need to reduce the gap between the loud and quiet parts.
This is where a Compressor shines. It is a “smart” volume control that automatically detects when audio gets too loud and turns it down, while leaving quiet audio alone.
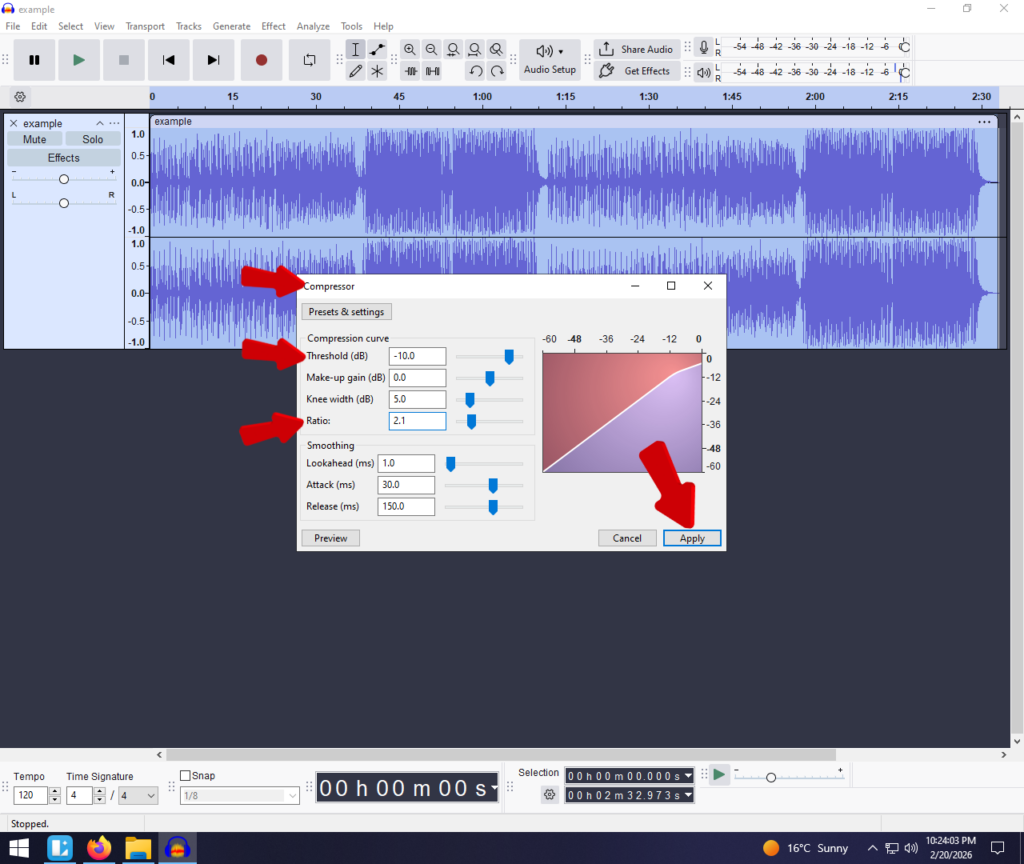
How to Apply Compression:
- Select your track.
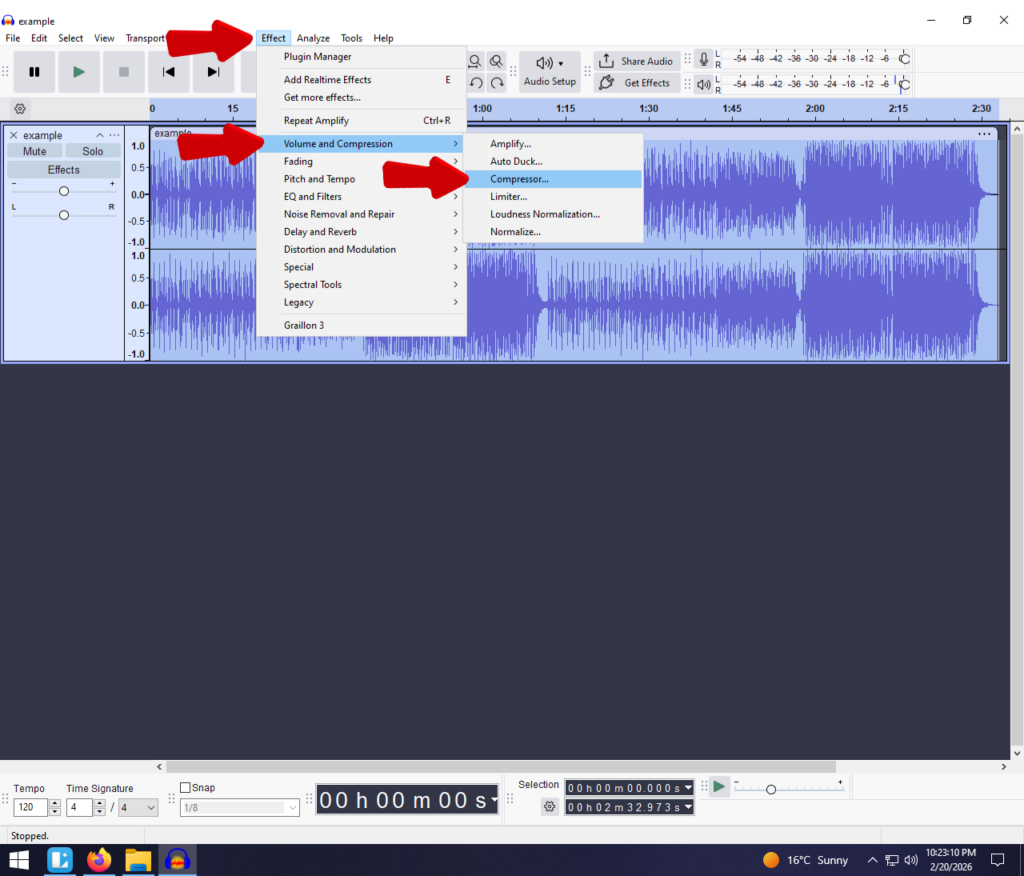
- Adjust the Threshold. Anything louder than this setting will be turned down.
- Set the Ratio to roughly 2:1 or 3:1 for spoken voice.
- Click Apply.
This results in a consistent, broadcast-ready sound where the volume stays level throughout the recording.
Pro Tip: How to Prevent Volume Issues Before You Edit
The harsh reality of audio editing is that if your source file is heavily distorted (clipped) during recording, software like Audacity often cannot fully repair it. Lowering the volume of a clipped file just makes the distortion quieter—it doesn’t remove the crackle.
The best way to avoid fighting with volume sliders in Audacity is to use a microphone with 32-bit Float Recording, like the Hollyland LARK MAX 2.


Why 32-bit Float Matters:
Standard microphones record in 16-bit or 24-bit depth. If you scream into them, the data hits a ceiling and is lost forever. The Hollyland LARK MAX 2 uses 32-bit float, which captures such a massive dynamic range that it is practically impossible to clip.
If you record something too loud with the LARK MAX 2, you can simply import it into Audacity, lower the volume, and the “lost” audio reappears perfectly clear. It turns a ruined take into a usable one.
Additionally, the LARK MAX 2 features Wireless Audio Monitoring via its new OWS earphones. This allows you to hear your volume levels in real-time while you record, ensuring your gain is set correctly at the source so you have less work to do in post-production.
Frequently Asked Questions (FAQ)
What is the difference between Gain and Volume in Audacity?
Gain affects the input level (recording sensitivity), while Volume affects the output level (playback loudness). In Audacity, you are technically adjusting the volume of the file. However, if your Gain was too high during recording, lowering the Volume later won’t fix the distortion.
Why is my audio still distorted after lowering the volume?
If you lower the volume and still hear a crackling or fuzzy sound, your audio was likely clipped at the source. The microphone was overwhelmed during the actual recording. Software can lower the volume, but it cannot easily restore the data lost during clipping unless you recorded in 32-bit float.
What dB level should I aim for in Audacity?
For a final export, aim for a peak level of -1.0 dB. If you are producing a podcast, the industry standard for loudness is roughly -16 LUFS (Loudness Units Full Scale) for stereo files, which balances the overall perceived loudness.
Conclusion
Audacity offers powerful tools like Amplify, Normalize, and the Envelope Tool to help you tame loud audio and save your listeners’ ears. However, the “Golden Rule” of audio engineering remains true: the better your source recording, the less editing you have to do.
Ready to stop fixing bad audio and start recording distortion-free takes? Check out the Hollyland LARK MAX 2 to ensure studio-quality recordings every time.