.png)
You just finished a great recording session, only to look at your waveform and see a solid brick wall. The audio sounds crackly, harsh, and fuzzy. You’re dealing with the nightmare of every content creator: clipping.
If you are wondering how to fix audio clipping and distortion in Audacity, you have come to the right place. While digital distortion is technically permanent, Audacity offers powerful tools to reconstruct your audio and make it usable again.
What is Audio Clipping and Can it Be Saved?
Audio clipping happens when your input signal is too loud for the digital system to handle. In the digital world, there is a hard volume ceiling, typically set at 0dB.
When your audio tries to push past 0dB, the system stops recording data. Instead of capturing the natural curve of the sound wave, it chops the top off flat. This results in that tell-tale distorted crackle that ruins voiceovers and interviews.
The Honest Truth: Data Destruction vs. Repair
Before we start fixing things, we need to manage expectations. Digital clipping destroys data.
Unlike analog tape, which sounds warm and fuzzy when pushed too hard, digital clipping simply deletes information. That audio data is gone. When you use repair tools in Audacity, you aren’t “finding” the lost sound. You are asking the software to analyze the surrounding audio and mathematically guess what the peak should have looked like.
- Mild Clipping: If your audio only hits the red occasionally, Audacity can usually reconstruct the peaks seamlessly.
- Severe Distortion: If your waveform looks like a solid block (a “brick”), the damage is likely permanent. The software just doesn’t have enough information to make an accurate guess.
Visual Cues: How to Spot Clipping
You can identify clipping immediately by looking for two signs:
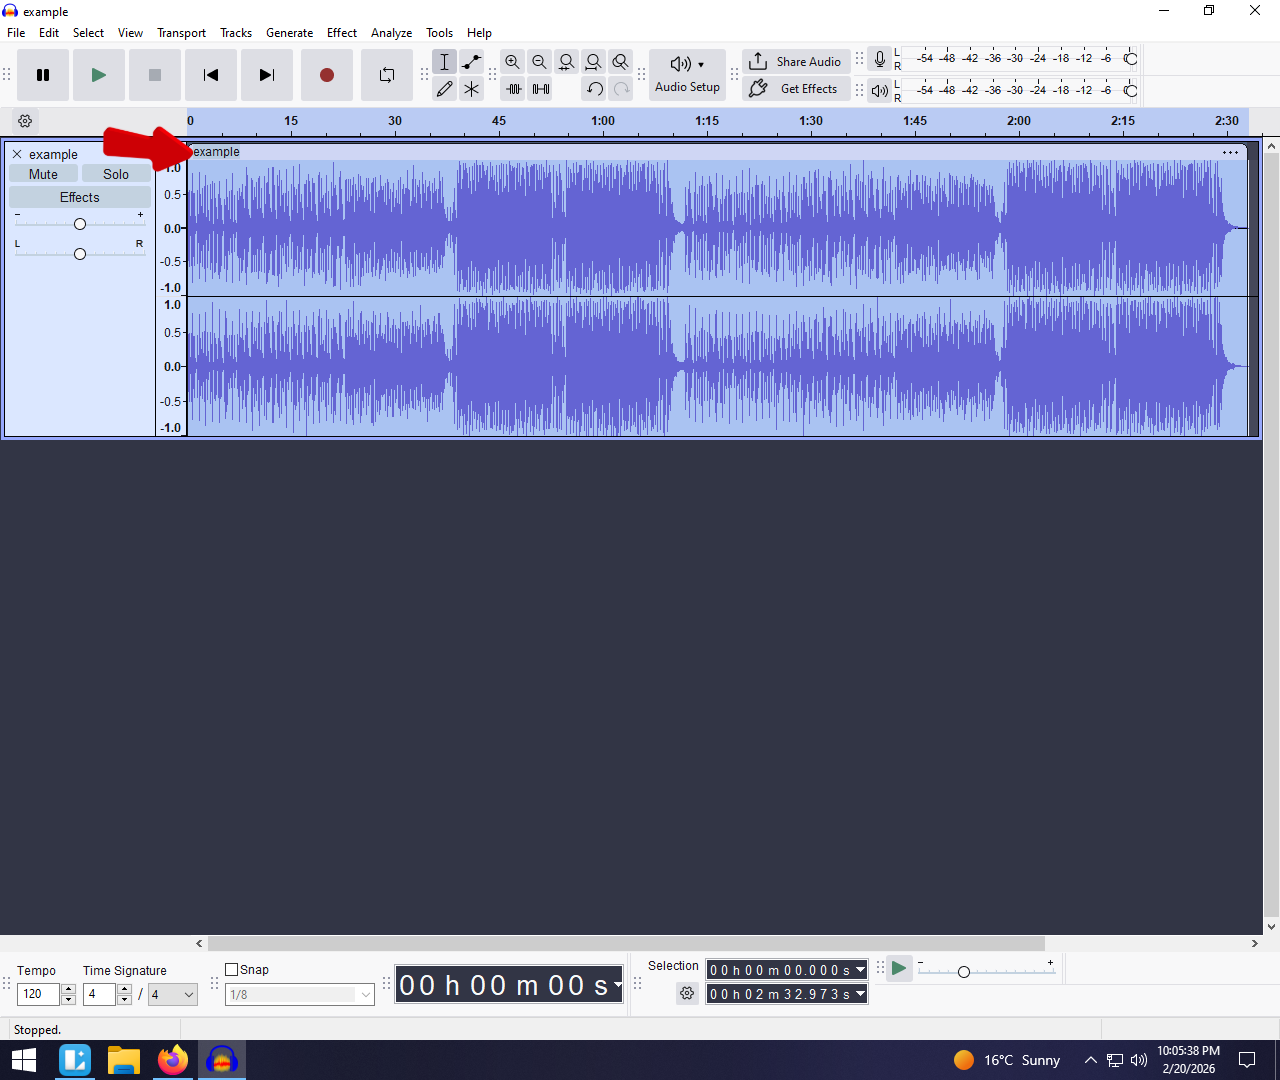
- Flat-Topped Waveforms: Zoom in on the loudest parts of your track. A healthy wave is spiky or curved. A clipped wave looks like a plateau—the top has been sliced off horizontally.
- The “Red Line” Warning: To see exactly where your audio is damaged, go to the menu bar and select View > Show Clipping. Audacity will display vertical red lines wherever the audio has touched or exceeded 0dB.

Step 0: The Crucial Prep Work (Create Headroom)
Before you touch any repair tools, you must lower the volume of your track. Do not skip this step.
Most users fail to fix their audio because they try to run the “Clip Fix” tool on a track that is already hitting the digital ceiling (0dB). If your audio is maxed out at the top, the software has no physical space to draw the new, reconstructed peaks. You cannot build a new roof on a house if you are already pressing against the sky.
You need to create Headroom—empty space above the waveform where Audacity can draw.
How to Create Headroom in Audacity
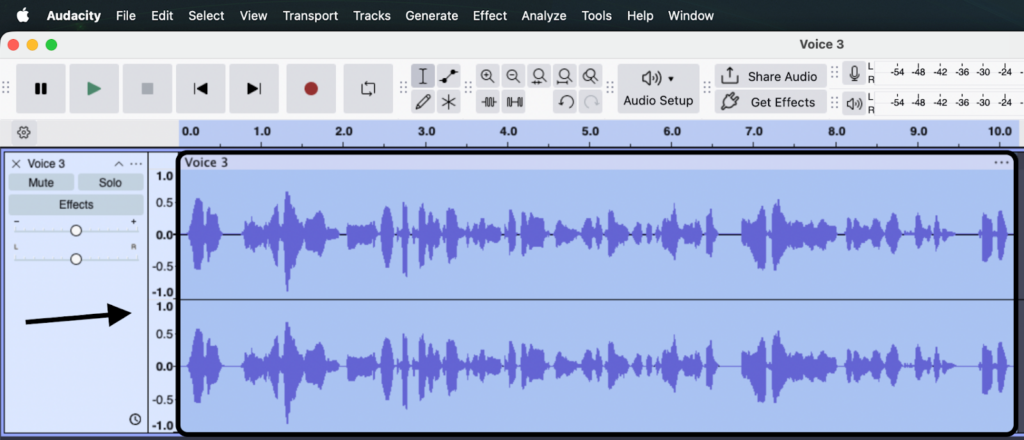
- Select Your Audio: Click the track header or press Ctrl + A (Cmd + A on Mac) to select the entire recording.
- Open the Amplify Tool: Go to Effect > Volume and Compression > Amplify.
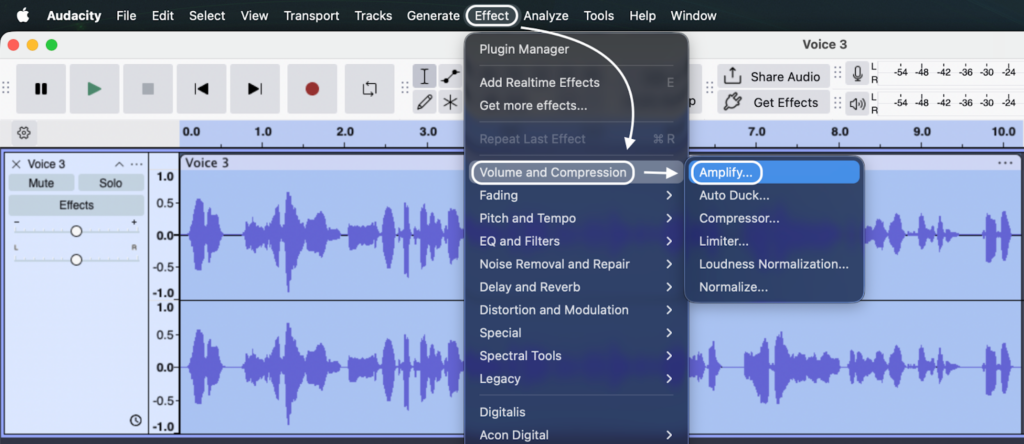
- Lower the Gain: In the “Amplification (dB)” box, enter -10.0.

- Note: Ensure “Allow clipping” is unchecked.
- Apply: Click Apply.

Why This Works
You will see the waveform visually shrink. This is exactly what you want. By dropping the overall volume by 10dB, you have moved the “flat-topped” sections away from the absolute limit. Now, Audacity has vertical space to draw the natural curve of the sound wave above where it was cut off.
Method 1: Using the Audacity “Clip Fix” Tool (Best for Mild Distortion)
For audio that is only slightly distorted, Audacity’s native Clip Fix plugin is your best defense. It uses interpolation to rebuild the missing tops of your waveform.
Follow these steps to apply the repair:
- Identify the Damage: Go to View > Show Clipping to see the red bars indicating distortion.

- Select Your Audio: Highlight the clipped section of the track.
- Critical: Ensure you have already lowered the gain (Step 0). If the waveform is still touching the top, this effect will fail.
- Open the Tool: Navigate to Effect > Noise Removal and Repair > Clip Fix.

- Set Threshold of Clipping: Start with 95%. This tells Audacity to treat any audio reaching 95% of the max volume as “clipped” and in need of repair.
- Adjust “Reduce Amplitude”:
- If you already lowered your track volume manually (Step 0), leave this at 0 dB.
- If you skipped Step 0, set this to -10 dB to create headroom automatically.

- Preview and Apply: Click Preview. If the crackling is reduced, click Apply. The red lines should disappear, and the flat tops of your waveform should now look pointed and natural.

Pro Tip: Avoid running Clip Fix on an entire hour-long podcast at once. It’s heavy on your processor. For the best results, highlight and process small, specific sections (10–30 seconds) where the distortion is most audible.
Method 2: Masking Distortion with EQ (When Repair Fails)
Sometimes, the “Clip Fix” tool isn’t enough. If the distortion is severe, the software simply cannot guess what the original waveform looked like. At this stage, your goal shifts from repairing the audio to hiding the damage.
Distortion creates “harmonics,” which sound like harsh, high-frequency crackling or fizz. Since human speech primarily lives in the mid-range frequencies, you can often cut out the high frequencies where the “fizz” lives without making the voice unintelligible.
Here is how to use a Low-Pass Filter to soften the blow:
- Select the distorted audio region.
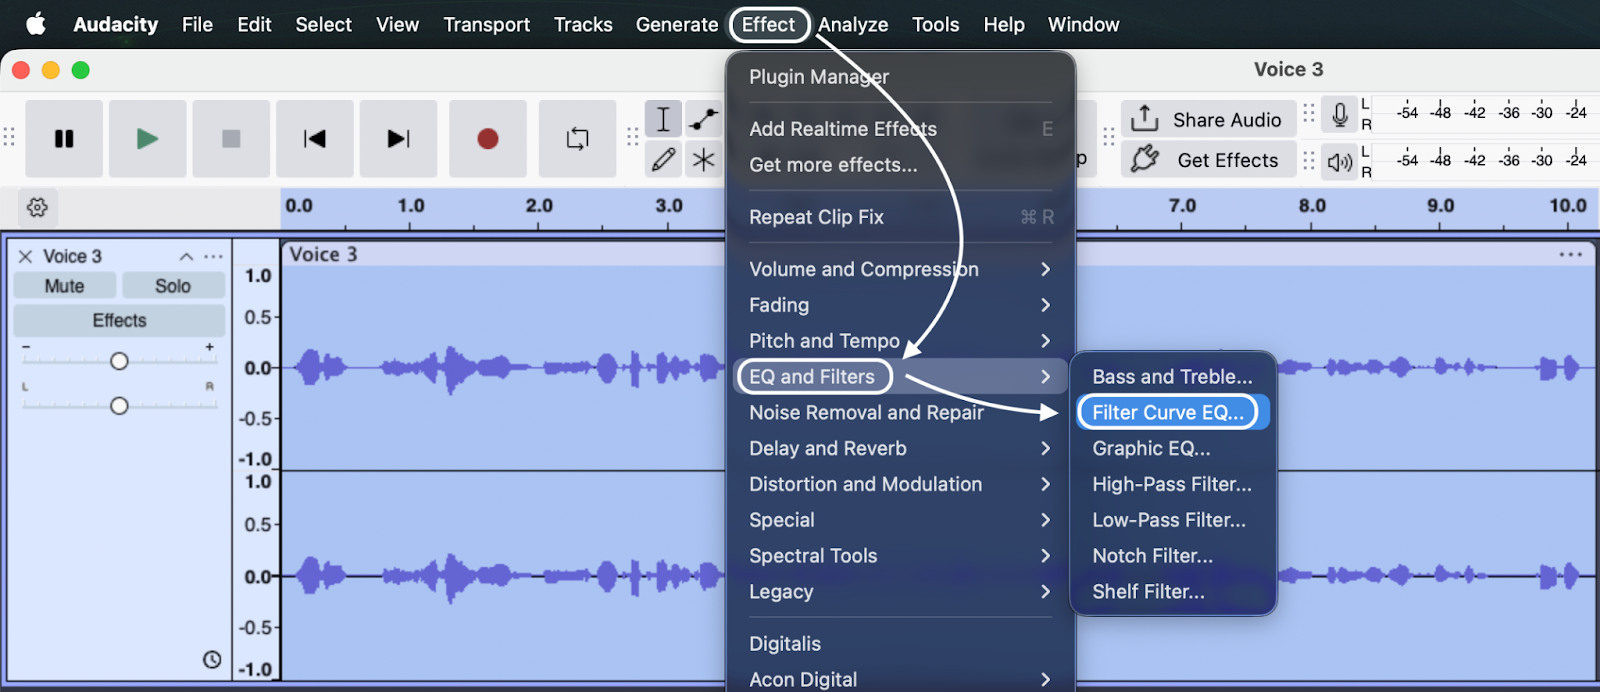
- Navigate to Effect > EQ and Filters > Low Pass Filter.

- Adjust the Cutoff: By default, the curve might cut off too much. Drag the control point so the line stays flat until roughly 6000Hz (6kHz) to 8000Hz (8kHz), then drops off sharply.
- 6kHz: Removes more distortion but makes the voice sound “muffled” (like a phone call).
- 10kHz: Retains more clarity/air but leaves more distortion in.
- Click Preview. If the crackling is reduced to a tolerable level, click Apply.

Note: This is a compromise. You are trading “crispness” for “smoothness.” The audio will sound slightly darker, but listeners usually prefer a muffled voice over ear-piercing digital distortion.
The Only Way to Guarantee Zero Clipping: 32-bit Float Audio
The “Clip Fix” tool is a powerful band-aid, but it relies on guesswork. The harsh reality of standard recording (16-bit or 24-bit) is that once you hit 0dB, the data is gone.
However, modern technology has introduced a format that makes clipping mathematically impossible: 32-bit Float.
The Solution: Hollyland LARK MAX 2
If you are tired of panicking over red lines, the most effective upgrade you can make is switching to a recorder that supports 32-bit float, like the Hollyland LARK MAX 2.

Hollyland LARK MAX 2 - Premium Wireless Microphone System
A premium wireless microphone for videographers, podcasters, and content creators to capture broadcast-quality sound.
Key Features: Wireless Audio Monitoring | 32-bit Float | Timecode
Unlike standard microphones, the LARK MAX 2 captures an enormous dynamic range. Think of it like a room with a ceiling that is miles high. No matter how loud you scream, you will never hit the roof.
How It Works in Post-Production
Here is the “magic” of using the LARK MAX 2 with Audacity:
- The Scenario: You record a segment where the guest suddenly yells. In the timeline, the waveform looks like a solid block—completely blown out.
- The Fix: Instead of running a complex repair tool, you simply select the track and lower the gain (Amplify > -10dB).
- The Result: Because the file is 32-bit Float, the audio data above 0dB was preserved, not deleted. As you lower the volume, the flattened peaks reappear perfectly intact.
With this technology, you can recover heavily distorted audio and make it crystal clear, eliminating the need for reconstructive plugins entirely.
Common Pitfalls When Fixing Audio
Recovering distorted audio is a balancing act. Push the software too hard, and you trade one problem (crackling) for another (digital artifacts). Avoid these three mistakes to keep your audio usable.
1. Over-Processing (The “Robotic” Effect)
It is tempting to run the Clip Fix tool multiple times or set the threshold to 100% hoping for a perfect repair. However, aggressive processing often destroys the natural tone of the human voice.
- The Result: The audio starts to sound metallic or “underwater.”
- The Fix: Be conservative. If the distortion is severe, accept a slight imperfection rather than turning your voice into a robot.
2. Relying on “Show Clipping” Visuals
Audacity’s red lines are useful for diagnosis, but they can be misleading during repair. Many users fix the audio but panic because they still see red lines.
- The Reality: If you haven’t lowered the gain enough, the reconstructed peaks might still touch the 0dB ceiling, keeping the red lines visible even if the audio sounds fine.
- The Fix: Toggle “Show Clipping” OFF after your repair attempt. Close your eyes and listen. If you don’t hear distortion, the audio is fixed.
3. Confusing “Normalize” with “Repair”
A major misconception is that the Normalize effect fixes distortion. It does not.
- Clipping means the top of the waveform is missing.
- Normalizing simply changes the overall volume.
If you Normalize a clipped track to -3dB, you are simply turning the volume down on a distorted signal. Always use Clip Fix to reconstruct the waveform before you apply any normalization.
Frequently Asked Questions (FAQ)
Why is my Audacity recording showing red vertical lines?
These red lines indicate digital clipping. Your input volume (gain) was too high, causing the audio signal to hit the digital ceiling of 0dB. To stop this, lower your microphone input volume or move further away from the mic.
Is audio clipping permanent?
Technically, yes. The data above 0dB is discarded. However, tools like Audacity’s Clip Fix can guess what the waveform should have looked like and reconstruct the peaks. It’s an estimation, not a true restoration.
What is the best recording level to avoid clipping?
Aim for your average speaking volume to sit between -18dB and -12dB, with your loudest peaks (laughter or shouting) never exceeding -6dB. This creates headroom—a safety buffer for sudden loud noises.
Does the “Amplify” effect fix clipping?
No, Amplify alone does not fix clipping. Lowering the volume of a clipped track just gives you quieter distortion. However, Amplify is a necessary first step to create room for the Clip Fix tool to do its job.
Conclusion
Audacity’s Clip Fix tool is a lifesaver when you’re in a pinch, but it isn’t a magic wand. It can smooth out the jagged edges of a digital clip and make a recording listenable again, but it cannot fully restore data that was never recorded.
The best “repair” is always prevention. Moving forward, aim to keep your recording peaks between -12dB and -6dB.
If you want to eliminate the risk of clipping entirely—without constantly watching your levels—consider upgrading to a 32-bit float system like the Hollyland LARK MAX 2. Because 32-bit float captures the full dynamic range of sound, “clipping” becomes a thing of the past. You can simply turn the volume down in post-production, and the audio remains crystal clear. It’s the ultimate insurance policy for content creators who can’t afford to lose a take.