



































.png)
 简体中文
简体中文 
You can record a podcast straight from your iPhone. And guess what? No studio setup or complicated gear is needed here. With the right setup, your episode can sound ready for publishing. This guide takes you through the entire recording process. You will learn about apps, microphones, recording, and exporting files. Whether this is your first episode or another recording attempt, these steps keep everything simple.
What You Need to Record a Podcast on iPhone
Before hitting record, make sure these basic things are ready.
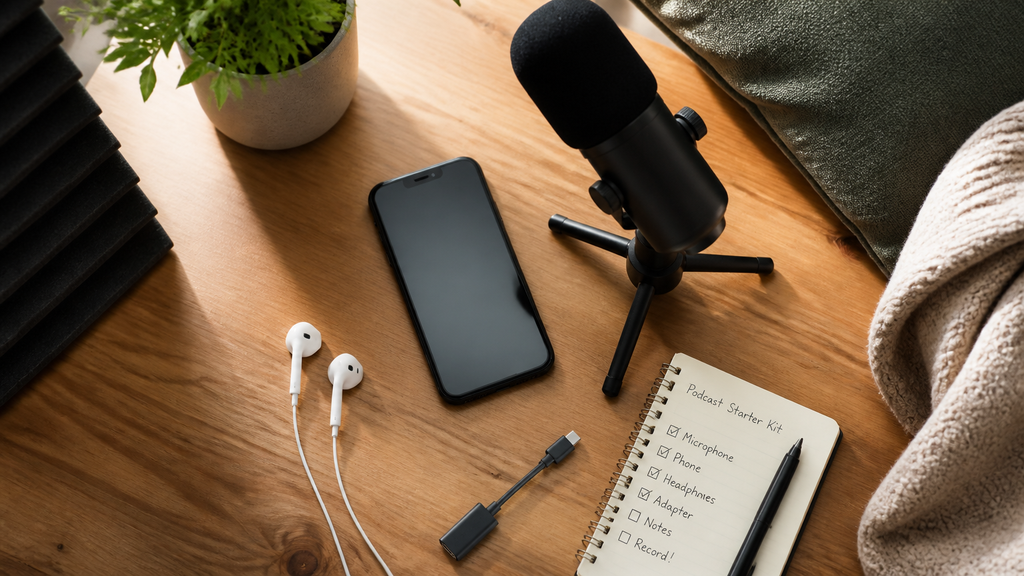
- iPhone running iOS 14 or later: All core recording apps and external audio input support work reliably on iOS 14 and above.
- A recording app: Free options are covered in the next section; no purchase is required to start.
- A quiet space: A small, soft-furnished room makes a bigger difference than almost any piece of hardware.
- An external microphone (optional but recommended): The built-in iPhone mic works for a rough test recording, but adding one external mic is the single most impactful upgrade you can make for audio quality.
Best Apps to Record a Podcast on iPhone
Picking an app is the first decision that shapes the rest of your workflow. Here are the four apps most first-time podcasters will encounter, evaluated on cost, use case, and the key limitation you’ll hit when you outgrow them.
| App | Cost | Best For | Key Limitation |
|---|---|---|---|
| Voice Memos | Free | Quick draft captures and rough notes | No gain control; omnidirectional pickup makes it unsuitable for publishable audio |
| GarageBand | Free | Solo or co-hosted episodes with on-device multi-track editing | Music-focused interface has a slight learning curve for podcast newcomers |
| Ferrite Recording Studio | Free tier / Paid | Podcasters recording multiple episodes; includes chapter markers and a built-in editor | Full-version cost is a barrier for absolute beginners |
| Spotify for Creators | Free | Fastest path from recording to a live, published episode | Limited editing control; tied to Spotify’s hosting ecosystem |
Which app should you use? Download GarageBand if you want multi-track control and plan to edit on-device without spending anything. Choose Spotify for Creators if your goal is to publish as fast as possible without a separate editing step. Ferrite becomes the right choice once you’re past your first episode and want a purpose-built podcasting environment.
The rest of this guide uses GarageBand as the primary demo app, with notes for Ferrite where the steps differ.
How to Set Up Your Microphone for iPhone Podcast Recording
The microphone you pick sets the ceiling for your recording quality. Before setting everything up, know why this matters. Your iPhone’s built-in mic can limit overall recording quality. Those limits can be tough to overcome later.
Why the Built-In iPhone Mic Falls Short for Podcasting
The built-in iPhone microphone is omnidirectional, meaning it picks up sound equally from all directions, including room reverb, surface vibration, and ambient noise. There’s no practical way to position it close to your mouth while holding the phone at a normal recording angle, and audio quality varies noticeably across iPhone generations. For a publishable podcast episode, one external microphone solves all three problems at once.
Setting Up the Hollyland LARK A1 on iPhone
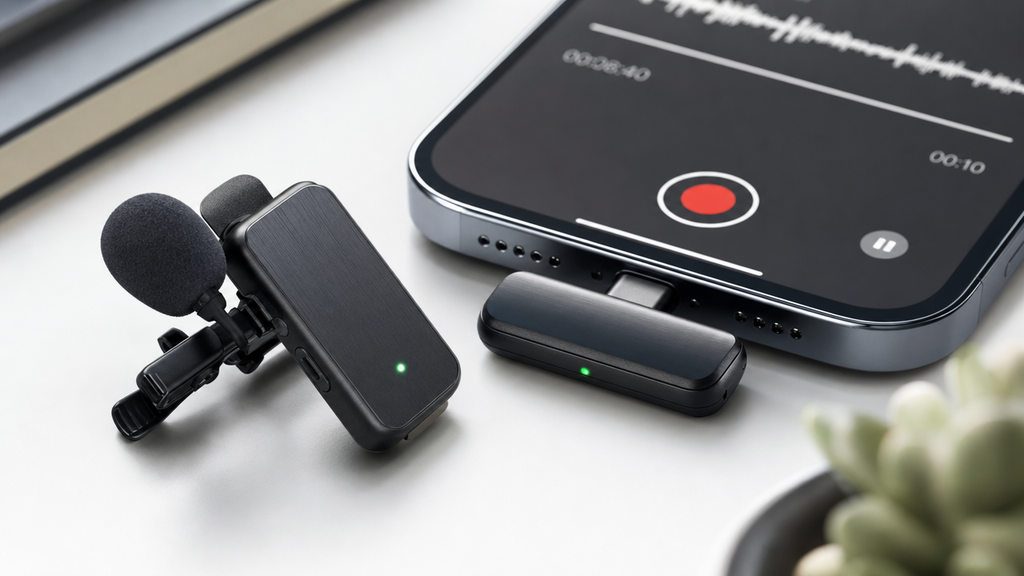
The Hollyland LARK A1 is a wireless lavalier microphone system with a compact receiver that plugs directly into the iPhone’s charging port. No Bluetooth pairing, no additional apps, and no adapters are required. Here’s the full setup sequence from unboxing to recording-ready:

Hollyland LARK A1 - Affordable Wireless Microphone
A perfect starter mic for creators on a budget. It’s simple to use and features effective noise cancellation.
Key Features: 48kHz/24-bit | 3-Level Noise Cancellation | 54-Hour Battery
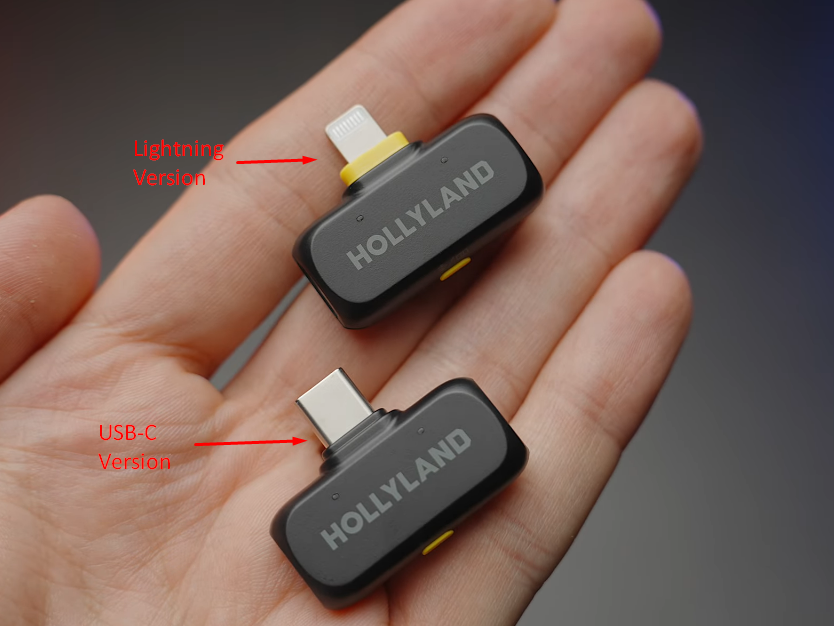
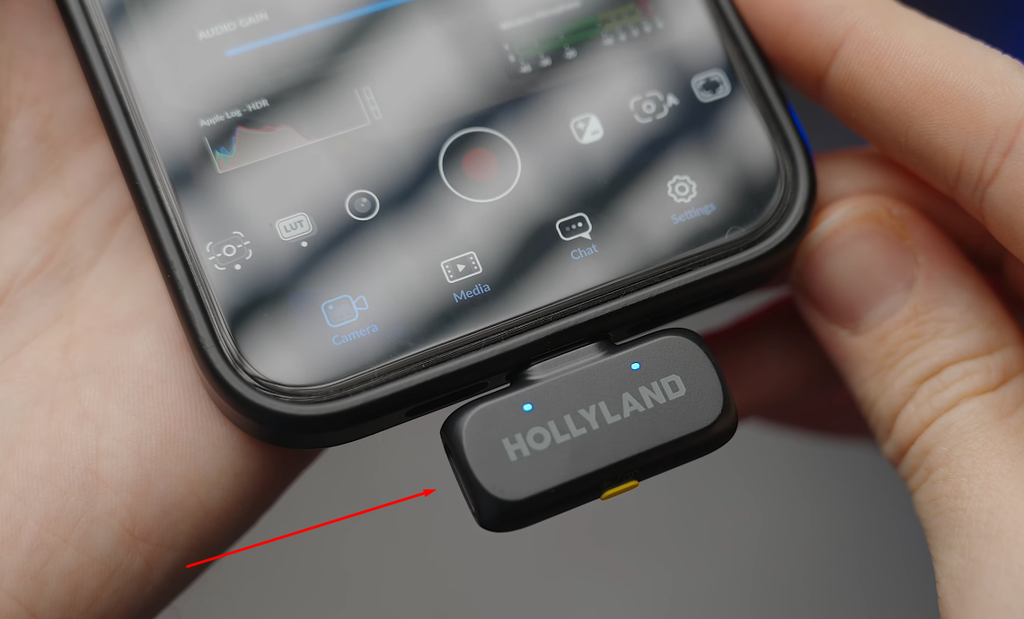
- Connect the receiver to your iPhone. Plug the LARK A1 receiver into the Lightning port for iPhone 14 and earlier, or the USB-C port for iPhone 15 and later. iOS recognizes the receiver immediately as an audio input device with no driver installation or settings change required. The receiver’s LED lights up once it’s drawing power from the port.
- Power on the transmitter. Press and hold the power button on the LARK A1 transmitter until the LED activates. The LED flashes during the startup sequence while the unit initializes.

- Confirm the pairing connection. Watch the LEDs on both devices. A successful paired connection is indicated by a solid, static blue LED on both the transmitter and the receiver. If either LED is still flashing rapidly, the units have not yet paired; pairing typically completes automatically within a few seconds.


- Set the Noise Cancellation level. Find the NC button on the transmitter body. Press it once to activate the noise cancellation. Once the feature is enabled, the indicator light on the transmitter will turn solid green.

Then open the HollyAudio app, connect LARK A1, and adjust the noise cancellation level (NC Level) to Low, Medium, or High, if needed. For a standard indoor environment such as a home office or bedroom, Low and Medium are a reliable starting point. For noisier spaces with persistent HVAC noise, traffic, or other continuous background sound, use High.

- Clip the transmitter to your clothing. Attach the transmitter to a shirt collar or lapel, approximately 15 to 20 cm (6 to 8 inches) from your mouth. The transmitter sends audio wirelessly to the receiver plugged into the iPhone, so no cable runs from your body to the phone.

- Verify the input in your recording app. Open GarageBand and navigate to Settings, then Audio/MIDI, then Input Source. The LARK A1 receiver should appear as a listed option; select it. In Ferrite, tap the microphone icon before starting your session and confirm the LARK A1 is the active input. If the app still shows the built-in microphone, unplug and reinsert the receiver, then recheck the input source.
Note: If you switch recording apps after connecting the LARK A1, always verify the input source again in the new app. Some apps default back to the built-in microphone each time they open, regardless of what was previously selected.
Step-by-Step: How to Record Your Podcast Episode on iPhone
With your app open and microphone confirmed, you’re ready to record. The steps below follow a GarageBand session from open to close, with notes for Ferrite where the interface differs.
- Open GarageBand and start a new project. Tap the “+” icon on the GarageBand home screen, then select Audio Recorder from the instrument picker. This opens a single-track recording view with a visible input level meter at the top of the screen.

- Check your input level before recording. Speak at your normal conversational volume and watch the input meter. The signal should peak in the green or yellow zone. If the meter clips into red, lower the gain using the adjustment bar on the left side of the screen.

If there is no signal at all, tap the input jack icon and confirm that the LARK A1 is selected.

- Activate Do Not Disturb and Airplane Mode. Swipe into Control Center and enable both before pressing record. Incoming notification sounds and even silent-mode vibrations embed directly into the audio track and cannot be cleanly removed in post-processing.
- Record 10 seconds of room silence. Tap record and sit quietly for 10 full seconds before speaking. This room tone sample gives GarageBand’s and Ferrite’s noise reduction tools a reference of your room’s ambient noise floor, which they use to subtract background sound during post-processing.
- Begin speaking. Maintain a consistent distance from the transmitter throughout the session. Leaning back or pulling away creates volume drops that are noticeable and time-consuming to fix in editing.
- Use the LARK A1 mute function for mid-session pauses. When you need to pause briefly (a cough, a page shuffle, an unplanned interruption), press the power button twice on the transmitter to activate the mute function rather than stopping the recording in the app. The transmitter’s LED changes state to solid red, confirming the muted condition. GarageBand continues running and captures silence in the track rather than a cut, which is much cleaner to work with in editing.

- Adjust Noise Cancellation if room conditions change mid-session. If background noise increases during the recording (an HVAC system cycles on, traffic picks up outside), press the NC button on the transmitter and assign noise cancellation levels via the HollyAudio app, as discussed earlier.
- Stop the recording and let the project save. Tap the stop button in GarageBand. The app auto-saves to your projects library. Do not force-quit the app before the save indicator clears. In Ferrite, the session saves to your library automatically.
- Play back 60 to 90 seconds using earphones. Listen to a section from the middle of the recording using earphones rather than the iPhone speaker. Earphones reveal gain inconsistencies, unexpected echo, and background noise that the phone speaker can mask. If the playback sounds clean, the session is complete.
Tips for Better Audio Quality When Recording on iPhone
These five adjustments cost nothing and improve recording quality in ways that are difficult to fix during editing:

- Record in a small, soft-furnished room. Closets with hanging clothes, curtained rooms, and carpeted spaces absorb echo and reflections that reduce speech intelligibility. Rooms with hard walls, tile floors, or large windows are the most difficult environments to get clean audio in.
- Maintain consistent distance from the microphone throughout the session. Even with a clip-on transmitter, shifting forward and backward creates volume swings that add extra editing work. If you need to move, keep the transmitter clipped to your clothing so it moves with you.
- Enable Do Not Disturb and Airplane Mode before every session. Even a silent-mode vibration from an incoming notification can embed an audible artifact into your recording. Make this a pre-session habit before every episode.
- Capture 10 seconds of room silence before you start speaking. This room tone clip gives noise reduction tools in GarageBand and Ferrite a reference sample of your specific ambient environment. Without it, post-production cleanup is harder.
- Run a 30-second test record before committing to the full episode. Record a brief sample, play it back with earphones, and check for gain issues, unexpected echo, or floor noise. Five minutes of pre-session testing protects an hour or more of recording time.
How to Export and Publish Your Podcast Recording from iPhone
Before exporting, run a quick cleanup on the raw recording. In GarageBand, use the track region handles to trim silence from the start and end of the session, then run a normalize pass through the Master Effects section to even out the overall volume. In Ferrite, the trim and normalize tools are available directly from the editing timeline. This cleanup is a separate task from a full editing session and typically takes less than five minutes.
To export and publish your episode:
- Export from GarageBand. Tap the down-arrow icon in the top-left corner, select My Songs, then long-press your project and tap Share, then Song. Choose your quality setting before confirming. In Ferrite, tap the export icon and select your destination format before confirming.
- Choose MP3 at 128 to 192 kbps. This format is accepted by all major podcast hosting platforms. Use 192 kbps if the episode includes music segments. M4A is the native iPhone export format and is accepted by most platforms, but MP3 is the safer universal choice if you plan to upload to multiple directories.
- Save the file to the Files app. In the Share sheet, select Save to Files and choose a folder you will remember. This makes the file accessible for upload from Safari or any hosting app on your iPhone.
- Choose your publishing path.
- For Spotify: Open Safari on your iPhone, then log in to Spotify for Creators. From there, create your new podcast episode through Safari. Mobile app uploads aren’t available, so use the web dashboard. Spotify automatically manages hosting and creates your RSS feed too.
- For an external host such as Buzzsprout or Podbean: Open Safari and sign in. Then head over to the upload section. Pick your podcast file directly from the Files app. Your hosting platform creates the RSS feed automatically afterward. That feed sends episodes across Apple Podcasts, Spotify, and more.
- Add episode metadata before publishing. Enter the episode title, description, and episode number in your hosting platform before you hit publish. This data travels with the RSS feed and controls how your episode appears across podcast directories.
FAQs
Can I record a podcast on iPhone without any extra equipment?
Yes. Voice Memos is free and already installed on iPhones. You don’t need any extra hardware to start recording. The app doesn’t offer manual gain control, though. Still, newer iPhones can capture audio ready for publishing. Room noise and reverb aren’t the headache they once were. Native options like Voice Isolation and Studio Voice can manage them directly.
What is the best free app to record a podcast on iPhone?
GarageBand is the best free choice for podcasters who want multi-track control and plan to edit on-device. Spotify for Creators is the better option when the priority is publishing quickly rather than editing. Both are free to download and use, with no in-app purchase required to start recording.
Does the Hollyland LARK A1 work with all iPhone models?
Yes. Choose the Lightning receiver for iPhone 14 and earlier. For iPhone 15 and later, choose the USB-C receiver instead. Both plug straight into the iPhone charging port. No adapter is needed for either receiver. iOS recognizes both as audio input devices instantly. You also won’t need drivers or extra setup later.
How do I reduce background noise when recording a podcast on iPhone?
Start with a small room filled with soft furnishings. These materials help reduce echoes and unwanted room noise. Next, turn on Noise Cancellation on the LARK A1 transmitter. Pick Medium for normal indoor spaces and High for noisier rooms. Then clean things up during post-processing with GarageBand. Ferrite also offers built-in noise reduction for this step.
What audio format should I export my podcast in?
MP3 at 128 to 192 kbps is accepted by all major podcast hosting platforms and is the safest choice for broad compatibility. Use 192 kbps if the episode includes music segments. M4A is the native iPhone export format and works on most platforms, but MP3 is more universally supported across directories.
Conclusion
Recording a podcast on an iPhone has four simple stages. First, pick your app and connect your microphone. Then record the episode before exporting and uploading it. Your first session might take longer while everything feels new. After that, future episodes should move much more quickly. If you’re using the built-in iPhone mic, upgrade it. The Hollyland LARK A1 can make the biggest difference.
