



































.png)
 简体中文
简体中文 
Your iPad can record clean, usable audio straight from the box. With the right microphone, things can get even better. You can keep recordings simple or push toward professional-quality results. There is a recording method ready for whatever you need. This guide covers three easy ways to record audio. We will start with Voice Memos and then explore GarageBand. Finally, we will cover external microphones with USB-C and wireless options.
Which Recording Method Should You Use?
Before getting started, pick the tool that matches your needs.
| Use Case | Recommended Method | What You Need |
|---|---|---|
| Quick voice notes, lectures, meetings | Voice Memos | Nothing extra; the app is pre-installed |
| Voiceover, podcast draft, music demo | GarageBand | Free app (download from App Store if needed) |
| Podcast production, interviews, music, vlogging | External microphone + Voice Memos or GarageBand | USB-C mic or wireless lavalier (e.g., Hollyland LARK A1 or LARK M2) |
Method 1: Record Audio on iPad Using Voice Memos
Voice Memos is pre-installed on every iPad running iOS 12 or later. It requires no configuration, no account, and no learning curve. For quick capture, it is often all you need.
Before you start: Go to Settings → Apps → Voice Memos → Audio Quality → Lossless. This records at a higher quality with no added cost or complexity.
- Open Voice Memos. Find it on your Home Screen or search for it in Spotlight. The app opens directly to the recording interface.
- Tap the red record button. The large red circle at the bottom center starts recording immediately. A live waveform appears to confirm the microphone is picking up sound.

- Pause or resume as needed. Tap the record button again to pause without creating a new file. This is useful when capturing a lecture or interview in sections without multiple separate recordings.
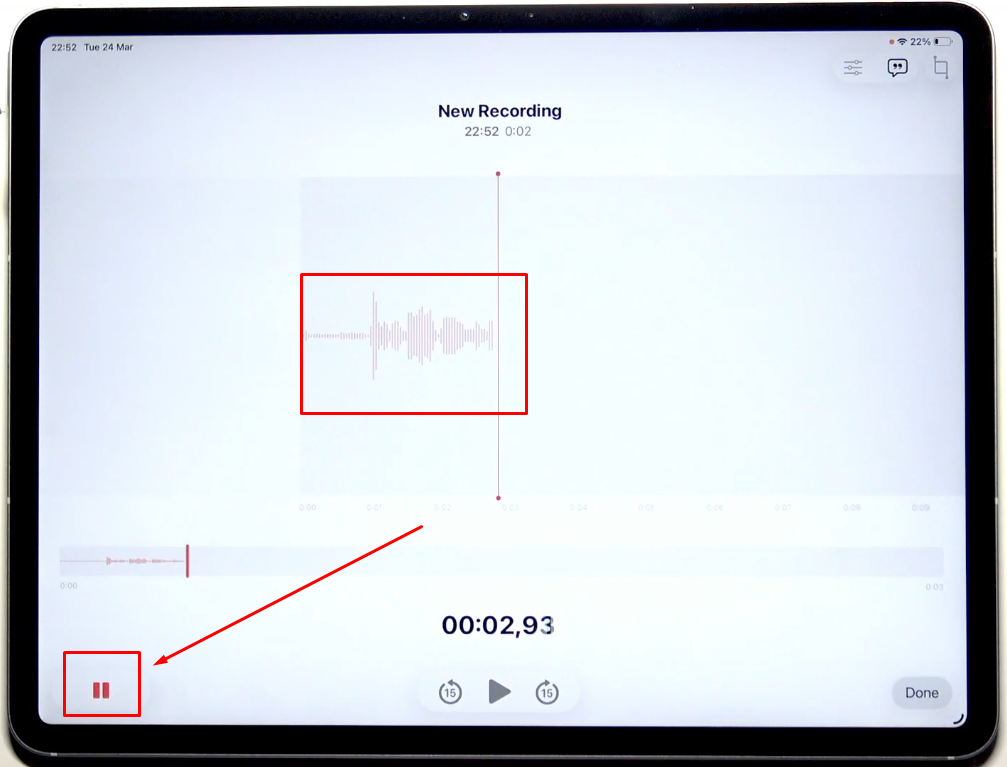
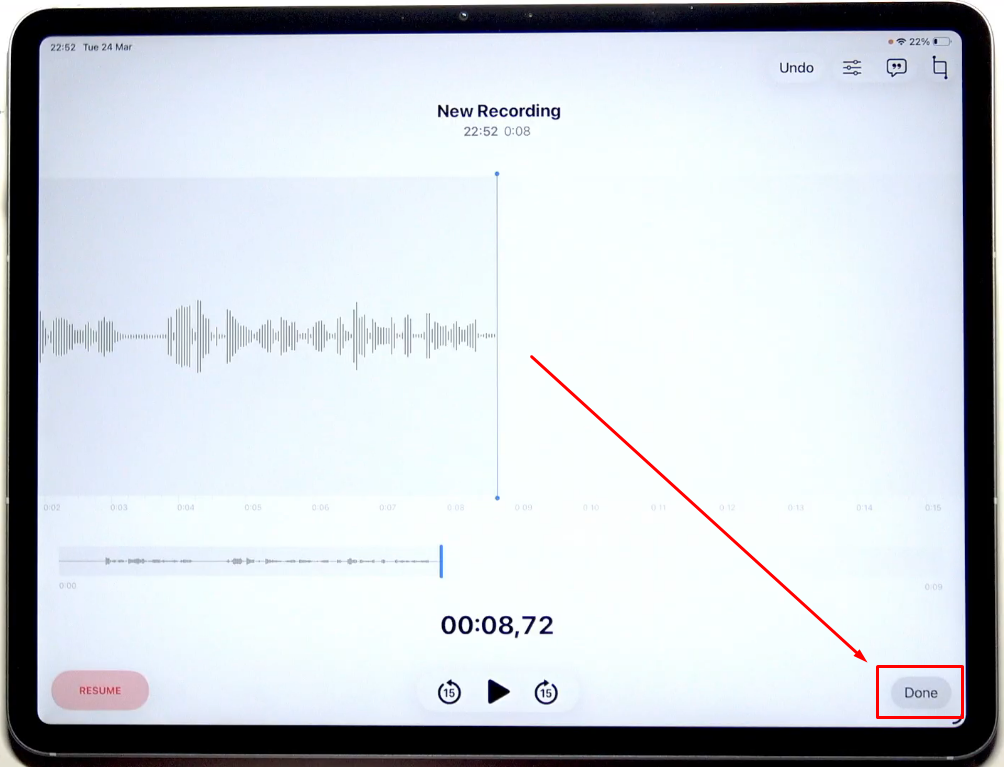
- Stop and save. Tap Done when the recording is finished. The app saves the file automatically with a timestamp. Tap the title to rename it something you will recognize later.
- Access your recordings. All saved files appear in the main Voice Memos list. Tap any entry to play it back. Use the three-dot menu to share, duplicate, or export the file.
- Enable iCloud sync (optional). Go to Settings → [Your Name] → iCloud and toggle Voice Memos on. Recordings will appear across your iPhone, iPad, and Mac automatically.
Note: On iPad models with dual built-in microphones, Voice Memos records in stereo when Lossless quality is enabled. iPad Pro and iPad Air models with multiple mic arrays benefit most from this setting.
Method 2: Record Audio on iPad Using GarageBand
GarageBand gives you manual control over input gain, track levels, and export format. It is the right step up from Voice Memos when you need recordings that hold up in post-production or need to be shared as a polished audio file.
GarageBand is a free download from the App Store if it is not already installed on your device.
- Open GarageBand and create a new project. Tap the + icon on the My Songs screen. GarageBand will prompt you to select a track type.

- Select Audio Recorder. Swipe through the track type carousel and tap Audio Recorder. This track type is built specifically for capturing live microphone input.

- Check your input source. At the top of the Audio Recorder interface, tap the Input Source selector (jack icon). Confirm the correct microphone is selected. If no external mic is connected, it will default to Built-In Microphone.

- Set your recording level. Speak at your normal volume and watch the input meter. Adjust the Input Volume to bring levels into the green-to-yellow range. Red on the meter means clipping, which causes audible distortion in the recording.

- Arm the track. Tap the red circle on the track header in the main timeline view to arm it. The track header will turn red to confirm it is ready to record.
- Press record and monitor. Tap the red Record button in the transport bar at the top. GarageBand counts in (this can be disabled in settings) and begins recording. Watch the waveform to confirm the input is registering.

- Export when finished. Tap the back arrow to return to My Songs. Long-press your project, then tap Share → Song to Files to save it as an audio file to the Files app, or Share → AirDrop to send it immediately to another device.
Note: GarageBand detects an external microphone automatically when one is connected via USB-C. The Input Source selector will switch away from the internal microphone. That workflow is covered in full in Method 3 below.
Method 3: Record Audio on iPad with an External Microphone
The iPad’s built-in microphones handle casual capture adequately, but distance, room reflections, handling noise, and background hum can degrade a recording in ways that are difficult to fix in editing. Connecting a dedicated external microphone addresses those problems before they reach the file.

Option A: Wireless USB-C Setup with the Hollyland LARK A1
The Hollyland LARK A1 is a compact wireless lavalier system with a USB-C receiver that plugs directly into any USB-C iPad. No adapter, no driver installation, and no app configuration required. It is the fastest way to move from internal tablet mic quality to professional-grade audio capture.

Hollyland LARK A1 - Affordable Wireless Microphone
A perfect starter mic for creators on a budget. It’s simple to use and features effective noise cancellation.
Key Features: 48kHz/24-bit | 3-Level Noise Cancellation | 54-Hour Battery
- Insert the LARK A1 USB-C receiver into the iPad’s USB-C port. The receiver is a small dongle roughly the size of a USB drive. Push it in firmly. On USB-C iPads, connecting compatible accessories is super simple. The connection is direct, so no adapter is needed. This includes iPad Pro 2018 and later models. It also covers iPad Air 4th generation and later models. The iPad mini 6th generation is included as well. So are the iPad mini (A17 Pro) and standard iPad 10th generation. Later standard iPad models also support this direct connection.

- Power on the LARK A1 transmitter. Press and hold the power button on the transmitter body until the LED turns on. The transmitter and receiver are pre-paired at the factory, so they will connect to each other automatically without any manual pairing steps.

- Confirm the LED status. A steady blue LED on both the transmitter and the receiver indicates both units are connected and actively transmitting. A blinking LED means the unit is in pairing or standby mode. Wait until both LEDs are steady before starting a recording.

- Clip the transmitter to your clothing. Attach the LARK A1 transmitter to your collar or lapel using the included clip. Position it approximately 15 to 20 centimeters below the chin for the cleanest vocal capture.

- Turn on and set your noise cancellation level. Press the power button once on the transmitter to activate noise cancellation. The indicator light turns solid green, confirming the function is enabled.

Once done, set the noise-canceling levels. To do that, connect the LARK A1 to the HollyAudio app. Locate the NC level option, and choose Low, Medium, or High.

- Open Voice Memos or GarageBand. iPadOS recognizes the LARK A1 USB-C receiver as an audio input device automatically. In GarageBand, tap the Input Source selector in the Audio Recorder track. It should now display the external microphone rather than Built-In Microphone.
- Check the input level meter. Speak at your recording volume and watch the level meter respond. If you see movement, the iPad is reading from the LARK A1 and not the internal mic.
- Start recording. Press the record button in Voice Memos or arm the track and press record in GarageBand. Audio is now being captured through the LARK A1 at a significantly higher signal-to-noise ratio than the built-in microphone provides.
Option B: Wireless Setup with the Hollyland LARK M2
The Hollyland LARK M2 is designed for content creators who need to move freely during a recording. The transmitter weighs just 9 grams, clips discreetly to a shirt or jacket, and delivers up to 40 hours of combined battery life across the transmitter and receiver. It is well-suited for vlogging, on-camera interviews, and all-day shooting schedules where cables would restrict movement or appear on camera.
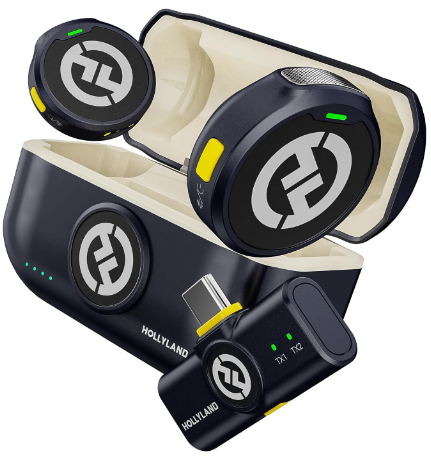
Hollyland LARK M2 - Mini Lavalier Microphone
An incredibly lightweight and compact wireless button microphone that captures high-fidelity audio.
Key Features: 9g Button Size | 48 kHz/24-bit | 40 Hours Battery
- Power on the LARK M2 transmitter and receiver. Press and hold the power button on each unit until the LED activates. The LARK M2 transmitter and receiver are pre-paired out of the box. Both units will connect to each other automatically once powered.


- Confirm the pairing LED state. A steady blue LED on both units confirms an active wireless link. A blinking LED means the unit is still searching for its paired counterpart. Do not begin recording until both LEDs are steady.

- Connect the LARK M2 receiver to the iPad. Insert the receiver’s USB-C output into the iPad’s USB-C port. iPadOS will recognize it as an external audio input immediately, following the same recognition flow as the LARK A1.

- Clip the transmitter to your clothing. The LARK M2 transmitter is button-sized and built for discreet on-camera placement. Attach it to a shirt pocket, collar, or lapel. Because it is wireless, the wearer can move freely, turn away from the camera, or step back without interrupting the recording.

- Open GarageBand and confirm the input source. In the Audio Recorder track, the Input Source selector should display the LARK M2 receiver as the active microphone. If it still shows Built-In Microphone, tap the selector and manually choose the external input from the list.
- Use the mute toggle for clean takes. Press the mute button on the LARK M2 transmitter to cut the signal instantly. The LED changes state, typically turning red or flashing, to confirm mute is active. This gives you a clean, audible cut between takes directly from the transmitter without touching the iPad.
- Start recording. With the LARK M2 confirmed as the input source, begin recording in GarageBand or Voice Memos. Check input levels on a short test take before committing to a long session.
How to Improve Audio Recording Quality on iPad
These tips apply to any recording method and take effect immediately.

- Reduce room echo. Hard, bare walls reflect sound and make recordings sound hollow. A room with carpet, curtains, or upholstered furniture absorbs that reflection. A closet full of clothing is an effective makeshift vocal space.
- Keep the iPad still. Movement creates handling noise, especially in Voice Memos where the built-in microphone is close to where you hold the device. Use a stand, or prop the iPad against something stable during a take.
- Run a 15-second test before any long session. Record a short clip and play it back immediately to check for clipping, background hum, or unexpected buzzing before you commit to a full recording.
- Move away from fans and HVAC vents. Low-frequency rumble from air conditioning is one of the most common noise complaints in tablet recordings. Move to the opposite side of the room or close the nearest vent during a take.
- Keep iPadOS updated. Regular system updates include audio driver stability and microphone recognition improvements. An outdated iOS version often causes intermittent microphone failures.
- Use an external microphone for anything that matters. No amount of room treatment or gain adjustment fully compensates for the sensitivity and noise floor of a purpose-built lavalier or condenser microphone. A USB-C mic like the LARK A1 is the single upgrade with the most immediate impact on recording quality.
Troubleshooting: iPad Not Detecting Your Microphone
Microphone permission is blocked in the app. Go to Settings → Privacy & Security → Microphone and confirm that Voice Memos or GarageBand shows the toggle in the on position. Without this permission, no microphone input reaches the app at all.
USB-C receiver is not recognized after plugging it in. Remove the receiver, wait two seconds, and reinsert it firmly. If you are using a passive USB-C adapter rather than a device with a native USB-C output, the adapter may not carry audio data. Use a USB-C receiver directly whenever possible.
Bluetooth microphone is not switching to the input source. Open Control Center, press and hold the audio card in the upper-right corner, and confirm the correct Bluetooth device is listed as the audio input. Bluetooth audio input sources sometimes require manual selection on iPadOS.
External mic does not appear in GarageBand’s input selector. Exit the project, disconnect and reconnect the microphone, and reopen the project. GarageBand occasionally needs to re-scan connected audio devices at launch to register a new input.
LARK A1 or LARK M2 receiver is not recognized by iPadOS. Check the LED on the receiver before assuming the issue is on the iPad side. A non-illuminated LED means the unit is not powered. A steady LED with no iPad recognition suggests a port or software issue. Try the other USB-C port if your iPad model has one, or restart the recording app entirely. A blinking LED means the receiver is still searching for its paired transmitter and is not yet ready to pass audio. Lastly, the solid blue light on both the transmitter and receiver means that both units are paired and ready for use.
FAQs
Can I record audio on iPad without any app?
Voice Memos is pre-installed and ready the first time you open it. No download, no account, and no setup steps are required. Open the app, tap the record button, and recording begins immediately. Method 1 above covers every step in detail, including the quality settings worth adjusting before your first take.
What external microphone works best with iPad?
Look for a microphone with a USB-C output for a direct, adapter-free connection on modern iPad models. The Hollyland LARK A1 is a strong plug-and-play starting point with a USB-C receiver that recognizes instantly. The Hollyland LARK M2 extends that into a fully wireless workflow for creators who need to move freely or record on camera.
Does iPad record in stereo or mono?
Voice Memos records in stereo on iPad models with multiple built-in microphones when Just select Stereo under Recording Mode in Settings > Apps > Voice Memos. Most single external microphone inputs, including lavalier mics, record in mono by default in GarageBand unless you are using a stereo microphone configuration or a dedicated stereo audio interface.
How do I record audio from another app while using Voice Memos?
iPadOS does not allow two apps to hold the microphone at the same time. If a background app is actively using the microphone, Voice Memos will fail to record or will capture silence. Fully close the background app before opening Voice Memos or GarageBand to ensure the microphone input is available.
Conclusion
Voice Memos covers quick capture with zero setup, GarageBand adds gain control and flexible export options, and an external microphone removes the most significant quality limitation in any iPad recording workflow. For anyone recording more than casual voice notes, a USB-C microphone is the upgrade that delivers the most immediate, audible difference. The Hollyland LARK A1 is the simplest starting point for a wirelessUSB-C recording, and the Hollyland LARK M2 is the right choice when a wireless, cable-free workflow matters.
