.png)
If you want to start recording audio without paying a monthly subscription fee, Audacity is the best place to start. Since its release in 2000, it has become the industry standard for open-source audio editing. It is a fully functional Digital Audio Workstation (DAW) that works seamlessly across Windows, Mac, and Linux.
In this guide on how to use Audacity: a step-by-step tutorial for beginners, we will cut through the technical jargon and focus on the essential tools you need to produce professional audio.
Audacity is designed for efficiency. Unlike complex studio software like Pro Tools or Adobe Audition—which can feel like learning to fly a spaceship—Audacity is straightforward. It is the perfect tool for:
- Podcasting: Recording multi-track conversations and adding intro music.
- Voice-Overs: Creating clean, crisp narration for YouTube videos or audiobooks.
- Simple Music Production: Laying down demo tracks or digitizing old vinyl and cassettes.
The “Garbage In, Garbage Out” Rule
While Audacity is powerful, it’s important to manage your expectations. Software is a tool for polishing, not performing miracles.
If your source audio is distorted, clipped, or filled with heavy static because of a low-quality microphone, no amount of editing effects can make it sound professional. Audacity can remove silence and trim mistakes, but the clarity of your final export depends entirely on the quality of the hardware you record with.
Step 1: Download and Installation
Before you search Google, stop. Because Audacity is open-source and incredibly popular, there are dozens of “fake” websites trying to trick you into downloading malware or paid versions of this free software.
To get the legitimate, safe version, you must download it from the official developer site: audacityteam.org or https://www.audacityteam.org/download/.
Compatibility
Audacity works on almost any computer:
- Windows: Windows 10 and 11 (32-bit and 64-bit).
- macOS: macOS 12 and later (supports both Intel and Apple Silicon/M-series chips).
- Linux: AppImage available for most distributions.
Installation Instructions
- Navigate to the Download page on the official site.

- The site usually auto-detects your operating system. Click the blue button labeled “Download Audacity.”
- For Windows: Run the .exe file. Follow the setup wizard (the default settings are fine).
- For Mac: Open the .dmg file and drag the Audacity icon into your Applications folder.


- Launch the program. If you see a welcome screen with a “How to Get Help” message, you are ready to go.
Step 2: Setting Up Your Microphone (Crucial Step)
Downloading the software is easy, but configuring it correctly is where most beginners get stuck. If you don’t tell Audacity exactly which microphone to listen to, it will likely default to your laptop’s built-in webcam microphone, resulting in distant, tinny audio.
Locate the Audio Setup button in the top toolbar (or the device dropdown menus in older versions) to configure your input and output.
1. Audio Host
This determines how Audacity communicates with your sound card.
- MME: This is the default setting and compatible with almost all devices. Stick with this unless you have latency issues.
- Windows DirectSound: A slightly newer alternative to MME.
- WASAPI: Generally used for recording “system audio” (what is playing on your computer screen) rather than a microphone.

2. Recording Device (Input)
This is the most critical setting. Click on Recording Device and look for your specific microphone in the list.
- Avoid Defaults: Do not select “Microsoft Sound Mapper” or “Realtek High Definition Audio” if you have an external mic plugged in.
- Select Your Hardware: Look for the specific brand name or USB interface name of your microphone.

Pro Tip for Wireless Users:
If you are using a professional wireless system like the Hollyland LARK MAX 2, your computer will recognize the receiver (RX) via the USB-C connection. You must select “Hollyland LARK MAX” as your input source.
This step is vital because the LARK MAX 2 records in 48kHz/24-bit Studio Quality. If you accidentally leave your input on your laptop’s internal mic, you are bypassing the high-fidelity hardware you just invested in.
3. Playback Device (Output)
This determines where you hear the audio during playback.
- Select your Headphones.
- Warning: Do not use your laptop speakers while recording. If your microphone picks up the sound coming from your speakers, it creates a feedback loop (a loud screeching noise) or a distracting echo. Always wear headphones to monitor your audio.

Step 3: Recording Your First Clean Track
Now that your microphone is selected, it’s time to capture audio. However, simply hitting the red button isn’t enough to guarantee professional results. You need to watch your volume levels to avoid distortion.
Understanding the Recording Meter
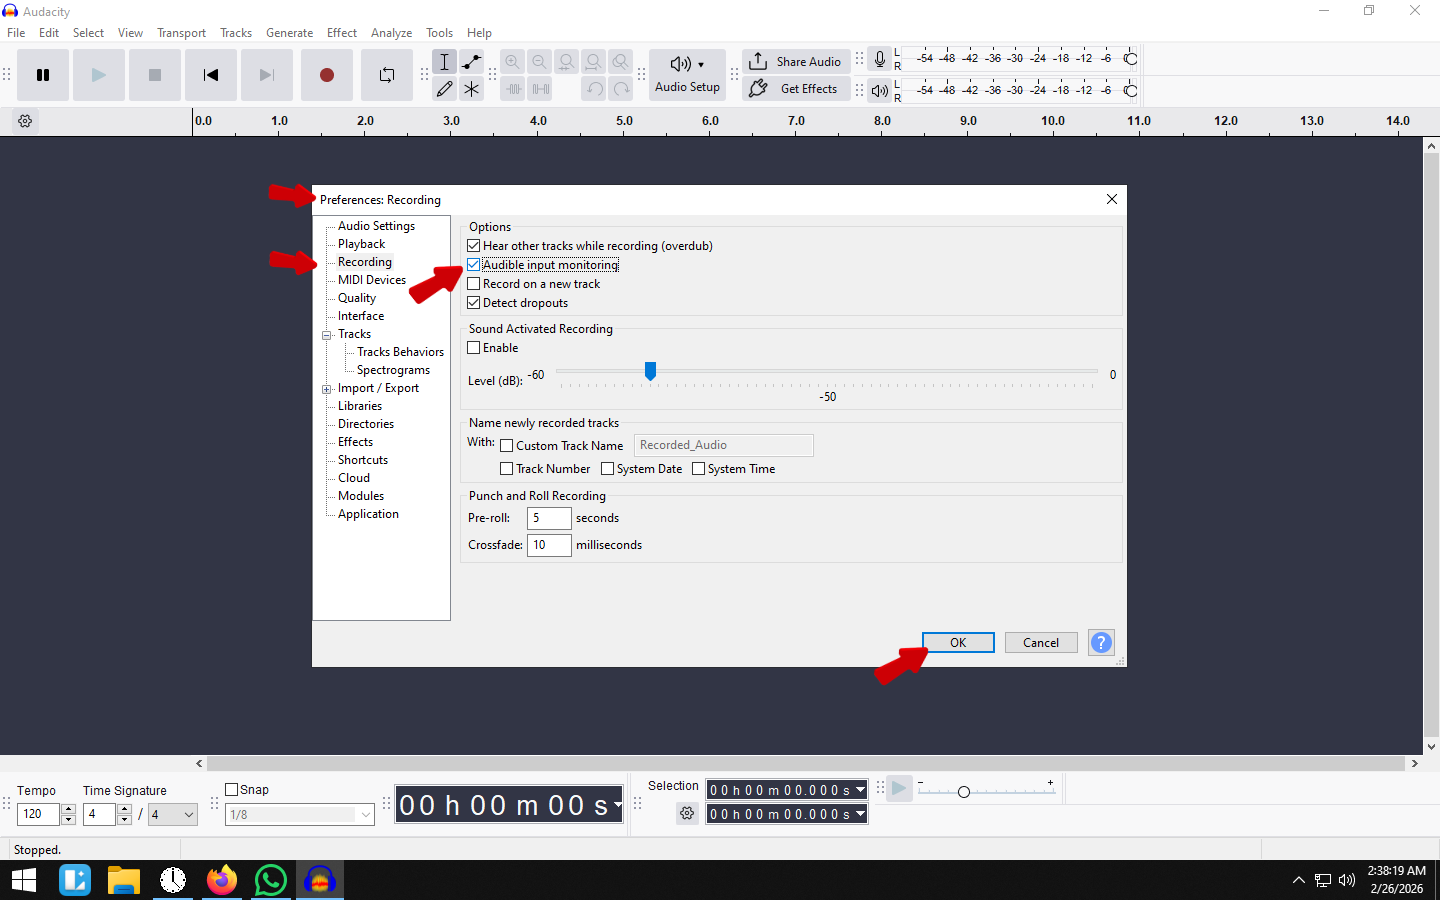
Before you commit to a full take, look at the Recording Meter Toolbar (usually at the top of the screen with a microphone icon). Click the microphone icon and select “Enable Silent Monitoring”. This allows you to see your input levels without actually recording yet.


- The Green Zone (-54dB to -18dB): This is too quiet. If your audio stays here, you will introduce hiss (static) when you try to make it louder later.
- The Sweet Spot (-12dB to -6dB): This is your target. You want your voice to peak in this yellow/high-green range. It provides a strong signal with enough “headroom” to avoid distortion.
- The Red Zone (0dB): This is the danger zone. If the meter hits the edge (0dB), your audio will “clip.” Clipped audio sounds distorted and crunchy, and in most cases, it cannot be fixed.
The “Room Tone” Trick
This is the most overlooked step by beginners. When you press the Record button (the red circle), do not speak immediately.
- Sit perfectly still and record 5 to 10 seconds of silence.
- This captures the “Room Tone”—the natural sound of your air conditioner, computer fan, or ambient hum.
- You will use this 5-second sample later to teach Audacity exactly what noise to remove during the editing phase.

Once you have captured your room tone, begin your script. If you make a mistake, snap your fingers or clap loudly near the mic to create a visual spike in the waveform. This makes it easy to find and delete the error later.
Pro Tip: How to “Un-Clip” Distorted Audio
If you get excited and laugh too loud during a recording, you will likely hit the “Red Zone,” causing permanent distortion. Standard microphones cannot fix this.
However, if you are using the Hollyland LARK MAX 2, you can enable 32-bit Float Recording. This technology captures such a massive dynamic range that “clipping” is virtually impossible. Even if your waveform looks like a flat brick of red distortion in Audacity, you can simply use the Amplify effect to lower the volume, and the audio detail will be perfectly restored. It is a massive safety net for dynamic creators.
Step 4: Basic Editing Tools (Cut, Copy, and Trim)
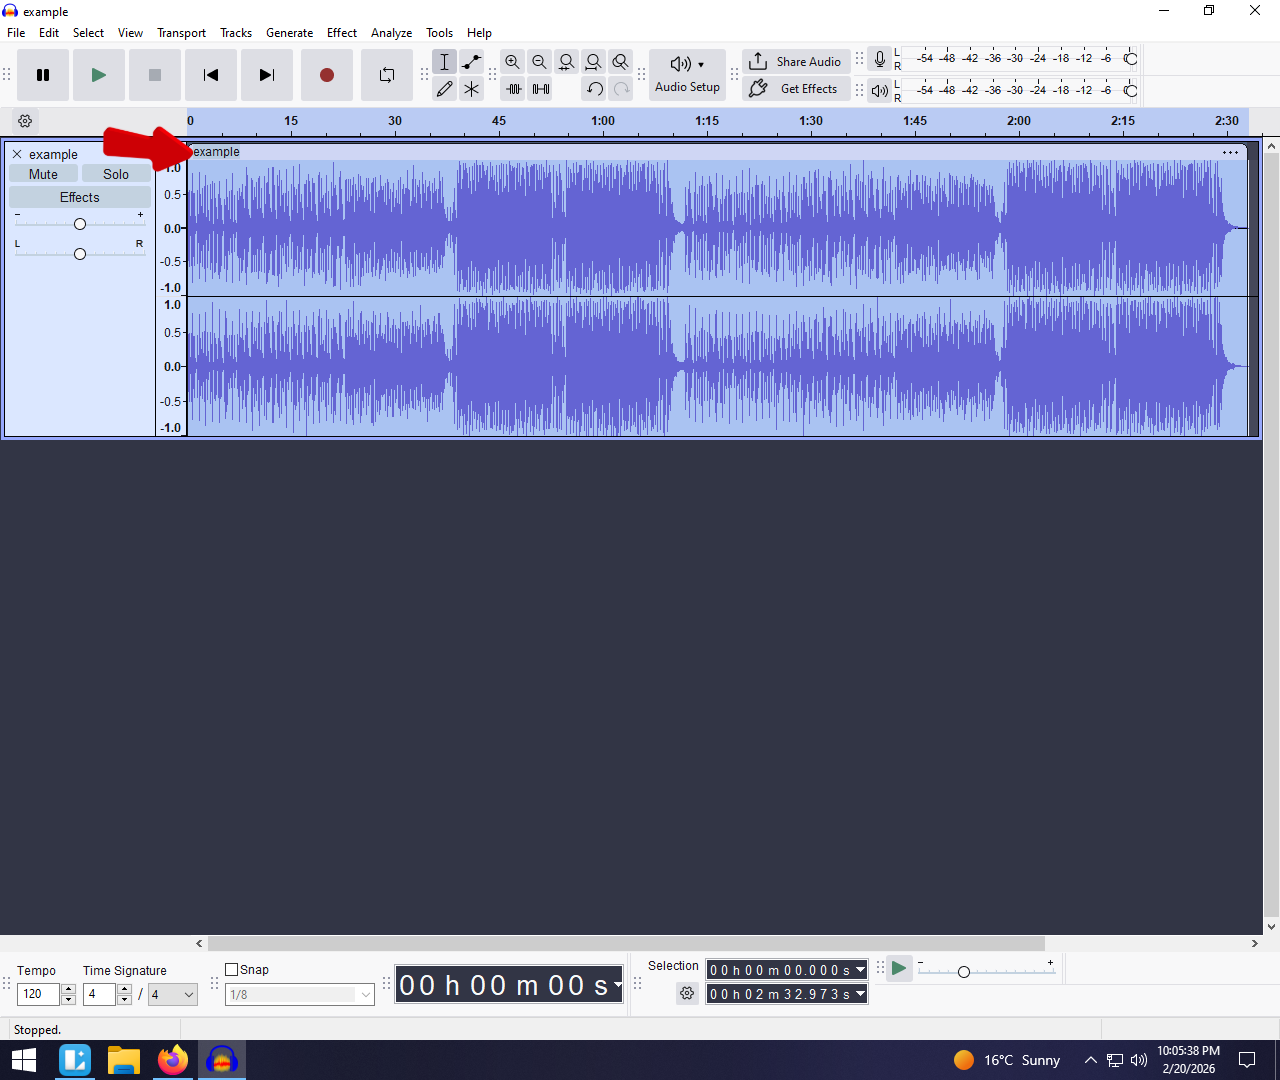
Once your audio is recorded, you will see a long, squiggly blue line called a waveform. To turn a raw recording into a polished episode, you need to master the toolbar.
While Audacity offers dozens of features, you will spend 90% of your time using just three specific tools.
| Tool Icon | Tool Name | What It Does | Keyboard Shortcut |
|---|---|---|---|
| I-Beam (Cursor) | Selection Tool | Highlights specific sections of audio to edit, delete, or apply effects to. | F1 |
| Line with Dots | Envelope Tool | Manually adjusts volume levels over time (fade in/out) without splitting the track. | F2 |
| Magnifying Glass | Zoom Tool | Zooms in on waveforms to find precise silence or clicks. | F4 |
How to Remove Mistakes (The “Cut” and “Delete”)
The most common task in audio editing is removing “umms,” “ahhs,” long pauses, or mistakes where you stumbled over a sentence.
- Select the Tool: Ensure the Selection Tool (F1) is active. Your cursor should look like an “I-Beam.”

- Highlight the Error: Click and drag your mouse over the section of the waveform you want to remove. The background of the selected area will turn light white.

- Preview: Press Spacebar to listen to only the highlighted section. This ensures you aren’t deleting words you want to keep.
- Delete: Press the Delete key (or Backspace) on your keyboard. The audio is removed, and the remaining clips automatically snap together to close the gap.

Pro Tip: If you want to remove the audio but keep the space (time) empty—for example, to remove a cough during a co-host’s sentence—press Ctrl + L (Silence Audio) instead of Delete.
How to Move Clips (Time Shift vs. Clip Handles)
If you are watching older tutorials, you might be looking for a “Time Shift Tool” (a double-ended arrow icon). Audacity changed this in recent updates.
There is no longer a separate button for moving tracks. Instead, Audacity now uses Clip Handles.
- The Old Way: You had to switch tools to move audio.
- The New Way: Look at the top of your audio clip inside the track. You will see a title bar (Clip Handle) with the track name.
- Hover your mouse over the Clip Handle (the top border of the waveform region).
- Your cursor will change from an I-Beam to a Hand Icon.
- Click and Drag the clip left or right to reposition it along the timeline.

This allows you to align your voiceover with music intros or sync up two different speakers without constantly switching toolbar buttons.
Step 5: How to Remove Background Noise in Audacity
Background hiss, air conditioner hum, and static are the enemies of clear audio. Fortunately, Audacity’s Noise Reduction tool is one of its most powerful features. It works by “sampling” the noise you want to remove and then mathematically subtracting that sound profile from your entire recording.
Follow this three-step process to clean up your track:
1. Get the Noise Profile
This is why recording 5 seconds of silence (room tone) at the start of your session is essential. Audacity needs to know exactly what “silence” sounds like in your room.
- Use the Selection Tool (F1) to highlight a section of your recording that contains only background noise (no talking, breathing, or mouse clicks).
- Go to the top menu and click Effect > Noise Reduction and Repair > Noise Reduction.

- In the pop-up window, click the button labeled “Get Noise Profile”.

- Note: The window will close immediately. This is normal; Audacity has now “learned” the noise pattern.
2. Apply Noise Reduction
Now that Audacity recognizes the noise, you can remove it from the spoken parts of your audio.
- Select your entire track by pressing Ctrl + A (Windows) or Cmd + A (Mac), or by double-clicking the track header.
- Go back to Effect > Noise Reduction and Repair > Noise Reduction.

- This time, look at the sliders in “Step 2” of the window. For most beginners, the default settings work well, but here is a safe starting point:
- Noise Reduction (dB): 12 (Higher values remove more noise but can distort voice).
- Sensitivity: 6.00 (Controls how aggressively it targets the noise).
- Frequency Smoothing: 3 (Helps blend the audio).
- Click OK.

3. The “Robotic Voice” Warning
Be careful not to over-process your audio. If you set the Noise Reduction (dB) slider too high (e.g., 30dB+), your voice will start to sound metallic, robotic, or “underwater.”
It is always better to have a tiny bit of background hiss than a voice that sounds artificial. If the noise is still too loud after one pass, undo the action (Ctrl + Z) and try slightly increasing the settings, rather than running the effect multiple times.
Step 6: Exporting Your Audio (MP3 vs. WAV)
Once you have finished editing, removing noise, and polishing your track, it is time to get your audio out of Audacity.
There is a critical distinction beginners often miss: Saving your project (File > Save Project) creates an .aup3 file. This file only opens in Audacity. You cannot upload it to Spotify, YouTube, or email it to a friend to listen to on their phone.
To create a playable audio file, you must Export.
How to Export Your Track
- Go to the top menu bar and select File.
- Click Export Audio.
- Select your desired format (usually Export as MP3 or Export as WAV).

Which Format Should You Choose?
The two industry standards are WAV and MP3. Knowing which one to use depends on what you plan to do with the file.
1. WAV (Signed 16-bit PCM)
- What it is: An uncompressed, lossless audio format.
- Quality: Maximum fidelity. It sounds exactly like the recording in your DAW.
- File Size: Very large (approx. 10MB per minute of audio).
- Best For: Your Master Archive. Always keep a WAV copy of your work on your hard drive. If you plan to edit the audio further in video editing software (like Premiere or DaVinci Resolve), use the WAV file to prevent quality loss.
2. MP3
- What it is: A compressed, lossy audio format. “Lossy” means the encoder deletes data the human ear is unlikely to hear to save space.
- Quality: Good, but lower than WAV.
- File Size: Small (approx. 1MB per minute of audio).
- Best For: Distribution. This is the format you upload to podcast hosting platforms, send via email, or stream online.
Recommended MP3 Settings
When you select Export as MP3, Audacity will ask for quality settings. For the best balance of size and sound:
- Bit Rate Mode: Select Constant.
- Quality:
- 128 kbps: Standard for spoken word (podcasts/voiceovers).
- 192 kbps – 320 kbps: Recommended for music or high-detail sound design.
Adding Metadata
Before clicking “Export,” a dialog box on the lower left side called Edit Metadata can be clicked to input the Artist Name, Track Title, and Year. This data is embedded into the file, ensuring that when a listener plays your podcast in their car or on their phone, the correct title displays on their screen.


Pro Tip: Why Software Can’t Fix Bad Hardware
The “Golden Rule” of audio engineering is simple: Garbage In, Garbage Out.
Many beginners make the mistake of recording poor-quality audio, thinking, “I’ll just fix it in Audacity later.” This is a dangerous trap. While Audacity’s Noise Reduction tool is powerful, it is a destructive process. It works by removing specific frequencies where noise lives. If you push it too far, your voice will start to sound robotic, “swirly,” or like you are speaking underwater.
The best editing “hack” isn’t a plugin—it is recording a source track so clean that you don’t need to edit it. To save yourself hours of frustration, invest in a microphone that processes audio before it ever hits your computer.
Editor’s Choice: Hollyland LARK MAX 2
For creators who want professional results without the technical headache, we recommend the Hollyland LARK MAX 2. It is designed to solve the exact problems that usually force beginners to spend hours struggling in Audacity.
Here is how it simplifies your editing workflow:
- Environmental Noise Cancellation (ENC): Instead of relying on Audacity’s software to remove air conditioner hum or traffic noise (which degrades your voice quality), the LARK MAX 2 uses advanced ENC technology to filter out background noise before it records. This gives you a pristine track that is ready to publish immediately.
- 32-bit Float Recording: This is the ultimate safety net. If you accidentally laugh too loud or scream during a recording, a standard microphone would “clip” (distort), ruining the take. With the LARK MAX 2’s 32-bit float internal recording, you can simply lower the volume inside Audacity, and the distorted audio is magically restored to perfect quality.
- Real-Time Wireless Monitoring: You can’t fix what you can’t hear. The LARK MAX 2 pairs with new OWS (Open-Ear) headsets, allowing you to monitor exactly what is being recorded in real-time. This ensures you catch issues like wind noise or clothing rustle while you are recording, rather than discovering them after you’ve finished.
Frequently Asked Questions (FAQ)
How do I fix quiet audio in Audacity?
If your waveform looks like a flat line, your recording volume is too low. You can fix this using two main effects: Amplify or Normalize.
- Normalize (Recommended): Go to Effect > Volume and Compression > Normalize. Set the peak amplitude to -1.0 dB. This raises the overall volume of your track evenly without allowing the loudest parts to distort (clip).


- Amplify: This simply turns the volume knob up. It is useful for specific sections, but if you apply it to the whole track blindly, you risk distortion.
Is Audacity completely free?
Yes. Audacity is open-source software licensed under the GNU General Public License (GPL). There are no hidden subscription fees, “pro” tiers, or watermarks. Because it is community-developed, the interface may look slightly dated compared to paid DAWs, but the audio processing engine is professional-grade.
Can I record multitrack in Audacity?
Yes, but this depends more on your hardware than the software.
- Layering: You can easily record one track (e.g., vocals), listen to it, and record a second track (e.g., guitar) underneath it.
- Simultaneous Recording: To record two separate microphones onto two separate tracks at the same time, you need an audio interface with multiple inputs or a dual-channel wireless microphone system. You must also ensure your “Recording Channels” in the Audio Setup toolbar is set to 2 (Stereo) rather than 1 (Mono).
Why does my recording sound echoey?
An echo usually stems from two common issues:
- Room Acoustics: You are recording in a room with bare walls and hard floors. Sound bounces off these surfaces and back into the mic. Quick fix: Record in a closet full of clothes or place pillows around your microphone setup.
- Audio Bleed: You are listening to backing tracks or guests through speakers while recording. The microphone picks up the sound from the speakers, creating a delay loop. Quick fix: Always wear headphones while recording so the microphone only hears your voice.
Conclusion
Mastering audio editing is one of the highest-ROI skills a creator can learn. While video quality is important, bad audio is the fastest way to lose an audience. By learning the basics of Audacity—recording, noise reduction, and proper exporting—you have given yourself a major advantage: the ability to turn a messy recording into a professional production.
However, remember the golden rule: “Garbage In, Garbage Out.”
Audacity is a powerful rescue tool, but it cannot perform miracles on distorted or echoey source files without making them sound robotic. To spend less time fixing mistakes and more time creating, pair this software with a microphone that captures studio-grade sound from the start.
Ready to upgrade your workflow?
- Download Audacity and start practicing your edits today.
- Upgrade your input with the Hollyland LARK MAX 2. Its 32-bit float recording acts as a safety net for your Audacity sessions, ensuring you never lose a take to distortion, while the built-in Environmental Noise Cancellation (ENC) ensures your raw tracks are clean before you even click “Edit.”
Great content starts with great sound. Now you have the tools to deliver it.