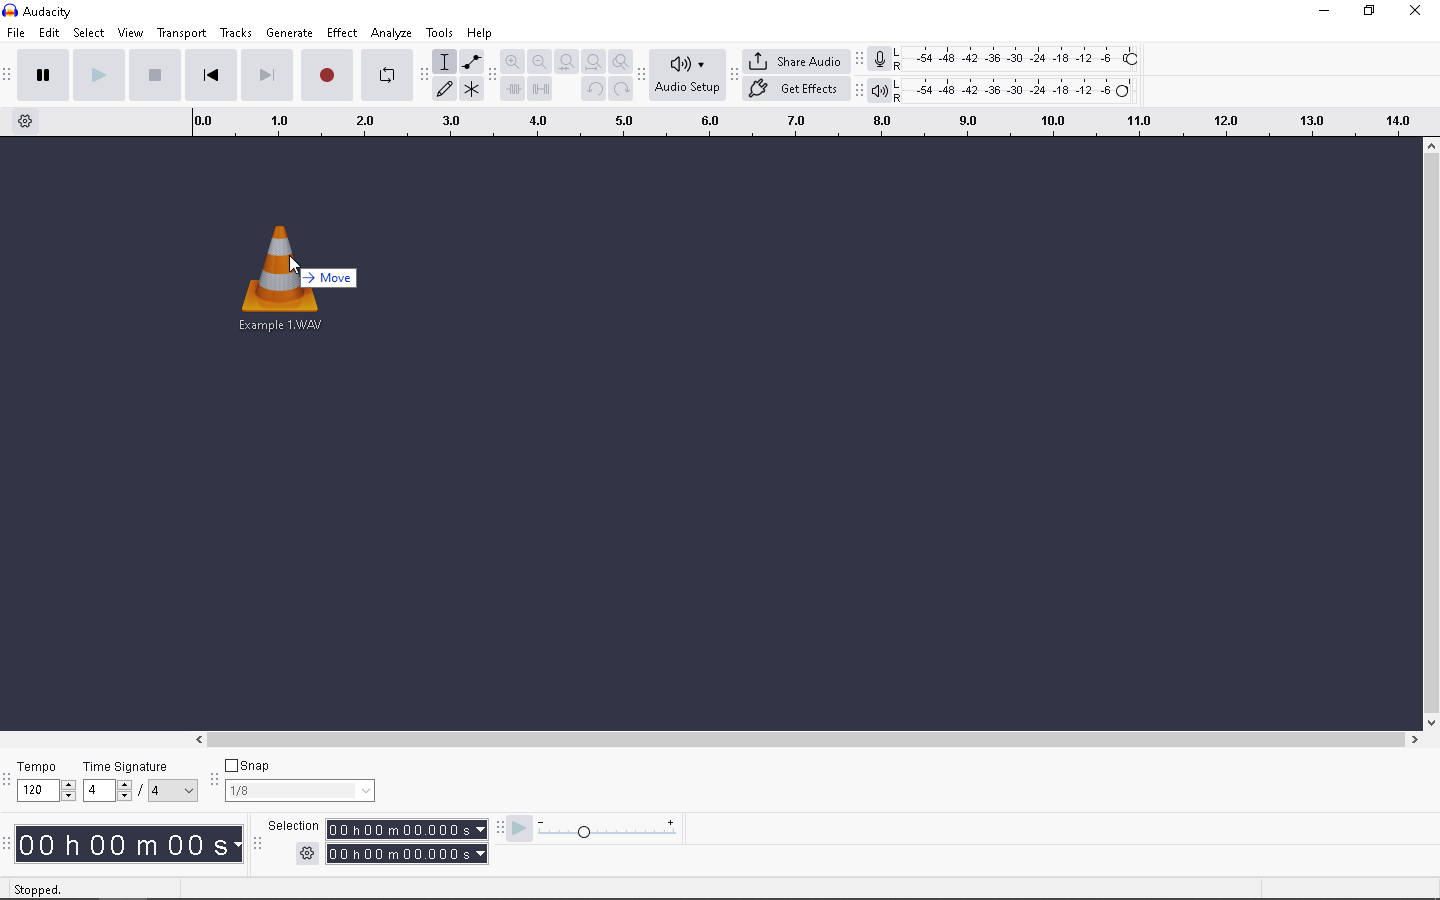
.png)
Audacity is a powerful open-source tool, but its stock effects can feel limited when you start tackling professional audio projects. Learning how to add and install plugins in Audacity allows you to use studio-grade tools—like vintage Equalizers (EQ), transparent Compressors, and Pitch Correction—without changing your software.
However, not all plugins are created equal. Before you start downloading, you need to know which format matches your operating system:
- VST3 (Virtual Studio Technology 3): The modern industry standard. These are CPU-efficient and highly recommended for both Windows and Mac.
- VST (Legacy): The older standard (often .dll files on Windows). While thousands of free VSTs exist, they are gradually being phased out.
- Audio Units (AU): Apple’s proprietary format. These work exclusively on macOS.
- Nyquist: Audacity’s native format. These lightweight scripts (ending in .ny) are designed specifically for Audacity.
Critical: Check Your Bit-Depth
The most common reason a plugin fails to load is a bit-depth mismatch. Modern versions of Audacity (3.0 and later) are 64-bit applications.
Many older, “classic” free plugins found on forums are 32-bit. If you try to install a 32-bit plugin into a 64-bit version of Audacity, it will not appear in your menu. To avoid frustration, always ensure you download the 64-bit (x64) version of any plugin.
Step 1: Locating the Correct Plugin Folder
The main reason plugins fail to appear in Audacity is simple: the files are in the wrong place.
Unlike standard software that you “install” with a setup wizard, many plugins—especially free ones from GitHub or indie developers—just provide a raw file inside a .zip folder. You cannot double-click these files to run them. Instead, you must manually move them to a specific directory that Audacity scans.
Use the table below to find the exact destination path for your operating system.
| OS | Plugin Type | Destination Path |
|---|---|---|
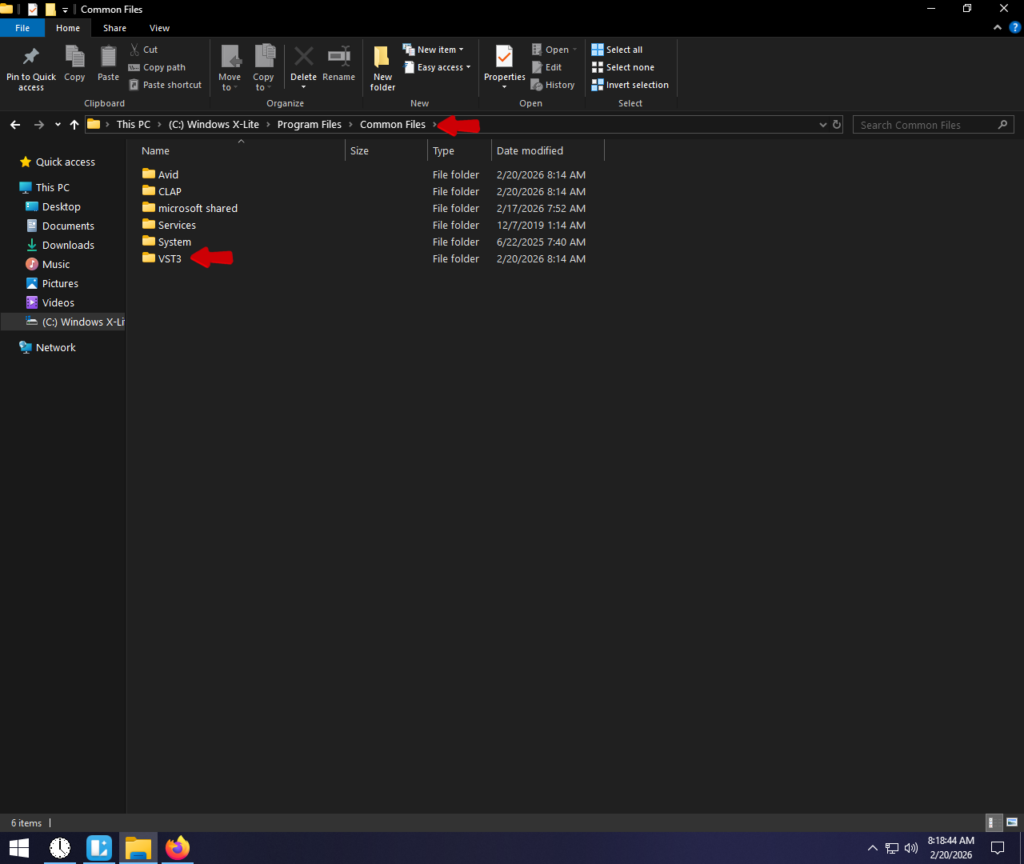
| Windows | VST3 (Modern Standard) | C:\Program Files\Common Files\VST3 |
| Windows | VST (Legacy/v2) | C:\Program Files\Steinberg\VstPlugins orC:\Program Files\Audacity\Plug-Ins |
| Mac | VST / VST3 | /Library/Audio/Plug-Ins/VST or /VST3 |
| Mac | Audio Unit (AU) | /Library/Audio/Plug-Ins/Components |
Important Notes on File Paths
- System-Wide Folders: The paths listed above are the best places to put your files. This allows other audio software you might use (like OBS or DaVinci Resolve) to access the same plugins.
- Create the Folder: If you navigate to these locations and don’t see a VST3 or Plugins folder, create one manually. Right-click, select New Folder, and name it exactly as listed in the table (case-sensitive).
Step 2: How to Install VST Plugins on Windows
Installing plugins on Windows usually requires manually moving files into system folders. While some modern plugins come with automatic installers, most free VSTs require this manual workflow.
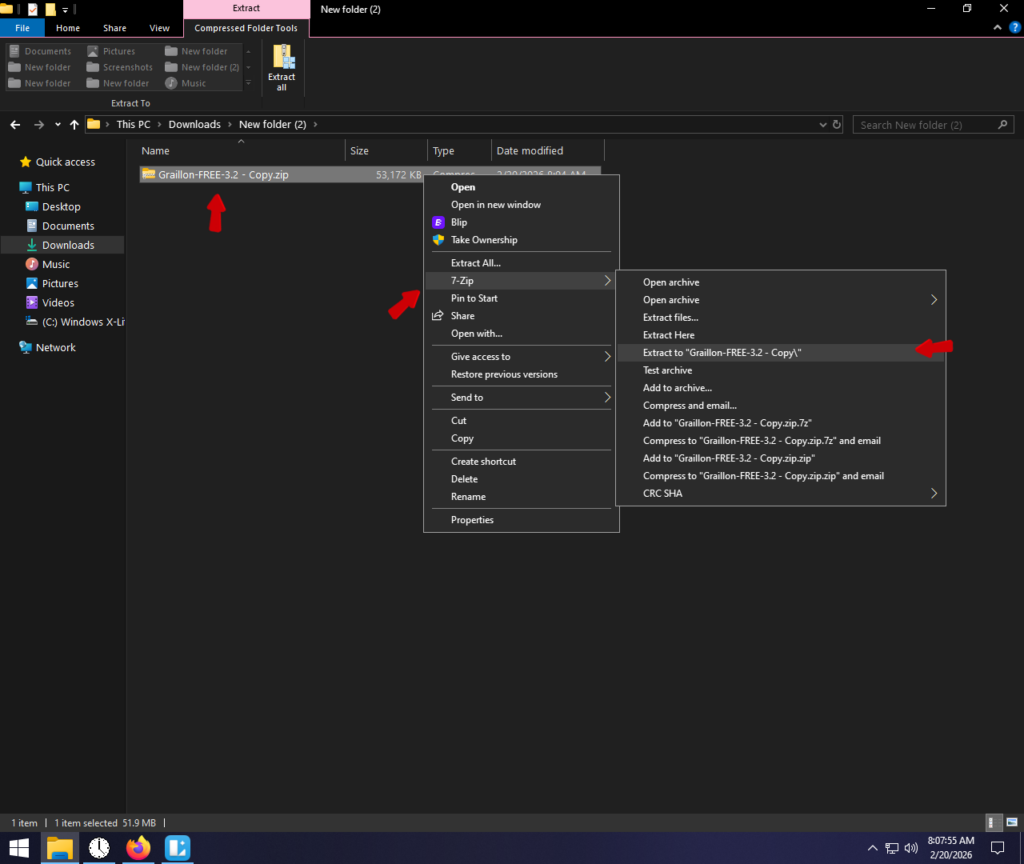
- Download and Extract
Most plugins download as a .zip or .rar folder. You cannot use the plugin while it is still compressed. Right-click the folder and select Extract All….
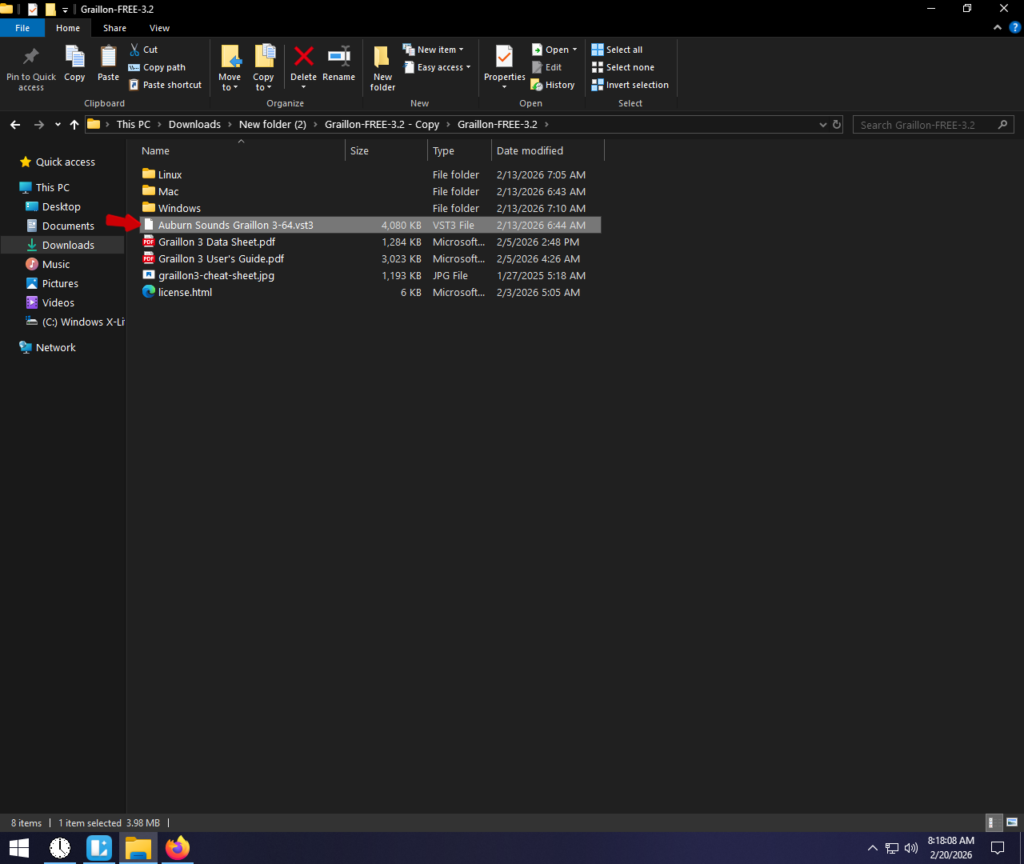
- Identify the File
Open the extracted folder.
- VST3: Look for a file ending in .vst3.
- VST (Legacy): Look for a file ending in .dll.
- Ignore text files like “ReadMe.txt” or “License”.

The Installer Exception (.exe Files)
If the downloaded folder includes a file named Setup.exe or Installer.exe, do not move files manually. Simply run the installer and follow the on-screen prompts. These programs automatically detect your VST folders and place the correct files for you.

Step 3: How to Install Plugins on macOS (AU & VST)
macOS users have a distinct advantage: access to Audio Units (AU). This is Apple’s system-level plugin format, which often runs more stably on Macs than standard VSTs. However, Audacity fully supports VST, VST3, and AU formats on macOS.
1. Locate the System Plugin Folder
The quickest way to access the plugin folder is via the Go to Folder command.
- Open Finder.
- Press Cmd + Shift + G (or click Go > Go to Folder in the menu bar).
- Type: /Library/Audio/Plug-Ins and hit Enter.
2. Drag and Drop the Files
Inside the Plug-Ins folder, you will see subfolders labeled Components, VST, and VST3. Place your files into the corresponding folder:
- Audio Units (.component): Drag these into the Components folder.
- VST Plugins (.vst): Drag these into the VST folder.
- VST3 Plugins (.vst3): Drag these into the VST3 folder.
Note: You may be prompted for your Mac password to authorize the move.
3. Restart Audacity
Audacity scans for new plugins upon launch. If the app was open while you moved the files, close it completely (Command + Q) and relaunch it.
Step 4: Activating Plugins in Audacity (The Crucial Step)
If you placed your files in the right folder but still can’t see them in your effects menu, don’t panic. This is the most common issue users face.
Unlike some other audio software that auto-loads everything, Audacity requires you to manually authorize new third-party tools. By default, it detects new files but keeps them “Disabled” to prevent crashes.
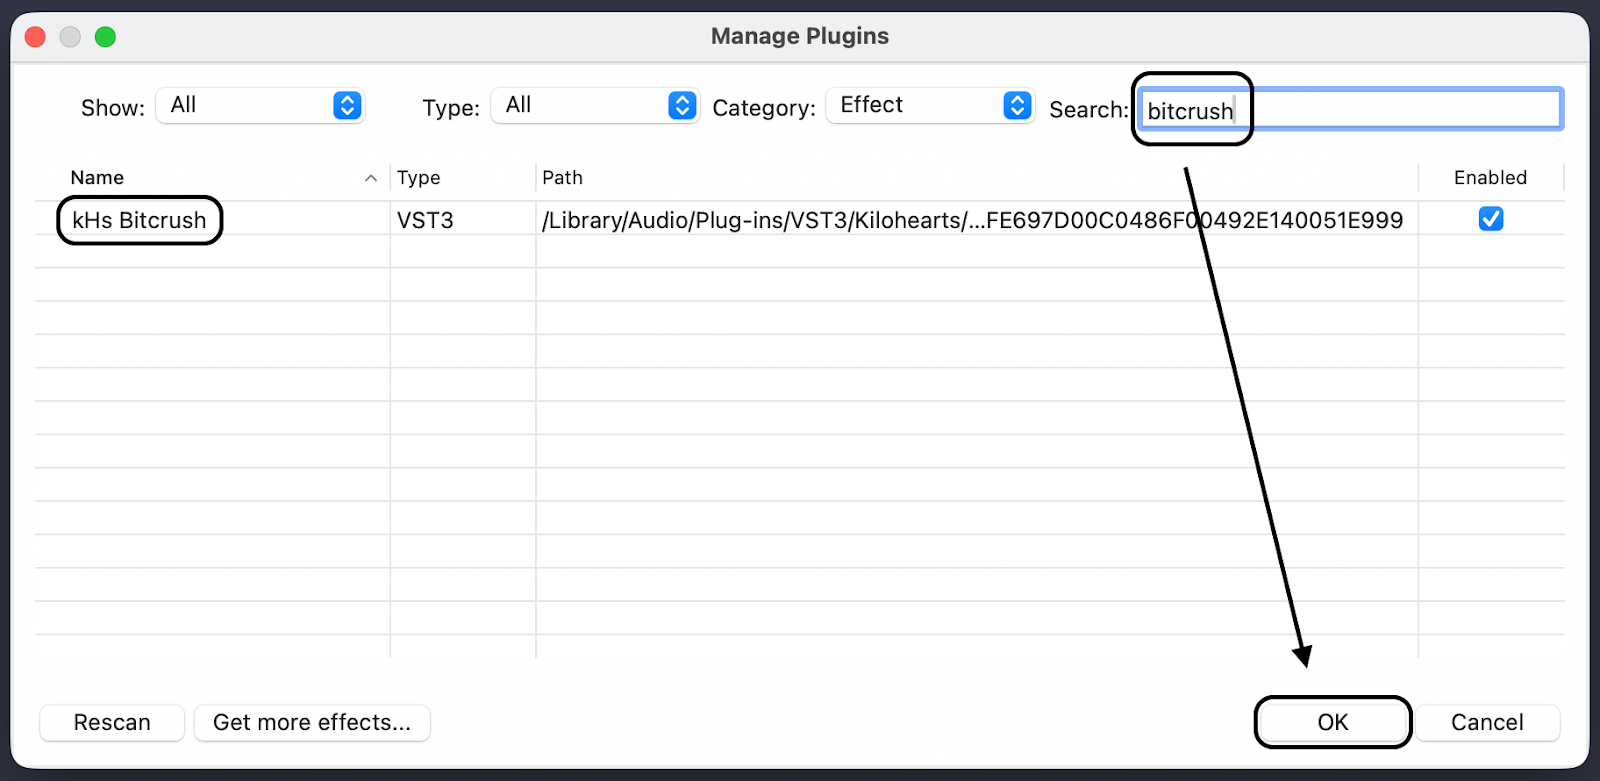
How to Enable Your Plugins:
- Open Audacity.

Go to Tools > Plugin Manager. (In older versions, look under Effect > Add / Remove Plug-ins…)

- Click the “Rescan” button at the bottom of the window. This forces Audacity to check your system folders again.
- Locate your plugin in the list. It will likely be marked as “New” or “Disabled”.
- Select it and click Enable.
- Click OK.

Your new plugin is now active and listed under the Effect menu.
Pro Tip: Reducing Reliance on “Fix-It” Plugins
Plugins are great tools, but they have limits. Relying too heavily on “restoration” plugins—like aggressive Noise Reduction or De-Reverb—often introduces digital artifacts. When you push these tools too hard, your voice can start to sound robotic or “underwater.”
The most effective “plugin” isn’t software; it is a clean source recording.
If you constantly hunt for new plugins to fix distorted audio or remove background hiss, the issue is likely your hardware. “Fixing it in post” consumes hours of editing time that could be saved during the recording phase.
The Hardware Advantage: Hollyland LARK MAX 2
For creators looking to bypass the “repair” phase entirely, professionals use tools like the Hollyland LARK MAX 2.

Hollyland LARK MAX 2 - Premium Wireless Microphone System
A premium wireless microphone for videographers, podcasters, and content creators to capture broadcast-quality sound.
Key Features: Wireless Audio Monitoring | 32-bit Float | Timecode
This wireless microphone system solves the two biggest problems that force users to rely on plugins:
- 32-bit Float Recording: This technology captures such a massive dynamic range that your audio never clips or distorts, even during sudden loud outbursts. This effectively eliminates the need for “De-Clipper” plugins.
- Studio Quality Capture: With a 48kHz/24-bit sampling rate, the raw audio is pristine.
By capturing a cleaner signal upfront, you can stop using plugins to fix your audio and start using them to enhance it creatively.
Troubleshooting: Why Won’t My Plugin Show Up?
If your new effect is missing from the menu, it is almost always due to one of three specific errors.
1. Bit-Depth Mismatch (32-bit vs. 64-bit)
This is the most common culprit.
- The Problem: Modern Audacity (v3.0+) is 64-bit. If you install an older 32-bit plugin, Audacity cannot “see” it.
- The Fix: Go back to the developer’s website and download the 64-bit (x64) version of the installer or .dll file.
2. Incorrect File Placement
Modern formats are strict about where they live. A common mistake is placing a VST3 file into a folder designed for legacy VST2 plugins.
- VST3 Files: Must go in C:\Program Files\Common Files\VST3 (Windows) or /Library/Audio/Plug-Ins/VST3 (Mac).
- VST (.dll) Files: These are more forgiving but should be placed in the Steinberg or Audacity Plug-Ins folder.
3. You Forgot to “Rescan”
Audacity does not automatically scan for new plugins every time it launches.
- The Fix: Open Tools > Plugin Manager, click Rescan, and ensure the plugin status is set to Enabled.
Frequently Asked Questions (FAQ)
Can I use VST3 plugins in Audacity?
Yes. Audacity fully supports VST3 as of version 3.2. This is a significant upgrade, as VST3 plugins generally offer better CPU performance and resizable interfaces. If yours aren’t showing up, make sure you have updated Audacity to the latest version.
How do I install Nyquist plugins?
Nyquist plugins (files ending in .ny) are native to Audacity and easier to install.
- Download the .ny file.
- Open Audacity and go to Tools > Nyquist Plug-in Installer.
- Click Browse, select your file, and hit Install.
Are Audacity plugins free?
It depends. Audacity itself is free and comes with stock effects. Third-party plugins are made by external developers. There are thousands of high-quality free plugins (from makers like Valhalla or TDR), but industry-standard tools (like FabFilter) usually require a paid license.
Does Audacity support Real-Time Effects?
Yes. You can now tweak settings while listening to the audio, rather than applying the effect blindly. Look at the Track Control Panel on the left side of your track and click the “Effects” button to open the Real-time Effects stack.
Conclusion
Mastering third-party plugins is the best way to move from a casual Audacity user to a serious audio creator. While managing .dll and .component files can feel technical at first, the workflow is always the same: Download the 64-bit file, Move it to your system’s plugin folder, and Enable it inside the Plugin Manager.
Once your library is set up, test your new EQ or compressor on a fresh project. Just remember: plugins work best when they are enhancing good audio, not rescuing bad audio. If you want to hear the subtle nuances of your new effects, start with a pristine source using tools like the Hollyland LARK MAX 2.
Now that your library is set up, go hit record and start experimenting.