Adding audio to your PowerPoint presentations can elevate them to the next level, making them more engaging and dynamic. Whether you’re incorporating background music, narration, or sound effects, audio can enhance your message and captivate your audience. In this comprehensive guide, we’ll walk you through the step-by-step process of adding audio to PowerPoint presentations, ensuring that your slides are not only visually compelling but also audibly stimulating.
Audio plays a crucial role in presentations by providing context, emphasis, and emotional resonance. It can complement visual content, reinforce key points, and cater to different learning styles. Whether it’s background music to set the mood or narration to guide the audience through the slides, incorporating audio can make your presentations more dynamic and memorable.
Selecting the Right Audio Format
Before adding audio to your PowerPoint presentation, ensure that your audio files are in a compatible format. While MP3 is the most widely supported format, WAV and AIFF offer higher audio quality but may result in larger file sizes. Consider your presentation’s needs and audience preferences when selecting the appropriate format.
Editing Your Audio File for Quality
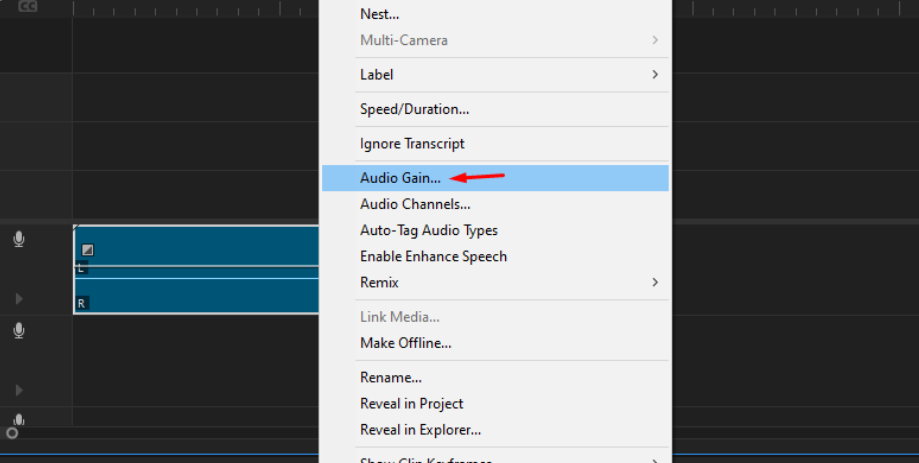
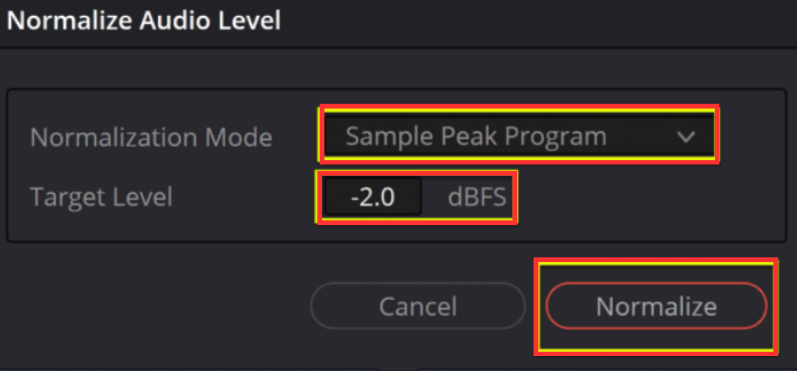
Quality audio enhances the professionalism and impact of your presentation. Before inserting audio into PowerPoint, it’s essential to edit your audio files for clarity, volume levels, and any unwanted background noise. Use audio editing software to trim, adjust levels, and apply effects to optimize the audio for your presentation.
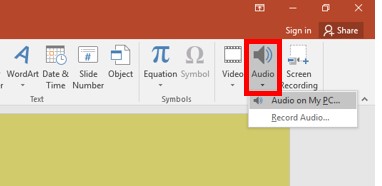
Adding Audio to PowerPoint
Microsoft PowerPoint provides robust features for recording audio narration directly within your presentation and exporting it as a video. Unlike recording audio in one continuous file, PowerPoint enables slide-by-slide audio recording, facilitating easy revisions and updates. This approach streamlines the creation process and empowers creators to deliver polished presentations.
For Windows Users
- Design your PowerPoint presentation with a focus on visual elements supplemented by concise text.
- Navigate to the Slide Show tab and select “Record Slide Show” to initiate the audio recording process.

- Opt for “Record from Current Slide” or “Record from Beginning” based on your presentation requirements.
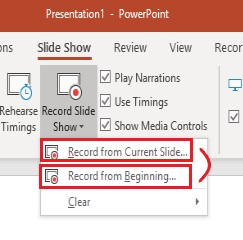
- Begin recording narration for each slide by clicking the Record button, ensuring clarity and coherence in your delivery.
- Utilize the Advance Narration feature to seamlessly transition between slides and maintain synchronization.
- Once all audio recordings are complete, save the presentation as a regular PowerPoint file before proceeding to export.
- Click on File, then Export, and select “Create a Video” to generate the MP4 file format.

- Choose the desired video quality and ensure the “Use Recorded Timings and Narrations” option is selected.
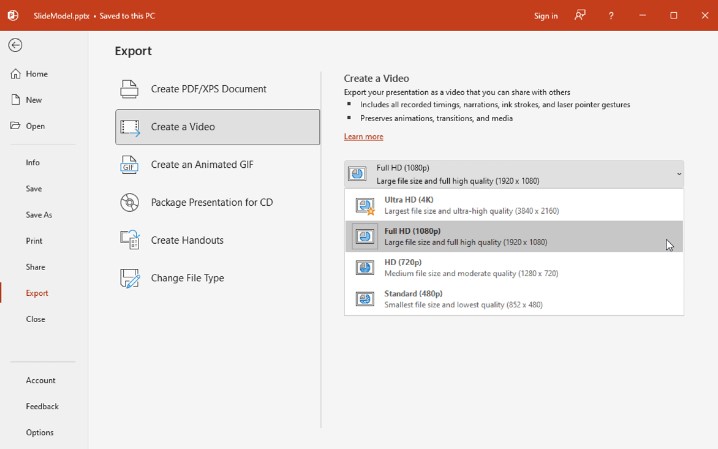
- Follow the prompts to save the video in your preferred location and monitor the export progress accordingly.
It’s important to note a known issue affecting some Windows 11 users regarding PowerPoint exports to .mp4 files. Certain visuals within exported PowerPoints may appear flipped or upside down. While we’re actively collaborating with Microsoft to resolve this issue, a temporary workaround involves converting the file to a .WMV format.
For Mac Users
- Craft your PowerPoint presentation with a focus on impactful visuals and minimal text to engage your audience effectively.
- Access the Slide Show tab and select “Record Slide Show” to commence the audio recording process.

- Initiate the narration recording by clicking the red circle recording button, maintaining clarity and coherence throughout.
- Pause or stop the recording as needed, ensuring seamless transitions between slides.
- Review the recorded audio by clicking on “Play from Start” under the Slide Show tab.
- If revisions are necessary, delete the speaker icon on the respective slide to remove the audio recording and clear slide timings.
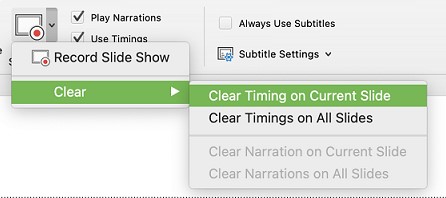
- Save the presentation as a regular PowerPoint file and proceed to export by selecting File, then Export.
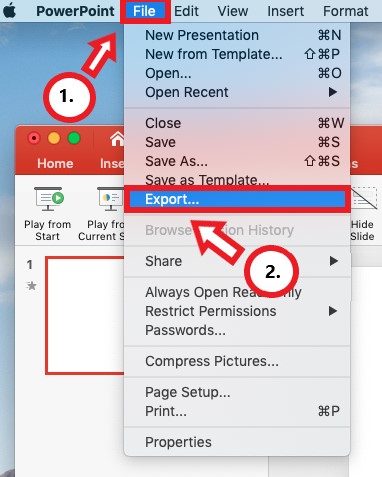
- Choose the MP4 file format, select the appropriate video quality, and ensure the “Use Slide Timings” option is enabled.
- Finalize the export process by clicking Export and monitor the progress indicator until completion.
Playing the Sound with Animation
To streamline your workflow, swiftly access the Timing dialog box immediately after adding a sound file and animation.
- Begin by adding an animation to the desired object on your slide, whether it’s a text box, picture, or Excel chart.
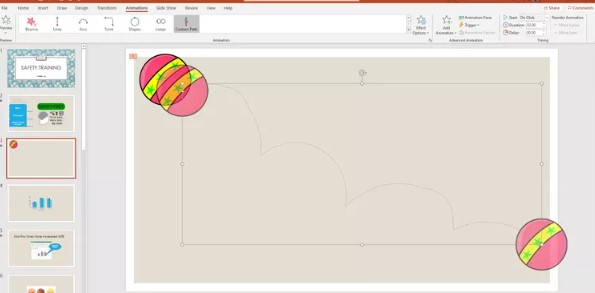
- Once the animation is applied, insert the sound file onto the slide.
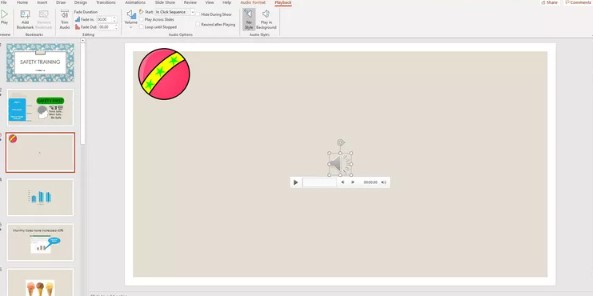
- Navigate to the Animations tab on the ribbon menu.
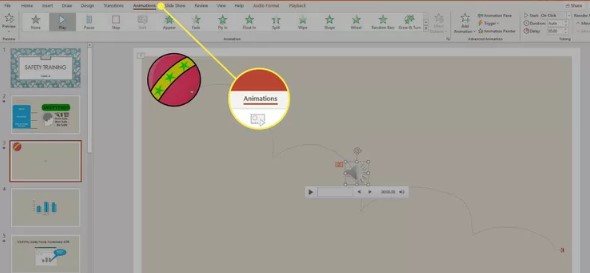
- In the Advanced Animation section towards the right side of the ribbon, locate and click on the Animation Pane button. This action opens the Animation Pane on the right side of your screen.
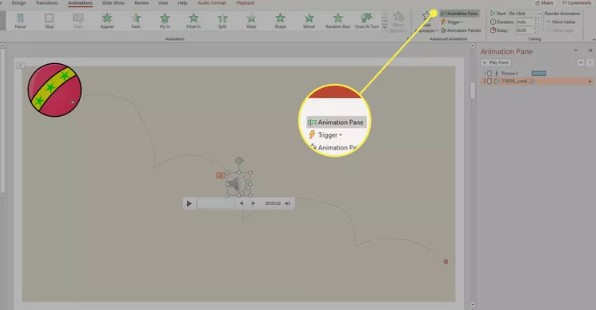
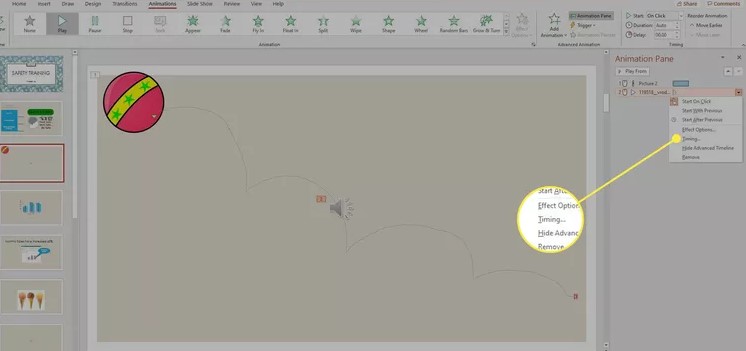
- Within the Animation Pane, locate the sound file you inserted and click the drop-down arrow next to it. From the dropdown menu, select Timing to access the Play Audio dialog box.
- In the Play Audio dialog box, switch to the Timing tab and choose Triggers.
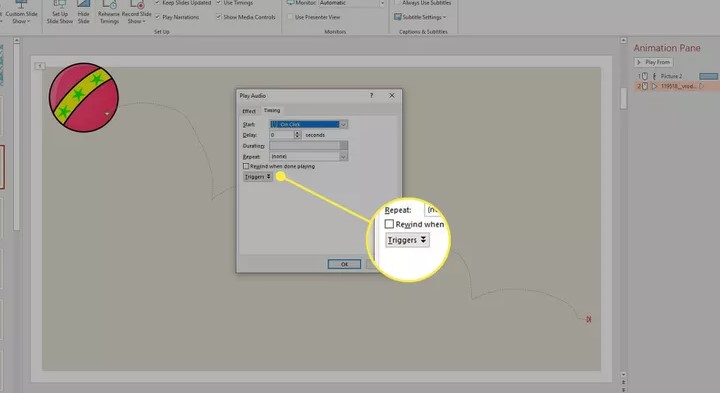
- Select the option “Animate as part of the click sequence” and confirm your selection by clicking OK.
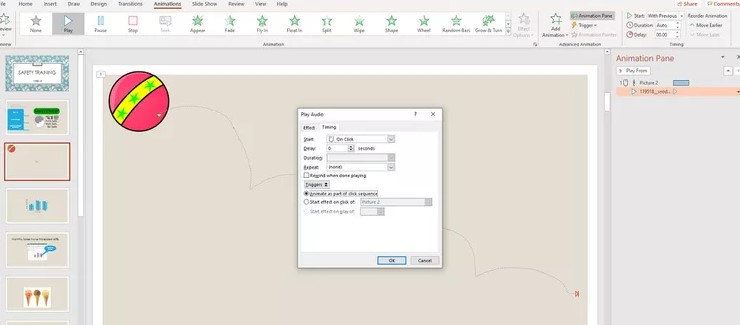
- To test the slideshow, either press the F5 key to initiate the show from the beginning or use the shortcut Shift+F5 to start from the current slide if it’s not the first one in the sequence. This allows you to verify that the sound plays concurrently with the animation as intended.
Tips for Sharing Presentations with Audio
- To record audio directly in PowerPoint, go to the “Insert” tab, click the “Audio” icon, and select “Record Audio.” This opens a recording toolbar for easy voice recording.
- For presentations with audio across multiple slides, select the audio icon, go to the “Playback” tab, and choose “Play Across Slides.” This ensures seamless background music or narration.
- Sync audio with slide timings by navigating to the “Slide Show” tab and selecting “Record Slide Show.” This ensures precise timing alignment, enhancing presentation coherence.
- Alternatively, add audio to slides by inserting video files with audio. Similar to adding audio files, just select the video file, and PowerPoint will extract the audio upon insertion, allowing for creative integration.
Elevate Your Audio Experience: Introducing the Hollyland Lark C1 Microphone, a versatile solution for enhancing your PowerPoint presentations with crisp and clear audio. Designed with convenience and quality in mind, the Lark C1 Microphone offers seamless integration with PowerPoint, ensuring optimal sound performance for your audience.


Hollyland Lark C1 - Wireless Microphone for Mobile
A plug-and-play wireless microphone system designed for mobile devices.
Key Features: MFi-certified | Hi-Fi Audio | 32 Hours Duration
Whether you’re recording narration, adding background music, or incorporating sound effects, this microphone delivers professional-grade audio with ease. With its compact design and wireless connectivity, the Lark C1 Microphone provides flexibility and mobility, allowing you to move freely while delivering your presentation.
Conclusion
Adding audio to your PowerPoint presentations enhances engagement and makes your message more memorable. Understanding PowerPoint’s audio features and following the steps outlined in this guide allows you to seamlessly integrate audio into your slideshows. By combining audio with animations and effects, you can create dynamic presentations that inform, inspire, and captivate your audience. Whether you’re recording narration, adding background music, or incorporating sound effects, the Lark C1 Microphone ensures crystal-clear audio transmission, leaving a lasting impression on your audience.
We value your opinion! Share your thoughts and experiences with the Hollyland Lark CR Microphone. How has it improved your PowerPoint presentations? Do you have any tips or suggestions for maximizing its effectiveness? Leave your feedback below and join the conversation!
Frequently Asked Questions
What audio file formats are supported by PowerPoint?
PowerPoint supports various audio file formats, including MP3, WAV, and AIFF. These formats ensure compatibility with your presentation software, allowing you to seamlessly integrate audio into your slideshows.
How do I add spoken audio to PowerPoint?
To add spoken audio to PowerPoint, navigate to the “Insert” tab, select “Media,” then “Audio.” Choose “Record Audio,” ensure your device has a working microphone, name your audio file, and click “Record” to start speaking. This seamless integration enhances your presentation’s impact and engagement.
How can I ensure my audio plays across all slides?
To ensure that your audio plays across all slides, you can use the “Play Across Slides” option in PowerPoint. Simply select the audio file, navigate to the “Playback” tab, and check the “Play Across Slides” option. This ensures continuous playback throughout your presentation.
How to record a PowerPoint presentation with audio?
Recording a PowerPoint presentation with audio is simple. Ensure your microphone is set up correctly, then go to the “Slide Show” tab, select the starting slide, and click “Record Slide Show.” This feature adds a personal touch and context to your slides for your audience’s benefit.
Can I add audio to specific parts of a slide?
Yes, you can add audio to specific parts of a slide in PowerPoint. Insert audio objects and synchronize them with slide elements using animations and triggers to enhance your presentation’s impact.
How do I edit audio in PowerPoint?
Editing audio in PowerPoint is convenient. Click on the audio file, go to “Audio Tools,” and select “Trim Audio” in the “Playback” tab. Use playback controls to trim the audio clip precisely to your preferences.
What should I do if my audio is not playing in PowerPoint?
If your audio isn’t playing in PowerPoint, try several troubleshooting steps. Check audio settings, ensure compatibility and proper insertion of the audio file, and consider restarting PowerPoint or your computer. Update audio drivers and try converting or reinserting the audio file if needed.


.png)


