


.png)
Reverb—short for reverberation—is the natural reflection of sound in a space.
It can make a dry recording sound like it was captured in a studio, a concert hall, or even a cathedral. Knowing how to add reverb to audio is a skill that instantly elevates your sound, whether you’re making music, producing a voiceover, or editing dialogue.
This guide walks you through choosing the right tools, importing audio, applying and fine-tuning reverb, and exporting a polished, professional track. We have used Audacity to show the steps. However, feel free to pick the tool you’re familiar with.
Step 1 – Choose Your Audio Editing Software
Adding reverb requires software that can apply audio effects. Your choice depends on your skill level, budget, and workflow.

Popular Options
- Audacity – Free, open-source, and ideal for beginners. It’s lightweight, cross-platform, and has a built-in reverb effect.
- Adobe Audition – Industry standard for post-production, offering precise control over reverb and other effects.
- GarageBand – Free for macOS users, beginner-friendly, with good presets for music and voice.
- Reaper – Affordable, customizable, and great for both beginners and advanced users who want flexibility.
Choosing the Right One
- Budget-conscious? Go for Audacity or GarageBand.
- Need advanced controls? Try Adobe Audition or Reaper.
- Editing on the go? Some mobile DAWs also offer reverb features, but desktop apps generally provide better results.
Step 2 – Import Your Audio File
Once your software is ready, bring your audio into the workspace. This is your starting point before any effects are applied.
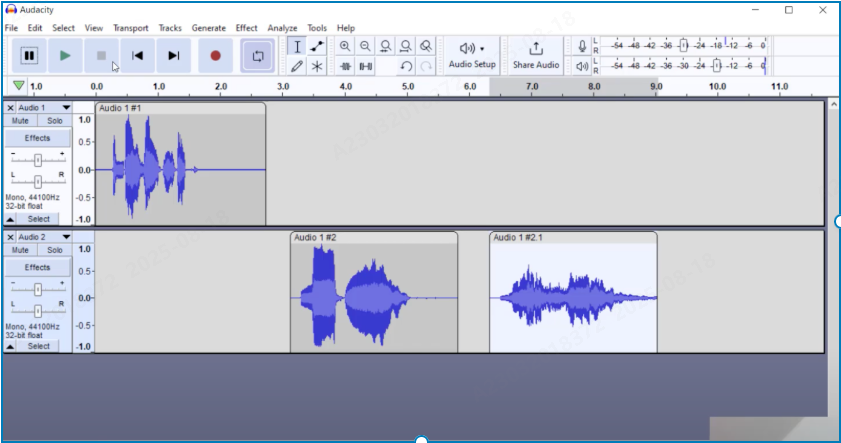
In Audacity
- Go to File > Import > Audio or drag your file directly into the main window.
- The waveform will appear on a track. This is the visual representation of your sound.
Supported Formats

- WAV – Best for editing; uncompressed and high quality.
- MP3 – Compressed; smaller size, but slightly reduced quality.
- AIFF – Similar to WAV, used mainly on Mac.
Step 3 – Locate the Reverb Effect
Every audio editing program organizes effects differently, but reverb is usually easy to find.
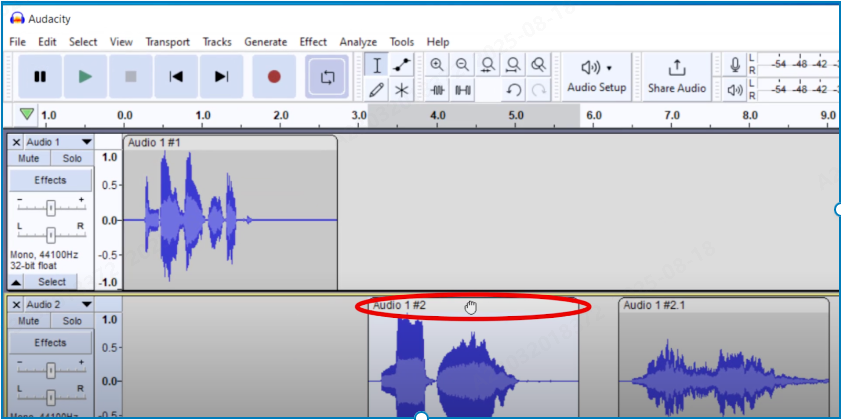
In Audacity
- Highlight the section of audio you want to process.
- Click Effect > Reverb from the top menu.
- If you don’t see it, go to Effect > Add / Remove Plug-ins and enable it.
Why Your Source Recording Matters
If your recording starts clean, reverb will enhance rather than amplify flaws. Recording with a Hollyland LARK MAX 2 wireless microphone gives you that clean base. Its 32-bit float recording captures every detail without clipping, and OWS Bluetooth monitoring lets you hear exactly how reverb will blend with your sound in real time. This means less guesswork and more accurate editing later.


Step 4 – Adjust Reverb Settings

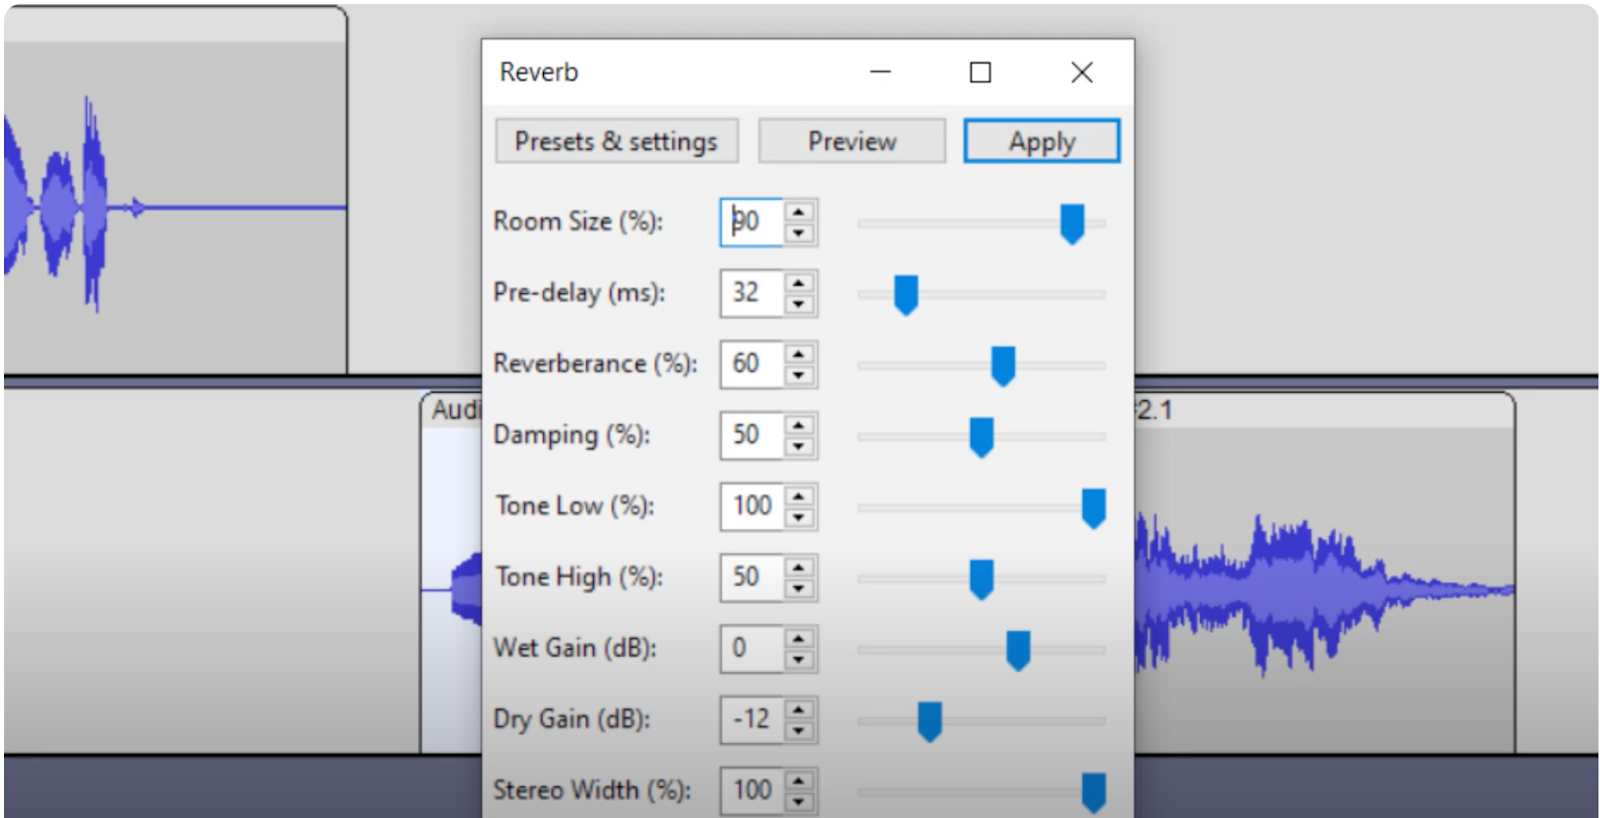
Reverb is highly customizable, and even small adjustments can drastically change the mood and depth of your audio. The Room Size control simulates the space’s dimensions—smaller values create a studio-like sound, while larger ones mimic halls or churches.
Decay Time determines how long the reverb lasts after the sound ends, with shorter times keeping speech clean and longer times adding drama to music. Pre-Delay adds a brief gap before the reverb starts, helping words or notes remain crisp.
Finally, the Wet/Dry Mix sets the balance between the processed and original sound, allowing you to achieve anything from subtle ambience to a full, immersive effect.
Sample Settings
- Podcast Voice: Room size 20–30%, decay 0.8–1.2s, wet mix under 20%.
- Acoustic Guitar: Room size 40–60%, decay 1.5–2.5s, wet mix around 30–40%.
- Ambient Music: Room size 70%+, decay 3–5s, wet mix above 50%.
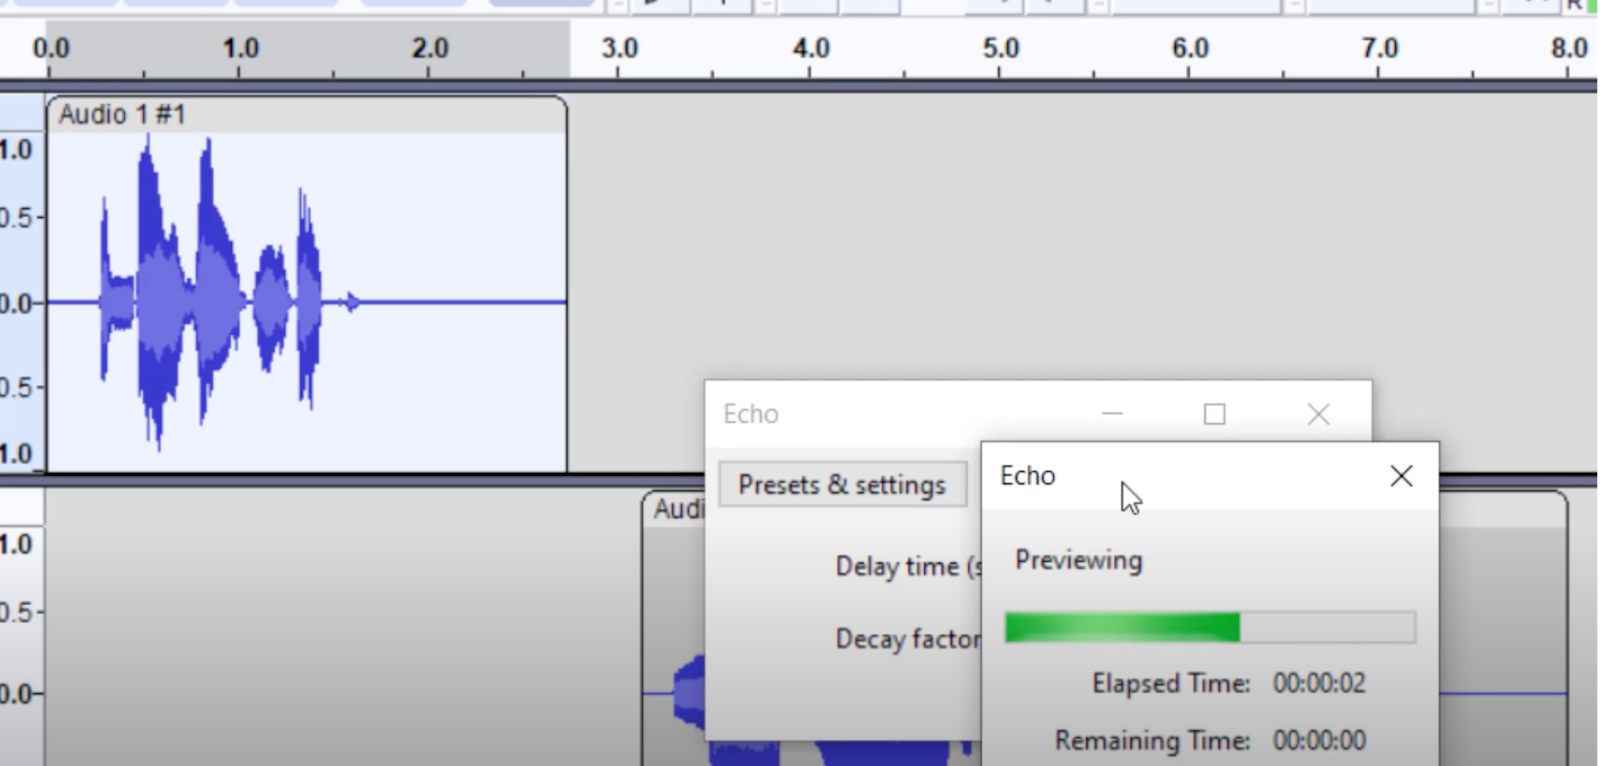
Step 5 – Preview and Fine-Tune
Never apply reverb without carefully listening to the results. Start by looping a short section of your audio—this lets you hear the effect repeatedly without constantly restarting playback. As you listen, adjust one control at a time, such as decay, room size, or wet/dry mix, to hear the effect of each change.
Try different presets for quick comparisons, but treat them only as starting points and refine them to match your recording’s tone and purpose. Pay special attention to how reverb interacts with pauses, quiet moments, and sharp sounds like consonants or drum hits, as these details often reveal whether the settings are too heavy or too subtle.
Tips for Clarity
- Avoid high wet mix values for spoken words—too much reverb can make speech muddy.
- Compare your audio on headphones and speakers to ensure it sounds balanced everywhere.
- Step away for a few minutes, then return with fresh ears before finalizing.
Step 6 – Save and Export
Once you’re satisfied with the reverb, finalize your track by saving and exporting it.

- Save your project in the software’s native format (e.g., .aup3 in Audacity) so you can edit it later.
- Export in WAV for the highest quality or MP3 for smaller, shareable files.
- Check volume levels to ensure there’s no clipping after reverb is applied.
- Choose the correct sample rate (44.1kHz for music, 48kHz for video).
- Add basic metadata like title and artist if your software allows.
- Save a backup copy in a separate folder or drive to protect your work.
- Test your exported file on headphones and speakers to confirm the sound quality.
Key Considerations Before Applying Reverb
- Match reverb to your content: A podcast needs a small, clear space; a cinematic track can use a larger, more atmospheric effect.
- Clean your audio first: Remove background noise before adding reverb, as the effect will make unwanted sounds more noticeable.
- Keep it subtle: Aim for depth and space without overwhelming the main voice or instrument.
- Think about playback devices: A mix that sounds good on studio monitors might need lighter reverb for phone or laptop speakers.
- Use presets as a guide: Start with a preset close to your goal, then adjust settings to suit your project.
- Test different decay times: Longer decays create drama; shorter ones keep recordings tight and clear.
- Preview before finalizing: Listen carefully to how reverb blends with your track and make small adjustments until it feels natural.
Conclusion
Learning how to add reverb to audio is a game-changer for any creator. The right amount of reverb can make music sound more atmospheric, podcasts more engaging, and videos more cinematic.
FAQs
1. Can I add reverb to a voice without making it unclear?
Yes. Choose a small room size, short decay, and keep the wet mix low so speech remains crisp and intelligible. Testing on both headphones and speakers helps ensure clarity across different playback systems.
2. What’s the best software for beginners?
Audacity is free, simple to use, and offers built-in reverb controls, making it ideal for first-time users. It also supports plugins, so you can expand its capabilities as your skills grow.
3. Can I undo the reverb after applying it?
If you haven’t saved or exported, simply undo the effect. Otherwise, use a dereverb tool to reduce it. Saving an unprocessed copy of your audio before editing is the safest way to avoid mistakes.
4. Is reverb the same as echo?
No. Echo produces clear, repeated delays, while reverb creates smooth, blended reflections of sound. In short, echo is distinct and rhythmic, while reverb is continuous and immersive.
5. Can I hear reverb live while recording?
Yes. Some recording setups allow real-time monitoring so you can adjust reverb during performance. This helps you make quick adjustments without waiting until post-production.


