Need to send audio from your Windows PC to a Mac? Whether you’re sharing music, routing sound for a podcast, or just syncing setups, it’s easier than it sounds.
You can stream audio smoothly in real time with the right tools and a stable network. For creators or presenters who prioritize clarity, using a reliable wireless mic like the Hollyland LARK A1 ensures your audio remains crisp, thanks to its 200-meter wireless range and easy plug-and-play setup. This guide walks you through the steps to get everything working without stress.


Hollyland LARK A1 - Affordable Wireless Microphone
A perfect starter mic for creators on a budget. It’s simple to use and features effective noise cancellation.
Key Features: 48kHz/24-bit | 3-Level Noise Cancellation | 54-Hour Battery
Best Tools to Stream Audio from Windows to Mac
There are several ways to stream audio from Windows to Mac, depending on your setup and desired sound quality.
Tool 1#: AudioRelay (Fast Setup Using Wi-Fi)
If you want the simplest way to get started, AudioRelay’s for you.
- Download the AudioRelay app from audiorelay.net, click the download Windows version, then install it like any standard app.

- Open the app and select your audio input device. On the Server tab, click this arrow:
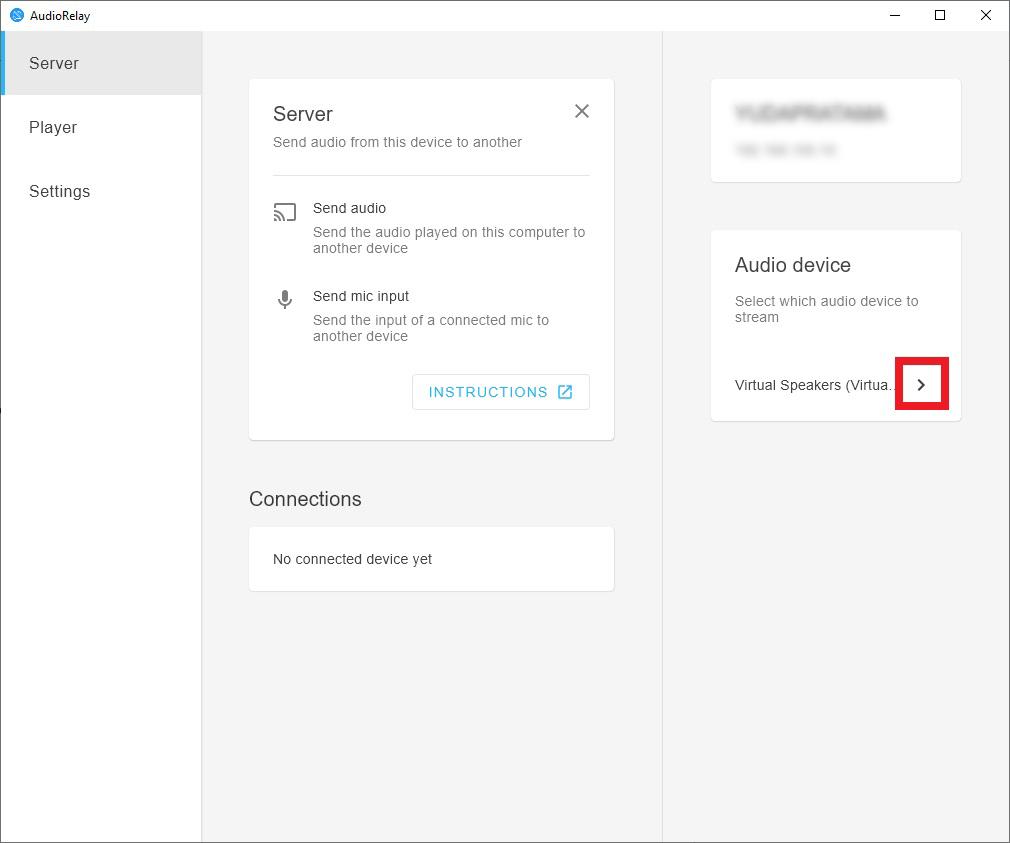
- All your input devices will be available, and then select your preferred input device.
- If you have an external mic like Hollyland LARK A1, simply plug it into your Windows via USB-C or 3.5mm adapter. It will be detected automatically in your input device settings.

- Make sure you have a stable Wi-Fi connection, and then connect both devices to the same network.
- Once everything is set up, click the Start button in the top-right corner. Once it’s running, the app will show your device’s name and local stream IP address (usually something like 192.168.x.x).

- On your Mac, open a browser (preferably Google Chrome) and go to the URL provided by your Windows Server. AudioRelay acts as a browser-based receiver on macOS.

- You’ll hear the audio streaming in real-time.
- To adjust latency, lower the buffer for less delay or increase it for more stability (ideal for music or long sessions).

- And now audio from your Windows PC is playing on your Mac. You can route it to speakers, record it, or monitor it.
Tool #2: VBAN Receptor and VoiceMeeter (Low-Latency Pro Workflows)
If you’re looking for a lightweight local solution without too many extra installs, VBAN Receptor from VB-Audio is a solid option.
- On your Mac, download and install the VBAN Receptor.

- On your Windows, download the Voicemeeter and install the App.
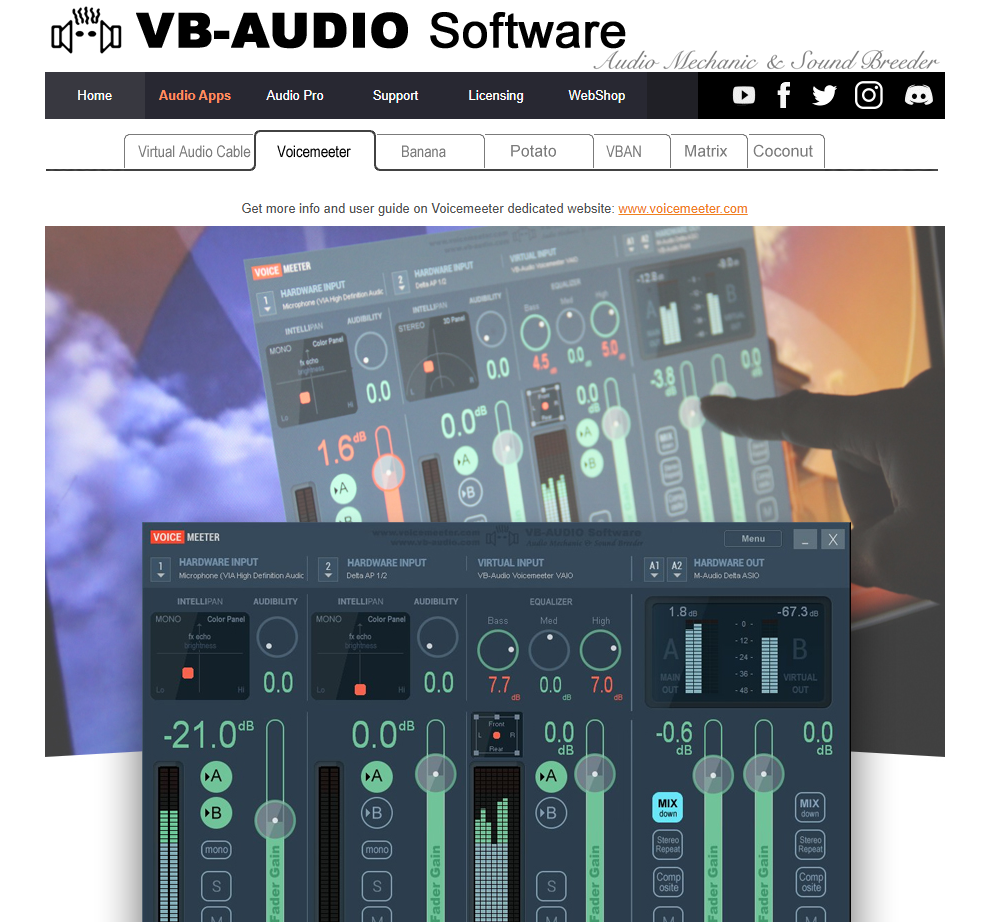
- To finish the installation process, restart your Windows PC by clicking OK.

- Once it’s installed on your Windows, open the App and select input audio > Stereo Input 1 > Select Input Device.
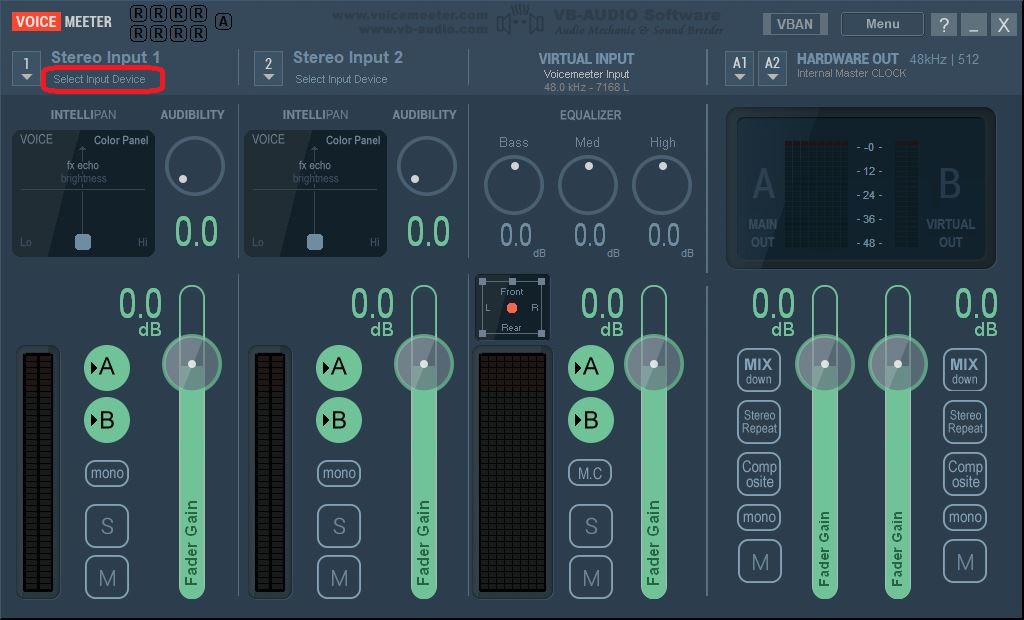
- All your input devices will be available. Select your preferred input device.
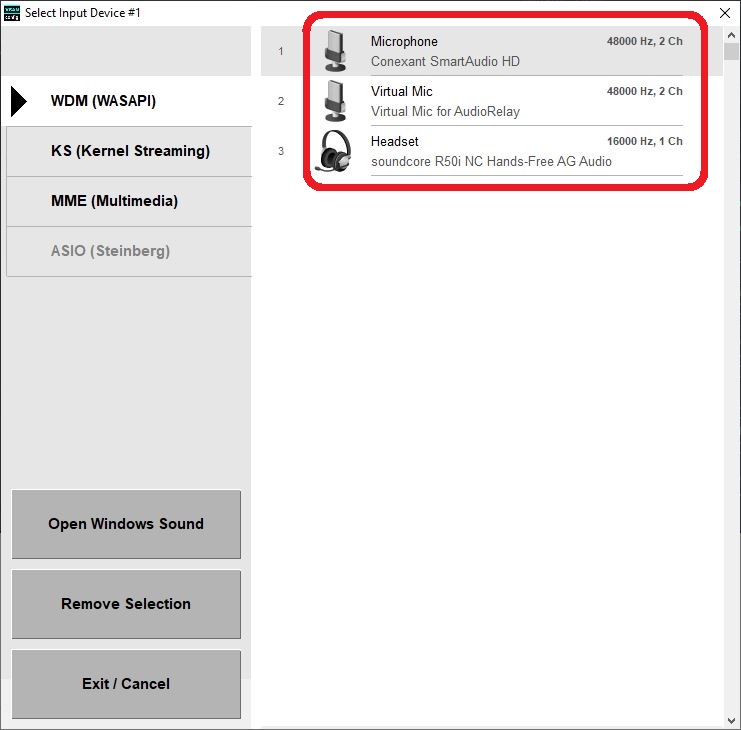
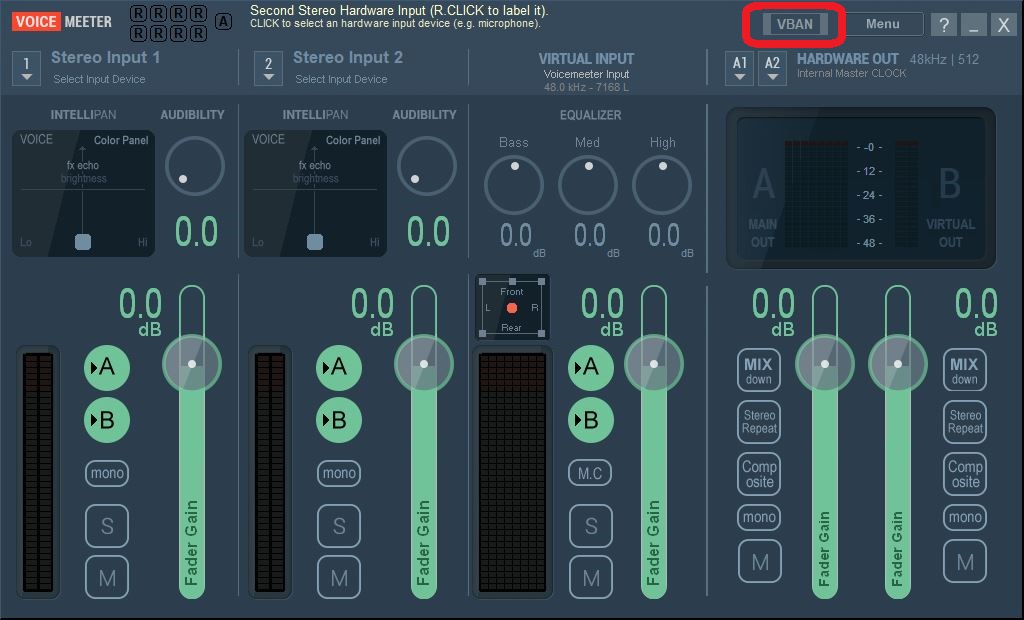
- Then click the VBAN tab at the top-right menu.
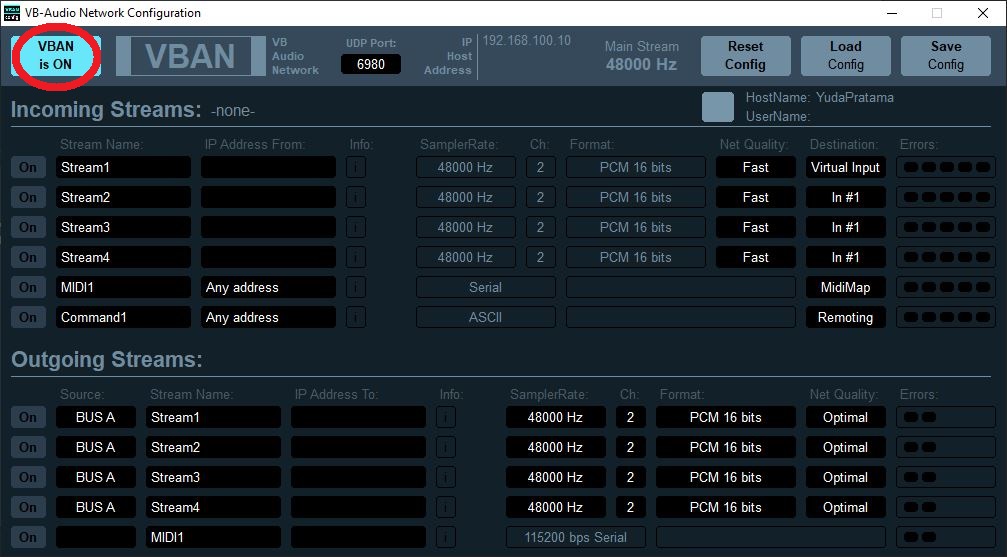
- Turn on the VBAN Stream toggle, and a pop-up will appear to allow access. Allow it
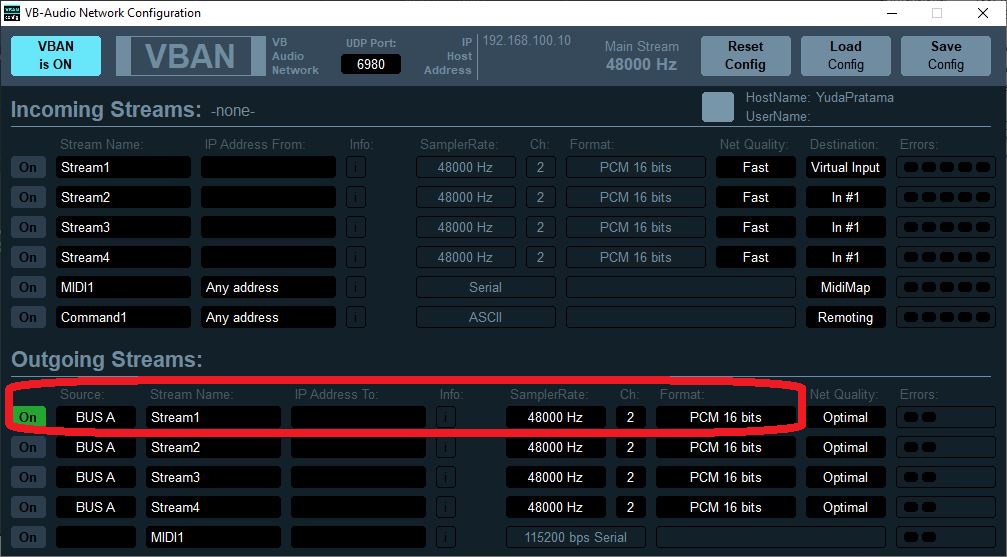
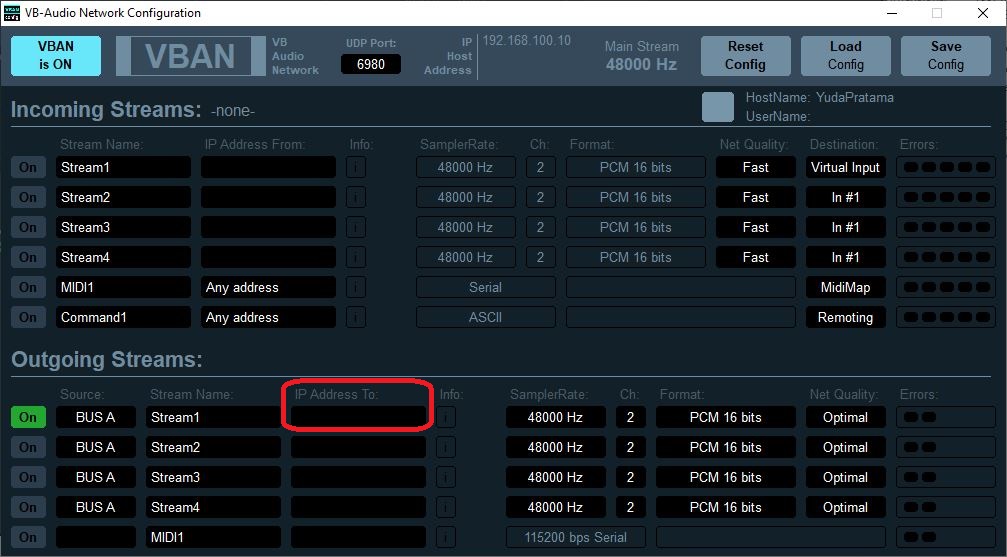
- In the Outgoing Streams section, click and select Stream 1 (what you preferred), then.
– Stream Name: (give the name)
– IP Address: (enter your Mac IP Address)
– Port: 6980 (default)
– SamplerRate: 48000 Hz (default)
– Ch: 2 (default)
– PCM 16 bits (default)
- Find your Mac IP Address by navigating System Settings > Network > Details > (IP Address).
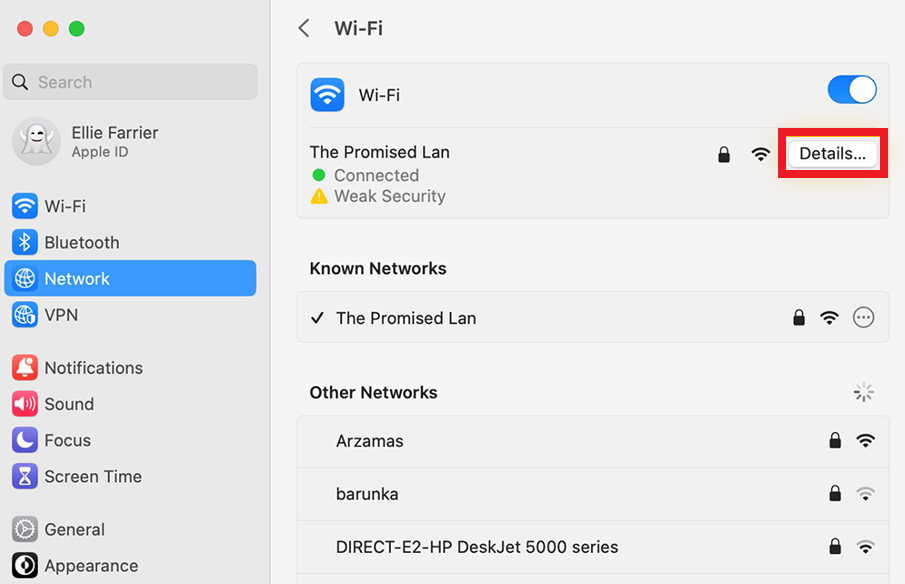
- Now, Enter your Mac IP Address on your VBAN Receptor Windows.
- On your Mac, open the VBAN Receptor App. Make sure the port is 6980 (default). If the connection is correct, the stream from the PC will appear automatically.

- On your Voicemeeter Windows, click on the stream name (marked in green or with an active sign). This indicates that the audio stream is connected and can be heard.

- It’s now connecting; you can hear and stream audio from Windows via Mac.
Tool #3: SonoBus (Cross-Platform Audio Streaming)
If you’re looking for a clean and flexible way to stream audio between your Windows PC and Mac, SonoBus is a solid choice.
- Go to https://sonobus.net from a browser and download the SonoBus app from both devices.
- Choose the download version for Windows and Mac.
- Then, install the SonoBus on both devices using the standard installation process.

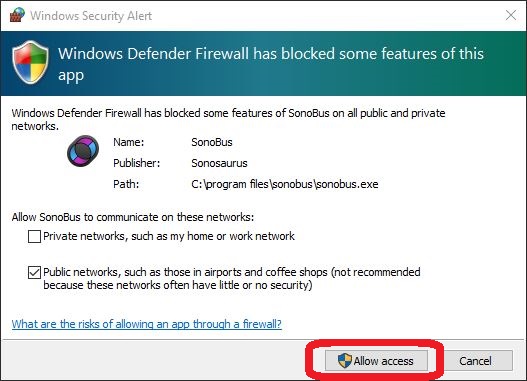
- Launch the SonoBus app on Windows, and a new window will appear; then click Allow access to continue.
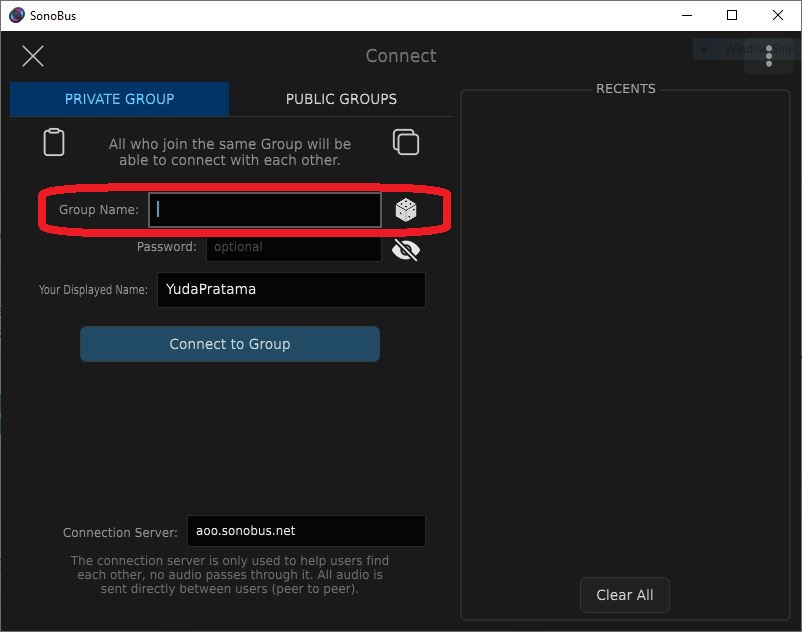
- In the main menu, click the Connect button.

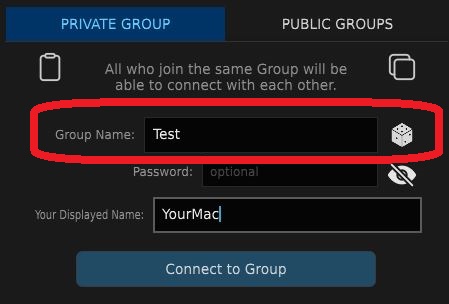
- Select the PRIVATE GROUP tab and enter a group name. You can also set a password (optional), then click the Connect to Group button. This acts like a room or channel name.
- Then click the Settings icon at the top left menu.

- A new window will appear, on the tab Audio, you will see Input Device and Output Device.
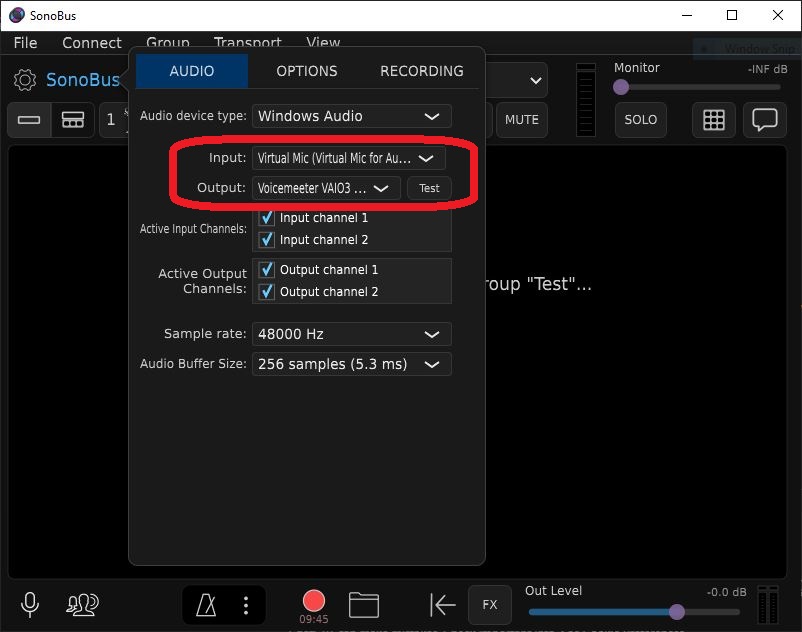
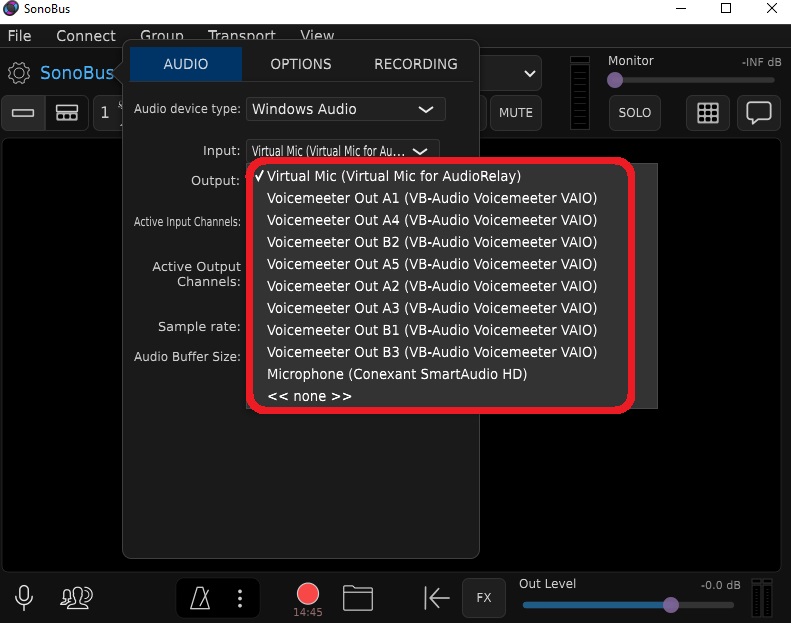
- To select your input device, click the dropdown menu and all your input devices will be available, then select your preferred input device.
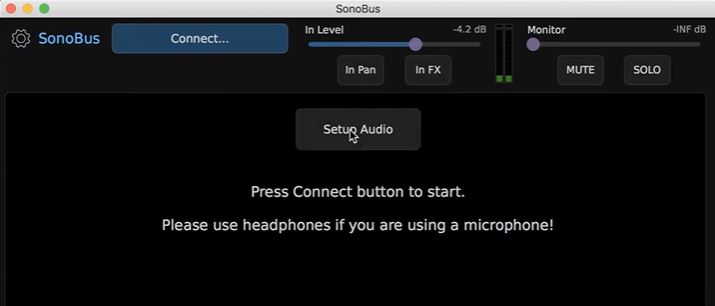
- Launch the SonoBus app on Mac.
- In the same tab box, PRIVATE GROUP, enter the same session name used on your Windows, then click the Connect to Group button.
- Click settings, on the Audio tab, then configure your output device by selecting your preferred output device.
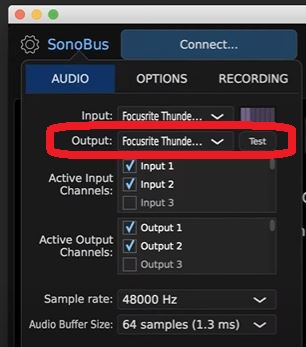
- Check the monitor box at the top-right to hear the incoming stream in real time; you can adjust the volume, gain, and pan for your preferred listening setup.

- You can also adjust to optimize the buffer.
– Smaller values = lower latency (try 128 or 256 samples).
– Quality Preset: “High Quality” works well on most networks.
– Latency Compensation: Keep it enabled unless you hear delays.

- Once connected, you’ll see your computer’s name in the connection panel with a green indicator, audio, and latency meters. Any sound from your Windows machine will stream to your Mac.
- Run audio from Windows (ensure it’s directed to the selected device). On your Mac, use headphones or speakers to check if the audio plays clearly and in real-time.

Tool #4: SoundWire (Simple and Direct Audio Streaming)
For those who want a quick, no-hassle setup, SoundWire gets the job done with minimal effort.
- Download SoundWire Server on Windows, then install the App.
- On your Mac, download and install the SoundWire Client via Wine, or you can use an Android emulator such as BlueStacks.

- Make sure your Windows and Mac are both connected to the same Wi-Fi network.
- Launch the SoundWire server from Windows
- In the SoundWire app, you’ll see your server’s IP address (192.168.x.x) at the top. Enter this on your Mac.

- Select your input device from the “Input Select” dropdown.

- On your Mac, launch the SoundWire Client App from BlueStacks and enter the server IP Address.
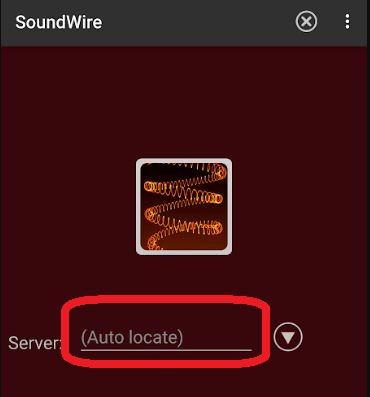
- Hit this connect icon to start the streaming.

Conclusion
Before streaming audio from Windows to Mac, always test your setup first. Glitches, Wi-Fi drops, or routing bugs can ruin your stream fast. Always keep a backup method ready, like a wired aux connection or second app. Don’t assume it’ll just work. Try, tweak, and make sure everything’s solid. That little effort up front can save you a big headache later.
FAQs
- Can I stream both system audio and mic?
Yes, just mix them first using something like Voicemeeter, then route the combined signal to your Mac.
- Is Bluetooth good for audio streaming?
No, Bluetooth adds delay and compression, so stick with Wi-Fi or LAN for smoother, real-time audio.
- Can I control Windows audio from a Mac?
Not directly, but you can use apps like Parsec or AnyDesk to control playback and volume remotely.


.png)


