


.png)

Uploading videos to YouTube can sometimes feel overwhelming, especially with large file sizes or formats that don’t work quite right. HandBrake, a free and user-friendly tool, can make the process smoother. It helps you compress files, tweak video settings, and prepare your content for the platform without much hassle.
If you’ve ever wondered how to make your videos upload faster while keeping them clear and professional, this guide will show you how HandBrake can help. Let’s get started!
Why You Should Use HandBrake for YouTube Videos
HandBrake is an essential tool for YouTube creators. It allows you to optimize video quality while reducing file size, making uploads faster and easier. Large files can slow uploads or take up too much storage, but HandBrake compresses them without sacrificing clarity.
It also ensures your videos are in formats YouTube supports, such as MP4, MKV, or MOV, so you won’t face compatibility issues. With built-in presets and encoding options tailored for YouTube, HandBrake simplifies the process of preparing your videos. Whether you’re a beginner or an expert, it helps make your content look professional and upload-ready.
How to Use HandBrake for YouTube Videos?
Using HandBrake to prepare your videos for YouTube is simple and effective and can greatly enhance your upload experience. Whether you want to compress large files or ensure your videos are in the right format and resolution, HandBrake offers all the necessary tools. However, before diving into the steps, you’ll need to download and install the software on your computer.
To get started, head to the HandBrake website. You’ll find a prominent download button on the homepage to quickly grab the latest version. Alternatively, you can visit the Downloads page to choose the specific version that matches your operating system, whether it’s Windows, macOS, or Linux.
Once installed, you’ll be ready to start optimizing your videos for YouTube with a few easy steps. Let’s walk through them!
Step 1: Launch HandBrake and Upload Your Video File
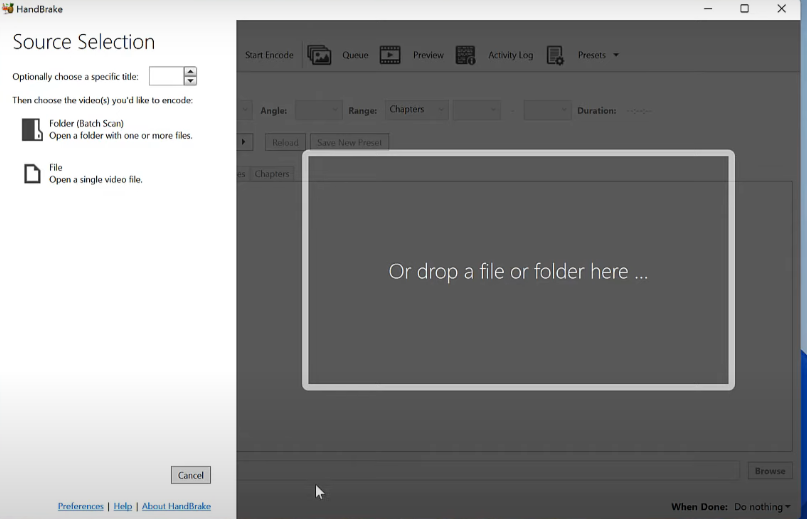
To get started, open HandBrake by double-clicking the cocktail and pineapple icon on your desktop. Once it’s open, you’ll see an option to add your video.
HandBrake refers to the video you want to edit as the “Source.” To upload it, simply click the “Open Source” button in the toolbar and browse your files. Alternatively, you can drag and drop the video directly onto HandBrake’s main window.
Step 2: Select a Preset
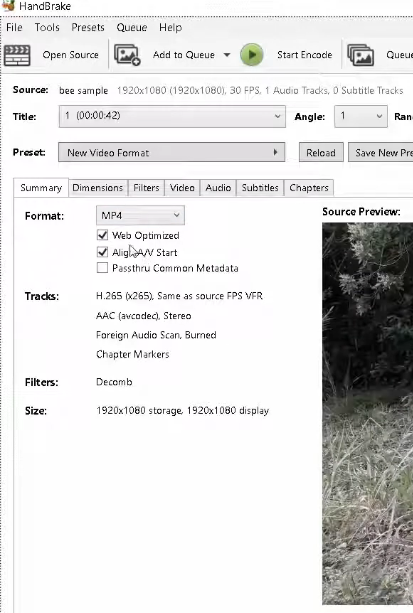
HandBrake makes it easy by offering several presets designed to optimize your video for different devices and platforms. The default “Fast 1080p30” preset is a great starting point for YouTube. It’s quick and works well across most devices.
In the Summary tab, make sure you select both “Web Optimized” and “Align A/V Start” to ensure smooth playback online.
Then, head to the Video tab and adjust the following settings:
- Video Encoder: H.264
- FPS: Same as source
- Framerate: Constant Framerate
- Constant Quality: RF 22 (ideal for YouTube compression and a good balance between quality and size)
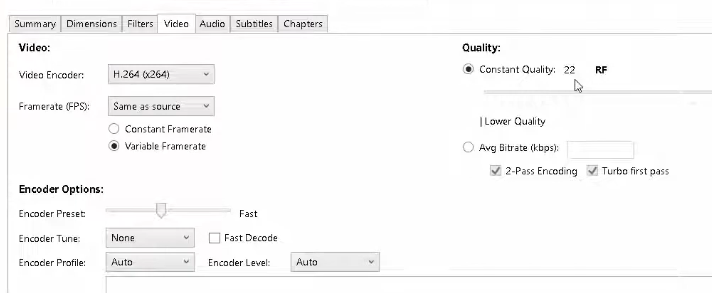
These settings will ensure your video is ready for a smooth upload to YouTube with optimal quality.
Step 3: Select a Destination
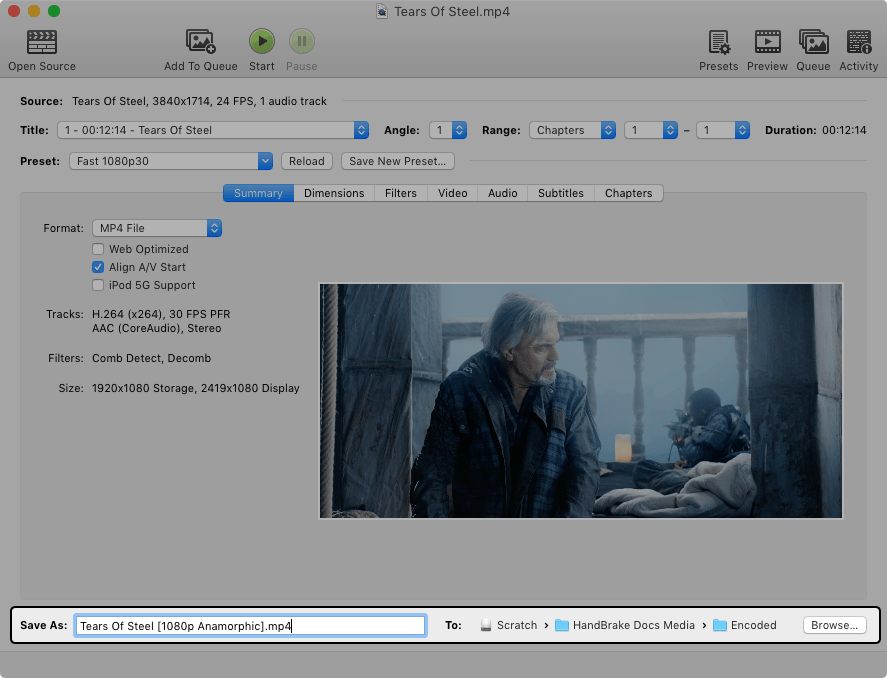
Now it’s time to choose where your encoded video will be saved. Click the “Browse” button at the bottom to pick a destination folder on your computer. You can also give the file a custom name, making it easier to find later. This step ensures you know exactly where your finished video will be so you can upload it to YouTube without any hassle.
Step 4: Start the Encode
Once you’ve set everything up, it’s time to start the encoding process. Simply click the green “Start Encode” button at the top of the screen. HandBrake will begin working its magic, showing you the progress.

Once it’s finished, you’ll get a notification, and your newly encoded video will be saved in the destination folder you selected earlier. Now, you’re ready to upload your optimized video to YouTube!
Conclusion
HandBrake is an invaluable tool for optimizing your videos before uploading them to YouTube. With its user-friendly interface and powerful features, you can easily adjust settings to ensure your videos meet YouTube’s quality, format, and size requirements.
By following the simple steps outlined, you can streamline your video preparation process, resulting in faster uploads and better playback performance. Whether you’re uploading a vlog, tutorial, or short film, HandBrake offers the flexibility and efficiency needed to enhance your YouTube content.
While optimizing your video files with HandBrake is an essential step for smoother uploads, starting with high-quality footage can make your content stand out even more. Consider using a dedicated streaming camera to capture crystal-clear images and elevate your viewers’ experience right from the start.
FAQs
Can HandBrake improve video quality?
HandBrake can help you adjust video quality to suit your needs. Its RF control acts like a quality slider. Moving it to the right improves the video quality but may increase file size. Sliding it to the left reduces the quality, reducing the file size. While it can’t enhance the original resolution, it lets you fine-tune the balance between quality and file size for better results.
Can HandBrake convert 4K video?
Yes, HandBrake can easily convert 4K videos to 1080p. This is a useful feature if you want smaller files without losing too much quality. However, the process can be demanding on your computer. Even with Intel QSV hardware acceleration, the conversion might take some time. Still, it’s a reliable tool for handling high-resolution videos.
What is the best video setting in HandBrake?
Choosing the best video settings in HandBrake depends on your resolution. For standard definition (480p/576p), an RF value between 18 and 22 works well. For HD videos (720p), aim for RF 19 to 23. Full HD (1080p) videos look great with RF 20 to 24, while 4K Ultra HD (2160p) performs best with RF 22 to 28. These ranges effectively balance quality and file size, making your videos look sharp without being too large.


