.png)
If you are opening, exporting, and closing dozens of audio files one by one, you are wasting valuable time. Learning how to batch convert audio files in Audacity using Macros is the easiest way to automate this repetitive task. Whether you need to switch a folder of WAV files to MP3s or apply a quick normalization effect to an entire podcast series, Audacity’s built-in automation does the heavy lifting for you.
In this guide, we will walk through the exact steps to set up your workflow, where to find those notoriously hidden exported files, and how to speed up your editing process.
Why Use Audacity Macros for Batch Conversion?
In Audacity, a Macro (formerly known as “Chains” in older versions) is a sequence of commands that automates repetitive tasks. Instead of processing individual tracks manually, a well-built macro lets you command the software to process an entire folder of audio files at once. This turns hours of tedious clicking into a background task that finishes while you step away from your desk.
Here is why using Audacity’s Macro feature is the best workflow for bulk audio processing:
- Convert hundreds of files in minutes: Instantly batch convert massive folders of WAV files to MP3s (or vice versa) without a single manual export click.
- Apply effects simultaneously: Stack commands to automatically Normalize, apply EQ, or trim silence right before the file exports.
- 100% free and built natively: There is no need to pay for premium software or download sketchy third-party format converters. This powerful automation engine is built directly into Audacity.
Step-by-Step: How to Batch Convert in Audacity Using Macros
Follow these exact steps to set up your automated conversion workflow:
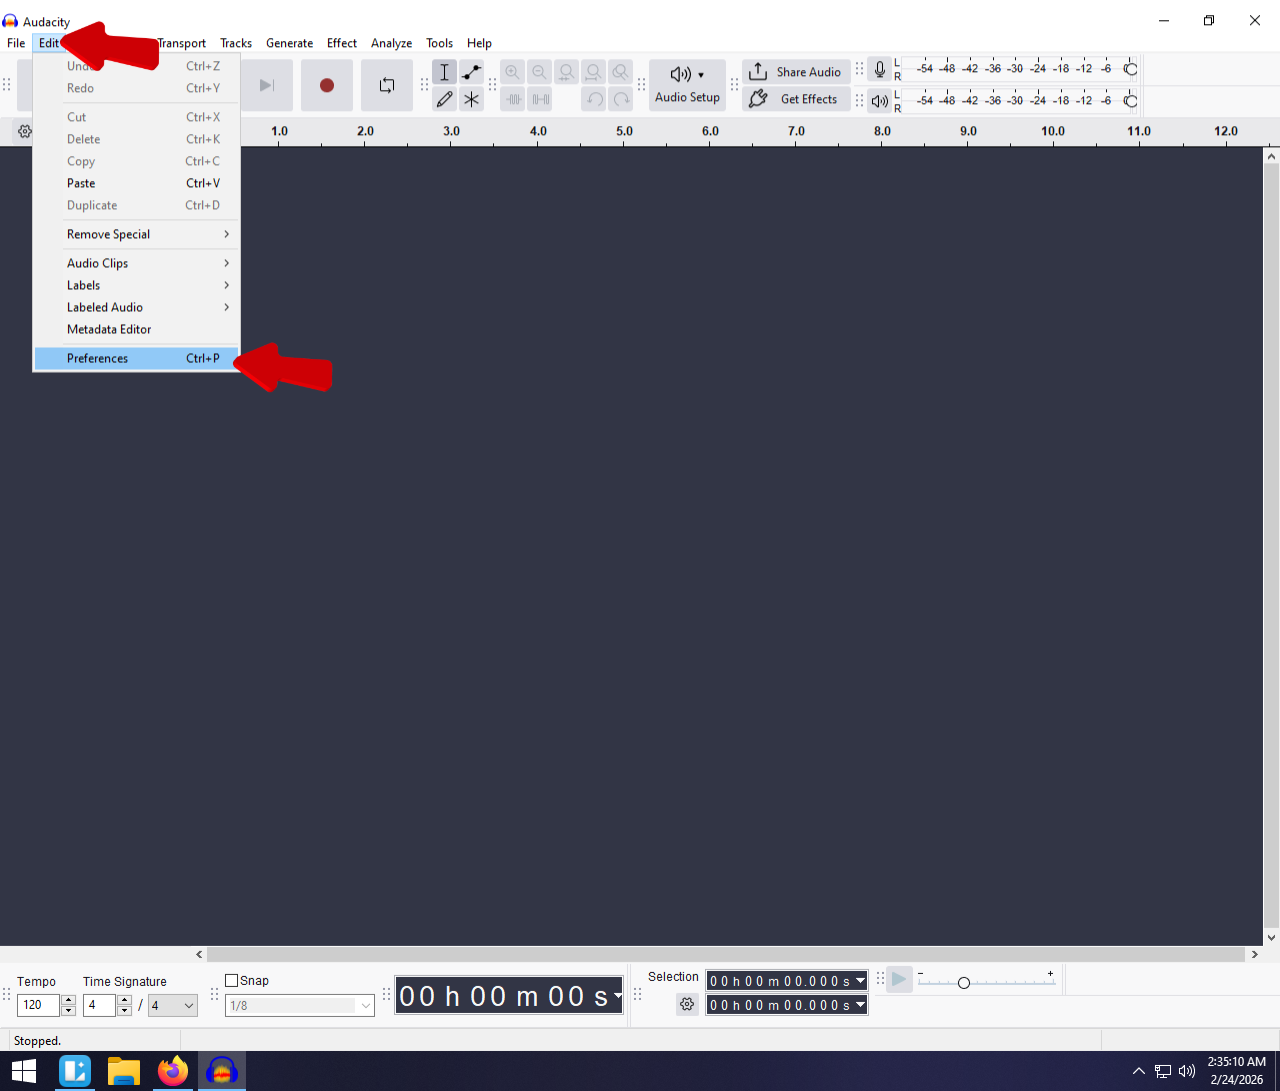
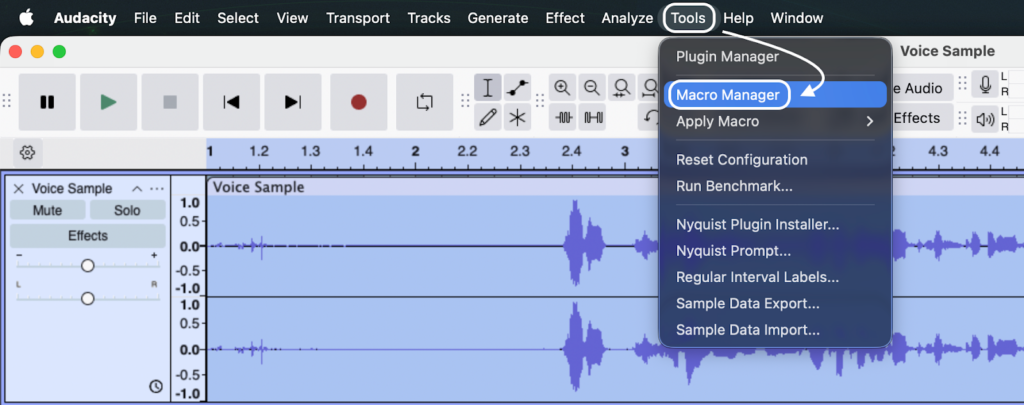
- Open the Macros Manager: Navigate to your top menu bar, click on Tools, and select Macros Manager from the dropdown menu.
- Create a New Macro: In the Manage Macros window, click the New button located on the left side. Give your macro a clear, recognizable name (such as “Convert to MP3” or “Batch to WAV”) and click OK.

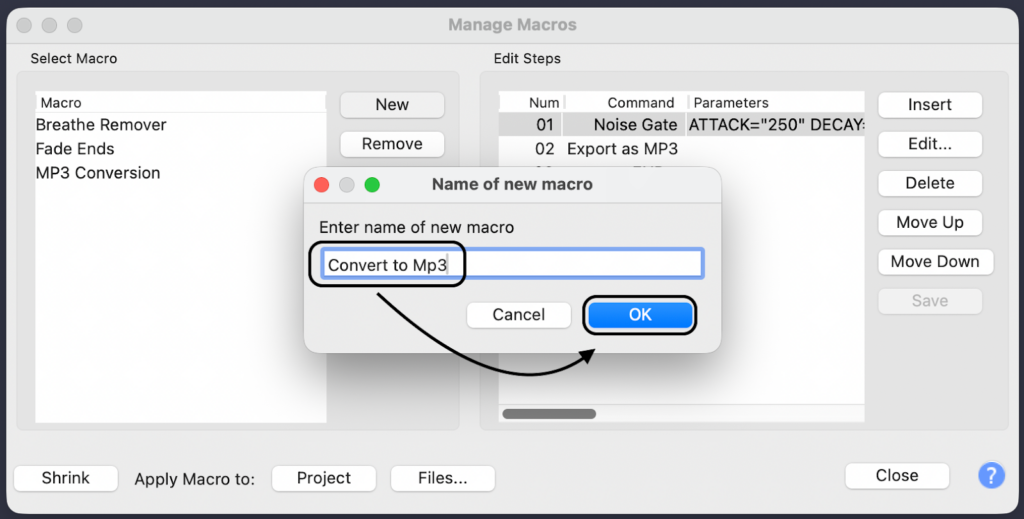
- Insert the Export Command: With your new macro selected, click the Insert button on the right. Scroll through the alphabetical list of commands until you find your desired output format, such as Export as MP3 or Export as WAV. Select it and click OK.


Crucial Note: You only need this single command in your list. Audacity automatically knows when the process is finished, so you do not need to add an “End” command.
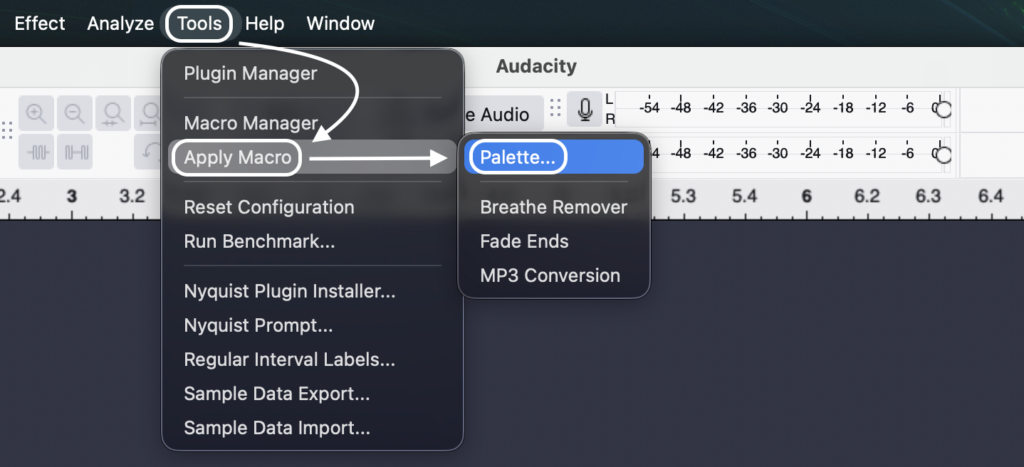
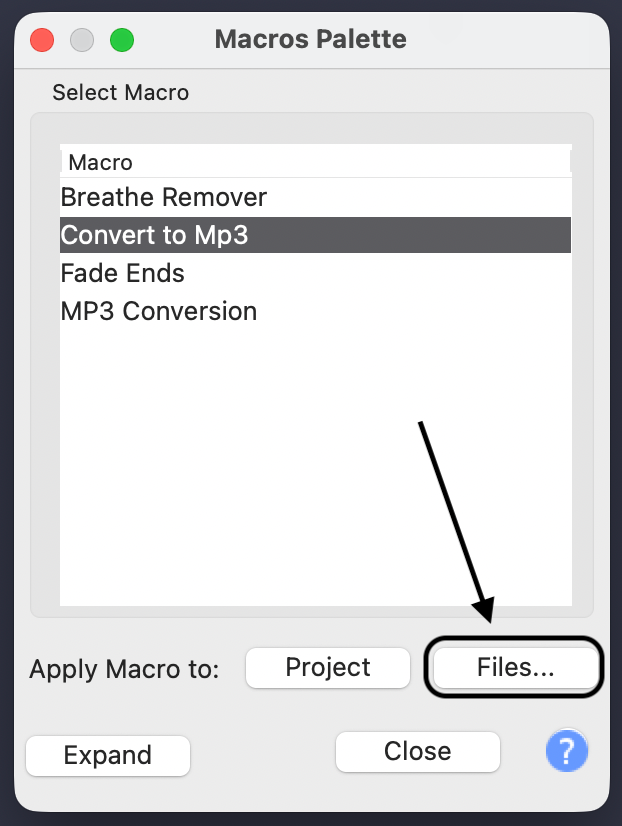
- Apply the Macro to Your Batch: Click Close to exit the Macros Manager. Go back to the top menu and navigate to Tools > Apply Macro > Palette. Select the macro you just built, click the Files… button, and highlight all the audio files on your computer that you want to convert.
- Let Audacity Process: Once you click Open, a progress bar will appear on your screen. Audacity will now automatically open, convert, and export every single file in your selected batch without any further manual input.
The Biggest Pitfall: Where Do Batch Converted Files Go?
You just ran your macro, the progress bar finished, and now you are left wondering where your files went. Unlike a standard manual export, Audacity does not prompt you to choose a destination folder when running a batch process.
Instead, Audacity automatically creates a brand-new folder to safely store your converted audio without overwriting your originals. You will find your finished files in a folder named “macro-output”.
This folder is generated directly inside the exact directory where your original source files are stored. For example, if you applied the macro to a batch of WAV files located in Documents/Podcast/RawAudio, your newly converted MP3s will be waiting for you at Documents/Podcast/RawAudio/macro-output.
If you selected original files that were scattered across several different folders on your computer, Audacity will create a separate “macro-output” folder inside each of those respective directories.
Pro Tip: Faster Workflows Start Before You Edit
The golden rule of audio production is simple: “Garbage In, Garbage Out.”
While Audacity makes it incredibly easy to batch convert file formats, relying on macros to batch-fix clipped, distorted, or noisy audio rarely yields perfect results. Applying a blanket Noise Reduction or Normalization macro across dozens of unique files is a gamble that often ruins the nuances of your recordings.
The absolute best way to save hours in Audacity is to capture perfect audio at the source. If your raw files are clean, your post-production workflow shrinks down to a single step: simple format conversion.
For creators who want to eliminate post-production triage, we highly recommend upgrading to the Hollyland LARK MAX 2 for professional, studio-quality recording. It is specifically engineered to bypass the need for heavy audio repair:

Hollyland LARK MAX 2 - Premium Wireless Microphone System
A premium wireless microphone for videographers, podcasters, and content creators to capture broadcast-quality sound.
Key Features: Wireless Audio Monitoring | 32-bit Float | Timecode
- 32-bit Float Recording: This completely changes your workflow. It captures such a massive dynamic range that your audio never distorts, even with screaming or sudden loud noises. You can skip adding limiters or normalization steps to your Audacity macros entirely.
- Studio Quality 48kHz/24-bit Audio: Guarantees crisp, broadcast-ready sound right out of the box.
- Professional ENC (Environmental Noise Cancellation): Automatically blocks out background hums, AC units, and room noise. You will never need to risk running a batch noise reduction macro again.
- Wireless OWS Earphone Integration: You can monitor this pristine audio wirelessly in real-time via their new OWS earphones, ensuring your sound is flawless before you ever sit down at your computer.
By capturing pristine audio on the front end, you can use Audacity strictly for what it does best in an automated workflow—batch converting your formats in seconds so you can hit publish faster.
Advanced Macro Tricks: Adding Effects to Your Batch Convert
Format conversion is just the beginning of Audacity’s automation tools. You can stack multiple audio effects into a single macro to process, mix, and convert hundreds of files simultaneously.
To add an effect, open the Macro Manager, select your existing conversion macro, and click Insert. From there, you can choose any built-in Audacity effect to apply to your batch.
Popular Macro Effects to Add
- Normalize: Insert the Normalize command to automatically adjust the peak volume of every file to a standard level (like -1.0 dB). This ensures your entire batch of audio files has a consistent, professional volume.
- Compressor: Add the Compressor command to automatically reduce the dynamic range of your audio. This evens out the loud and quiet parts of your tracks before they are converted to their final format.
⚠️ Crucial Warning: Command Order Matters
Audacity processes macro commands sequentially from top to bottom. If you place a “Normalize” effect after your “Export” command, Audacity will export the raw, unedited audio first, making the effect useless.
To prevent this, always apply effects before exporting. Your Export as MP3 or Export as WAV command must be the absolute last step in your macro chain. If you make a mistake, simply select a command and use the Move Up or Move Down buttons on the right side of the Macro Manager to fix your workflow order.
Frequently Asked Questions (FAQ)
Can I batch convert MP3 to WAV in Audacity?
Yes. When building your new macro inside the Macros Manager, simply choose the Export as WAV command instead of MP3. Audacity will automatically convert your entire batch of compressed MP3s into uncompressed WAV files and drop them directly into your macro-output folder.
Why is my Audacity macro not working on files?
The most common mistake is accidentally clicking Apply to Project instead of Apply to Files inside the Macro Palette. “Apply to Project” only runs the macro on the audio currently open on your timeline. If the macro still fails, double-check that your original audio files are not corrupted and are in a format Audacity natively supports.
Does batch converting reduce audio quality?
It depends entirely on the export format you choose in your macro. Converting high-resolution audio into a lossy format like MP3 will permanently compress the file and reduce its overall quality. However, batch converting a WAV to another lossless format like FLAC—or keeping it as a WAV at the same sample rate—retains 100% of your original audio quality.
Conclusion & Next Steps
Audacity Macros transform the tedious, hours-long task of formatting audio into a process that takes just a few clicks. Once you build your macro, batch converting your entire audio library becomes virtually automatic.
Take five minutes right now to set up your first “Export to MP3” macro. You will thank yourself the next time you have dozens of files to process.
Remember, the ultimate post-production time-saver is capturing flawless audio from the start.
Upgrade your setup with the Hollyland LARK MAX 2 to take advantage of 32-bit Float Recording and Studio Quality 48kHz/24-bit audio. When your source files are perfectly balanced and clip-free, you can skip the complex editing chains and use Audacity strictly for quick, easy format conversions.