Ever wondered why some audio feels effortless with its flow? Though it has multiple transitions and cuts in the backend? The magic happens with the feature called fading.
If you record with top-tier gear like the Hollyland LARK M2S wireless microphone system or any other setup, the secret often lies in how you perfect fade-ins and fade-outs.
In this guide, we’ll show you how to use Audacity’s free editing tools to create smooth, professional fades that make your audio sound like it came straight from a studio.
What is Audio Fading
Audio fading involves gradually increasing (fade-in) or decreasing (fade-out) the volume of an audio track over a specified duration. This technique eliminates abrupt starts and stops that can jar listeners, creating smooth transitions that sound natural and professional.
Getting Started with Audacity
Before we look into fade effects, ensure you have Audacity installed on your computer.
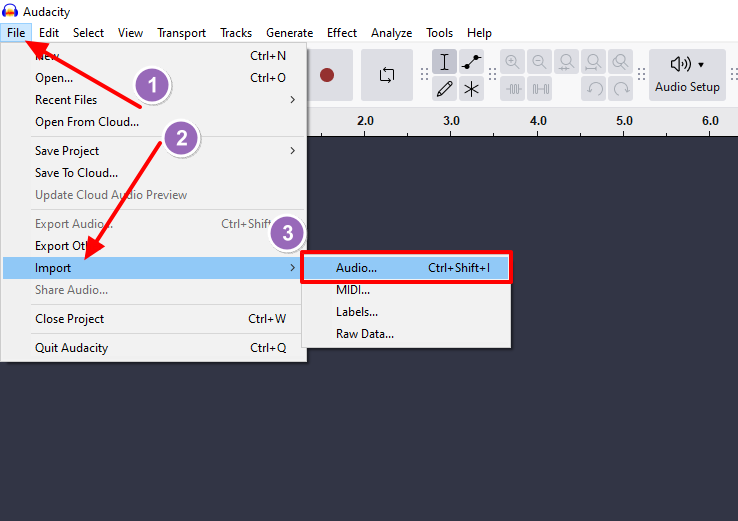
Start by importing your audio file into Audacity:
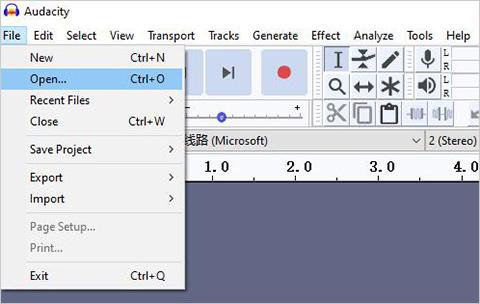
- Open Audacity and click File > Import > Audio or directly click Ctrl+Shift+I

- Navigate to your audio file and select it, and click Open.

- Your audio waveform will appear in the main editing window, displaying the visual representation of your sound waves.

How to Create Fade-In Effects in Audacity
Fade-in effects work best at the beginning of audio tracks or after periods of silence. Here’s how to create them:
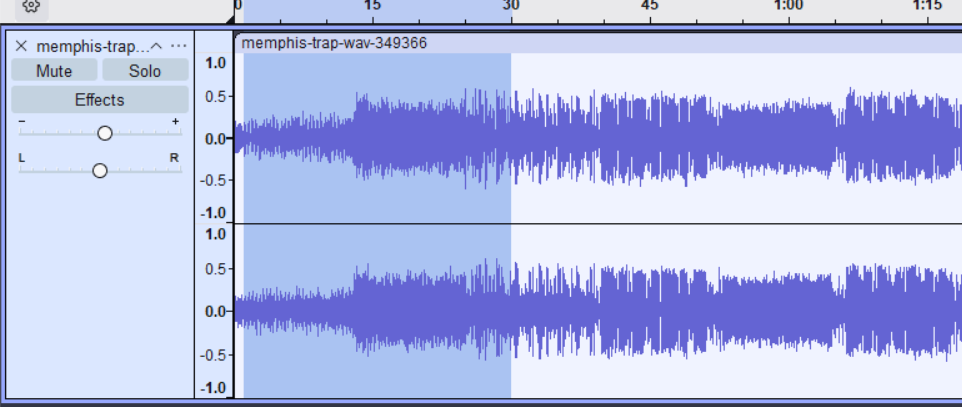
Step 1: Select the Audio Region
- Position your cursor at the very beginning of your audio track.
- Click and drag to select the portion where you want the fade-in effect to occur.

- Typically, fade-ins last between 1-5 seconds, though this depends on your audio content.
Step 2: Access the Fade-In Effect
With your audio selection highlighted:
- Navigate to the Effect menu at the top of the screen, scroll down, and select Fade In.

- Audacity will immediately apply the effect to your selected region

The fade-in effect in Audacity uses a linear fade by default, meaning the volume increases at a constant rate throughout the selected duration.
Step 3: Preview and Adjust
After applying the fade-in:
- Press the spacebar or click the play button to preview your audio

- Listen to how the fade-in sounds in context
- If you’re not satisfied, use Ctrl+Z (or Cmd+Z on Mac) to undo
- Reselect a different duration and reapply the effect
How to Create Fade-Out Effects
Fade-out effects typically work best at the end of audio tracks or before transitions to different content.
Step 1: Navigate and Select to the End
- Scroll to the end of your audio track or to the point where you want the fade-out to begin.
- Click and drag from your desired starting point to the end of the audio track.

- When working with high-quality recordings from devices like the Hollyland LARK M2S, which offers up to 24-bit/48kHz audio resolution, you’ll have excellent source material that responds beautifully to fade effects.
Step 2: Apply the Fade-Out Effect
- Go to Effect > Fade Out

- Audacity applies the effect immediately
- The volume will gradually decrease from full volume to silence over your selected region

Step 3: Fine-Tune Your Results
- Play back the audio to evaluate the fade-out.
- Consider the context: music tracks might benefit from longer fade-outs (3-10 seconds), while spoken content often works better with shorter fades (1-3 seconds).
Advanced Fade Techniques in Audacity
Apart from the methods we already discussed, Audacity has different tools to automate the fading process easily.
Using the Envelope Tool
For more precise control over your fades, try the Envelope Tool:
- Select the Envelope Tool from the toolbar (looks like two blue arrows)

- Click on your audio waveform to create control points

- Drag these points up or down to adjust volume levels
- Create custom fade curves by adding multiple control points

- This method allows for non-linear fades and more creative volume automation.
Crossfading Between Tracks
When transitioning between different audio segments:
- Import both audio files into Audacity
- Position them so they overlap slightly

- Apply a fade-out to the end of the first track

- Apply a fade-in to the beginning of the second track

- The overlapping region will create a smooth crossfade at the end of the first and the beginning of the second audio.

Export Your Faded Audio
After perfecting your fade effects:
- Select File > Export Audio or simply press Ctrl+Shift+E

- You can share the link to audio.com or directly save or export it to your computer.

- Select Save to computer and choose your desired format (WAV for highest quality, MP3 for smaller file size)

- Configure quality settings as needed
- Click Export
Troubleshooting Common Fading Issues in Audacity
Sometimes, fading can not give the necessary result. Try these steps to resolve the issue.
Fade Appears Too Abrupt
If your fade seems too sudden:
- Increase the selection duration
- Use the Envelope Tool for custom curves

- Try the Adjustable Fade effect in the Effect menu for more control options

Audio Clips During Fade
If you hear digital clipping:
- Reduce the overall track volume before applying fades

- Use Effect > Amplify to lower the peak levels

- Adjust levels and click Apply

- Ensure your source audio isn’t already at maximum volume
Inconsistent Fade Results
For consistent results across multiple tracks:
- Note the exact duration of successful fades
- Use the same selection techniques as above
- Consider creating macros for frequently used fade settings in Tools > Macros

.
Conclusion
Once you learn to master fades in Audacity, it can instantly level up your audio. If it is paired with high-quality recordings, these techniques will give your content a professional touch. Try to experiment with different tracks and trust your ear. You will soon get clean, effortless transitions, which will boost the quality of your audio.
FAQs
1. Why are the ‘Fade In’ and ‘Fade Out’ options grayed out in the Effect menu?
This is a common issue and almost always means that no audio has been selected. You must first use your cursor to click and drag over a portion of the audio waveform. Once a section is highlighted, the fade options in the Effect menu will become clickable.
2. Can I create a custom fade that isn’t a straight line?
Yes. For more control over the shape of your fade, use the Envelope Tool (it looks like two blue arrows with a line). This tool allows you to add control points to the audio track and manually draw your own volume curve, creating custom, non-linear fades for more artistic or precise transitions.
3. What if my audio clip ends too abruptly to create a good fade-out?
This happens when a track finishes without enough audio material for a gradual fade. The best solution is to extend the track manually. You can do this by copying the last few seconds of the audio, pasting it at the end to make the clip longer, and then applying your fade-out to that newly extended section.


.png)


