.png)
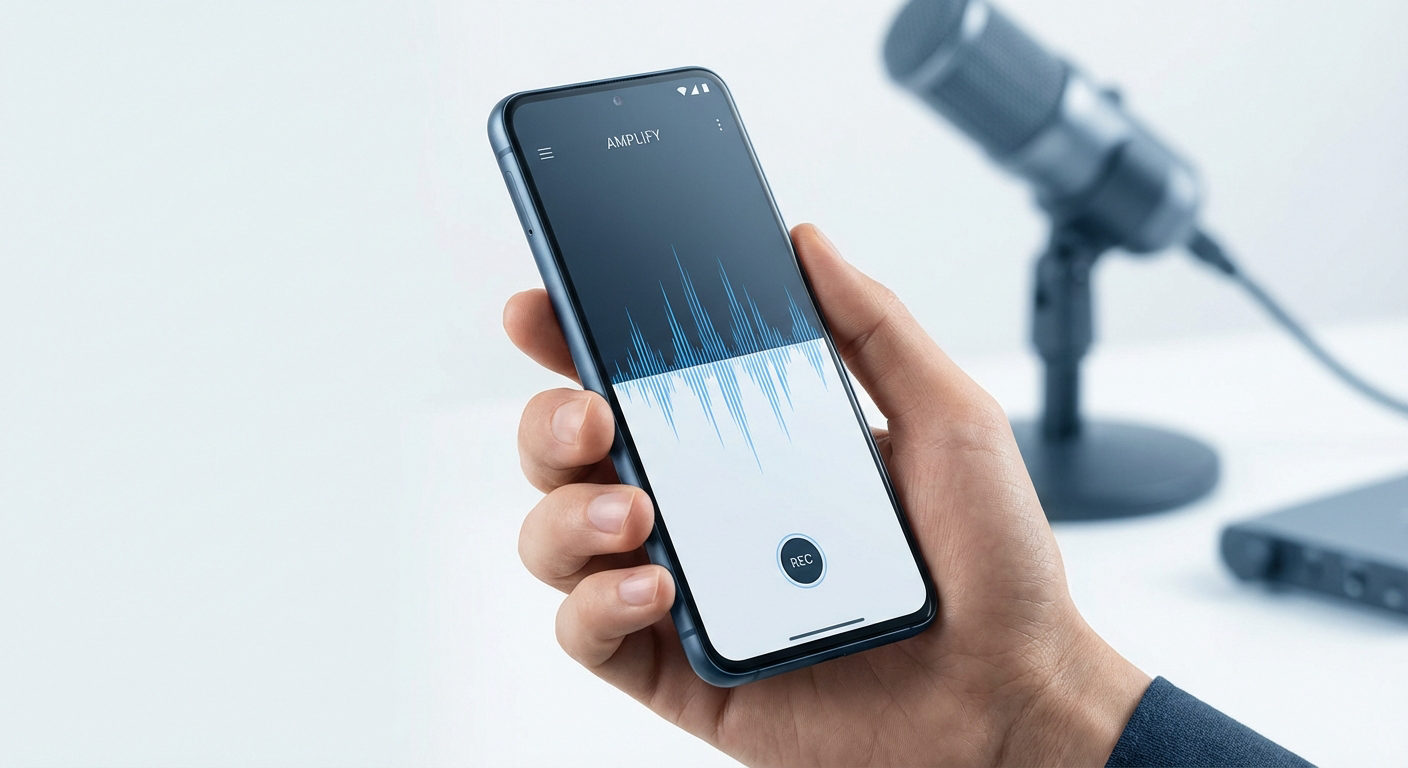
Podcasters and interviewers don’t always record audio content in their studios with professional equipment. Sometimes, they have to adapt and capture interview recordings on their smartphone when they are on the go. In such a situation, they should know the best methods and tools to perform this task on their Android device.
There are several built-in and third-party tools available that can help them optimize this audio content creation. Throughout this article, we will discuss all such methods and tools to prepare our readers for sudden content recording sessions.
Way 1. Using the Built-In Voice Recorder
All Android devices come with a default voice recorder that can help users capture lengthy recording sessions with a single click. After recording the interview, you can preview the audio for quality checks to ensure the best output.
In addition, this built-in voice recorder gives you the option to rename the files for easy audio file management. Let’s analyze the steps to perform this audio-capturing process with your smartphone.
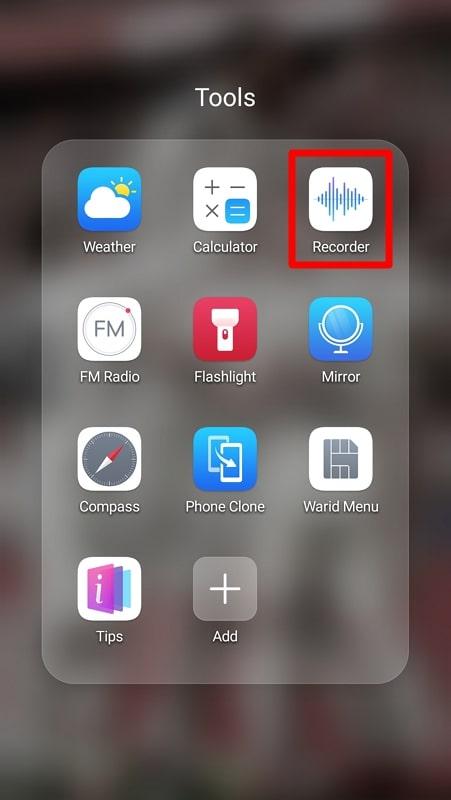
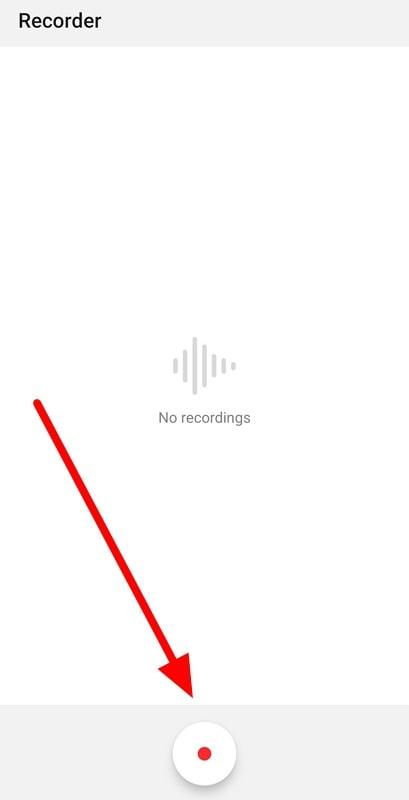
Step 1. Begin the voice recording process by entering the “Tools” folder to access multiple utility apps. Moving forward, hit the “Recorder” icon to access this tool for a new recording session.
Step 2. Upon entering the sound-capturing application, press the “Record” circle button at the bottom of your screen. Next, you need to speak after coming close to your microphone for an optimized voice recording output.
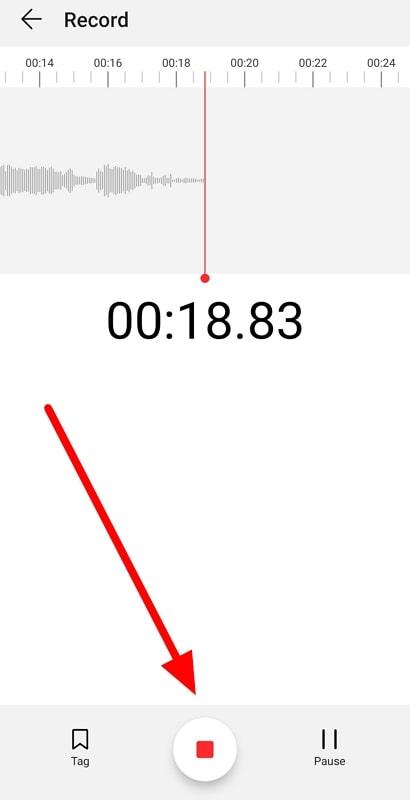
Step 3. Once you are done recording the audio content, tap the “Stop” red square button to save this file on your device. Finally, you get the option to preview the recorded content and rename the file to finish this sound-capturing session.
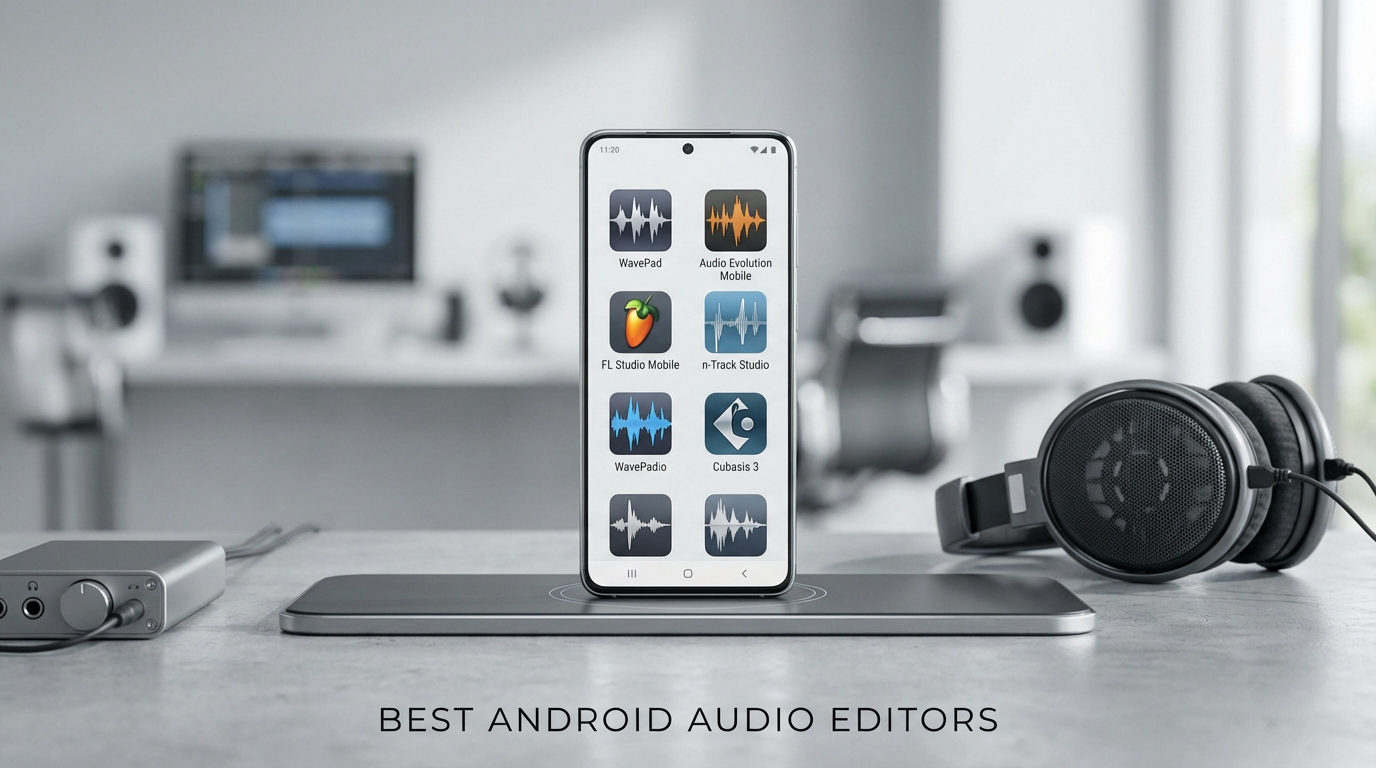
Way 2. Making Use of Third-Party Apps
Users who want to better record and manage their audio content can utilize voice recorders on the Google Play Store. On this platform, you can find various high-quality sound recording applications for crisp-quality output.
Some popular voice recording options include Easy Voice Recorder, Smart Recorder, and Hi-Q MP3 Voice Recorder. After selecting the tool that meets your requirements, follow these steps to record your audio.
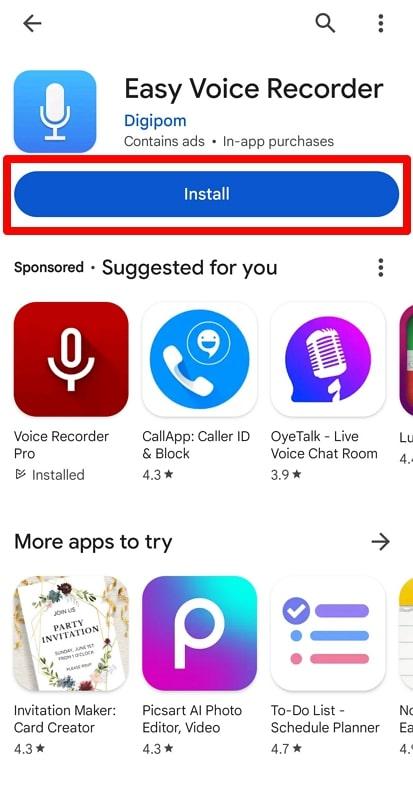
Step 1. First, visit the Play Store application to search for the best voice recorders available for Android devices. Upon choosing the appropriate voice recorded according to your needs, hit the “Install” button to download it on your device.
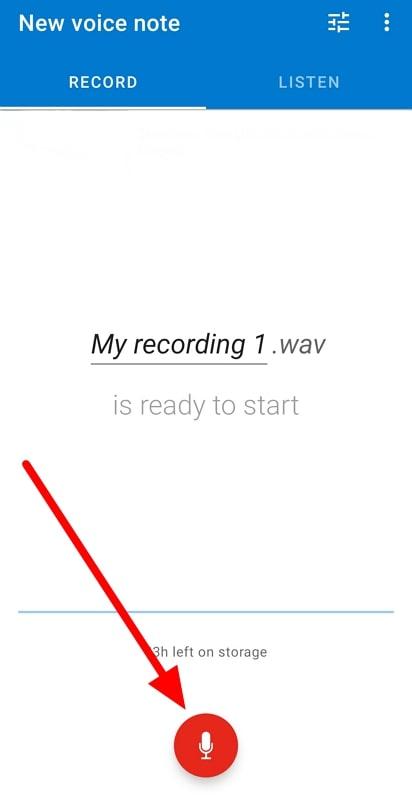
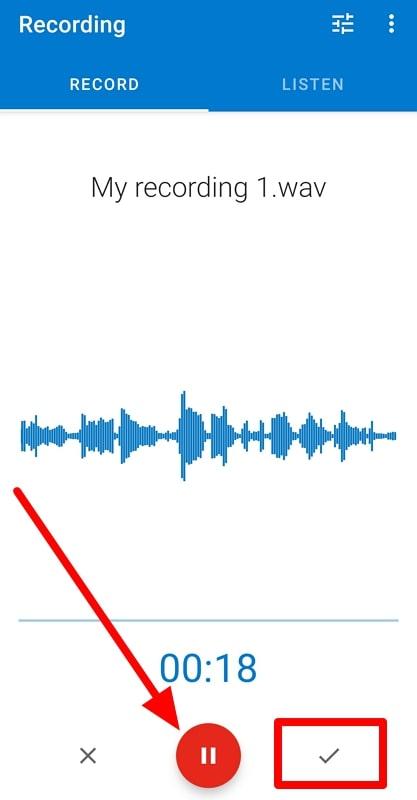
Step 2. Once the application is downloaded on your mobile, launch it and give permission to this app to record audio using a microphone. Now, press the “Microphone” icon at the bottom of your screen to start capturing your audio content.
Step 3. Afterward, hit the “Pause” icon to stop the recording and then tap on the “Tick” icon to save this recording on your device. Furthermore, you can rename the file while saving it on your Android device for easier audio file accessibility.
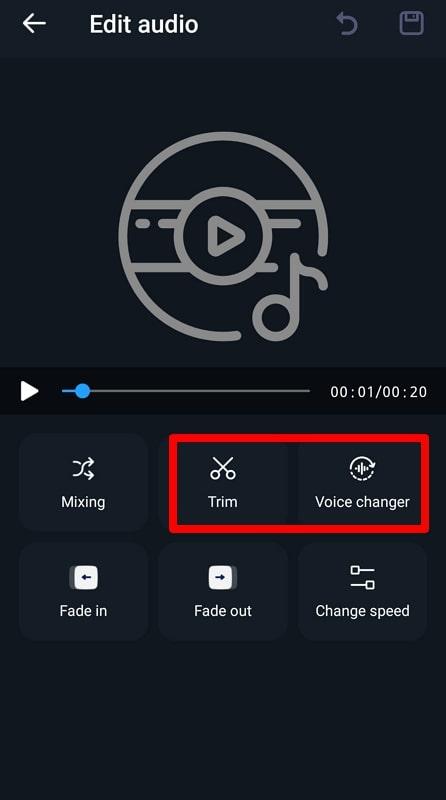
Step 4. Finally, this recording can be imported into a sound editing application, such as Super Sound. Next, you can mix or trim the audio with this editor to get the desired audio file. In addition, you can access the “Voice Changer” feature to apply innovative sound effects to your audio recording.
Way 3. Utilizing External Microphones for High-Quality Output
Professional podcasters may want the best quality recording session to maintain their audio content standard even when recording with Android devices. For this purpose, they can utilize external microphones to capture the crisp-sounding audio. Hollyland Lark Max will prove to be the best option for such recording with its highly efficient sound-capturing system. Interviewers can conduct studio-level recording sessions using MaxTimber technology.

Hollyland LARK MAX - Professional Wireless Microphone
A professional wireless microphone system featuring studio-quality audio with advanced noise cancellation.
Key Features: Studio-Quality Audio | Magnetic Attachment | 8GB Internal Recording
Other than that, it comes with two transmitters, so you can record podcasts or interviews without any problem. With its professional noise-cancellation feature, this wireless microphone is ideal for outdoor audio recording sessions. Moreover, it comes with over 8GB of internal storage to avoid running out of space while recording lengthy interviews.
Before choosing any external microphone for audio recording, you have to ensure that it is compatible with your Android version. You may need to connect the receiver of this microphone to your device through an appropriate adopter. Once the connection is established, you can utilize the built-in voice recording app or third-party tool to carry out the audio-capturing session.
Way 4. Capturing Audio from a Video
You also get the option to capture audio content using the “Camera” application on your Android device by recording video. Once the video is recorded, you can utilize the video-to-audio converters to extract voice recordings. The offline audio extractors for this process may include InShot, which is an all-in-one content creation application.
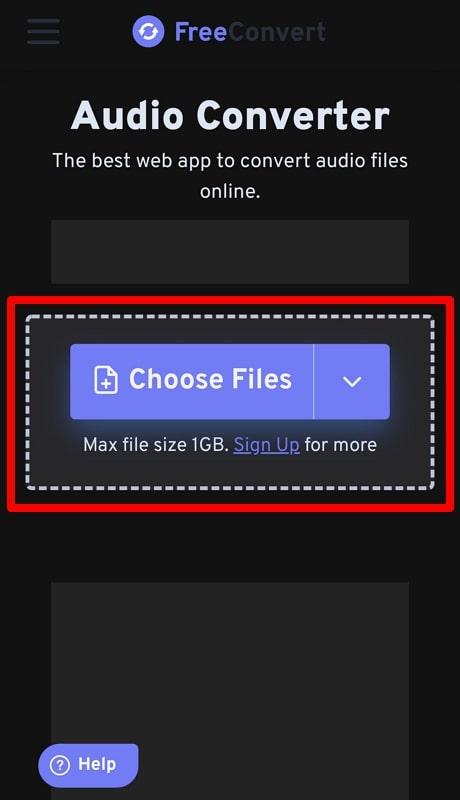
Besides that, you can use online converters, such as FreeConvert, to adopt a much simpler way of sound extraction. The following steps will help you to get a voice recording after capturing the video with the help of the “Camera” app.
Step 1. Upon launching the “Camera” application on your device, hit the “Circle” red button to start capturing video along with the audio.
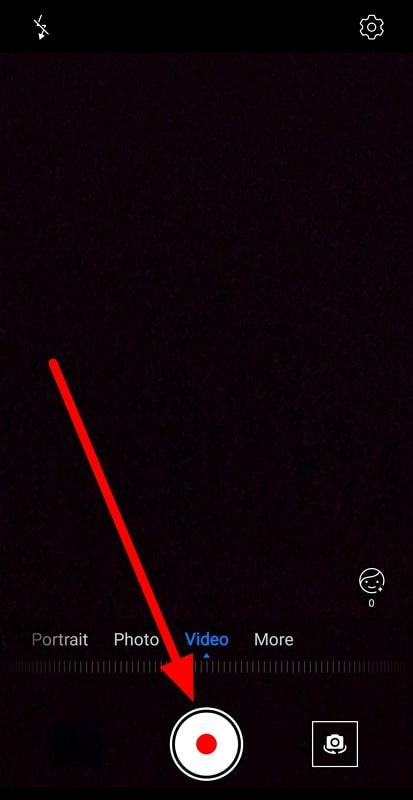
Step 2. Once you are done recording your voice with this app, press the “Stop” icon to save this video on your device.

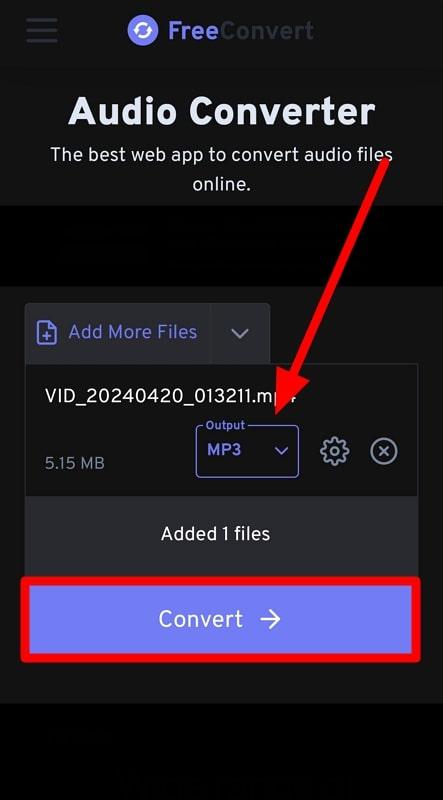
Step 3. Now, visit the official website of FreeConvert to access its video-to-audio conversion feature. Then, click on the “Choose Files” button to import the recorded video from your mobile.
Step 4. After importing this video, choose your desired audio file format and adjust the additional conversion settings. Finally, press the “Convert” button to save this extracted audio on your phone.
Way 5. Recording Calls for Audio Recording
Most Android devices don’t have a built-in call recorder due to security concerns that people might have for their privacy. Moreover, these phones are legally bound not to include such applications by default.
However, users can always download third-party tools, such as Call Recorder – Auto Recording and Cube ACR Recorder, from the Play Store. Follow the steps explained below to record a call on your Android device for sound capturing.
Step 1. Start the process by downloading the relevant application on your Android device and launching it for call voice recording. Once launched, give this tool the necessary permission to record audio using the microphone.

Step 2. Upon giving all the necessary permissions, dial the number and press the “Call” icon to record audio while talking on the phone. After finishing the call, you can access the “Recording” tab to listen to the captured sound.

While recording calls with such tools, you have to make sure you get consent from the receiver. In this way, you can comply with the local and national laws related to the call recording process.
Helpful Tips for Android Users to Get Better Audio Quality
When recording audio with Android devices, you can increase the quality of your output recording further using some additional tips. We have researched this topic and gathered these valuable tips to help you capture audio in the best possible manner.
- The best way to avoid disturbance and background noise while creating audio content is to capture sound in a quiet environment. When you have to record outdoors, we recommend identifying a place with limited public access.
- Users experiencing low audio volume levels should speak closer to the microphone while recording audio content. Throughout the sound-capturing session, you need to maintain a consistent distance from the mic to avoid distortion.
- Using third-party tools for recording, you will get various voice recording settings to adjust the output quality. Users should choose the best possible audio settings, such as AAC audio formats and other frequency adjustments.
FAQs Related to Capturing Audio on Android
Q1. What are the best audio recording apps for Android?
Users can benefit from various audio recording applications present on Play Store to optimize the sound-capturing process. Some simple recorders, including Voice Recorder Pro and Easy Voice Recorder, make things easier for beginners. However, professional podcasters should use apps with editing capabilities, such as BandLab – Music Making Studio.
Q2. How can I improve the audio quality of my recordings on Android?
Audio content creators should look for a quiet place to capture their sound recording sessions. In addition to that, they need to maintain an appropriate fixed distance from the microphone while recording to avoid low volume and distortion issues. We also recommend using external microphones like Hollyland Lark M2 to capture audio in the best possible quality.

Hollyland LARK M2 - Mini Lavalier Microphone
An incredibly lightweight and compact wireless button microphone that captures high-fidelity audio.
Key Features: 9g Button Size | 48 kHz/24-bit | 40 Hours Battery
Q3. Is it legal to record phone calls on Android?
Yes, recording phone calls on Android can be legal, but it depends on the laws in your location. Most countries require everyone on the phone call to agree to be recorded. So, you need to get permission from all participants before recording the conversation.
Q4. How do I transfer audio recordings from my Android device to a computer?
There are multiple methods to transfer your recordings from mobile to PC for storage and backup. One such method is directly sharing the file through a messaging application or Bluetooth. Other than that, you can utilize a USB to transfer audio content to your computer. Also, users can upload the recordings to a cloud storage service like Google Drive or Dropbox.
Q5. Can I record audio in the background while using other apps on Android?
Yes, you can make use of third-party tools like Easy Voice Recorder to capture sound while using other applications. Such tools will continue the recording session in the background, allowing you to continue using different apps. However, the built-in voice recorder in Android devices doesn’t provide this functionality to users.
Q6. How do I edit an audio recording on my Android device?
To edit or trim the recorded audio, you need to download audio editors from the Google Play Store for an optimized process. There are many options available for Android users, including BandLab and Super Sound. You can import the recorded audio content to any of these tools to apply the desired sound effects for the best quality output.
Q7. What formats can audio recordings be saved in on Android?
You can use third-party applications to record audio content in any desired format, such as WAV, MP3, and more. However, the built-in recorder in your Android device mainly saves the recorded audio in M4A and AAC format.
Q8. How do I share an audio recording from my Android device?
Using the recorder application to directly share the audio file is the best way to perform this file-sharing process. For this purpose, you need to locate the recording you want to share from the “Recordings” tab. Then, long-press the desired audio file to access the share feature. Finally, users can choose the best sharing method from options, including messaging apps, Bluetooth, and email.
Q9. Are there any limitations to recording audio on Android?
Yes, there are some limitations to recording audio on Android devices, including the absence of background recording with the built-in recorder. You may also face storage space limitations while recording audio in high-quality formats like WAV.
Q10. How do I delete an audio recording on my Android device?
After accessing the “Recordings” tab within the audio recorder, you need to long-press the desired file to access a new set of settings. From here, you can tap on the “Delete” icon to remove the recorded audio file from your device. However, these steps may vary a bit from app to app, so perform this function according to the tool you used for recording audio.
Conclusion
Upon reading this article, you are now familiar with the best methods and tools to record audio content on Android phones. Whether you decide to use a built-in recorder or third-party tools, make sure to follow the tips mentioned in this article.
Moreover, professionals who need studio-level audio output should consider an external microphone like Hollyland Lark Max. With its MaxTimbre technology and long-battery timing, this mic is the best for lengthy recording sessions.