.png)
The use of audio in your video editing can be an excellent way of enhancing the overall quality and impact of your video. You can use a variety of audio effects to change or modify the frequency ranges of any given audio clip, merging it with your video to make it more enjoyable to watch. In addition, these effects may also produce a certain degree of depth within your video, making it immersive and more realistic.
Moreover, using specific types of audio can also help create or exude a specific type of atmosphere or feeling. For instance, editing a reverb track in your video can give it more panache, stimulating particular sounds associated with, let’s say, a concert hall, adding way more space and depth, making what is portrayed in the video more believable.
Why CapCut Has Become the Go-To Video Editing App in Recent Times
CapCut is a pretty flexible and easy-to-use online video editing app that has recently blown up. It’s staggering to know that the app has up to 200 million active users every month, throughout the world. The editing tool was created by none other than Bytedance, which is also a subsidiary of TikTok and other equally renowned applications. CapCut provides a wealth of easy-to-use video editing tools and features, making it simple for users to create professional videos. In light of this, let’s briefly take a look at some of its most important features:
It’s Free: Anybody Can Use It
One of the most incredible things about CapCut, given the sheer number of features it offers, is the fact that it’s free to use. Anybody, anywhere in the world can access the app and create amazing videos. Unlike a slew of different online video editing tools and software, most of which require the user to subscribe to the app or contend with hidden fees, CapCut enables people to freely use the app without posing any financial barriers. The app’s commitment to accessibility and ease of use transcends affordability as it provides users with an incredibly simple interface designed to accommodate the needs of both beginners and expert editors.
A Simple Yet Intuitive Interface
CapCut is also hugely different than other video editing tools because of its comprehensive collection of features, especially its zero learning curve user interface. Moreover, while many online editing platforms do offer somewhat similar features, what’s different about CapCut is that it offers a combination of features and tools users can combine to make great videos. For example, the platform is immensely popular for its multi-layer editing tool, enabling users to seamlessly overlay their images, multimedia files, videos, and text, producing excellent compositions. This is why CapCut is so popular amongst users in contrast to other tools, which essentially limit your creative freedom.
A Wealth of Editing Tools
CapCut offers a variety of flexible and easy-to-use features, helping users easily optimize their video editing experience. Let’s take a look at some of them.
Video Trimming and Splitting
You can accurately cut and split your videos using CapCut. This can be excellent if you want to do away with any unimportant sections or produce crisp transitions between different video clips.
Multi-Layer Editing
With the platform’s multi-layer editing tool, you can easily overlay your text, audio, and video files, making in-depth and aesthetically pleasing compositions.
Variety of Effects and Video Filters
The platform also provides a slew of different video templates, effects, and filters, all of which can be seamlessly modified or adjusted, allowing you to optimize the visual properties of your videos. In addition, you’ll also be able to choose from a variety of color grading options, styles, formats, and creative effects.
Now that you know all about CapCut and why it can be a wonderful option for users to create and edit beautiful and impactful videos, let’s get into the main section of the tutorial, which shows how users can move audio in CapCut.
The Prerequisites
Download CapCut and install the app on your device
Before doing anything else, download and install the CapCut on your desktop or Mac. You can even download it on your phone for editing videos on the go.
Prepare the video and audio files you want to edit
Before beginning the editing process, first, make sure to import your audio file to CapCut. You can do that by clicking on the “import” button on the interface or dragging the file directly. You can also choose different types of audio files from within the platform itself.
A Basic understanding of video editing concepts is helpful
Using CapCut is quite straightforward, however, understanding the basics of video editing can be a big plus if you’re a beginner. Understand that the editing process can be quite lengthy and a bit perplexing if you don’t have the fundamental concepts nailed down. For example, to produce a brilliant video, you need to ensure that you have enough of it.
The video coverage should be plentiful so that you have enough to work with and won’t run the risk of having to reshoot the footage. Similarly, you should always create a mental image of what your project will look and sound like. It doesn’t have to be overly complex, you just need to outline all the points you are planning to make in the video, the type of environment you want the video to be set in, the type of audio you want to use, etc.
Step by Step to Move Audio in CapCut
Opening the Project
Launch the CapCut app.
After you download and install CapCut, launch the app on your device and start editing.
Tap the “+” icon to create a new project.
To add/import a video file or to simply start a new project, click on the “New Project” button on the interface, choose the file you wish to edit, and import on onto the platform. You can also select different types of aspect ratios in line with your video – for example, you can create a TikTok video, Instagram video, etc.
Adding Audio
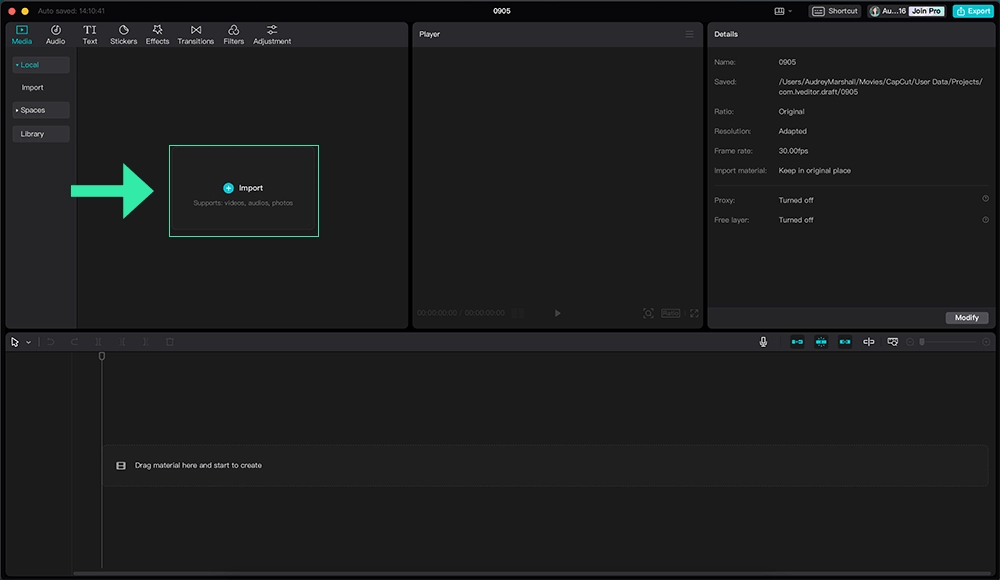
It’s very easy to add an audio file on CapCut. All you need to do is click on the “Import” tab on the interface select any audio file on your device and transfer it on CapCut. In addition, you can simultaneously add video and audio files via the same tab, as shown in the image above.
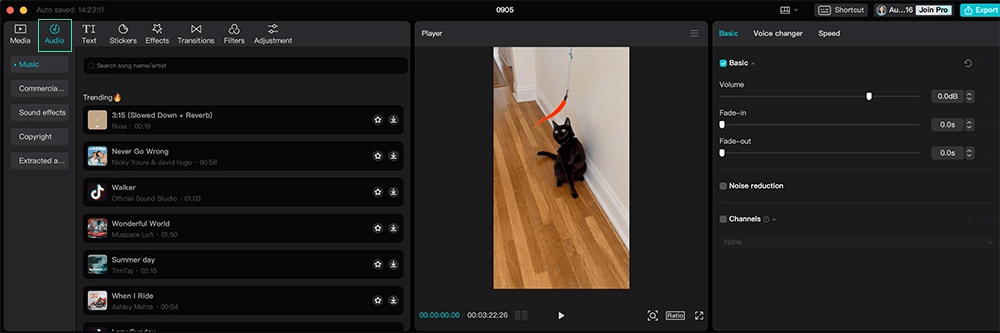
However, you can also choose to select audio files directly from CapCut’s library by clicking on the “Audio” tab. Then just drag the audio file on the video edit timeline and you’re set!
Moving the Audio
Tap on the audio clip on the timeline.
After you import your audio file and drag it on the video editor, which is in the form of the wavelength, you can edit the sound clip on the same timeline as well.
Long-press and hold the audio clip.
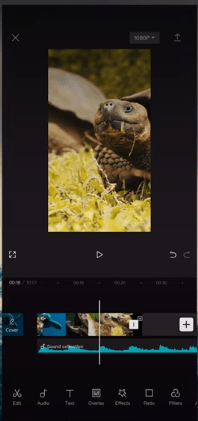
Make sure that you can see the video editing options, such as Edit, Audio, Text, etc. as shown in the image above. Then just tap and hold on to the audio clip and you’ll be able to move the wavelength (the audio) in any desired position in the timeline.
Fine-Tuning the Audio
Tap On The Audio Clip To Reveal Editing Options
One of the best things about CapCut is the fact that it offers a comprehensive array of video editing options you can use to add a variety of visually appealing effects and transformations to make your video look more attractive and profound. To access these editing tools, just click on the audio clip and a panel of options will open below it, revealing different editing options.
Using these options you can conduct a variety of audio editing processes, such as:
Trimming the Beginning And End of the Audio Clip
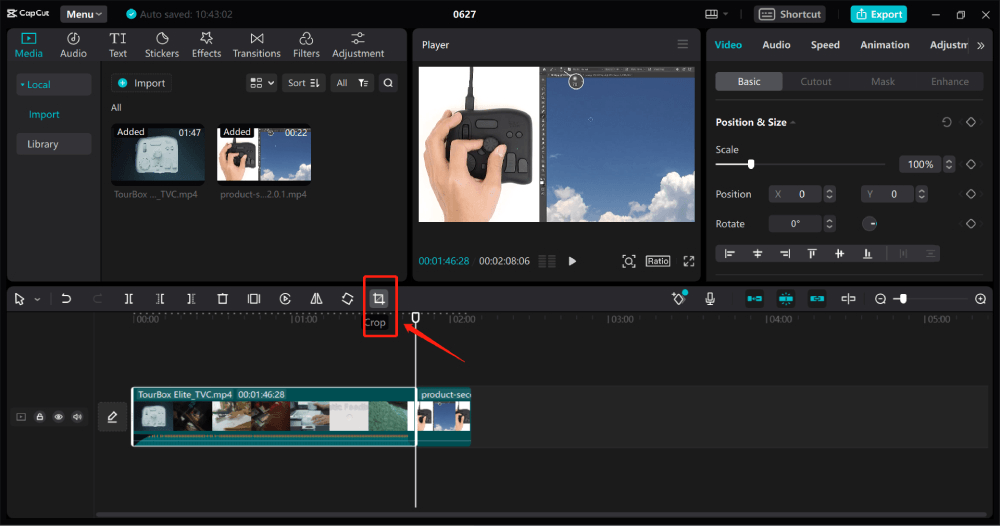
This is a simple way to either shorten the audio clip or remove any unwanted sounds from the video. After you import your desired audio file into the editing timeline, you’ll be able to move the wavelength in either direction, as shown in the image below.
Using the white vertical line, you can move the bar backward or forwards. To crop any part of the audio, just click on the square symbol on the option bar above the vertical line as shown in the image.
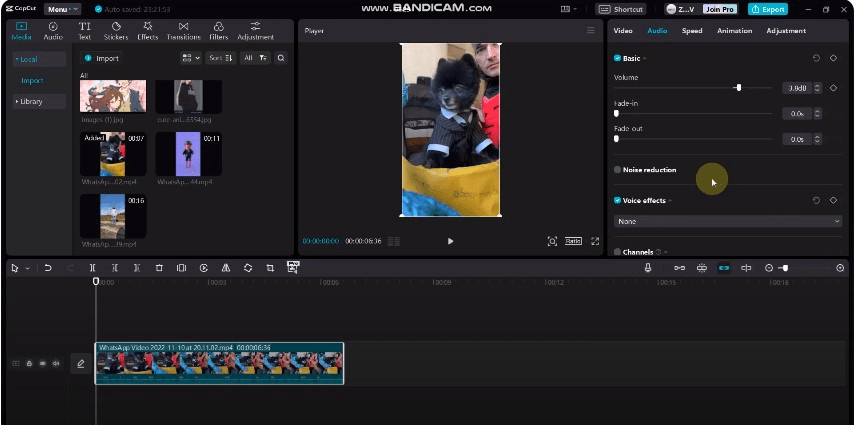
Adjusting the Volume
Adjusting the volume of your audio clip is also easy. All you have to do is click on the audio clip that you’re editing. After clicking it, you’ll be able to see a new box open on the top right hand of the screen displaying several audio options such as volume, fade-in, fade-out, noise reduction, and much more.
Add Fade-In and Fade-Out Effects
Audio fades are typically used to transition audio clips making them more immersive. Using the fade-in option will start the video in silence and then abruptly increase the volume as the video progresses. Fade-outs do the opposite, starting the video at full volume and then gradually becoming silent towards the end. You can adjust both settings in CapCut by following the steps mentioned above.
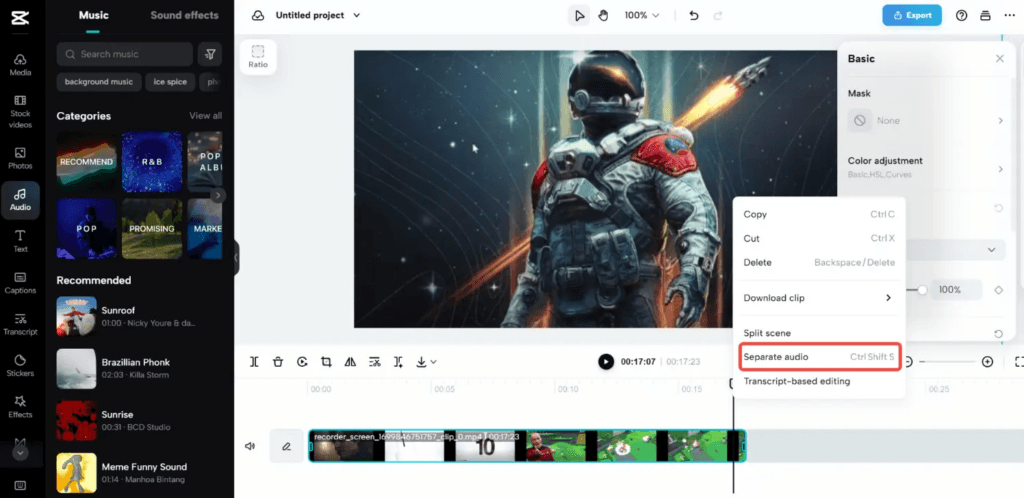
Split the Audio Clip into Multiple Parts
Another pretty cool feature of CapCut is that you can effectively split your audio clip into multiple parts spread throughout the timeline when you’re editing the video. After you drag your audio clip to the timeline section, right-click on the clip and select “Separate Audio” in the drop-down menu. You’ll immediately see that your audio has split into different sections. You can also choose different parts of the audio clip you want to split as well.
Saving the Project
Here’s how to save your project on your device.
Tap on the “Export” Button.
After you’re done editing your video, you can save your project by clicking on the “Export” tab on the top right-hand corner of the page.
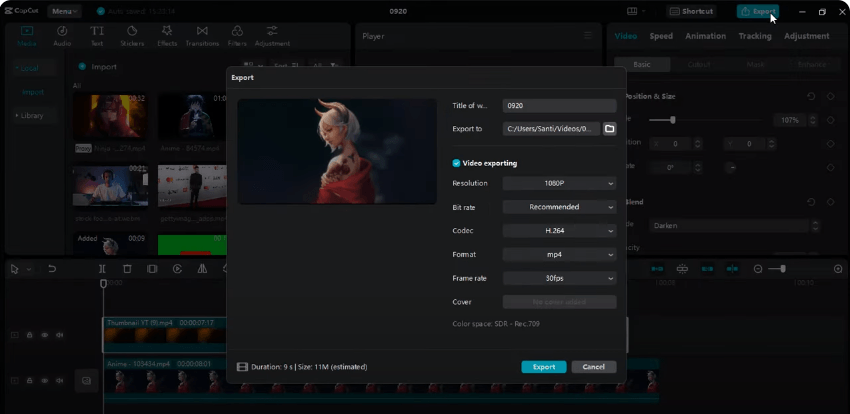
Choose the Desired Video Resolution and Frame Rate
After you click “Export”, a new menu will open where you’ll be able to add the finishing touches to your project. For example, you’ll be able to change the video resolution and frame rate of the video, rename the project, select the destination folder where you want to save the file, change the format of the audio or video file, etc.
Tap on “Export” to Save the Edited Video with the Moved Audio
Finally, when you’re done making the final touches, just click on the “Export” tab on the bottom of the menu, saving the video you’ve just added your audio to.
Additional Tips
You Can Move Multiple Audio Clips At The Same Time
Another interesting thing about CapCut is that you can also move different audio clips within the video and edit them at the same time. To do this, select the audio clip you’re editing on the timeline. Then, click on “Import” and while holding the Ctrl key, select different audio files from your device and import them to the platform. Or you could click on “Audio” and select multiple audio files provided by CapCut.
You Can Use Keyframes To Create Precise Audio Transitions
You can also use keyframes in CapCut to make crisp and immersive transitions in your video, modifying different elements in the timeline to make the video more impactful. For example, you can add a zooming effect to your video by selecting the video in the timeline and clicking on the keyframe button that looks like a diamond. Then, choose a point of zoom and edit the necessary modifications such as cropping or resizing the video.
FAQs
How can I move only a specific part of the audio clip?
To move a specific part of an audio clip, you’ll need to separate the audio from the video. After you import your clip on the timeline, select the clip and right-click on it. Then select “Separate Audio”, isolating the clip. You can then drag a specific part of the audio anywhere in the video.
How can I adjust the audio speed?
CapCut has a built-in audio speed adjustment option you can use to modify the pitch and speed of your audio and video. To do that, drag your project into the editor timeline and click on “Speed” on the menu in the top right-hand corner. You’ll be able to select different settings such as trims, duration, voice tone, etc.
Can I sync the audio with the video actions?
Yes, you can. To do that, you’ll need to first select an audio clip and drag it to the editing timeline. Then, click on “Auto Beat” on the timeline menu and select any beat you want. Then add a video to the timeline and cut different segments of the video to match the beats of the audio clip.
Conclusion
Moving audio in CapCut is a simple process. By following the steps outlined in this tutorial, you can easily add and adjust audio to your videos, creating more engaging and impactful content.
Having clear and high-quality audio from the start makes your editing workflow in CapCut much smoother. Consider using a wireless lavalier microphone; it’s ideal for capturing crisp audio, ensuring seamless edits and easier manipulation of sound within your video projects.