.png)
If you are wondering what image overlay is and how you can use it in filmmaking, think of it as a simple creative technique. You place one visual, like a video clip, graphic, or texture, on top of another to add style or meaning.By stacking these layers and adjusting their opacity or blend modes, filmmakers can create a composite image that combines the visual information of both sources into a single frame.

While most beginners associate overlays strictly with editing skills, professional filmmakers use them in two distinct environments:
- Artistic (Post-Production): In post-production, editors use image overlays for creative touches. They place things like film grain, light leaks, or logos on a video layer above your main footage. This helps them add texture, depth, or even branding without much effort.
- Technical (On-Set Monitoring): As a director or cinematographer, you can use external monitors with overlay features to make your job easier. You ghost a previous take over the live shot to keep things consistent. Or, use frame guides to line up your composition more accurately.
Type 1: Using Image Overlays in Post-Production (Editing)
When you’re editing, image overlays are mostly used to make videos look more creative and clean. Most modern digital cameras produce images that are clinically sharp and clean. Even if the footage looks technically flawless, it can sometimes feel a bit lifeless.
Filmmakers use overlays to reintroduce organic imperfections, add stylistic lighting, or insert essential branding elements. Below are the three most common categories of post-production overlays and how to apply them.
Texture Overlays: Creating the “Film Look”

Texture overlays are used to intentionally degrade the footage to mimic the aesthetic of analog film.
- Film Grain: Digital sensors do not have grain; they have noise. Overlaying scanned 16mm or 35mm film grain adds a pleasing, organic texture that “glues” your edit together.
- Dust and Scratches: These mimic the physical wear and tear of a film reel. They are excellent for flashback sequences, horror films, or vintage-style music videos.
Light Effects: Leaks and Flares

Light overlays add depth and dynamism to a flat shot.
- Light Leaks: These occur when light accidentally hits film stock. In digital editing, they are often used as transitions. A bright flash of orange or red light can easily cover up a cut between two very different clips.
- Lens Flares & Bokeh: If you are shooting against a flat background, overlaying out-of-focus light elements (bokeh) in the foreground creates an illusion of depth and complexity.
Graphics: Logos and Lower Thirds

Unlike textures, which usually cover the whole screen, graphic overlays provide specific information.Alpha Channels: Most graphic overlays (like a YouTuber’s “Subscribe” button or a documentary Lower Third) are exported as PNGs or ProRes 4444 files. These formats contain an Alpha Channel, meaning the background is already transparent. You simply place them on the top video track, and no blending effects are required.
Mastering Blend Modes

If your overlay isn’t a transparent PNG, like a film grain clip that looks like grey noise or a light leak on black, you’ll need to use Blend Modes to make it work.
Blend modes tell your editing software how to mix the pixels of the top layer (the overlay) with the bottom layer (your footage). Choosing the wrong mode will result in a muddy image or a black screen.
Here is a quick reference guide to the essential blend modes for filmmakers:
| Blend Mode | How It Works | Best Used For |
|---|---|---|
| Screen | Removes Black. It keeps only the bright pixels of the overlay and makes the dark pixels transparent. | Light Leaks, Fire, Sparks, Lens Flares. (Any effect filmed against a black background). |
| Multiply | Removes White. It keeps the dark pixels and makes the bright pixels transparent. | Paper Textures, Ink Spills, Grunge. (Great for mixed-media collages). |
| Overlay / Soft Light | Adds Contrast. It mixes the layers to brighten the highlights and darken the shadows while applying the texture. | Film Grain, Noise, Subtle Textures. (Soft Light is a gentler version of Overlay). |
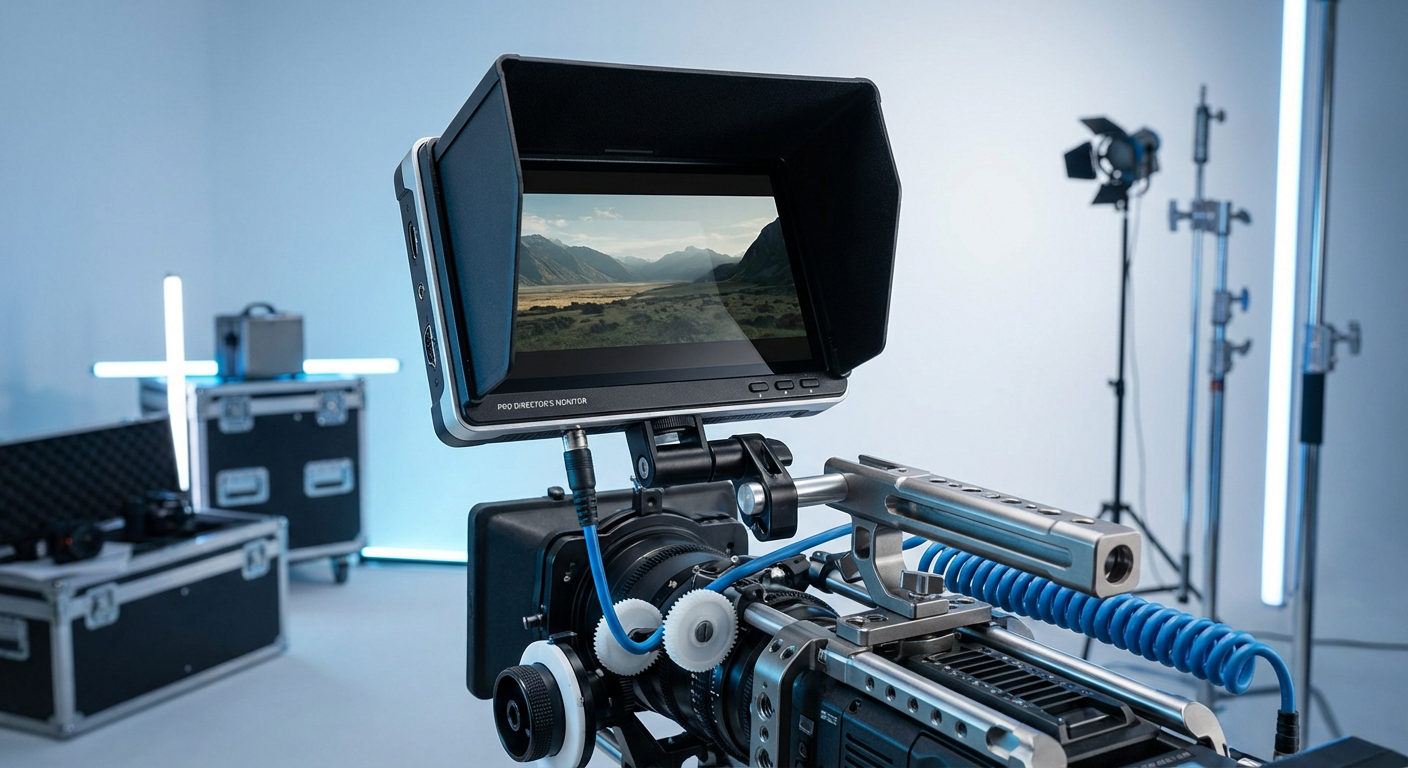
Type 2: Using Image Overlays On-Set (Monitoring & Continuity)
While post-production overlays focus on aesthetics, professional filmmakers rely on technical overlays during the actual shoot. When you’re on set, overlays aren’t just for looking cool. They help you make sure everything is accurate, flows smoothly, and looks balanced.
Using overlays on your field monitor allows the Director of Photography (DP) and Director to visualize the final output before the camera even rolls, saving hours of frustration in the editing room.
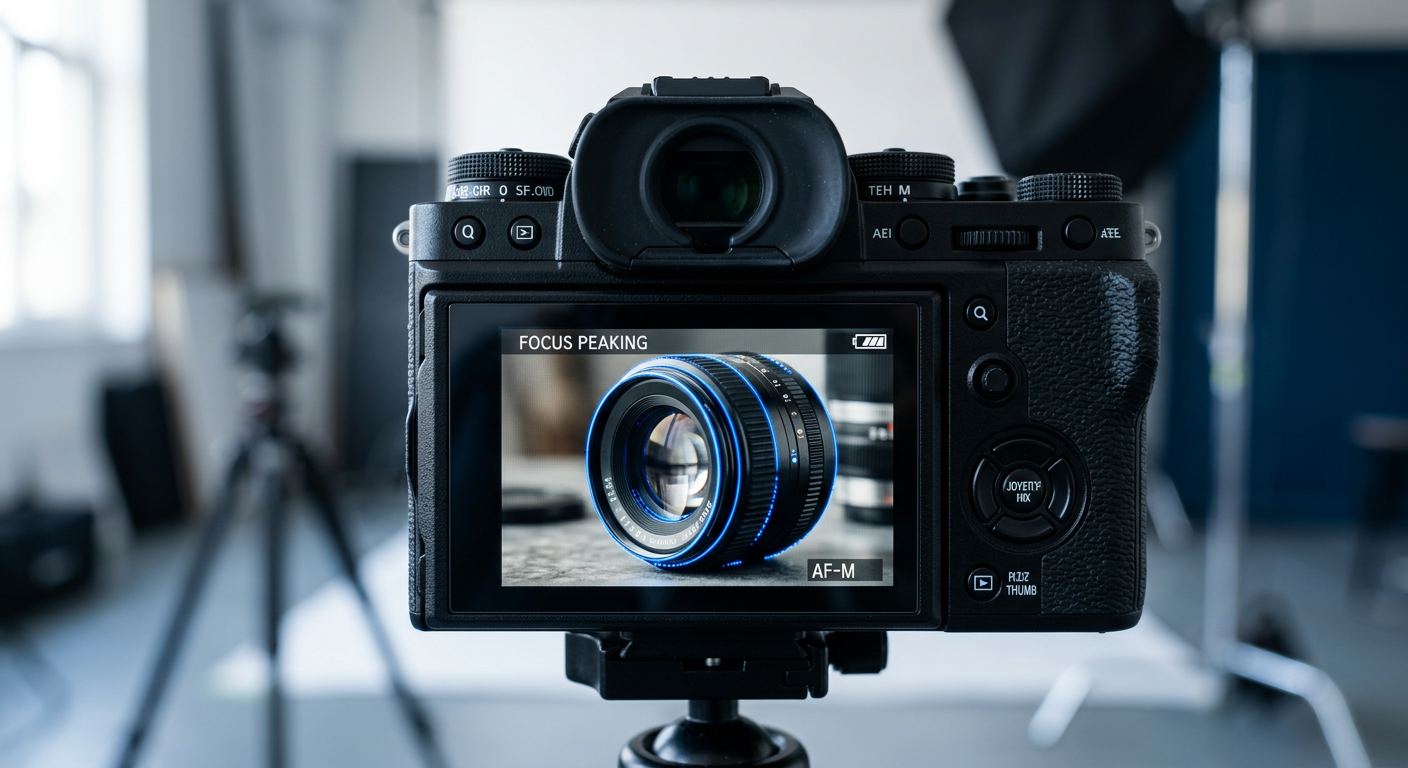
Ensuring Continuity with “Ghosting” (Onion Skinning)

One of the most powerful uses of image overlay on-set is Ghosting (also known as Onion Skinning). This feature lets you grab a still frame from an earlier shot and overlay it on your live camera feed at about half opacity (around 50%).
It’s useful for helping you with:
- Stop Motion Animation: Ensuring the subject moves the exact distance required between frames.
- Match Cuts: Aligning an actor’s eyes or a prop in the exact same screen position as the previous scene to create a seamless transition.
- Reshoots: If you are returning to a location days later, a ghost overlay ensures you match the exact camera angle and focal length of the original footage.
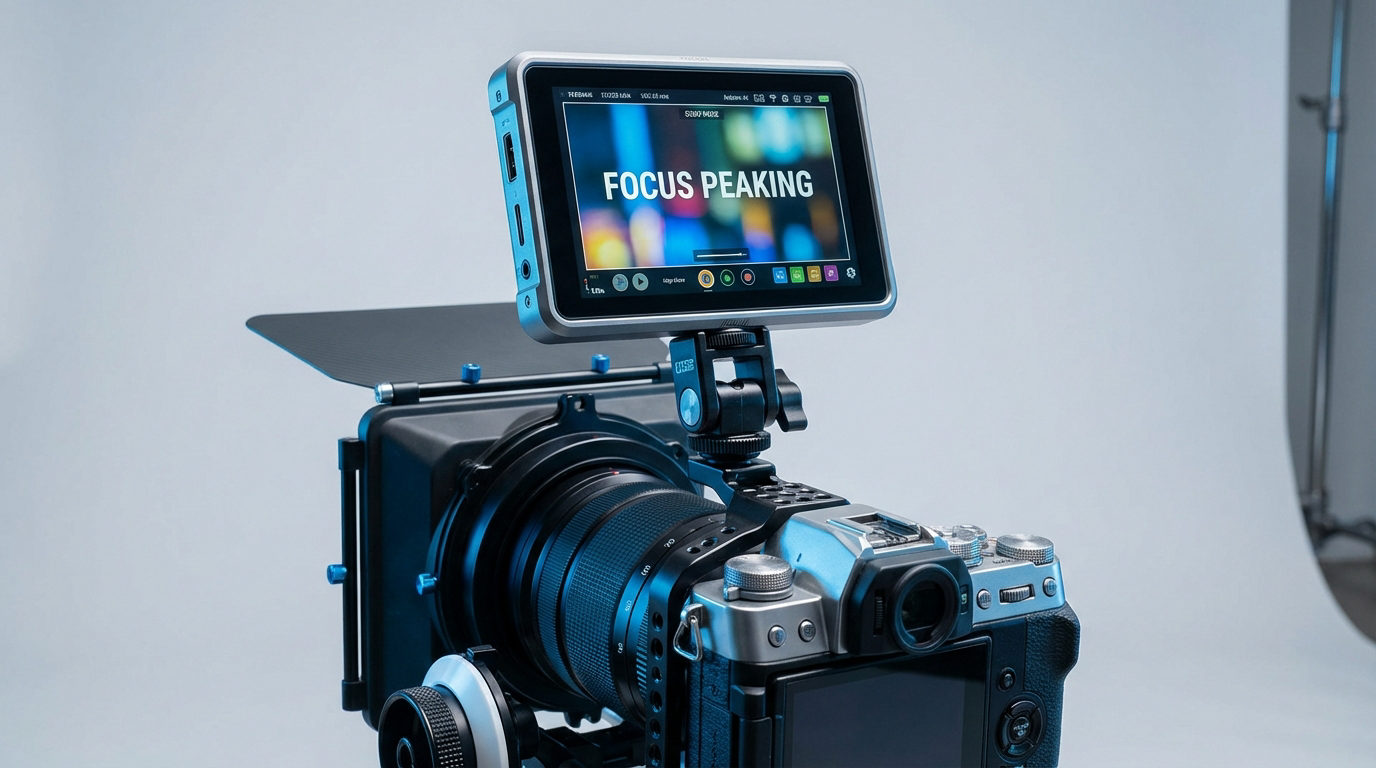
Framing for Multiple Platforms (Aspect Ratio Overlays)

In modern production, one video often has to fit YouTube (16:9), Instagram Reels (9:16), and a website header (21:9). As you noticed that each aspect ratio is different, so shooting without some visual guides can make it challenging to get everything to look right.
Aspect Ratio Overlays place semi-transparent black bars or guide lines over your monitor’s image. This helps the camera operator frame the subject perfectly for the main format. It also ensures nothing gets cut off when the video is cropped for vertical social media posts.
Wireless Monitoring and Overlay Integration

To effectively use these tools, the crew needs to see them in real-time without being tethered to the camera. This is where a robust wireless video transmission workflow becomes the backbone of the production.
So, if you’re looking for smooth on-set monitoring and communication, the Hollyland Pyro 5 is a proven boon for professional crews and for pretty solid reasons!

Hollyland Pyro 5 - 5.5” Portable Camera Monitor
A 5.5-inch camera monitor that combines a transmitter, receiver, and high-brightness touchscreen into one unit.
Key Features: 5.5 Inches & 1500 Nits | 1 TX & 4 RX | 400m LOS Range | SDI & HDMI | Dual-Band | Camera Control
- It’s a 3-in-1 device that works as a monitor, transmitter, and receiver (no swapping of gears). It gives directors and focus pullers direct access to live camera feeds.
- Using this external wireless transceiver on a sunny day is no issue. Thanks to its 1500 nits of brightness, which keeps the screen clear and easy to view.
- It functions effortlessly with the entire Pyro ecosystem, including Pyro S, Pyro H, and Pyro 7.
More importantly, this device supports 3D LUT overlays and professional monitoring tools. You can apply a specific color look (LUT) to the monitor feed to preview the final color grade, or toggle frame guides on and off wirelessly. This helps everyone on set, from the lighting crew to the script supervisor, see the image that matches your creative vision before you start filming. That way, everyone knows the look and feel you’re going for and can make it happen.
Step-by-Step: How to Add an Image Overlay in Your Editor
Compositing works the same way, no matter if you’re using Adobe Premiere Pro, DaVinci Resolve, or Final Cut Pro. You place different layers on top of each other. And once done, you tell the software how they should appear together.
So let’s check the universal method to apply textures, light leaks, or logos to your footage.
- Import Your Assets
Bring both your primary video footage (the background) and your overlay asset (the texture, grain, or graphic) into your project bin. - Stack the Layers on the Timeline

Drag your main video clip onto Video Track 1 (V1). Next, drag your overlay asset onto Video Track 2 (V2), directly above the clip you want to affect. Think of this like a physical stack of paper; the clip on top covers the clip on the bottom.
- Access the Compositing Controls
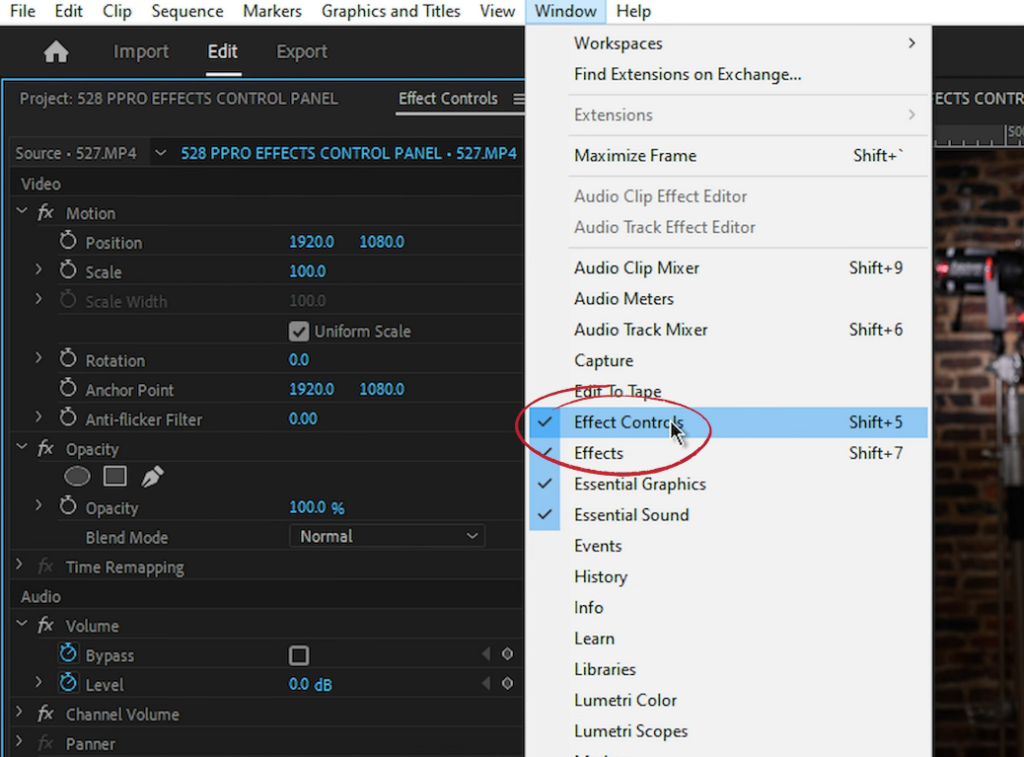
Select the overlay clip on V2. Open your editing software’s effects panel:
- Premiere Pro: Go to the Effect Controls panel.
- DaVinci Resolve: Open the Inspector tab.
- Final Cut Pro: Check the Video Inspector tab.
- Change the Blend Mode

Locate the “Blend Mode” or “Composite Mode” dropdown menu. By default, this is set to “Normal.” Change this based on your asset type (refer to the table in the section above):
- Select Screen for black backgrounds (light leaks).
- Select Multiply for white backgrounds (paper textures).
- Select Overlay for mid-tone textures (grain).
- Adjust Opacity to Taste

Rarely should an effect be left at 100% intensity. Lower the Opacity slider to blend the effect naturally. For film grain, 20–30% opacity is often the “sweet spot” where the texture is felt but not distracting.
Where to Find High-Quality Image Overlays (Free & Paid)
A high-quality overlay blends seamlessly into your footage, while a low-quality one looks like a cheap sticker. Depending on your budget and needs, here are three main sources for sourcing professional overlays.
1. Dedicated VFX Libraries

For the most realistic results, look for libraries specifically designed for filmmakers. Unlike generic stock sites, these platforms often provide ProRes or RAW files with high dynamic range.
- CinePacks & Lens Distortions: Known for authentic 4K light leaks, smoke, and atmospheric fog captured in-camera.
- Tropic Colour: Excellent for film grain scans and vintage textures.
- ActionVFX: The industry standard for explosions, fire, and debris elements (often used in Hollywood productions).
2. Stock Footage Platforms

If you need lots of different effects, like “old tape” glitches or floating dust particles, using a subscription stock site usually gives you the most for your money. You get access to many assets all at once, which makes it easier to find what you need.
- Envato Elements & Motion Array: Great for “all-in-one” subscriptions that include motion graphics templates and overlay packs.
- Storyblocks: Offers a massive library of generic overlays like rain, snow, and bokeh.
- Pexels & Pixabay: Good place to start if you want free stock video overlays. However, not all the videos you find there will be of high quality and resolution. So you will need to spend more time finding the right footage that fulfills your requirements.
3. Create Your Own (DIY)
Sometimes the specific texture you need doesn’t exist yet. You can create custom overlays using tools you likely already own.
- Photoshop/After Effects: Perfect for creating static overlays like binoculars, viewfinders, or grunge borders. Export these as PNGs with a transparent background or black-and-white JPEGs to use with blend modes.
- In-Camera Capture: You can film your own light leaks by “lens whacking” (detaching the lens slightly) or shooting light sources against a dark background. This guarantees your overlay matches the exact camera sensor and noise profile of your main footage.
Pro Tip: Watch Your Resolution
Always ensure your overlay resolution matches your timeline. If you are editing a 4K project, avoid using 1080p overlays. If you try to stretch a 1080p grain or dust clip to fill a 4K frame, it will end up looking blurry and pixelated. That messes with the whole high-quality look you’re going for.
Common Mistakes to Avoid When Using Overlays
Overlays can make your video look great, but using them the wrong way can make it look cheap. If the effects take attention away from the story, people will stop watching
So let’s avoid the following mistakes:
1. Overusing Effects (“The Muddy Look”)
Less is almost always more. A common beginner mistake is stacking multiple film grains, light leaks, and grunge textures on a single clip. This reduces the contrast of your original footage and creates a “muddy,” washed-out image.
- The Fix: Stick to one or two subtle overlays. If you can’t see the subject clearly because of a massive lens flare, reduce the Opacity or change the Blend Mode.
2. Mismatched Frame Rates
If things don’t line up technically in the right way, it can make the scene feel fake and break the attention of your viewers.. If you are editing a cinematic timeline at 24fps but apply a stock footage overlay (like rain or fire) that was rendered at 30fps or 60fps, you will likely introduce “judder” or stuttering.
- The Fix: Always check the frame rate of your assets before importing. If they don’t match, interpret the footage in your NLE to match your timeline, or find assets that are natively compatible.
3. Ignoring Color Space and Workflow Order
If you apply a high-contrast Rec.709 overlay, like a pre-rendered HUD graphic, above a flat LOG footage before color grading, it can look weird and not match the rest of your video. The overlay will look crushed and saturated, while the footage looks gray and flat.
- The Fix: Apply your overlays after your color grade or color space transform (CST). This ensures the overlay interacts with the final, corrected image rather than the raw camera data.
Subtlety is Key
Great filmmaking is all about the little details. Just like bad audio can mess up awesome visuals, having the right tools, like the Hollyland LARK MAX 2, is super important for capturing clear sound.

Hollyland LARK MAX 2 - Premium Wireless Microphone System
A premium wireless microphone for videographers, podcasters, and content creators to capture broadcast-quality sound.
Key Features: Wireless Audio Monitoring | 32-bit Float | Timecode
- Monitor audio wirelessly with the new OWS earphones
- 32-bit Float recording for no distortion, even in loud scenes
- Studio-quality 48kHz/24-bit audio for crystal-clear sound
- Professional ENC noise cancellation to keep the audio clean in any environment
Frequently Asked Questions (FAQ)
What is the best blend mode for removing black backgrounds?
The Screen blend mode is the industry standard for removing black backgrounds. This mode tells your editing software to display only the pixels that are brighter than the layer below it, effectively turning pure black (RGB 0,0,0) transparent. This is essential for using “organic” overlays like light leaks, fire, smoke, or dust.
Can I use image overlays on mobile editing apps?
Yes, most modern mobile video editors support advanced overlay features. Apps like CapCut, VN Video Editor, and LumaFusion allow you to stack multiple video or image tracks.
- In CapCut: Look for the “Overlay” button to add a second layer, then use the “Splice” menu to access blend modes like Filter, Lighten, or Screen.
- In VN: Use the “PIP” (Picture-in-Picture) track to import your overlay assets.
What is the difference between an overlay in photography vs. video?
They are basically the same idea. You stack layers to combine visuals, but the process can be more or less complicated. Photography involves blending static images, while Video requires you to manage duration, frame rates, and motion. For example, if your film grain overlay is only 10 seconds long but your scene is 30 seconds, you must loop the overlay on the timeline to cover the full duration.
Conclusion
Image overlays aren’t just a trend. They add cool effects like film grain or light leaks, and help keep things smooth during filming. Knowing how to use layers, whether in DaVinci Resolve or on location, can make your videos look more professional. For this, you need reliable gear like wireless monitors and good microphones. You can check out Hollyland’s ecosystem of filmmaking tools to enhance the quality of video projects.