.png)
.png) Français
Français .png) Deutsch
Deutsch .png) Italiano
Italiano .png) 日本語
日本語 .png) Português
Português  Español
 If you’ve ever tried to find the microphone on your Lenovo laptop when you go to join a video call or record audio, you’re not alone. The location of the built-in microphone can differ between models, making it hard for many people to find it. Knowing where your microphone is can help you troubleshoot sound issues. For example, you can adjust digital settings for better-quality sound or determine if you need an external mic for a clearer audio recording.
This guide explains the various locations where Lenovo usually places its microphones, how to locate yours, and how to adjust or enhance your laptop’s audio performance if necessary.
Common Locations of the Microphone on Lenovo Laptops
The microphone placement in Lenovo laptops may vary a little based on the actual model and its design. The different locations of the microphone on a Lenovo laptop are:
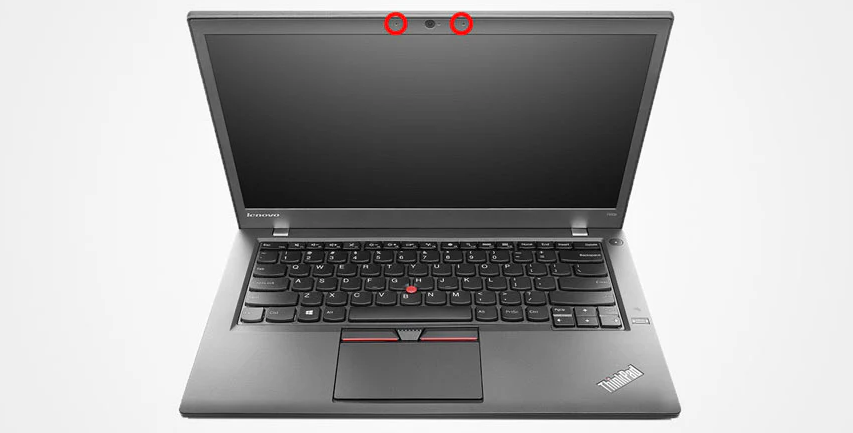
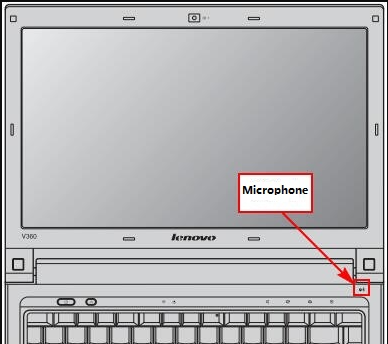
Near the Webcam (Most Common Location)
The microphone is generally built into the region around the webcam on most Lenovo laptops. This position is common because the microphone can easily pick up audio when the user is on a video call or recording. The microphone will be either a pinhole or a tiny dot appearing close to the webcam. It can be found on either the left or right side of the webcam on several Lenovo ThinkPad devices, such as the ThinkPad X1 Carbon or the ThinkPad T series.
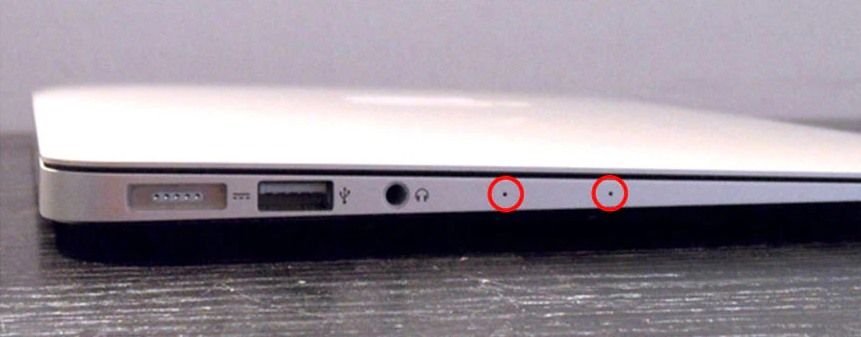
Dual Microphones (Higher-End Models)
Some premium Lenovo laptops for high-performance use have two microphones. These are generally located near the sides of the webcam or along the top edge of the display. Dual microphones improve the quality of audio by improving voice clarity and noise cancellation. For instance, in the Lenovo Yoga series, such as Yoga 9i or Yoga Slim 7, there is often a pair of microphones near the webcam.
Keyboard Area
If you have a Lenovo laptop, especially the IdeaPad series, the microphone is located next to the keyboard. It can be located above the keyboard or be a part of the palm rest region. It’s a less common but valid placement for capturing audio. For example, if you have a Lenovo IdeaPad 3 or IdeaPad 5, the microphone is usually located close to the top edge of the keyboard.
Bottom or Side Edge (Less Common)
The microphone might be located along the bottom edge (or side edges) of the device on older or budget-friendly Lenovo laptops. Look for a very small pinhole or a picture of a microphone symbol, which tells you where the mic is located.
How do you locate the microphone on your Lenovo laptop?
Finding your Lenovo laptop’s microphone is a simple task once you know where to look. Here are the areas where you can find it:
Use a Flashlight
One simple and effective tool for this task is a flashlight. Turn on your phone’s flashlight or a small handheld one. Place your laptop so the light shines at an angle across its surface. Look for a small, round hole. It is worth trying to find a microphone and other small ports or sensors on your device. Alternatively, if you still can’t find it, you can check its location in other ways.
Check the User Manual or Lenovo Support
If you are using a special model of your laptop, you can also refer to the user manual. Search for the laptop model manual on Lenovo’s official site. If you do not see it, search for your laptop manual. From Lenovo’s support page, visiting and looking for your laptop’s specifications will help you confirm where your microphone is located.
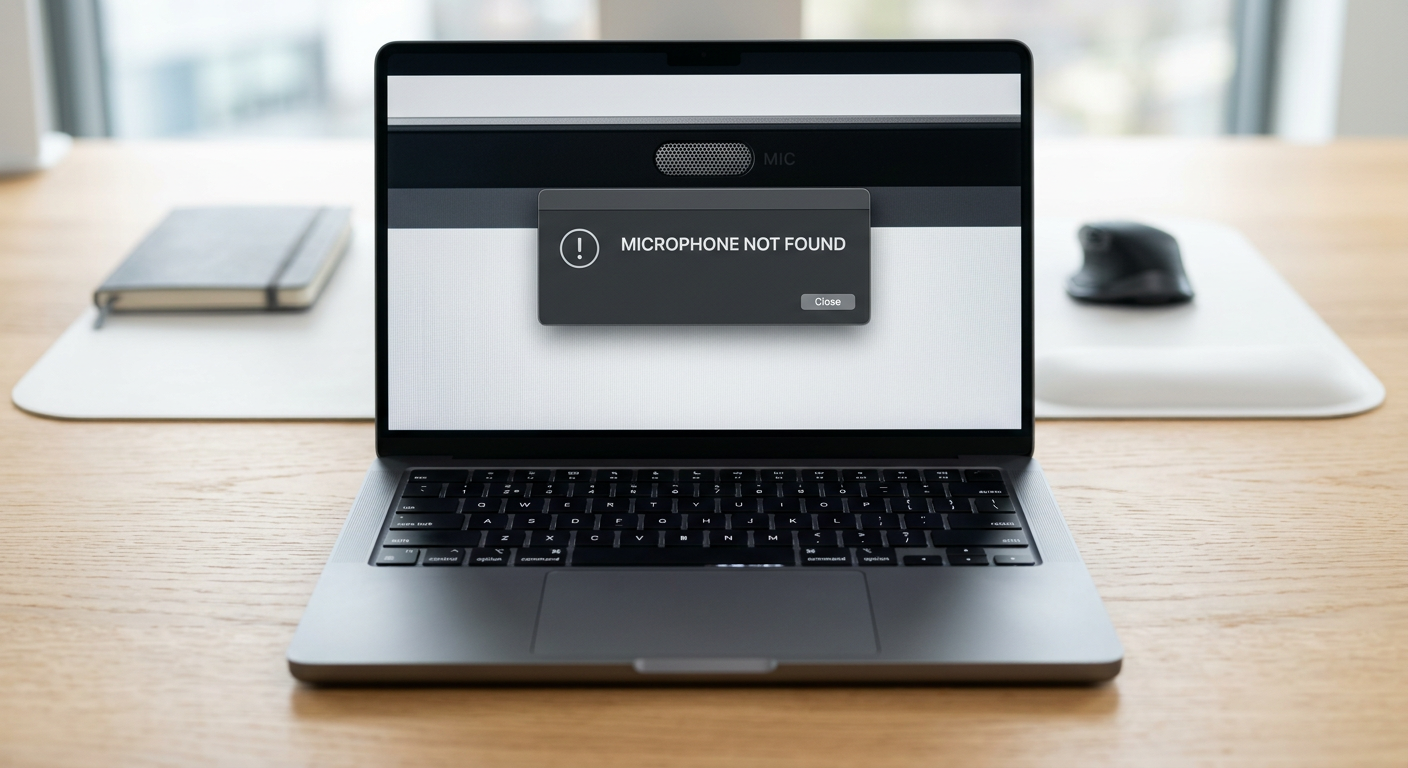
Test the Microphone
If you’re unable to identify the microphone just by sight, you can test whether it’s in use:
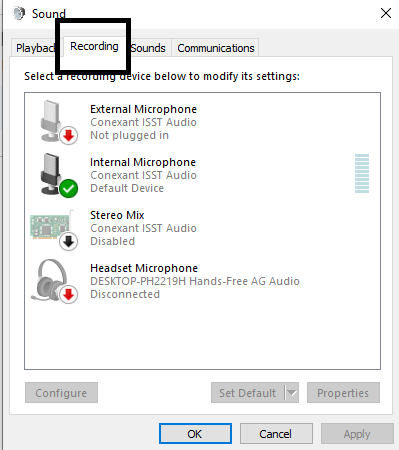
- Open up your laptop’s sound settings. To do so, right-click the speaker icon in the taskbar and click “Sounds.”

- Go to the Recording tab and speak into the microphone. The bars will move if you see them when the microphone is working.

- This will not give you a precise location, but it will confirm to you that the microphone is active and working.
Adjust Microphone Settings for Better Performance
Making microphone adjustments on your Lenovo laptop can significantly improve the quality of phone calls, recordings, and voice commands. Follow these steps to use the proper settings for your microphone:
Access Microphone Settings
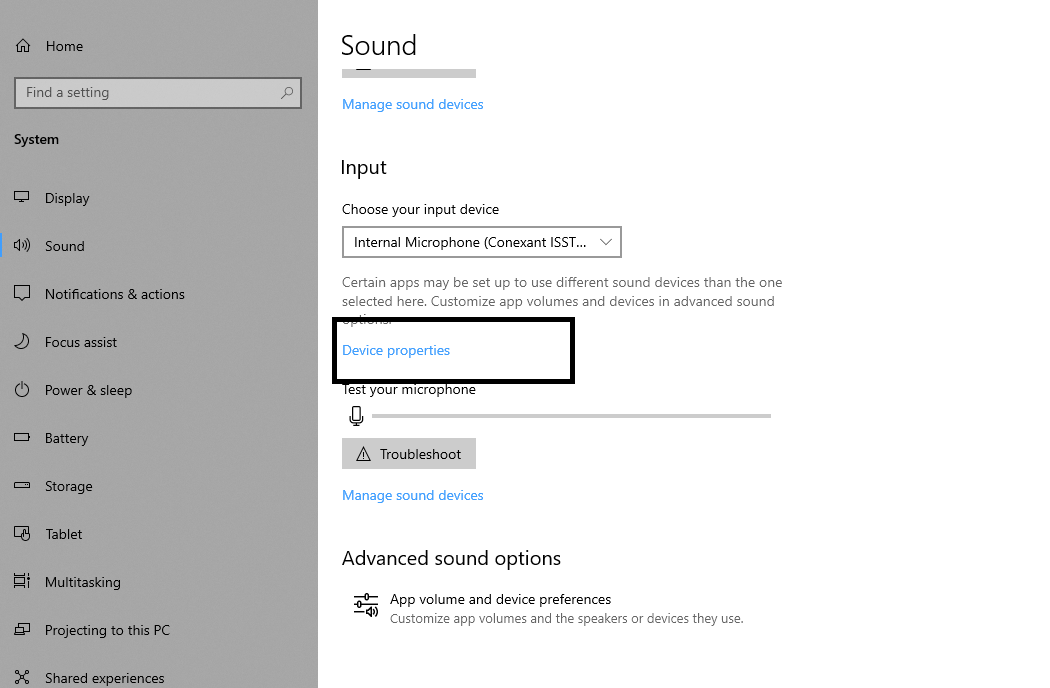
Windows Settings:
- Open Settings (Win + I)
- Go to System > Sound.
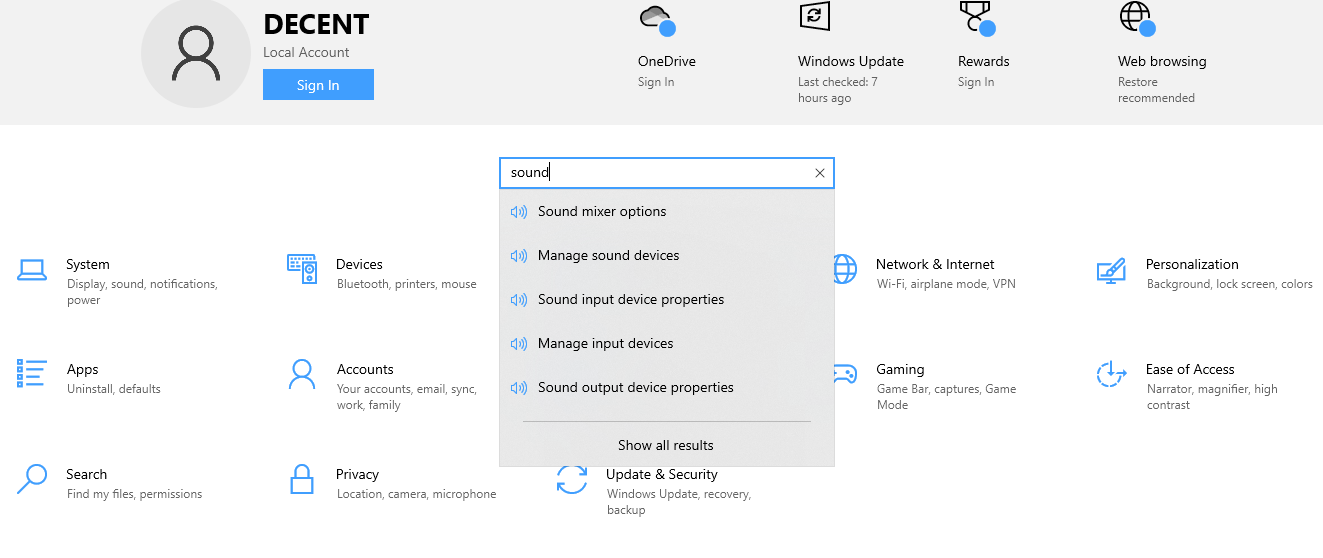
- If you have multiple devices, choose your microphone (under Input). To change settings such as volume and sensitivity, click Device Properties
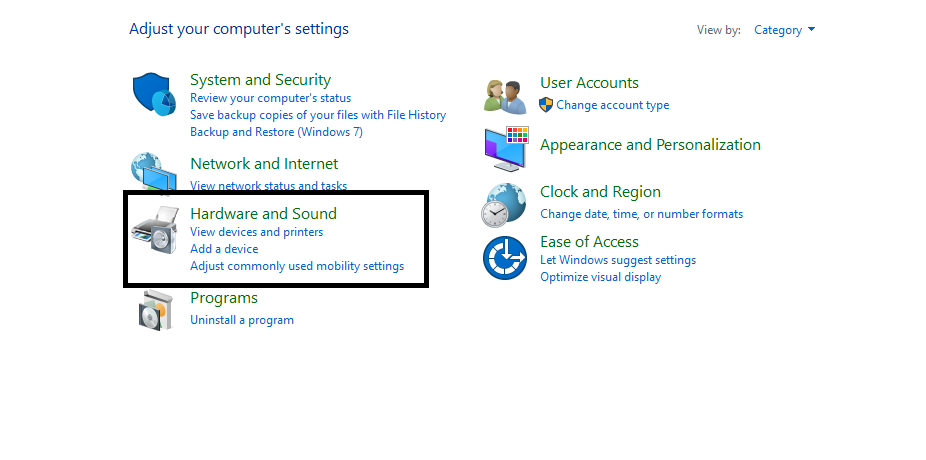
Control Panel:
- Open the Control Panel. Go to Hardware and Sound > Sound.
- Go to the Sound settings.
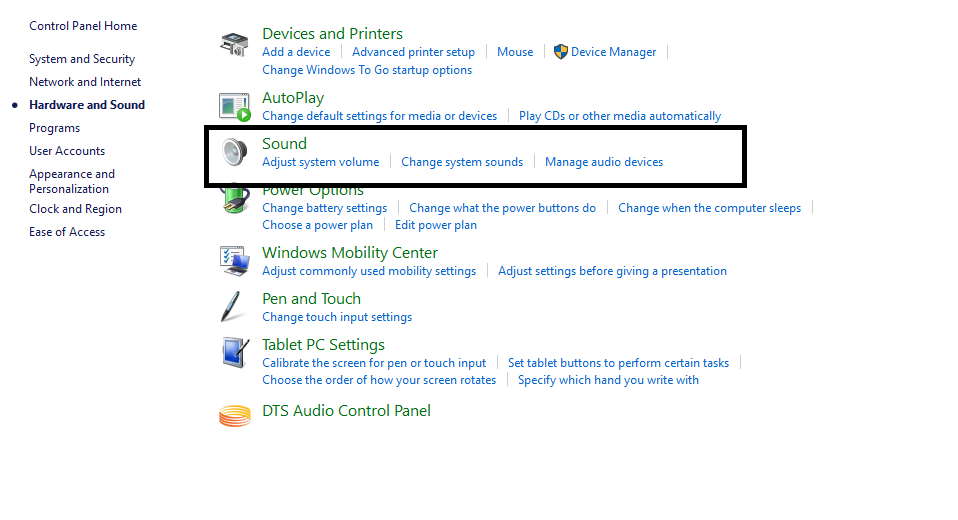
- Go to the Recording tab. Choose the microphone and click on Properties.
- Adjust settings like levels and enhancements.
Enable Microphone Enhancements
- In the Microphone Properties: Go to the Enhancements tab.
- Check options like:
- Noise Cancellation: Sounds that are not music are muted
- Echo cancellation: Reduces echo on calls.
- Beamforming (Hardware dependent): Improves voice clarity
- Click Apply, then OK to save changes.
Test Your Microphone
In the Sound Settings:
- In the Input section, speak into the microphone while observing the input level bar.
- If the bar is moving, your microphone is working. Change the volume and/or effects as needed.
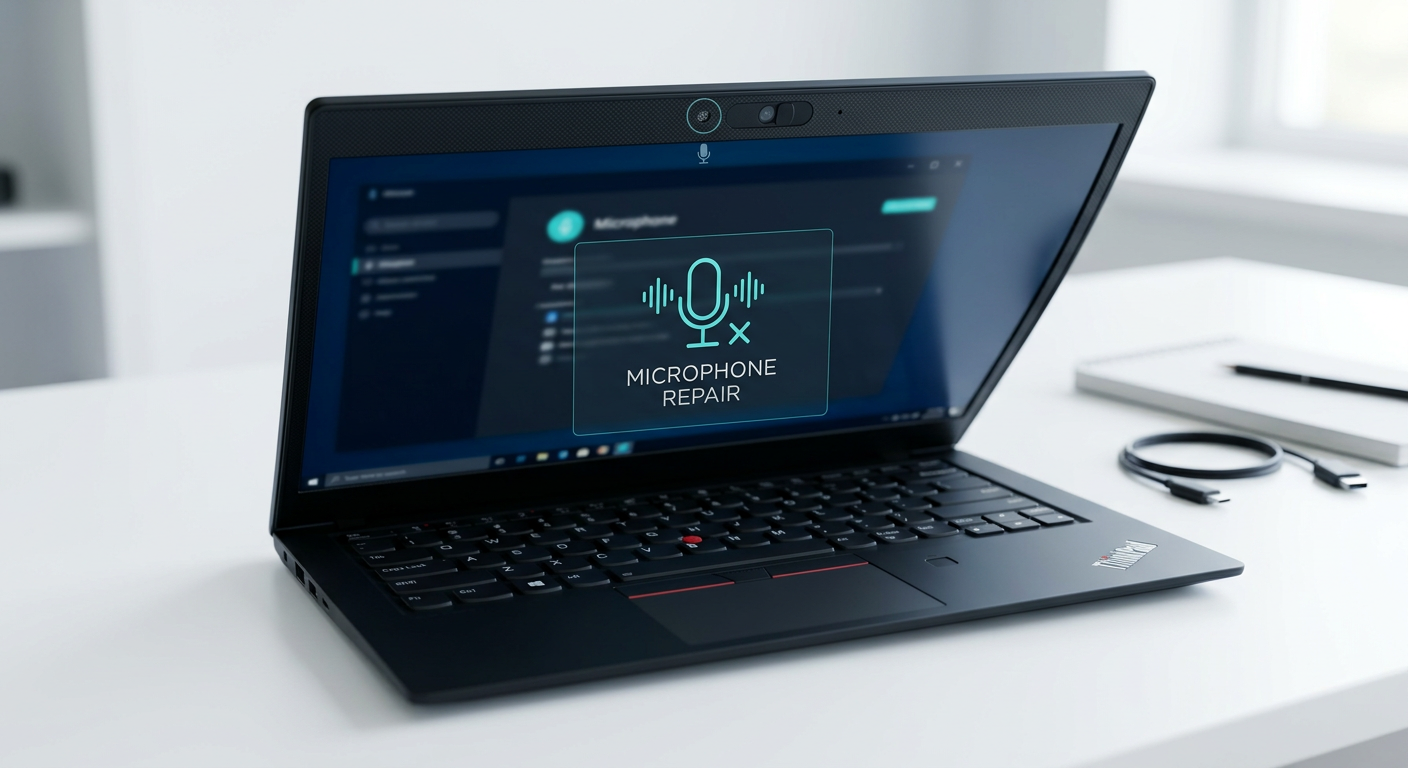
Update Audio Drivers
Outdated drivers can make your microphone not work. To update:
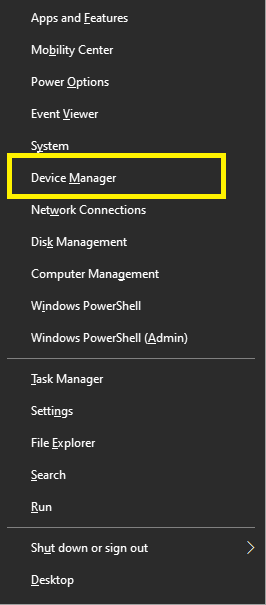
- Press Win + X and click on Device Manager.
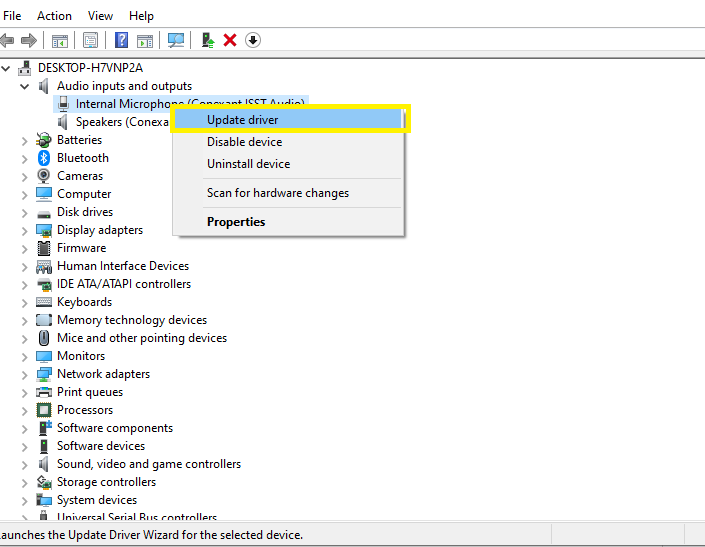
- Click on Audio inputs and outputs.

- Right-click the microphone and select Update Driver.
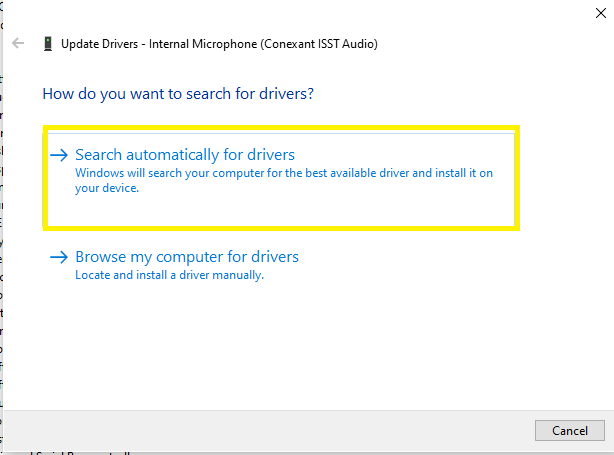
- Choose search automatically for drivers.
- After updating, restart your laptop.
Use Lenovo Vantage (Optional)
Lenovo Vantage is a utility for Lenovo laptops that can allow you to optimize your hardware settings:
- If Lenovo Vantage is not pre-installed, download it from the Microsoft Store and install it.
- Use the app to go to Hardware Settings> Audio.
- Make sure there are no settings related specifically to the microphone or updates available.
Adjust App-Specific Settings
Some apps (like Zoom, Teams, or Discord) have their own mic settings:
- Go to the app in its Audio or Settings menu.
- Pick the right mic and set the input volume or noise suppression settings.
External Microphones for Better Audio Quality
Built-in microphones are great for occasional use, but they usually don’t have the clarity and features needed for your professional audio streams and essential calls. If you want a more powerful sound with better noise cancellation, an external microphone is the best. One good choice is the Hollyland Lark M2S.

Hollyland LARK M2S - Wireless Hidden Microphone
An ultra-discreet wireless microphone featuring a clip-on transmitter for an “invisible” fit.
Key Features: No-Logo Fit | Ti+ Design | 48 kHz/24-bit
The Hollyland Lark M2S doesn’t have a logo on it, so you can look sleek and professional with your audio setup on set or at a special event. Its lightweight titanium clip allows anything to be clipped anywhere and has a strong, secure hold on any clothing. This microphone system allows crystal clear sound with little interference.
Conclusion
If you are a Lenovo laptop user, you must learn how to find the microphone on your device so you can troubleshoot and optimize audio performance as needed. It is common for most models to have one or multiple microphones located near the webcam, on the keyboard deck, or on the laptop’s edges.
By performing the steps mentioned above, you can quickly find where your microphone is and set it for the highest sound quality possible with the equipment. To record even better audio, you can use an external microphone like the Hollyland Lark M2S, which offers professional-grade sound.
If you’re aiming to significantly improve your audio clarity for online meetings, presentations, or recordings, investing in a wireless lavalier microphone can be a game-changer. Unlike the built-in microphone on your Lenovo laptop, a compact wireless lavalier mic provides crystal-clear sound quality and greater freedom of movement.
Frequently Asked Questions
How can I find the microphone in a Lenovo?
The edge of your laptop screen may contain a small hole that says “mic” or has a microphone icon. Most built-in microphones live at the top of the screen, especially if a webcam exists nearby.
Where is the microphone on the Lenovo Yoga 7i?
Above the screen, at the center of the screen bezel, is the built-in webcam, along with two microphones on the Lenovo Yoga 7i-15.
Where are microphones on laptops?
You will often see laptop microphones in the following places:
- Both above the screen (next to the webcam) and on either side of the screen,
- Front left or right of the keyboard
- On the sides of the laptop
How do you turn the mic on a Lenovo laptop?
- Right-click the sound icon on your taskbar and select “Recording devices.”
- Right-click on a blank space and check both Show disabled devices and Show disconnected devices.
- Search for “Microphone,” select “Properties,” and confirm that it is enabled (turned on).