.png)
You finish recording, hit playback, and realize your voice is only coming out of the left earbud. It’s a classic frustration, and it is the most common reason creators look up how to convert mono to stereo in Audacity.
But before you start duplicating tracks and sliding pan controls, you need to know which type of stereo you actually need. Most people think they want “Stereo,” but for dialogue, they usually need “Dual Mono.”
Here is the breakdown:
- Mono: A single audio channel. In a raw recording, this is “dead center,” but if exported incorrectly, it often plays through only one speaker (usually the left).
- True Stereo: Two independent channels (Left and Right) with different audio information. This creates width and immersion, which is standard for music.
- Dual Mono: The exact same mono signal duplicated to both the Left and Right channels at equal volume.
The Reality Check:
If you are editing a voiceover, podcast, or YouTube video, you rarely want True Stereo. Creating artificial differences between the left and right channels can make dialogue sound distracting or “phasey.”
What you likely want is Dual Mono—ensuring your voice is heard equally in both ears. The methods below cover how to fix the “left-ear-only” issue (Method 1) and how to create artificial width for creative effects (Methods 2 & 3).
Method 1: The “Dual Mono” Fix (Solving the ‘Left Ear Only’ Problem)
If your recording is only playing out of one side, this is the fix you need.
You aren’t trying to create “3D” depth here; you are simply forcing the exact same audio signal to play identically through both the Left and Right speakers. This is the industry standard for dialogue and interviews.
Follow these steps to balance your audio:
- Import your audio into Audacity.

- Check for “Bad Stereo”: If you see a stereo track (two waveforms) where one side is a flat line (silence), click the track name dropdown menu and select Split Stereo to Mono. Delete the silent track so you are left with one active mono waveform.

- Select the mono track by clicking the empty gray space in the track control panel on the left.
- Duplicate the track by going to Edit > Duplicate or pressing Ctrl + D (Windows) / Cmd + D (Mac). You should now have two identical mono tracks stacked vertically.

- Click the track name dropdown on the top track.
- Select Make Stereo Track from the list.

The Result
Audacity will instantly merge the two mono clips into a single stereo container. When you export the file, your voice will be centered and audible in both ears at equal volume.
Method 2: Creating “Wide” Stereo (The Haas Effect)
While “Dual Mono” makes audio play from both speakers, it doesn’t create depth. If your goal is to make a flat recording sound wide and immersive, you need to use a trick called the Haas Effect.
This technique tricks the brain into perceiving space by playing two identical sounds, with one slightly delayed. It’s perfect for adding richness to intro music or sound effects, though you should use it sparingly on main dialogue.
Step-by-Step: How to Apply the Haas Effect
- Duplicate Your Track:
Select your mono track and press Ctrl+D (Windows) or Cmd+D (Mac). You now have two identical tracks.

- Pan Hard Left and Right:
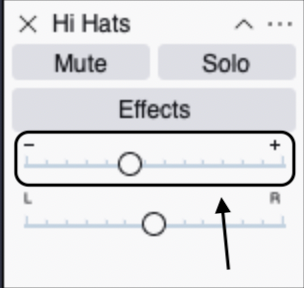
On the control panel to the left of the waveform:
- Set the Pan Slider on the top track to 100% Left.
- Set the Pan Slider on the bottom track to 100% Right.

- Apply the Delay:
You need to delay one of the tracks by 10 to 30 milliseconds.
- Option A (Visual): Zoom in extremely close on the waveform. Select the Time Shift Tool (or grab the clip handle in newer Audacity versions) and drag the bottom track slightly to the right.

- Option B (Precise): Click the start of the bottom track. Go to Generate > Silence and enter 0.020s (20ms). This pushes the audio forward by exactly 20 milliseconds.

- Join the Tracks (Optional):
Click the name of the top track and select Make Stereo Track. They are now locked together as a single wide stereo file.

⚠️ Warning: Watch Out for Phase Cancellation
This method comes with a risk. If the delay aligns the sound waves in opposition (peaks meeting troughs), they will cancel each other out.
- The Symptom: The audio sounds great in stereo headphones but sounds “hollow,” “tinny,” or completely disappears when listened to on a phone speaker.
- The Fix: Always test your mix in Mono before exporting. If the sound vanishes, adjust the delay time by a few milliseconds.
Method 3: Using Audacity Effects for Depth
If Method 1 is too flat but Method 2 feels too spacey, try using Reverb. This technique simulates a physical room, keeping your voice centered while adding “room tone” to the sides.
You aren’t just moving sound left or right; you are placing the listener in a room with the audio.
How to Create “Room Stereo” with Reverb
- Duplicate Your Track: Select your mono track and press Ctrl + D / Cmd + D.

- Isolate the Duplicate: Select only the new bottom track.

- Apply Reverb: Go to Effect > Reverb.

- Configure Settings:
- Room Size: Keep this small (20–40%). You want a “studio booth” feel, not a church.
- Reverberance: Low (20–30%) to avoid a muddy echo.
- Stereo Width: 100%. This is the most important setting—it forces the effect to the far left and right channels.
- Wet Only: Check this box. This ensures the track outputs only the reverb sound, not the original voice.

- Mix the Levels: Lower the volume of the Reverb Track significantly (start around -15dB to -20dB).

The Result: Your original Mono track provides clarity in the center, while the quiet Reverb track fills the empty space on the sides.
Pro Tip: Better Audio Starts at the Source
Audacity is a powerful tool, but relying on software to “fake” stereo width isn’t a magic bullet. Converting mono to stereo using delays can introduce phase issues, causing your audio to sound hollow on smartphones.
The most effective way to achieve a rich, professional sound is to capture high-fidelity audio at the source. If your raw recording is thin, no amount of stereo widening will fix it.
For creators looking to upgrade their input quality, we recommend the Hollyland LARK MAX 2.

Hollyland LARK MAX 2 - Premium Wireless Microphone System
A premium wireless microphone for videographers, podcasters, and content creators to capture broadcast-quality sound.
Key Features: Wireless Audio Monitoring | 32-bit Float | Timecode
Here is why hardware matters more than editing tricks:
- Studio-Quality Capture: The LARK MAX 2 records at 48kHz/24-bit, providing a much richer data profile than standard microphones. This “thick” audio file sits perfectly in a mix—whether you keep it centered or widen it—without sounding artificial.
- 32-bit Float Recording: This feature allows you to capture a massive dynamic range,
- making it virtually impossible to distort your audio. If you scream into the mic, you can simply turn the volume down in post-production without any loss of quality.
If you want your recordings to sound professional without needing complex post-production workflows, starting with a system like the LARK MAX 2 ensures you spend less time “fixing” audio and more time creating content.
Mono vs. Stereo: When Should You Use Which?
Before you convert every track you own, remember that Stereo isn’t automatically “better” than Mono. They serve different purposes. Using the wrong format can actually make your mix sound amateur.
Here is a quick breakdown to help you decide:
| Feature | Mono (Monophonic) | Stereo (Stereophonic) |
|---|---|---|
| Channels | Single channel (Center). | Two independent channels (Left & Right). |
| Best Used For | Dialogue, Podcasts, Voiceovers, Solo Instruments (Kick Drum, Bass). | Music, Ambient Backgrounds, Sound Effects (SFX), Immersive Soundscapes. |
| Listener Experience | Focused, direct, and punchy. Sound comes from “in front” of you. | Wide, spacious, and atmospheric. Sound has width and depth. |
| Common Mistake | Converting to stereo without adding width (pointless file size increase). | Recording a single voice in wide stereo (can sound phasey or distracting). |
Expert Insight: The Industry Standard for Dialogue
If you are recording a podcast, YouTube commentary, or a voiceover, Mono is the industry standard.
The human voice is a “point source”—it comes from one location. When you record a single voice in “True Stereo,” one side often ends up slightly louder than the other, or the room acoustics shift between channels. This creates a distracting image for the listener.
The Goal: You generally want “Dual Mono” (Method 1). This places the voice firmly in the center, ensuring maximum clarity. Use True Stereo or artificial widening only for background music, sound effects, or specific creative choices like ASMR.
Frequently Asked Questions (FAQ)
Why is my Audacity recording only coming out of the left ear?
This usually happens because you recorded a mono microphone onto a stereo track. Since the microphone only sends one signal, Audacity places it in the first available channel (Left), leaving the Right channel silent.
To prevent this, go to Audio Setup > Recording Channels and select 1 (Mono) Recording Channel before you hit record. To fix an existing recording, use the “Split Stereo to Mono” method outlined in Method 1.
Does converting mono to stereo improve audio quality?
No. Converting mono to stereo does not increase the resolution or fidelity of the audio file. It simply duplicates the existing data or manipulates the spatial field. If your original recording is noisy, a stereo conversion will just give you “wide” noise.
How do I split a stereo track into two mono tracks in Audacity?
If you have a stereo track where you need to edit the Left and Right sides independently:
- Click the down arrow next to the track name.
- Select Split Stereo to Mono.
- Audacity will separate the file into two distinct mono tracks that you can edit individually.
What is the difference between Joint Stereo and Stereo?
You will often see these options when exporting MP3s.
- Stereo: Stores the Left and Right channels as completely independent data streams.
- Joint Stereo: Uses a compression technique that saves the “sum” (L+R) and the “difference” (L-R) information. This is generally more efficient and often produces higher-quality files at lower bitrates.
Conclusion
Knowing when to use Dual Mono versus Pseudo-Stereo is the secret to professional audio in Audacity.
Remember the golden rule of mixing:
- Use Dual Mono (Method 1) if your goal is simply to fix a recording that is only playing out of one ear. This keeps dialogue centered and clear.
- Use Pseudo-Stereo (Methods 2 & 3) only when you need to create artificial width for music and sound effects.
One final check before you export: Always test your stereo conversion on different speakers. What sounds wide and immersive on studio headphones can sometimes disappear when played on a smartphone. If your mix sounds hollow on an iPhone, dial back the effects and stick closer to the center.EndFragment