.png)
If you are recording a solo podcast, you might never notice the delay. But the moment you try to overdub—recording vocals over a beat or a guest over a remote track—timing becomes critical. You perform perfectly in time with the music, but when you play it back, your voice sounds late.
This is a latency issue.
In this guide, we will walk you through exactly how to adjust latency compensation in Audacity so your tracks align perfectly every time, without you having to manually drag clips after every take.
Why Is My Audio Out of Sync?
The delay occurs because digital recording isn’t instantaneous. Your audio travels through a “Round Trip” journey:
- Analog Input: You speak into the microphone.
- Conversion: Your interface converts the sound from analog to digital (0s and 1s).
- Processing: Your computer’s CPU processes the data.
- Writing: The software writes the data to your hard drive.
Even on powerful computers, this process takes milliseconds. Audacity places the audio on the timeline exactly when it “arrives” at the hard drive, not when it left your mouth. This results in a recording that sits slightly behind the beat.
The Solution: Latency Compensation
To fix this, Audacity uses a corrective setting called Latency Compensation.
This setting tells the software to automatically shift your newly recorded track backward on the timeline by a specific number of milliseconds. By subtracting the exact time it takes for your computer to process the audio, the software realigns your waveform so it sits perfectly in sync with the backing track.
The “Loopback Test”: How to Find Your Exact Latency Value
Guessing your latency settings usually leads to frustration. The only accurate way to fix this is to perform a Loopback Test. This process physically measures the time it takes for audio to leave your computer, travel through your hardware, and return to the software.
Follow these steps to find your exact latency number:
1. Create a Physical Loop
- For Audio Interfaces: Use a standard 1/4″ instrument cable to connect your interface’s Output (Left) directly into its Input (Left).
- For USB Microphones: Plug your headphones into the computer (or the mic itself). Take the headphones off and place one ear cup directly against the microphone capsule. Turn the volume up loud enough for the mic to “hear” the click track through the headphones.
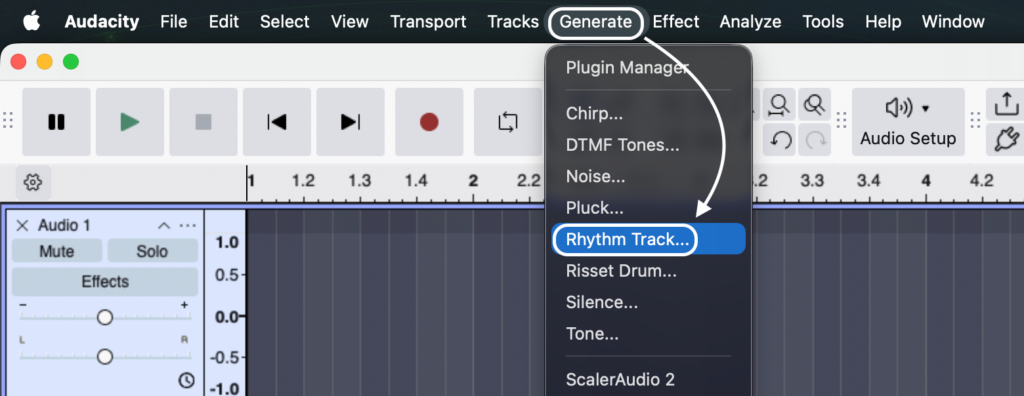
2. Generate a Reference Track
In Audacity, go to the top menu and select Generate > Rhythm Track (or Click Track in older versions). The default settings are fine; click OK to create a clean, sharp click track.
3. Record the Signal
Press the Record button. Audacity will play the click track, which will travel out of your headphones or interface and be immediately re-recorded onto a new track. Let it run for 3–4 clicks, then press Stop.
4. Zoom In Heavily
You now have two tracks: the original (top) and the new recording (bottom). The recording will naturally look “late.” Use the Zoom Tool (magnifying glass icon or Ctrl + Mouse Wheel) to zoom in on the very first click until you can see the individual start of the sound waves.

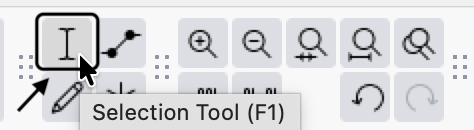
5. Measure the Delay Gap
Select the Selection Tool (I-beam icon). Click and drag to highlight the empty space (silence) starting from the exact beginning of the original click and ending at the exact beginning of the recorded click.
6. Read the Value
Look at the “Length of Selection” (or Start and Length of Selection) box at the bottom of the Audacity window. Ensure the dropdown format is set to hh:mm:ss + milliseconds.
The number displayed in the “Length” field (e.g., 0.130s or 130ms) is your system’s actual latency. Write this number down.

Applying the Fix: Changing Audacity Preferences
Once you have measured the exact delay, you simply need to plug that number into Audacity’s settings. This tells the software to automatically shift every future recording backward by that specific amount of time.
Step 1: Open the Preferences Menu
Navigate to the recording settings based on your operating system:
- Windows / Linux: Go to Edit > Preferences > Recording.
- macOS: Go to Audacity > Preferences > Audio Settings.

Step 2: Locate the Latency Settings
Inside the Recording menu, look for the section labeled Latency. You will see two fields:
- Buffer Length: (Default is usually 100ms). Do not touch this unless you are experiencing audio dropouts. This controls your computer’s processing buffer, not the track alignment.
- Latency Compensation: This is the field you need to adjust. The default is often set to -100 milliseconds.
Step 3: Input the Negative Value
This is the most critical step. Take the number you measured in the Loopback Test and enter it as a negative value.
- The Formula: -(Measured Value)
- Example: If you measured a delay of 130 milliseconds, you must enter -130 into the field.

Why Negative?
You are instructing Audacity to grab the audio clip effectively “from the future” and slide it backwards (to the left) on the timeline. If you enter a positive number, you will push the audio further to the right, making the delay twice as bad.
Pro Tip: After applying this setting, perform the Loopback Test one more time. The clicks on the two tracks should now align perfectly visually, confirming that your system is calibrated.
Hardware vs. Software: Eliminating Latency Before It Happens
Adjusting Audacity’s Latency Compensation fixes the alignment of your tracks after you hit the stop button. However, it does not solve the most frustrating part of latency: the delay you hear in your headphones while recording.
If you monitor your voice through Audacity (Software Playthrough), the audio signal creates a “round trip” echo—often 100ms or more—that makes it nearly impossible to speak naturally.
To perform your best, you need to hear yourself instantly. No amount of software tweaking can remove the physical time it takes for a computer to process live audio. This is where upgrading your hardware helps.
Professional Solution: The Hollyland LARK MAX 2
For creators who need to record professional overdubs or interviews without fighting the “echo effect,” we recommend the Hollyland LARK MAX 2.


Unlike standard USB microphones that often rely on software monitoring, the LARK MAX 2 features a dedicated hardware monitoring path. It uses Wireless Audio Monitoring via OWS (Open Wireless Stereo) earphones, allowing you to hear your voice instantly with a zero-latency feel.
Because you are monitoring directly from the receiver unit (rather than waiting for the signal to loop through Audacity), you can maintain perfect timing and pitch. Additionally, the system captures 48kHz/24-bit studio-quality audio, ensuring that while your monitoring is instant, your recording fidelity remains broadcast-grade.
Troubleshooting Common Latency Issues
Even with the correct numbers dialed in, you might still encounter syncing drifts. Often, these issues aren’t caused by the compensation setting itself, but by how your computer handles the audio stream.
Here is how to troubleshoot the three most common culprits.
1. Balancing Buffer Length vs. CPU Load
The Buffer Length acts as a waiting room for your audio data.
- Low Buffer (e.g., 100ms): Reduces latency but forces your CPU to work harder. If the buffer is too low, you will hear “crackling” or robotic glitches.
- High Buffer: Ensures smooth audio but increases the delay.
The Fix: If your recording sounds glitchy, go to Audacity > Preferences > Audio Settings and increase the Buffer Length slightly (try 150ms). You want the lowest number possible that still produces clean audio.


2. Changing Hardware Requires Retesting
Latency is specific to your hardware chain. The processing time for a generic USB headset is completely different from a dedicated audio interface.
The Rule: If you switch microphones or interfaces, you MUST redo the Loopback Test.
3. Windows Audio Drivers (MME vs. WASAPI)
If you are on Windows, the “Audio Host” setting in the top toolbar impacts lag significantly.
- MME: The default, legacy driver. Highly compatible but introduces significant latency.
- Windows WASAPI: A modern driver that communicates more directly with the audio device.
The Fix: If you are struggling with massive delays, switch your Audio Host from MME to Windows WASAPI.

How to Fix Latency on Pre-Recorded Tracks (Manual Shift)
If you have already finished recording an interview and realized it is out of sync, changing the Latency Compensation setting now won’t help. That setting only applies to future recordings.
For audio that is already recorded, you must manually align the tracks.
Method 1: The Clip Handle (Audacity 3.1+)
- Identify the Delay: Zoom in on a distinct sound, such as a sharp drum hit or the start of a word.
- Grab the Handle: Hover your mouse over the bar with the track name at the top of the audio clip. Your cursor will change to a hand icon.

- Drag to Align: Click and hold the handle, then drag the entire audio clip to the left until the waveforms align visually.

Frequently Asked Questions (FAQ)
What is the default latency compensation in Audacity?
Audacity typically defaults to -100 milliseconds. While this is a decent starting point for internal sound cards, it is rarely accurate for USB microphones. For professional results, perform the Loopback Test to find the specific delay for your gear.
Can I fix latency without a loopback cable?
Yes. Use the Headphone-to-Mic method described in the Loopback Test section above. Place your headphones directly against the mic capsule to record the click track. While this introduces a tiny amount of “air travel” delay, it is significantly more accurate than guessing.
Why does my recording sound like a robot?
This usually means your Buffer Length is set too low. Your computer cannot process the audio fast enough, resulting in dropouts. Increase the Buffer Length in Preferences (try 100ms or higher) to fix the static, then re-check your latency compensation.
Final Thoughts
Latency is an inevitable part of digital audio—signals take time to travel. While you cannot change the physics of processing speed, Audacity’s Latency Compensation effectively makes it invisible in your final project.
By performing the Loopback Test and inputting your precise millisecond offset, you ensure that every overdub aligns perfectly with the backing track the moment you press stop.
However, remember that software compensation only fixes the recording. If you want to eliminate the lag you hear in your headphones while performing, consider upgrading your input chain. Systems like the Hollyland LARK MAX 2 allow you to monitor your voice in real-time before it even reaches the computer, giving you a true “zero-latency” feel that software alone cannot provide.