.png)
If you have ever listened to a podcast where the background music was so loud you couldn’t hear the host speak, you have experienced a bad mix. Recording your audio is only half the battle; the “Mix” is where you ensure every element—voice, music, sound effects—can be heard clearly without overpowering the others.
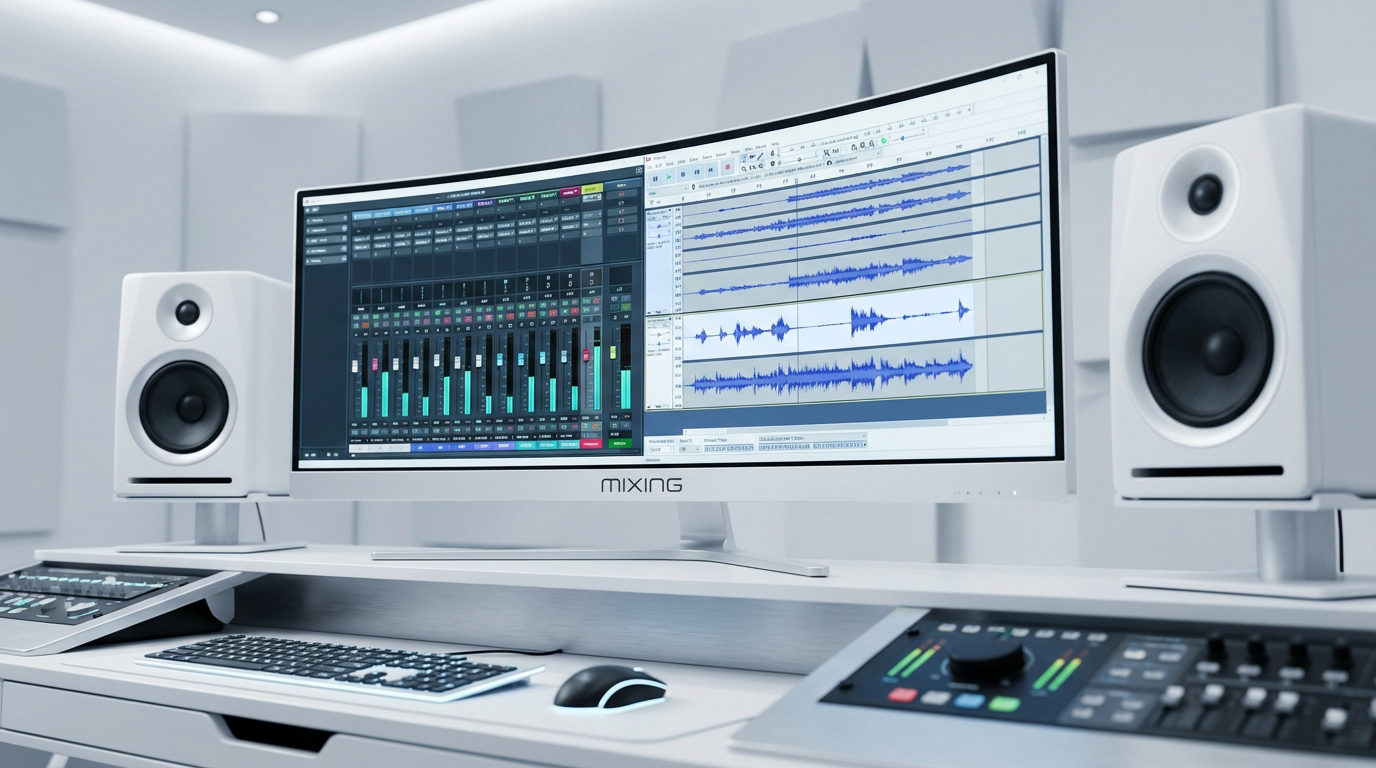
Learning how to use the Audacity Audio Mixer for better levels is the difference between an amateur recording and a professional production. The Mixer is your command center for this balance. Think of it like a conductor in an orchestra: the conductor doesn’t make the instruments play; they tell the violins to get quieter so the solo trumpet can be heard.
Input vs. Output: Knowing the Difference
Before touching a fader, it is critical to distinguish between two concepts that beginners often confuse:
- Recording Level (Input Gain): This is the volume your microphone captures while you are recording. You adjust this on your physical interface or microphone. Once recorded, this “raw” volume is baked into the file.
- Mixing Level (Output Volume): This is what you adjust in the Audacity Mixer. It changes how loud the track plays back in your headphones or speakers.
Key Takeaway: The Mixer cannot fix a recording that was captured too quietly (high noise floor) or too loudly (distorted). It is strictly for balancing audio that has already been recorded.
The “Golden Rule” of Mixing: Leave Headroom
Many new creators make the mistake of trying to get every track as loud as possible, pushing their sliders up to 0dB. In digital audio, 0dB is the ceiling. I
f your audio goes above 0dB, the waveform gets chopped off, resulting in harsh, crackling distortion known as Clipping. When you mix, you must respect Headroom.
If you have a voice track peaking at -3dB and you add a music track peaking at -3dB, the combined volume will exceed 0dB and distort your final file. To prevent this, you need to leave “room” for the tracks to combine.
- Don’t aim for 0dB on individual tracks.
- Do aim for -12dB to -6dB for individual tracks.
This ensures that when all your tracks play together, the Master output stays clean and professional, rather than hitting the “Red Zone.”
Pre-Mix Checklist: Quality Source Audio
Before you touch a single slider on the mixer board, you must understand one fundamental rule of audio production: You cannot mix your way out of bad recording quality.
The Audacity Mixer is designed to balance volume levels, not repair damage. If your source audio is “clipping” (hitting the red zone and distorting) during the recording phase, lowering the fader in the mixer will not fix the distortion—it will simply make the distorted audio quieter. This is often called the “Garbage In, Garbage Out” principle.
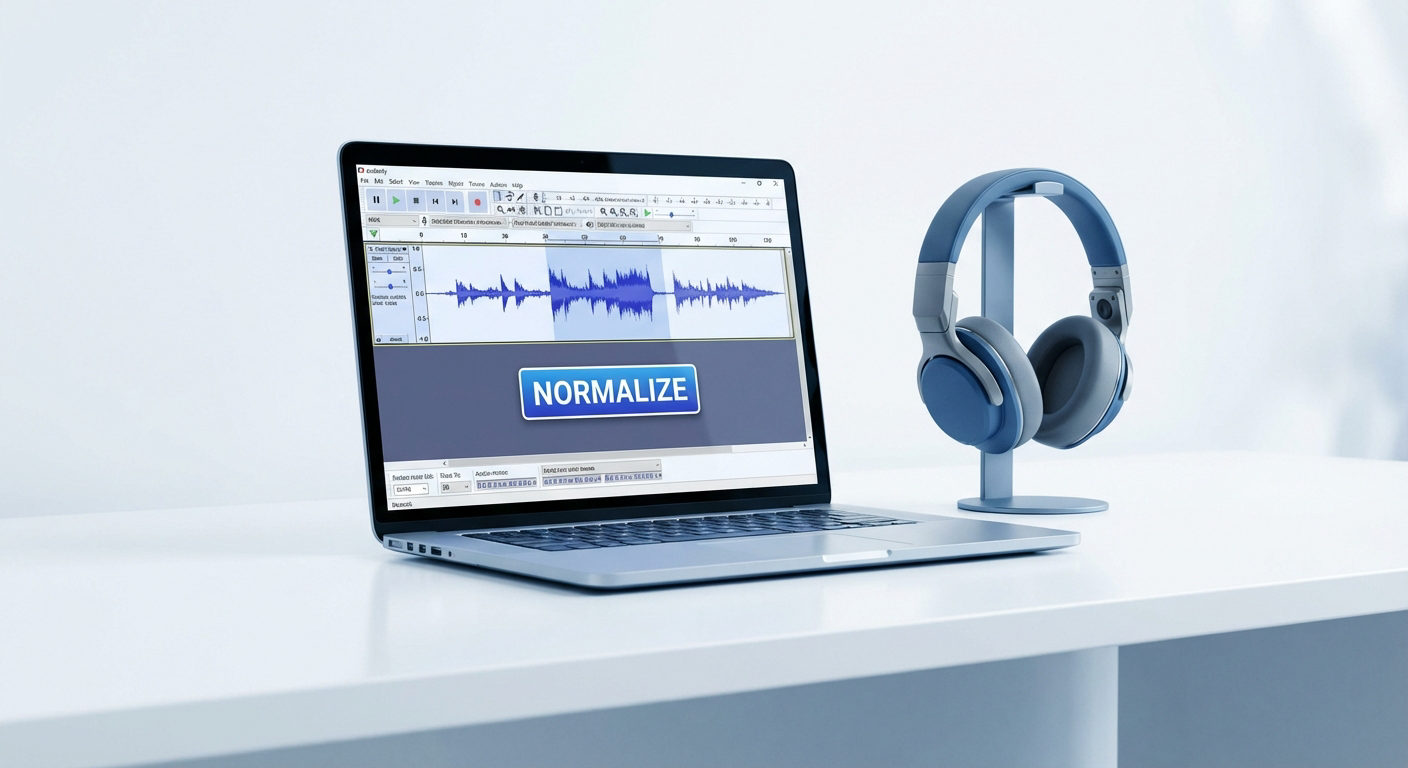
The Solution: 32-bit Float Recording
The most effective way to secure professional levels is to ensure your source audio is “unbreakable” before you even open Audacity.
For creators who want to avoid the stress of setting perfect gain levels, we recommend the Hollyland LARK MAX 2. Unlike standard microphones that distort if you laugh too loud or scream, the LARK MAX 2 features 32-bit Float Recording.

Hollyland LARK MAX 2 - Premium Wireless Microphone System
A premium wireless microphone for videographers, podcasters, and content creators to capture broadcast-quality sound.
Key Features: Wireless Audio Monitoring | 32-bit Float | Timecode
This technology captures such a massive dynamic range that it is mathematically impossible to clip the audio. Whether you are whispering or shouting, the audio data remains intact. If your levels look “blown out” when you import them into Audacity, you can simply normalize them down, and the waveform will be perfectly clean—saving you hours of rescue work during the mix.
Method 1: Using the Audacity Mixer Board (The Console View)
If editing volume directly on the waveform tracks feels cluttered, the Mixer Board is your best solution. This tool mimics a physical studio mixing console, stripping away the audio waves and presenting you with a clean, vertical interface focused entirely on levels and panning.
It is the ideal view for setting the “Global Volume” of your tracks—balancing the overall loudness of your voice against your background music.
How to Access and Use the Mixer Board
Follow these steps to balance your mix without altering the waveform data:
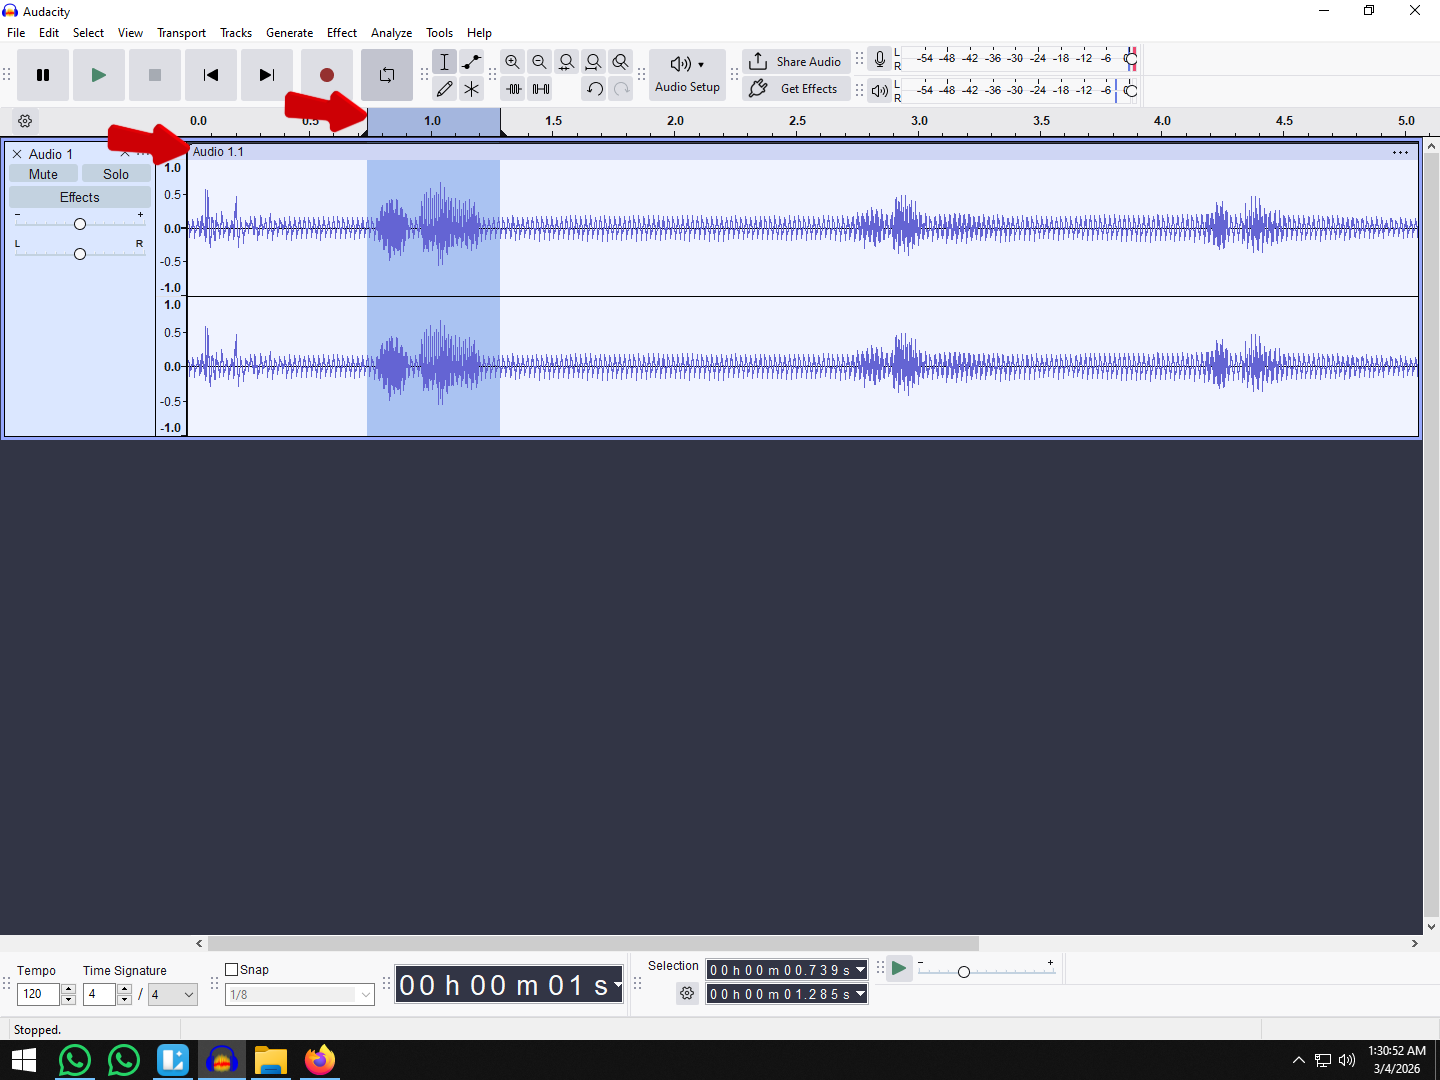
- Open the Mixer: Navigate to the top menu bar and select View > Mixer. A new window will pop up featuring vertical faders for every track in your project.

- Identify the Controls: Each strip has a Gain Slider (the large fader with a +/- dB scale) for volume and a Pan Slider (top knob) to move sound Left or Right.

- Monitor the Meters: Press Play (Spacebar) on your main project window. Watch the green meter bars move in the Mixer Board as the audio plays.
- Adjust for Headroom: Drag the Gain Sliders up or down. Your goal is to have the Master Output (usually on the far right) peak between -3dB and -6dB.

Note: If the meters hit the top and turn Red, you are clipping (distorting). Lower the sliders immediately until the red indicators disappear.
When to Use This Method
The Mixer Board is excellent for the “Big Picture,” but it has limitations.
- The Pros (Bird’s Eye View): This is the fastest way to compare relative volumes. For example, if you have three podcast hosts and one music track, you can easily see which host is too quiet and boost them to match the others.
- The Cons (No Automation): The Mixer Board is static. If you move a slider here, it changes the volume for the entire duration of that track. You cannot use this view to fade music out when someone starts speaking (ducking); for that, you need the Envelope Tool (covered in Method 3).
Method 2: The Track Control Panel (The Quick Adjust)
You don’t always need to open a separate window to balance your audio. If you are working on a laptop screen with limited space, or simply need to make a quick tweak to a single voice track, the Track Control Panel is the fastest method.
Locating the Gain Slider
On the left side of every audio track in your timeline, you will see a grey box containing the track name, playback controls, and a slider marked with – and + symbols. This is the Gain Slider.
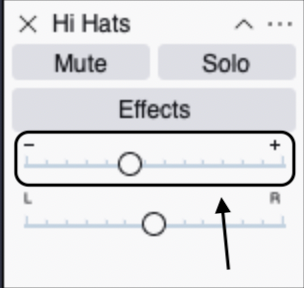
- Slide toward (-): Lowers the volume.
- Slide toward (+): Increases the volume.
When you hover your mouse over this slider, Audacity displays a tooltip showing the exact decibel change (e.g., Gain: -4.0 dB). This applies a “static” adjustment, meaning it raises or lowers the volume of the entire track by that specific amount.
How It Relates to the Mixer Board
It is a common misconception among beginners that the Track Control Panel and the Mixer Board are different tools. They are actually linked.
Think of the Track Control Panel as a “remote control” for the main mixer.
- If you lower the Gain Slider on the timeline to -6 dB, the fader in the Mixer Board view will instantly drop to -6 dB.
- Conversely, if you adjust the fader in the Mixer Board, the slider on your timeline will move to match it.
Which one should you use? Use the Mixer Board when you want to see all your tracks side-by-side to blend the final mix. Use the Track Control Panel when you are editing a specific clip and simply need to boost the volume quickly without leaving your timeline.
Method 3: The Envelope Tool (For Dynamic Mixing)
While the Mixer Board is excellent for setting the overall volume of a track, it has one major limitation: it is static. It applies the same volume level from the beginning of the recording to the end.
But what if you want your background music to start loud during the intro, fade down (duck) when you start speaking, and swell back up at the end?
For this, you need Dynamic Mixing, and in Audacity, the tool for the job is the Envelope Tool.
How to “Duck” Background Music
The Envelope Tool allows you to draw volume changes directly onto the waveform. Follow these steps to create a professional fade-under:
- Select the Tool: Click the icon that looks like two dots connected by a line in the main toolbar, or simply press F2 on your keyboard. You will see the blue borders of your audio tracks highlight.

- Create Control Points: Click anywhere on the blue line at the top or bottom of the waveform. This creates a “Control Point” (a small dot/handle).

- Shape the Volume: To lower the volume for a specific section, you need four points:
- Point A: Where the volume starts to drop.
- Point B: Where the volume reaches its lowest point.
- Point C: Where the volume stays low until.
- Point D: Where the volume returns to normal.
- Drag to Adjust: Click and drag the inner points (B and C) inward toward the center of the track. You will visually see the waveform shrink, indicating the volume is being lowered only in that specific area.

Pro Tip: The Secret to “Radio Quality” Intros
Don’t just drop the volume instantly. Place your control points about 1-2 seconds apart to create a ramp. This gradual fade prevents the mix from sounding jarring and mimics the smooth “ducking” used by professional radio DJs.
Troubleshooting Common Mixing Issues
Even with a perfectly laid out Mixer Board, you will run into specific sonic problems as you blend tracks. Here is how to fix the three most common issues that ruin a mix.
The “Red Zone” (Clipping)
If your playback meter hits the top and turns red, your audio is clipping. This means the combined volume of all your tracks exceeds 0dB, resulting in digital distortion that sounds like crackling or static.
You cannot fix this simply by turning down your speakers; you must lower the signal within Audacity.
The Quick Fix:
- Press Ctrl + A (Cmd + A on Mac) to select all tracks.

- Go to Effect > Volume and Compression > Amplify.

- Enter a negative number in the “Amplification (dB)” box (e.g., -2 or -3).
- Click Apply. This lowers every track proportionally, preserving your mix balance while recovering your headroom.

Muddy Sound (Voice vs. Music)
“Muddiness” happens when your background music and your voiceover are fighting for the same sonic space—usually in the mid-range frequencies. This makes the voice hard to understand without turning the volume up uncomfortably high.
How to clear it up:
- Volume First: Before touching EQ, ensure your background music is significantly lower than your voice. A common standard is for music to be -15dB to -20dB lower than the spoken track.
- Simple EQ: If the mix is still muddy, apply a High-Pass Filter to your voice track. This removes unnecessary low-end rumble (bass frequencies) that clashes with the music, making the speech cut through clearly.

Mono vs. Stereo (Panning)
Beginners often leave every track dead center. This creates a “narrow” mix where sounds are stacked on top of each other. Using the Pan Slider (L…R) on the Mixer Board creates space.
Panning Guidelines:
- Voice (Center): Always keep your main dialogue in the center. Humans are used to hearing speech directly in front of them.
- Sound Effects (Left/Right): Pan transient sounds (like a door slam or phone ring) slightly to the left or right to create a sense of environment.
- Music (Stereo): Keep music tracks in stereo (wide). If you recorded an instrument in mono, pan two recordings hard left and hard right to widen the soundstage.
Pro Tips for a Balanced Mix
Achieving a professional-grade mix isn’t just about moving sliders; it’s about how you listen and how you prepare. Use these three strategies to ensure your final export sounds crisp on every device, from car speakers to earbuds.
1. Always Monitor with Headphones
Never mix using your laptop speakers. Laptop speakers physically cannot reproduce low-end frequencies (bass) accurately, and they often apply their own internal processing that distorts the true sound of your audio.
If you mix on laptop speakers, you might boost the bass to make it audible, only to find that your podcast sounds muddy or “boomy” when played in a car. For the most accurate results, use a pair of flat-response studio headphones so you can hear exactly what is happening in the mix.
2. Isolate Tracks with “Solo” and “Mute”
When multiple tracks play simultaneously, it can be difficult to identify where a specific hiss, click, or background noise is coming from. The Audacity Mixer Board includes Solo and Mute buttons above every fader for this exact reason.
- Solo: Silences every other track except the one selected. Use this to critically listen to a specific voice track for background noise or distortion.
- Mute: Silences only the selected track. Use this to see if a specific track is “cluttering” the mix or clashing with another sound.

3. Monitor Your Audio in Real-Time
The best way to fix a bad mix is to prevent it from happening during the recording phase. If you are recording yourself, monitoring your levels in real-time is crucial to avoid clipping or recording too quietly.
This is where professional gear like the Hollyland LARK MAX 2 becomes essential. It allows for Wireless Audio Monitoring—and when paired with Hollyland’s OWS (Open Wireless Stereo) earphones, you can monitor your feed wirelessly without being tethered to the camera or receiver.
This ensures you know exactly what your levels sound like before you even hit the post-production phase, saving you hours of corrective mixing later.
Frequently Asked Questions (FAQ)
Where is the mixer in Audacity?
You can find the mixer by navigating to the top menu bar and selecting View > Mixer Board. This will open a separate floating window that displays vertical volume sliders and pan knobs for every track in your project, mimicking a physical studio console. If you prefer to adjust volume directly on the timeline, you can use the Gain Slider located on the left panel of each individual track.
How do I blend voice and background music in Audacity?
If you want the music to play quietly underneath your voice (a technique called “ducking”), the standard Mixer Board isn’t the best tool because it lowers the volume for the entire track. Instead, use the Envelope Tool (press F2 or click the icon with two dots connected by a line). This allows you to click on the blue waveform line to create “control points” and drag the volume down specifically during the sections where you are speaking.
What is the ideal dB level for a podcast?
For a professional sounding mix, you should generally aim for your main dialogue to peak between -3dB and -6dB on the playback meter. This ensures the audio is loud enough to be heard clearly without risking distortion (clipping). If you are looking for industry-standard loudness specifications, the target is usually -16 LUFS (Loudness Units Full Scale) for stereo podcasts, though checking this requires a specific loudness plugin or analyzer.
Why is my Audacity mixer greyed out?
If the Mixer Board option is greyed out in the View menu, it is usually because your audio is currently Paused rather than Stopped. Audacity locks many editing and viewing functions while in Pause mode. Press the Stop button (yellow square) or hit the Spacebar to fully stop playback, and the menu option should become available. It may also be greyed out if you have no tracks in your project window.
Conclusion
Mixing audio in Audacity doesn’t require a degree in sound engineering—it simply requires a good ear for balance. By now, you should understand that the Mixer Board is your tool for setting the overall “stage” of your project, ensuring no single track overpowers the others.
Meanwhile, the Envelope Tool acts as your fine-tuning brush, allowing you to dynamically duck music under vocals for that polished, professional radio sound.
However, remember the golden rule of post-production: It is always easier to mix high-quality audio than to fix bad recordings.
If you want to make your mixing process almost effortless, focus on capturing pristine source audio first. Tools like the Hollyland LARK MAX 2 are essential for solo creators. With its 32-bit Float Recording, you capture such a wide dynamic range that clipping becomes mathematically impossible. When your raw audio is distortion-free and crystal clear, you spend less time troubleshooting in the mixer and more time creating content that sounds great.
Take these tools, watch your headroom, and start building your perfect mix.