


.png)
CapCut HDR Video: How to Export and Create an HDR Look Step by Step
CapCut makes video editing simple, but HDR is one area that trips up even experienced creators. Whether you want to export true HDR footage or simply make your videos look more vivid and cinematic, the process depends on what you are starting with. In this article, you will learn how you can export HDR video in CapCut mobile and desktop applications. Also, you will explore tips to give an HDR look to your SDR videos.

What “HDR Video” Actually Means in CapCut
People searching for CapCut HDR video often mean two different things. So mixing them up can easily cause confusion and frustration.
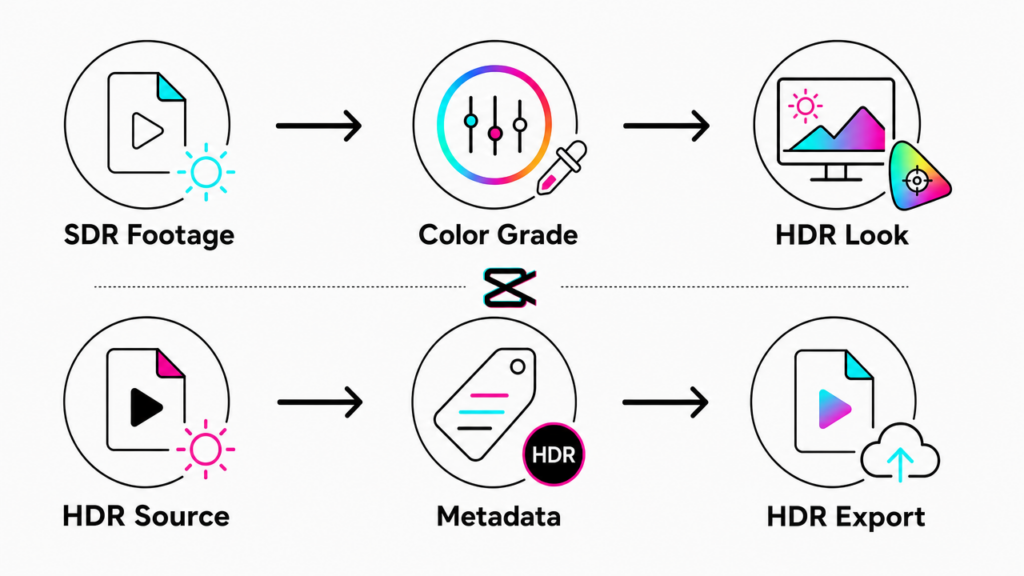
True HDR export means the output file retains HDR metadata (HDR10 or HLG format), enabling HDR-capable screens to display greater brightness and a wider color range. This requires HDR source footage to begin with.
HDR-style look means using CapCut’s built-in color tools to make standard SDR footage appear more vivid, dynamic, and three-dimensional, without any actual HDR data in the file.
Quick distinction: HDR Export = a technical file format with embedded metadata. HDR Look = a visual style achieved through color grading. CapCut supports both, but through entirely separate workflows.
Does CapCut Support True HDR Export?
Yes, CapCut supports true HDR export, but with strict conditions. The mobile app includes an HDR toggle in its export panel, and when properly used, it passes HDR color and brightness metadata through to the final output file. But this option may not be available for all users.
You can check out CapCut’s desktop application, which supports various HDR standards in its export settings.
Note: CapCut cannot create HDR from SDR footage. If your clips were shot in standard dynamic range, enabling the HDR toggle will not produce an HDR file. Your source footage must already contain HDR data, such as video recorded on an iPhone 12 or later (preferably iPhone 17) with HDR mode active, or compatible Android footage captured in an HDR camera mode.
Requirements and limitations at a glance:
- Source footage must be in HDR format (HLG or HDR10)
- Device must support HDR display (iPhone 12 or later on iOS 14+; Android support varies by manufacturer)
- Export format must be HEVC (H.265) to retain HDR metadata
- H.264 export strips HDR metadata even when the toggle is active
- The HDR toggle will not appear on unsupported devices
Platform Compatibility: Where Your HDR CapCut Video Will Actually Display
Not every platform handles HDR equally. Here is what to expect after you export:
| Platform | HDR Playback Support | Notes |
|---|---|---|
| YouTube | Yes | Full HDR10/HLG playback on supported screens |
| TikTok | Limited | Most playback reverts to SDR |
| No | Converts all uploads to SDR on ingestion | |
| Native Gallery (iOS/Android) | Yes | Displays HDR correctly on capable devices |
YouTube creators can benefit from true HDR export. It helps keep a higher dynamic range in videos. For TikTok and Instagram, a similar HDR-style look is usually enough. The method below gives a close visual result for viewers.
How to Export an HDR Video in CapCut Mobile (Step-by-Step)
Before you begin, confirm that your project contains HDR source footage. If your clips were shot in SDR, skip ahead to the next section. Once confirmed, follow these steps:
- Open your project in CapCut and complete all edits.
- Tap the export icon in the top-right corner of the editor screen.
- Select your resolution. Choose 1080p or 4K based on your source footage quality.
- Set the frame rate to match your source (typically 30 fps or 60 fps).
- Locate the HDR toggle or Smart HDR toggle. This option only appears on compatible devices when CapCut detects HDR footage in the timeline.
- Enable the HDR toggle.
- Set the format to HEVC (H.265). This step is important. H.265 preserves HDR metadata in the exported file.
- Set bitrate to High or use the Recommended preset.
- Tap Export and allow the process to finish.
- Verify the result by playing the file on an HDR-capable screen, or upload to YouTube and check the video details for an HDR label.
Note: If the HDR toggle is greyed out or absent, your device or source footage does not meet the requirements. Refer to the troubleshooting section at the end of this article.
How to Export an HDR Video in CapCut Desktop App (Step-by-Step)
If you have a desktop version of CapCut, you can export videos in HDR in a few simple steps. But since the workaround has multiple options to tweak, users, especially the new ones, may feel a bit complicated. It is because there is no clear label that says “HDR” or a specific toggle that enables or disables HDR quality export. But this is the best approach if you can’t export videos in HDR or the option is unavailable in the mobile version.
For your ease, the steps are categorized into two phases.
Phase 1:
1. Once all the editing work is done on your CapCut desktop app, check the Details section for the Color Space setting. If it’s Rec. 709 SDR, you will need to change it to HDR before exporting.

2. To do that, click the Modify button under the Details section to open Project settings.

Under the Details tab, locate the Color space dropdown menu, and select “Rec. 2100 HLG” or “Rec. 2100 PQ“. Both are different standards of HDR.

3. Under the Timeline settings section, change the frame rate to 30 fps or 60 fps.

4. Click Save to return to the timeline.
After making these changes, you will observe that the video becomes brighter and clearer (that’s what we expect from HDR color space).

5. To reconfirm the changes, check the Details section again. The Color space should now be Rec. 2100 HLG (or PQ).

Phase 2:
6. Click the Export button on the top-right corner of the interface to open export settings.
7. From the Resolution dropdown menu, choose the highest resolution, such as 4K.

8. Next, choose bit rate from the dropdown menu. We suggest Higher or Recommended options to pick from. Alternatively, you can also set a Custom bit rate.
9. Go to the Codec section, and select HEVC from the menu. This is a very important step of phase two.

10. This time, confirm the Color space in export settings and make sure it’s set to any of the HDR standards as discussed earlier.

11. Set other options, such as Audio as MP3 (or any other format), as per your preference.
12. Click Export.

Note: If your monitor or display screen does not support HDR playback, the changes may not appear correctly on the screen. But the exported video will be an HDR, and you can confirm it by playing the exported file on an HDR-supported device (LCD, LED, laptop, etc).
How to Create an HDR-Style Look in CapCut (When True HDR Isn’t Available)
For most mobile creators using standard recording modes, this part is the most useful. CapCut’s color tools include everything needed for an HDR-style look. You can apply it even on normal footage. The workflow below can be repeated for similar results each time.

- Saturation: Raising saturation increases how strong the colors appear in your clip. This helps normal footage look more vivid. It can create a stronger HDR-style visual feel.

- Graphs: CapCut mobile includes advanced RGB color curve tools that are not easy to notice. You can find them inside the Graphs icon in the Adjust panel. These tools let you control color channels and exposure curves in detail. By changing highlights, midtones, and shadows for red, green, blue, and white, you can create a bright and natural HDR-style look.

- Use HSL to boost selective color channels. In the HSL panel, increase the saturation and luminance of blues (skies, water) and greens (foliage, grass). Selective boosting creates the vibrant, natural depth that defines the HDR aesthetic.

- Add a subtle Vignette. A soft inward vignette draws the viewer’s eye to the center of the frame. Keep the intensity low so it adds depth. It should not look like a visible border around the frame.

- Apply a small Sharpen boost. Set sharpness around +15 to +20. The added edge definition produces the perceived clarity most audiences associate with premium-quality video.

Best Settings for CapCut HDR Video Quality
Use this as a quick reference before every export:
- Resolution: 4K for maximum quality; 1080p when file size is a concern
- Frame rate: Match your source footage — do not convert unless you intend to
- Format: HEVC (H.265) for HDR metadata retention; H.264 only when broad device compatibility is the priority over HDR preservation
- Bit rate: Higher or Recommended
Strong visuals are only half of a polished production. If you are editing content at this level of quality, your audio should match. A compact wireless mic like the Hollyland LARK M2 delivers clean, professional sound from a lightweight clip-on form that fits naturally into a mobile-first shooting workflow.
Common CapCut HDR Problems and How to Fix Them
Problem 1: The HDR toggle is grayed out
- Cause: Source footage is SDR, or the device does not meet CapCut’s HDR export requirements.
- Fix: Confirm footage was captured in HDR mode on a supported iPhone (12 or later) or a compatible Android device. Update your iOS or Android version to the latest available release.
Problem 2: HDR video looks washed out on some screens
- Cause: The file is being viewed on an SDR display. SDR screens apply tone mapping to HDR content, which can appear flat or low-contrast compared to what the video looks like on an HDR screen.
- Fix: This is expected behavior, not a CapCut error. Upload to YouTube and play the video on an HDR-capable device to evaluate the intended output accurately.
Problem 3: Colors look oversaturated after export
Cause: Saturation pushed too high during editing, or the Curve adjustment is too aggressive.
Fix: Reduce Saturation by 10 to 15 points and soften the curve shape. Review the export on a calibrated screen rather than relying on your phone’s built-in display, which can skew perceived saturation during editing.
Note: Some users have reported that the Smart HDR toggle is missing on Android smartphones but is available on their iPhones. While others claim that HDR export options are part of the Pro version.
FAQs
Can CapCut edit 4K HDR video from an iPhone?
Yes. CapCut on iOS supports importing and editing HDR footage recorded on iPhone 12 or later. Keep your timeline in the original HDR format throughout the editing process and export using HEVC with the Smart HDR toggle enabled. This preserves HDR metadata from the original capture file through to the final exported video.
Why does my CapCut HDR video look different on YouTube vs. my phone?
YouTube applies its own tone mapping when delivering HDR streams, and the visual result varies by screen. HDR-capable displays render expanded highlights and shadow detail. SDR screens receive a tone-mapped version that looks visually flatter in comparison. This variation is standard behavior across all HDR platforms and is not caused by a problem with the CapCut export.
Is there an HDR filter or effect in CapCut?
Yes. You can find an HDR effect in CapCut. Tap on the video on the timeline. Select Effects, and type HDR in the search field. Locate the free HDR effect, tap it to apply it to the video.
Conclusion
Exporting HDR video in CapCut depends on your original footage. If your source is already HDR, export settings can keep that range. On mobile, some users may see an HDR toggle during export. But this option is not available for everyone. If it is missing, try using the desktop version. There you can set the HDR color space before exporting. Contrarily, you can still adjust Saturation, HSL, and other color tools in the Adjust tab. These changes can help create an HDR-style look even without true HDR export.


Subscribe us
to get the latest news!


