.png)
Adding a voiceover in CapCut PC is one of the quickest ways to give your videos a professional, personal touch without leaving the editor. Whether you’re narrating a tutorial, recording commentary for a YouTube video, or explaining a slide-by-slide presentation, the process takes only a few minutes once you know where to look. This guide shows you all the major steps, from setup to final audio adjustments, so your voiceover lands exactly where you need it.

What You Need Before Recording a Voiceover in CapCut PC?
Before you hit record, take thirty seconds to confirm these items are in place. Skipping this checklist is the most common reason voiceover recording fails on the first attempt.
- CapCut desktop version installed: This guide covers the PC application only. Make sure you have the latest version downloaded from capcut.com, since the interface updates frequently.
- A working microphone: A built-in laptop microphone works for testing, but an external mic will give you noticeably cleaner audio. Either option is fine for getting started.
- Windows microphone permissions enabled: Go to Settings > Privacy > Microphone and confirm that CapCut (or “desktop apps” broadly) is allowed to access your mic. Without this, CapCut will not detect any audio input.
- A project open with footage on the timeline: You need at least one video or image clip placed in the timeline before the voiceover record button becomes active.
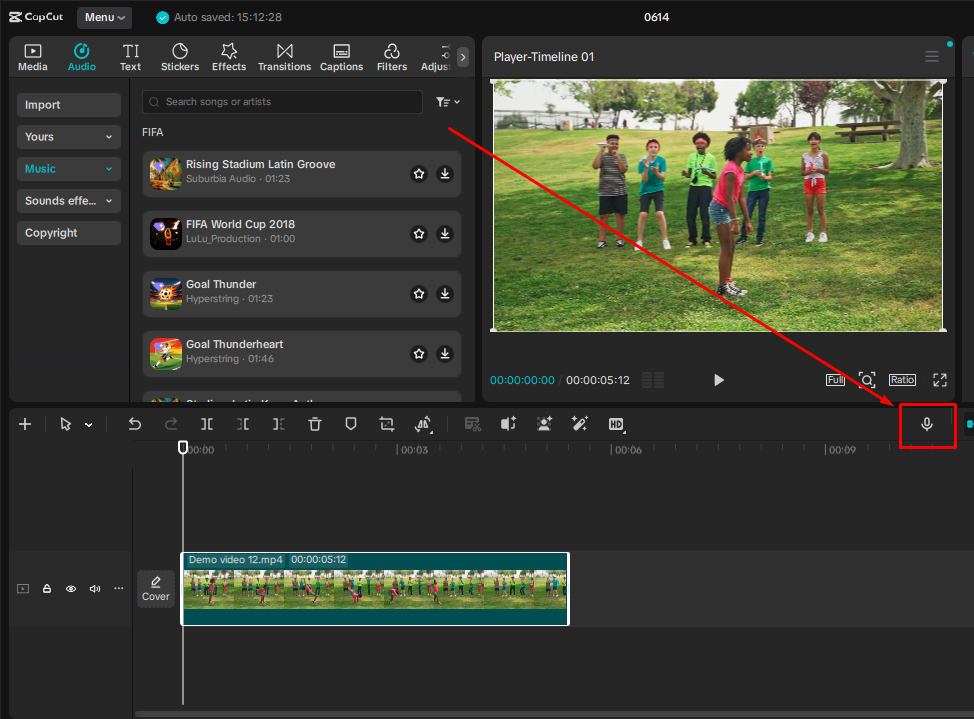
How to Find the Voiceover Feature in CapCut PC?
In the latest 2026 CapCut version, the voiceover feature is right there on the main interface.
- Open your project and make sure your video clip is visible on the timeline.
- Look at the timeline toolbar. You will see icons labeled options like “Undo,” “Redo,” “Split,” and the “Voiceover” icon (microphone symbol) on the right side of the toolbar menu.
Step-by-Step: How to Record a Voiceover in CapCut PC?
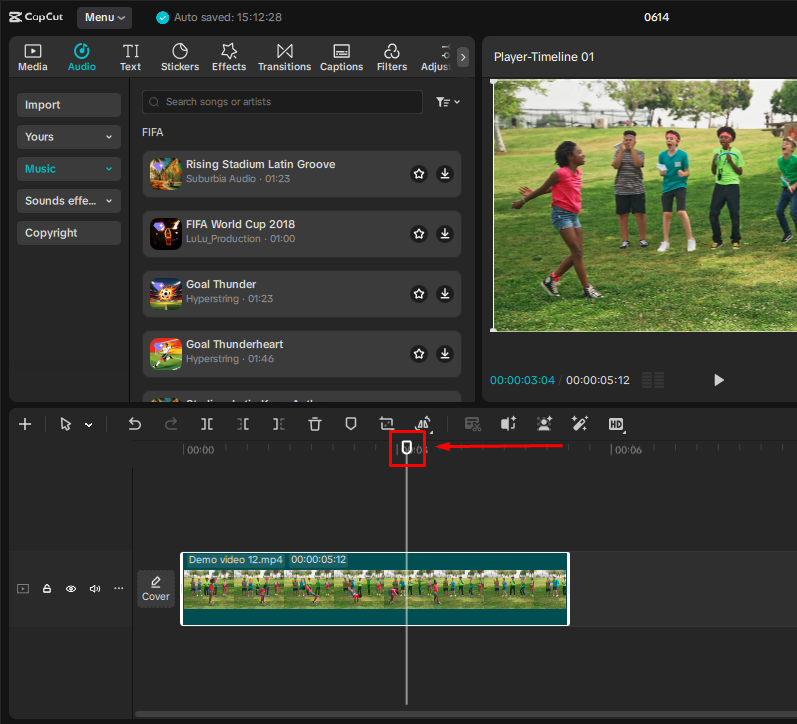
- Position your playhead. Click on the timeline at the exact frame where you want your voiceover to begin. This determines where your audio clip will be placed automatically.
- Click the Record button. Click on the Voiceover icon to open its dedicated panel. Now, check if the correct microphone is selected from the “Input device” dropdown menu. Then, make sure the Volume slider isn’t set to Zero; otherwise, your voice won’t be recorded.
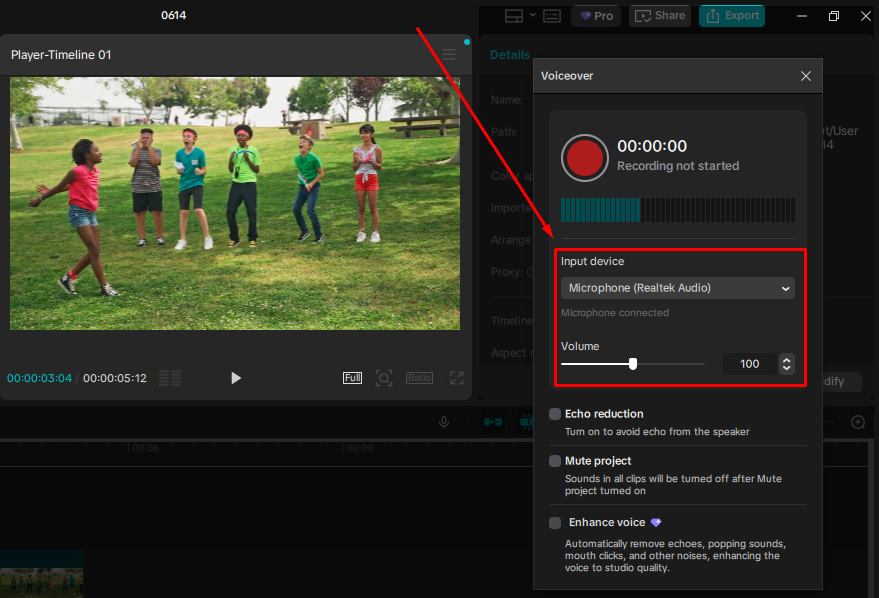
Once everything is checked, click the red record button to start recording.
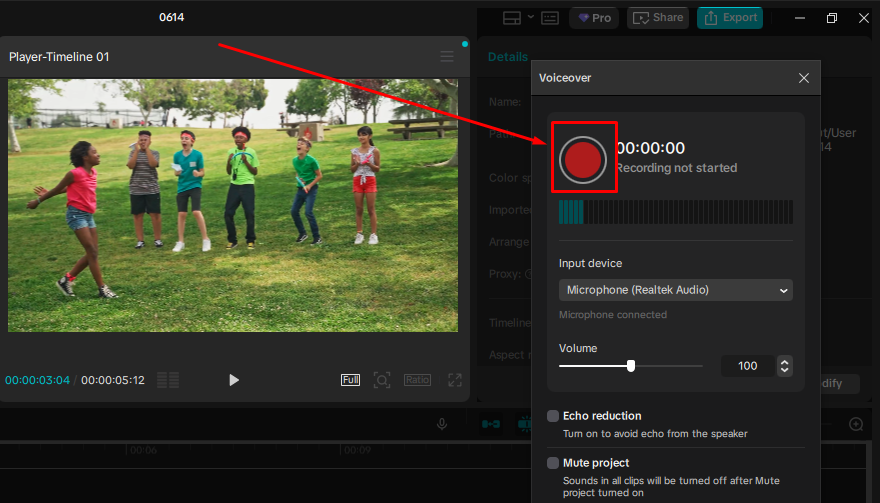
- Wait for the countdown. CapCut plays a brief three-second countdown before it starts capturing. Use this time to get ready and take a breath before speaking.
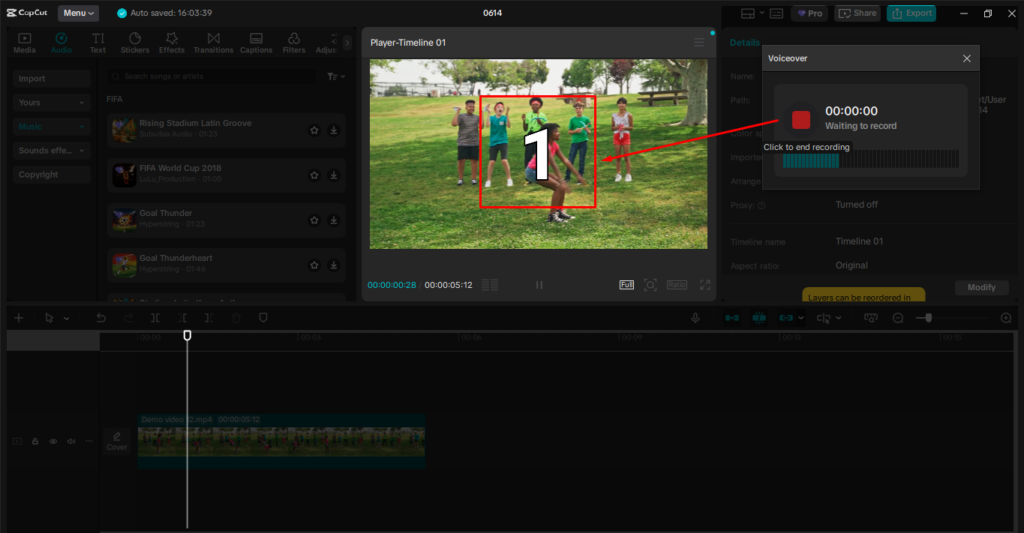
- Speak clearly into your microphone. Record your narration. You can watch the video play back in the preview window while you record, which makes syncing your words to specific moments on screen much easier.
- Click Stop (or press the record button again) to end recording. CapCut will automatically place your voiceover as a new audio clip on the timeline, aligned to the playhead position you set in step one.
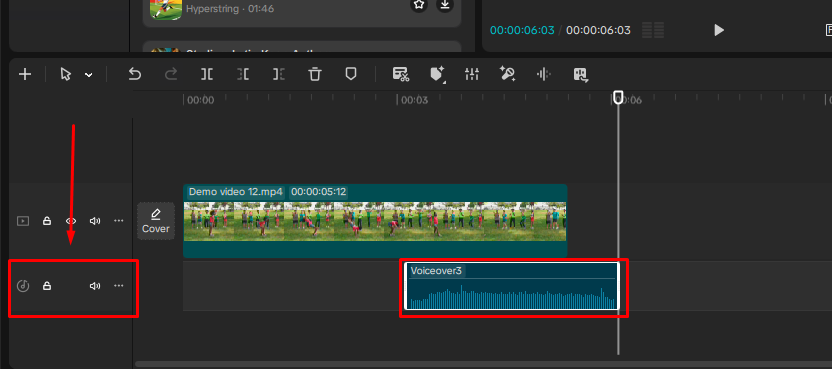
- Review the playback. Press the spacebar to play your video from the beginning. Listen to how the voiceover syncs with your footage. If the timing is off, you can drag the audio clip left or right on the timeline to reposition it.
Note: If you want to mute the original video audio while your voiceover plays, select the video clip, open its audio settings, and drag the volume slider to zero or use the “Mute” toggle. This is especially useful for footage that has background noise you don’t want competing with your narration.
How to Edit and Adjust Your Voiceover in CapCut PC
Once your voiceover clip appears on the timeline, CapCut gives you several tools to refine it before export.
- Trimming the clip. Click on your voiceover audio clip in the timeline to select it. Drag the left or right edge inward to trim silence from the beginning or end. This is the fastest way to remove the few seconds of dead air before you started speaking.

- Adjusting volume. Select the voiceover clip and look for the volume slider in the right-side editing panel. You can raise or lower the voiceover volume independently from your background music or original video audio.

- Applying noise reduction and voice enhancement. With the voiceover clip selected, navigate to the audio editing panel and look for “Reduce noise” and “Enhance voice.” Enabling noise reduction can significantly reduce hum, fan noise, and room echo captured during recording. The voice enhancement feature improves the overall audio quality.
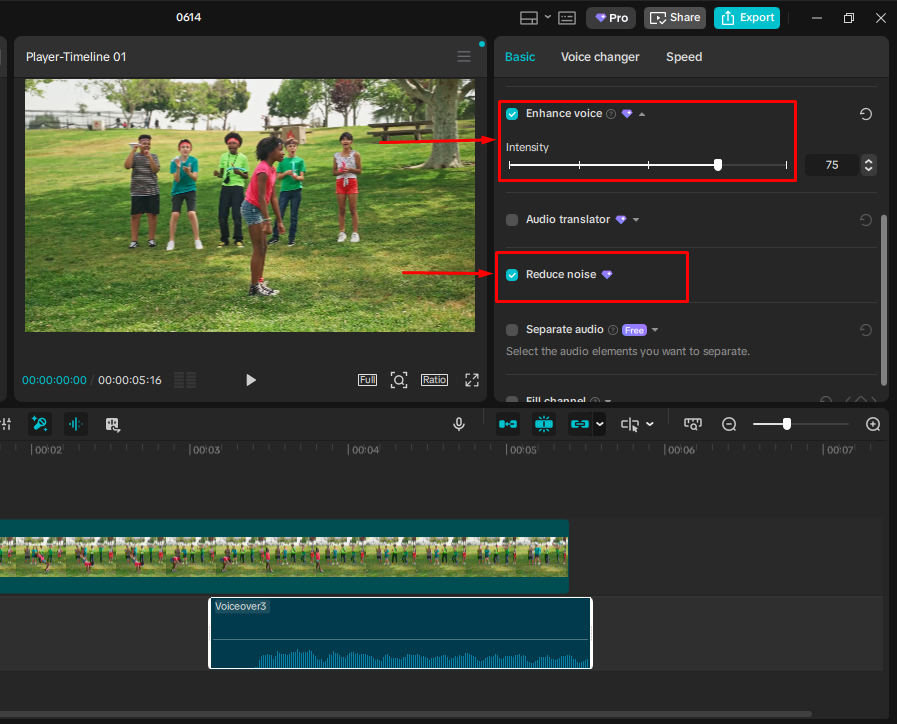
Note: In CapCut PC, Enhance voice and Reduce noise are Pro features.
- Splitting or repositioning the clip. If you recorded one long voiceover but need different sections to align with different parts of your video, position the playhead at the split point and use the Split function. You can then drag each segment independently to match the video.


Tips for a Better-Quality Voiceover on CapCut PC
Small changes to your recording environment and equipment make a bigger difference than any post-production filter.

- Record in a quiet room: Fans, air conditioning, keyboard clicks, and street noise all get picked up by your microphone. Closing doors and windows before recording reduces the amount of cleanup needed afterward.
- Maintain consistent mic distance: Staying about 6 to 10 inches from your microphone keeps volume levels stable throughout the recording. When distance changes, audio levels shift in noticeable ways. This creates uneven loudness that can distract listeners. Editing later often cannot fully smooth these variations.
- Use an external microphone: Built-in laptop microphones are positioned to capture the entire room, not just your voice. Using an external USB or wireless mic helps reduce background noise. Pointing it toward your mouth gives clearer and warmer audio.
- Consider a dedicated wireless mic for regular recording: For creators who record voiceovers frequently or who also capture footage while moving, a wireless microphone like the Hollyland LARK MAX 2 is worth considering. It records at 48 kHz with 32-bit Float audio and features AI Noise Cancellation, meaning the audio arriving in your timeline is already clean and full-range. This makes CapCut’s own noise reduction tools work even more effectively with less audible artifacting.
- Use CapCut’s AI Noise Cancellation as a fallback: If your room is not quiet enough, CapCut includes noise reduction in the audio panel. It helps reduce mild to moderate background noise in recordings. It does not replace a quiet recording space, but it can improve imperfect audio.
Alternative: Using Text-to-Speech Instead of Recording
If you prefer not to record your own voice, CapCut PC has a Text-to-Speech feature that converts typed text into spoken audio. This is different from the voiceover recording workflow described above. To use it, go to the Text tab in the top menu, add a text box, type your script, and select “Text to Speech” from the text editing options to choose a voice and generate the audio automatically. This option is useful for quick explainer videos and fast content creation. It also helps keep a steady voice across many videos without extra recording sessions.
FAQs
Why is my microphone not working for voiceover in CapCut PC?
The most common cause is a missing Windows permission. Go to Settings > Privacy & Security > Microphone and make sure microphone access is turned on for desktop apps. Also, the “Let apps access your microphone” option is enabled. Inside CapCut, check the Record panel to confirm the correct input device is selected. If your mic appears in Windows but not in CapCut, restarting the application usually resolves the detection issue.
Can I re-record a voiceover over the same section in CapCut PC?
Yes. Click the existing voiceover clip in the timeline, then delete it using the Delete key or the right-click context menu. Then reposition your playhead to the same starting point and record a new take. Alternatively, record a new clip on top of the old one and delete whichever version you prefer after comparing them in playback.
How do I lower background music volume when playing a voiceover in CapCut PC?
Select the background music clip in your timeline first. Then lower its volume in the audio panel on the right. A range around 10 to 25 percent usually keeps balance with the voiceover. You can also use keyframes to reduce volume during speech parts.
Can I use an external USB or wireless microphone with CapCut PC?
Yes. CapCut PC pulls audio from whatever input device Windows recognizes as the default microphone. Plug in your USB mic or connect your wireless receiver, set it as the default input in Windows Sound Settings, and CapCut will use it automatically the next time you open the Record panel.
Does CapCut PC have noise reduction for voiceovers?
Yes. Select your voiceover clip on the timeline, then look for “Noise Reduction” in the right-side audio editing panel. Toggle it on and adjust the intensity slider. For voice recordings, a moderate setting typically removes unwanted background hum without making the voice sound processed or hollow.
Conclusion
Recording a voiceover in CapCut PC follows four main steps. First, open the Record tab inside the Audio section. Next, place your playhead at the right spot. Then record your narration and adjust it afterward. You can trim clips and balance volume before exporting. Once understood, it only takes a few minutes per project. After that, you can try CapCut audio effects and music options to add more depth. If sound quality keeps causing issues, using an external microphone gives the biggest improvement.