.png)
Live streaming a video event on YouTube can feel intimidating when you’re just starting out. From setting up the camera to configuring the software, there are many moving parts. The good news is that YouTube offers built-in tools that make it easier than ever to go live. With the right software, you can start streaming confidently in just a few steps.
Read on for a clear, step-by-step guide on how to stream video on YouTube.
What Devices Do You Need Before You Stream
Before going live, make sure you have the basics ready:
- A verified YouTube account with no live streaming restrictions
- A computer or a mobile device
- Stable internet connection with at least 3–6 Mbps upload speed (check using Speedtest.net)
- A camera or webcam
- A microphone for clear audio
If you’re new, start small. Even a laptop webcam and built-in mic can work. For professional events, consider external gear and streaming software.
Method 1: How to Stream Video with YouTube Studio (Browser)
YouTube Studio allows you to go live directly from your browser, eliminating the need for additional setup. Here’s how:
- Sign in to your YouTube account and go to YouTube Studio. This is where you manage streams and channel settings.

- Click the Create button (camera icon with a plus sign) in the top-right corner.

- Then select Go Live to open the Live Control Room.

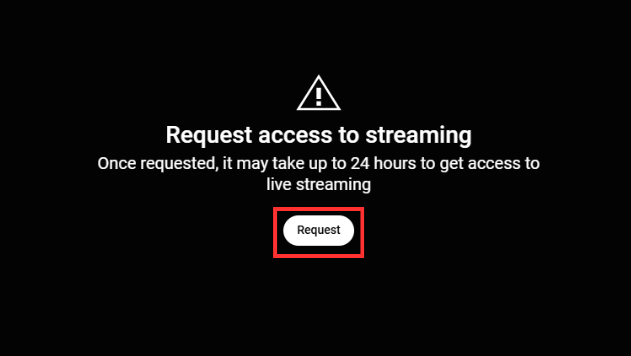
- Request access to streaming by clicking on the “Request” button.
- If you are accessing the live stream for the first time, then it may ask you to verify your phone number. Do so by clicking “Verify.”

- After verifying, choose the built-in webcam option.

- Fill in the basic details for your live stream, including the title, description, category, and privacy settings.

- Decide who can watch your live stream. YouTube offers three visibility options: Private, Unlisted and Public. Select the option that best fits your needs before going live.

- You can also schedule your live stream video for later.

- Grant permission for your browser to access your camera and microphone.

- Preview your settings.

- Select the devices you’ll use for the stream. For smoother performance, use a 4K 30 fps video streaming webcam that supports 24/7 live broadcasting, such as the Hollyland VenusLiv Air.

- When ready, click Go Live. Your stream will start immediately, and viewers can join via your channel.

This method is ideal for beginners or those who need to make broadcasts, as it doesn’t require any additional software.
Method 2: How to Stream Video on YouTube Using StreamYard
StreamYard is a browser-based tool that simplifies live streaming. It doesn’t need heavy installations, and you can connect directly to YouTube. Here’s how:
- Open StreamYard in your browser and log in to your account

- On the dashboard, click Create a live stream.

- Choose whether you want to start a live studio or schedule a pre-recorded video to go live.

- Select YouTube as your destination (you can also stream to multiple platforms).

- Add your stream title and description. You can set these separately for each destination.

- If you like, you can schedule the stream for later. Once done, click Create live stream.

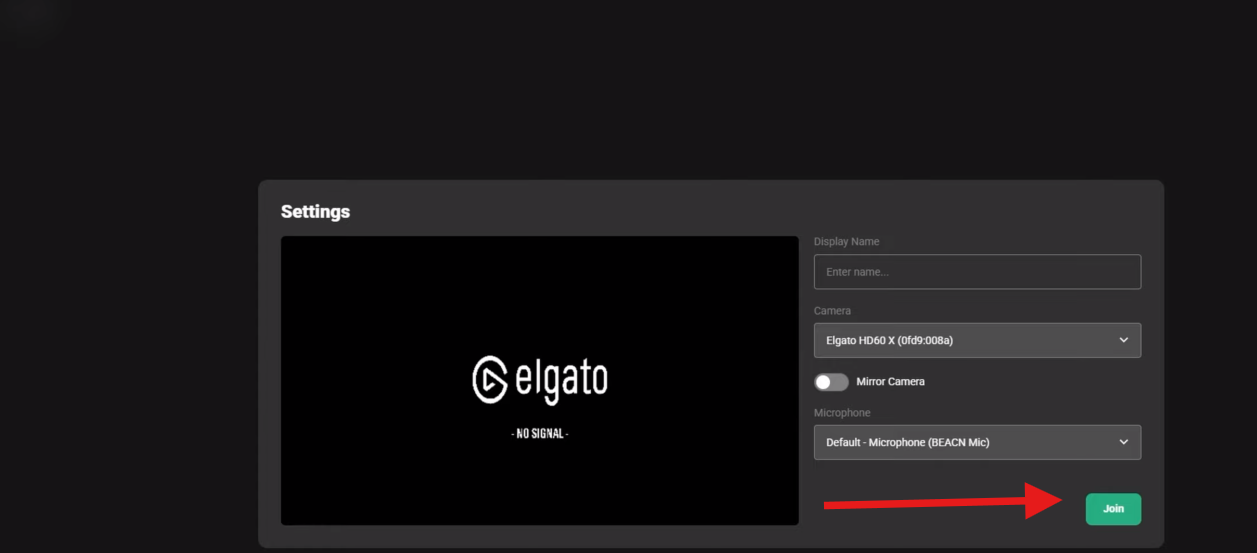
- You’ll be taken to the studio where you can test your camera, mic, and layout.

- Press Enter Studio.
- When you are ready to go live, click Go Live in the upper-right-hand corner.

- Click End Stream to finish the video stream.

Method 3: How to Stream Video on YouTube with OBS Studio
Learning how to stream video using OBS on YouTube will improve the quality of your material and captivate your viewers like never before.
- Download and Install OBS Studio.

- Log in to your YouTube account and open YouTube Studio from your profile menu.

- Go to Settings and then select Channel.

- Click the “Feature eligibility” button. Make sure Live Streaming is enabled. (Activation for new accounts may take up to 24 hours).

- Click “Go Live” within YouTube Studio to access the Live Control Room.

- Choose the Streaming Software option.

- Click “Copy” to copy your YouTube video stream key directly to your clipboard.

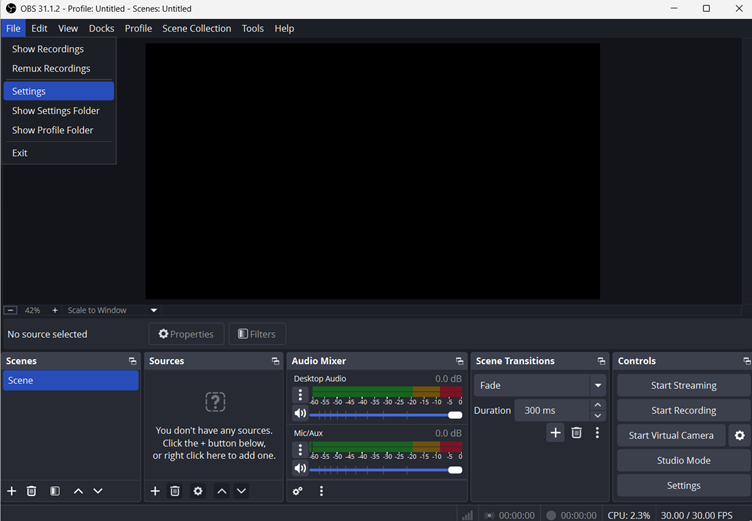
- Now open the OBS studio and configure video settings according to your needs from the “Output” tab.

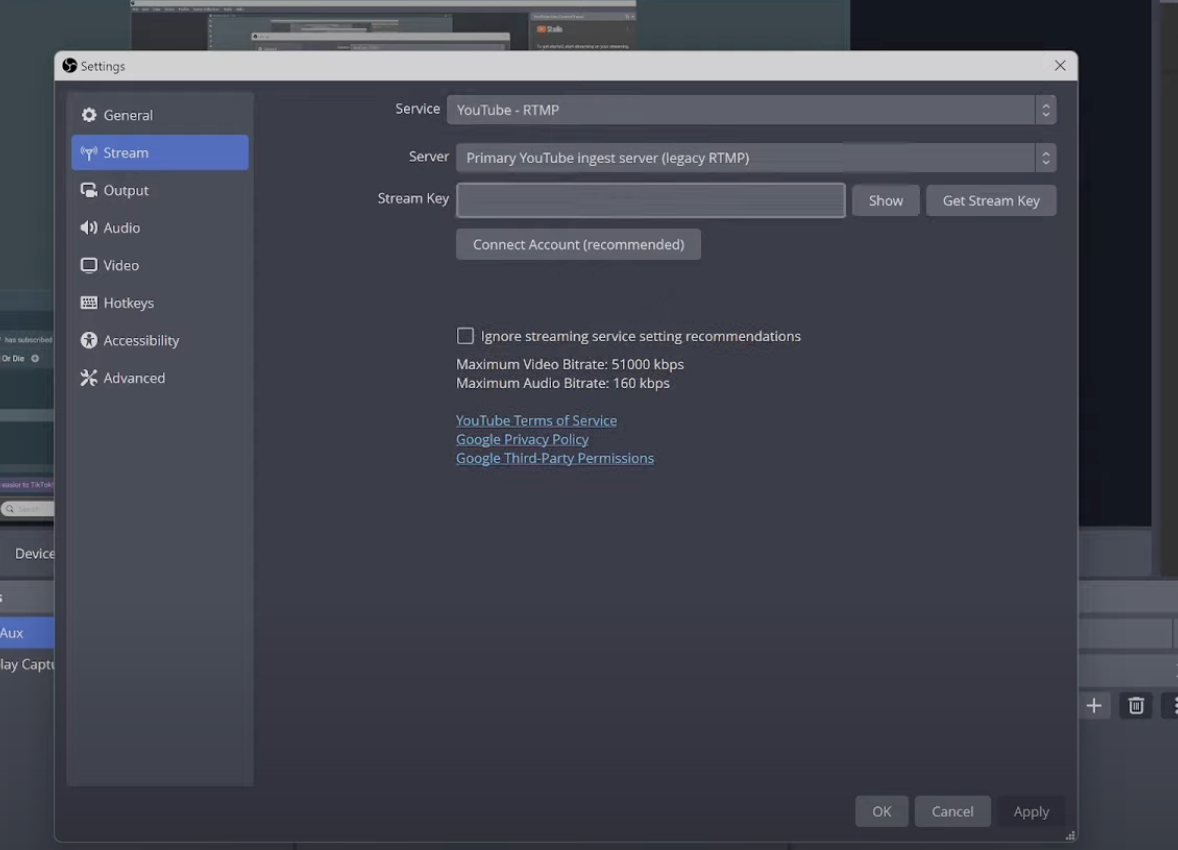
- In the Stream tab, select Service > YouTube – RTMPS. Paste your Stream Key from YouTube.

- Adjust your audio using the “Audio Mixer” on the homepage.

- Click Start Streaming in OBS. Your broadcast will now appear on YouTube.

OBS is ideal for professional streams, as it allows you to switch scenes, add graphics, and customise every detail.
Conclusion
Streaming video events on YouTube is easier than it looks once you understand the steps. Whether you use YouTube Studio or professional tools like StreamYard and OBS Studio, you can go live in minutes. With the proper setup, you’ll deliver smooth, engaging streams that keep your audience connected.
FAQs
1. Do I need special equipment to live stream on YouTube?
Not necessarily. You can start with a basic webcam and microphone. However, better gear improves quality. Many creators upgrade to external cameras and mics to deliver professional audio and video during live streams.
2. How fast should my internet be for live streaming?
For 1080p at 60fps, aim for a minimum upload speed of 6 Mbps. For 720p, 3–4 Mbps is enough. Always test your connection before going live to avoid buffering.
3. Can I monetize my YouTube livestreams?
Yes. Once you’re part of the YouTube Partner Program, you can earn money through ads, Super Chat, memberships, and sponsorships. Check YouTube’s eligibility requirements before planning monetized streams.