.png)
It is quite puzzling to understand how to connect a microphone to a speaker, especially when there’s a wired, wireless, and Bluetooth variety. You must keep in mind that each device has a different setup. For example, there is a different way to connect a wired mic to a Bluetooth speaker. And the method is totally different when connecting a wireless mic to a Bluetooth speaker.
But the entire process becomes hassle-free if you know the right ways to do it. So to ease your pain, this article sheds light on three cases of connecting microphones to speakers.
As you move forward, you will learn the method to connect a wired microphone to a Bluetooth speaker. In the second case, you will uncover simple steps to connect a wireless microphone with a wired speaker. And the third case is all about connecting a wireless microphone to a wireless speaker, such as a Karaoke unit.
So let’s get started.
1. How to Connect a Wired Microphone to Bluetooth Speaker
In this section, you will learn the step-by-step method to connect a wired microphone with a 3.5mm input jack to a Bluetooth speaker. You need a Bluetooth transmitter device and a desktop computer to make this process successful. Also, the device used in this tutorial has TX (transmitter) and RX (receiver) modes.
Step-by-Step Setup
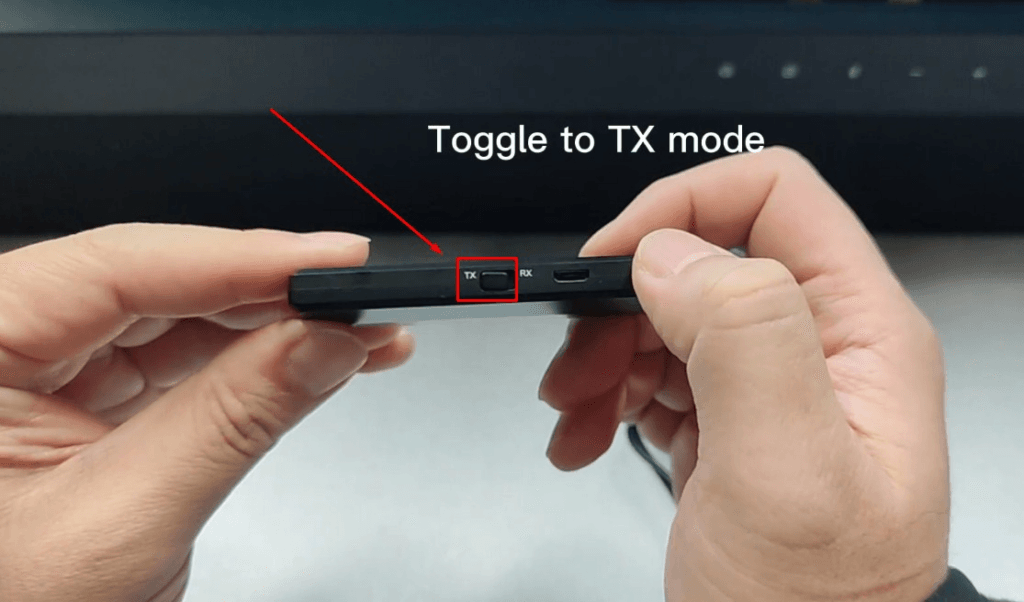
- Step 1: Unbox the Bluetooth transmitter device. You will notice that the device has a TX (transmitter) and RX (receiver) mode with a toggle switch in the center. Therefore, switch to the TX mode and continue with the next step.
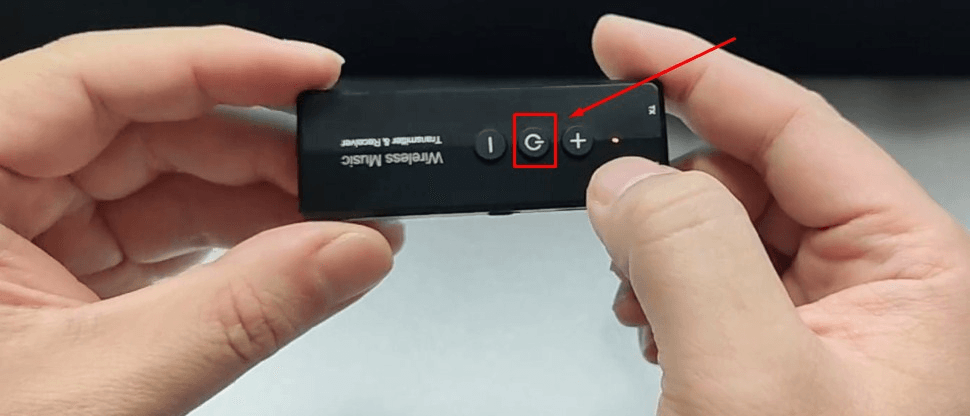
- Step 2: Press and hold the power button for 3 seconds to turn on the device. Once done, turn on the Bluetooth speaker so both devices may pair with each other.
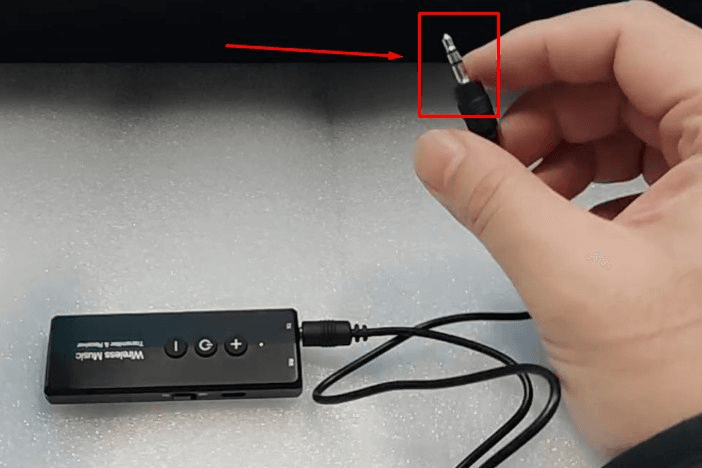
- Step 3: Once the transmitter and speaker are paired, put a 3.5mm jack cable in the TX port of the device.
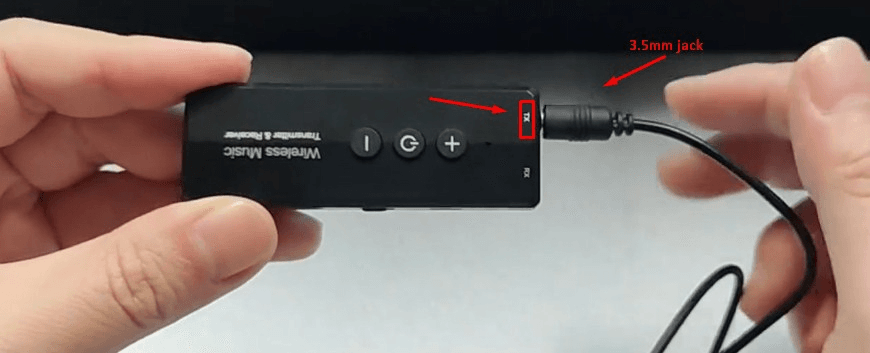
- Step 4: Now, add the other end of the cable to your computer’s 3.5mm female jack. It is the same hole where you plug in your wired speaker.
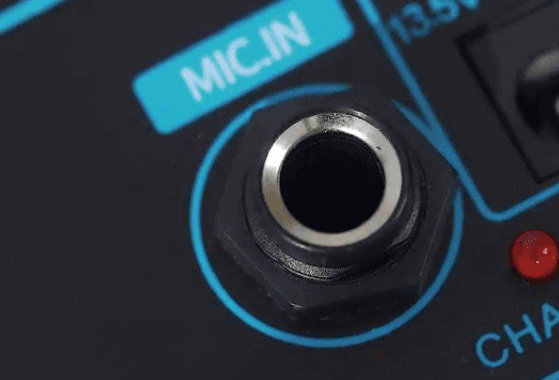
- Step 5: Find the “Mic In” jack on your computer, and insert the 3.5mm jack of the wired microphone.
- Step 6: Test your microphone and enjoy the audio coming out of the Bluetooth speaker.
2. How to Connect a Wireless Microphone to Wired Speaker
If you have a wireless microphone, but the only audio output source is your wired speakers, don’t panic. Because you can still connect your mic to it. But there are a few things you need to arrange.
For example, a wireless microphone with a receiver that has a 3.5mm jack. In case the jack size is bigger, you can use a connector to make it compatible with the jack input of your wired speaker.
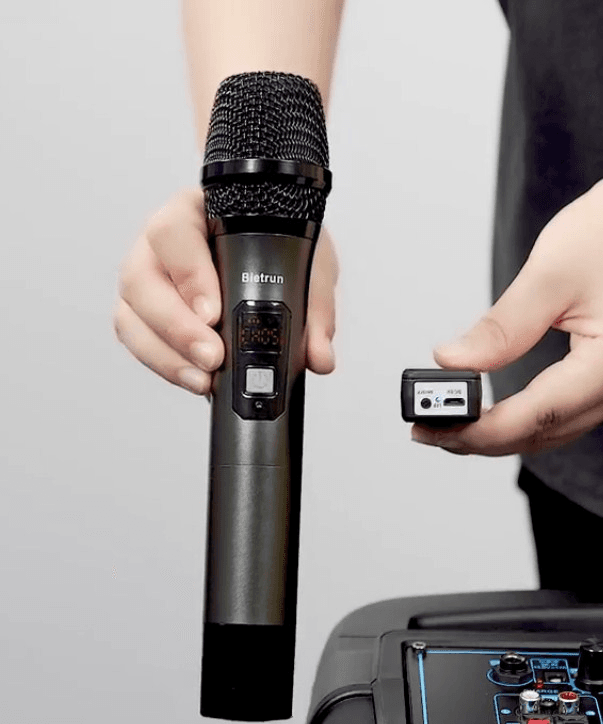
Bietrun WXM02 handheld wireless microphone with a receiver is used to show you the complete process. But feel free to choose any other wireless microphone of your choice. However, make sure you can connect it similarly, as you will see in the steps below. Otherwise, you might waste your time and money.
Step-by-Step Setup
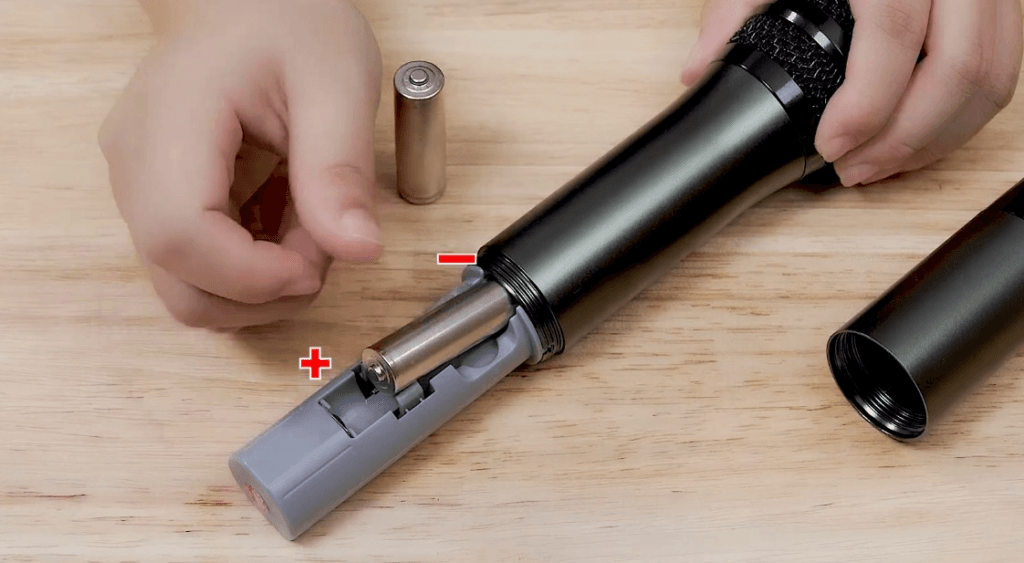
- Step 1: Beitrun WMX02 mic runs on batteries. So, open the lower part of your microphone and place 2 AA batteries to turn on the microphone.
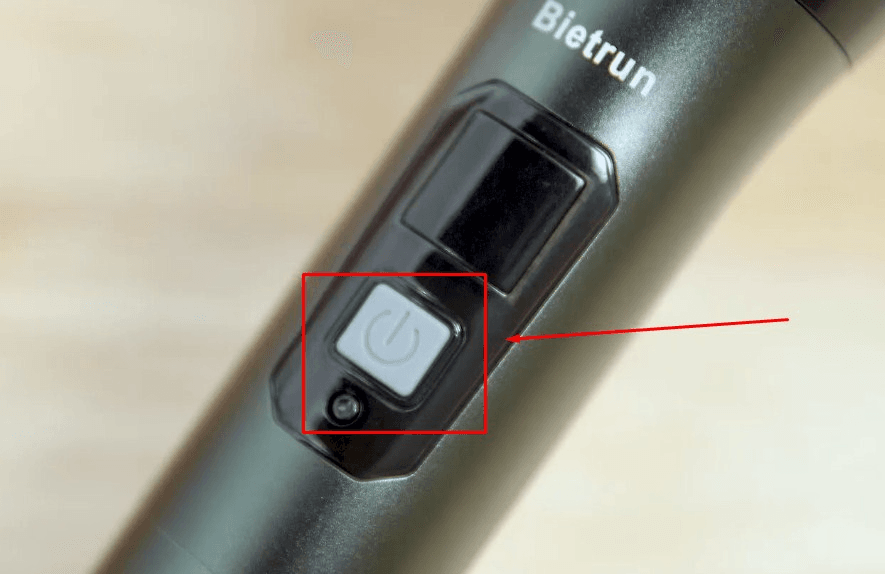
- Step 2: Press and hold the square-shaped power button to turn on the mic after adding the batteries. The small light below the button will start blinking, ensuring the unit is ready to be paired with the receiver.
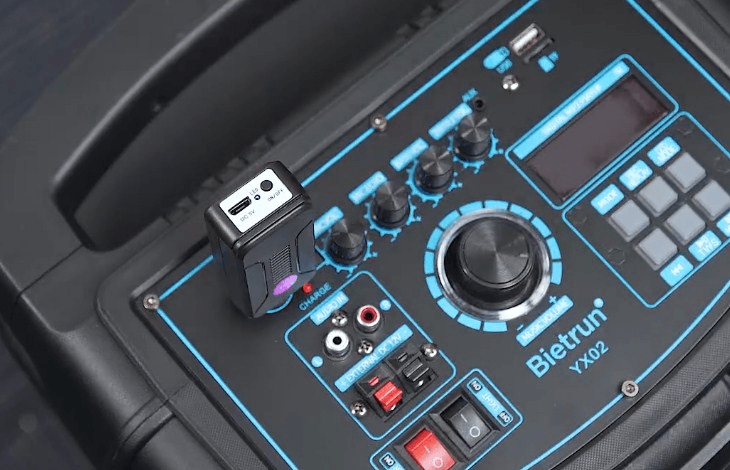
- Step 3: Now, press the ON/OFF button on the receiver. Check the green LED light next to the power button to ensure the receiver is turned on.
- Step 4: After activating both units, make sure to check that the microphone shows a display, whereas the receiver has a green light turned on. If you can see these two things, it means you have successfully paired your mic with the receiver.
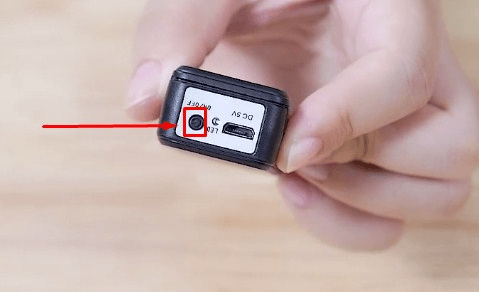
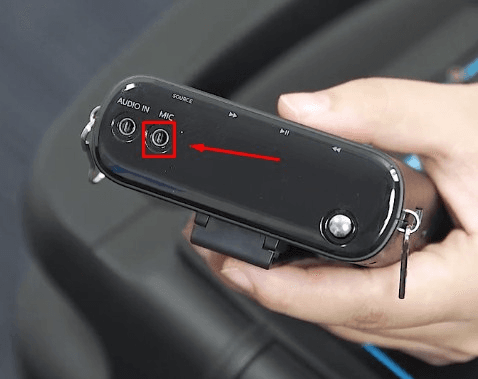
- Step 5: The receiver has a 6.35mm audio jack by default. So if your wired speaker or amplifier has the same 6.35mm mic-in option, you can insert the receiver.
- Step 6: Otherwise, use a 3.5mm connector to plug in the receiver in your wired speaker’s 3.5mm mic input.
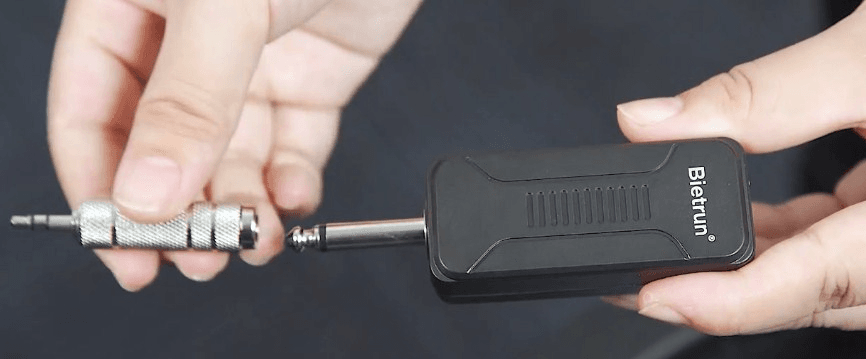
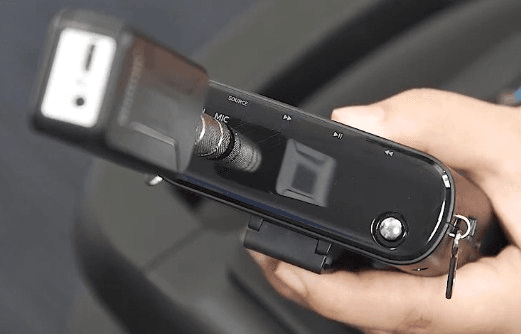
- Step 7: Test your wireless microphone on your wired speaker.
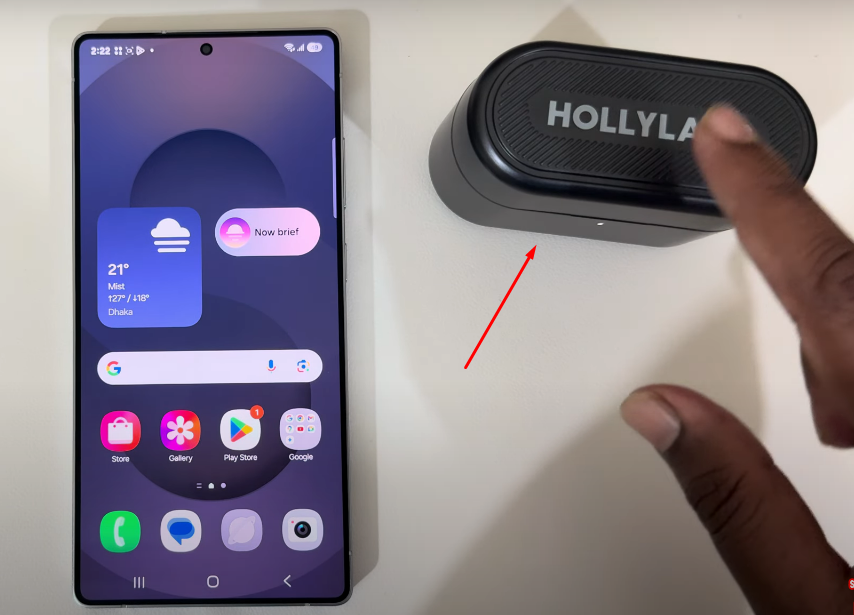
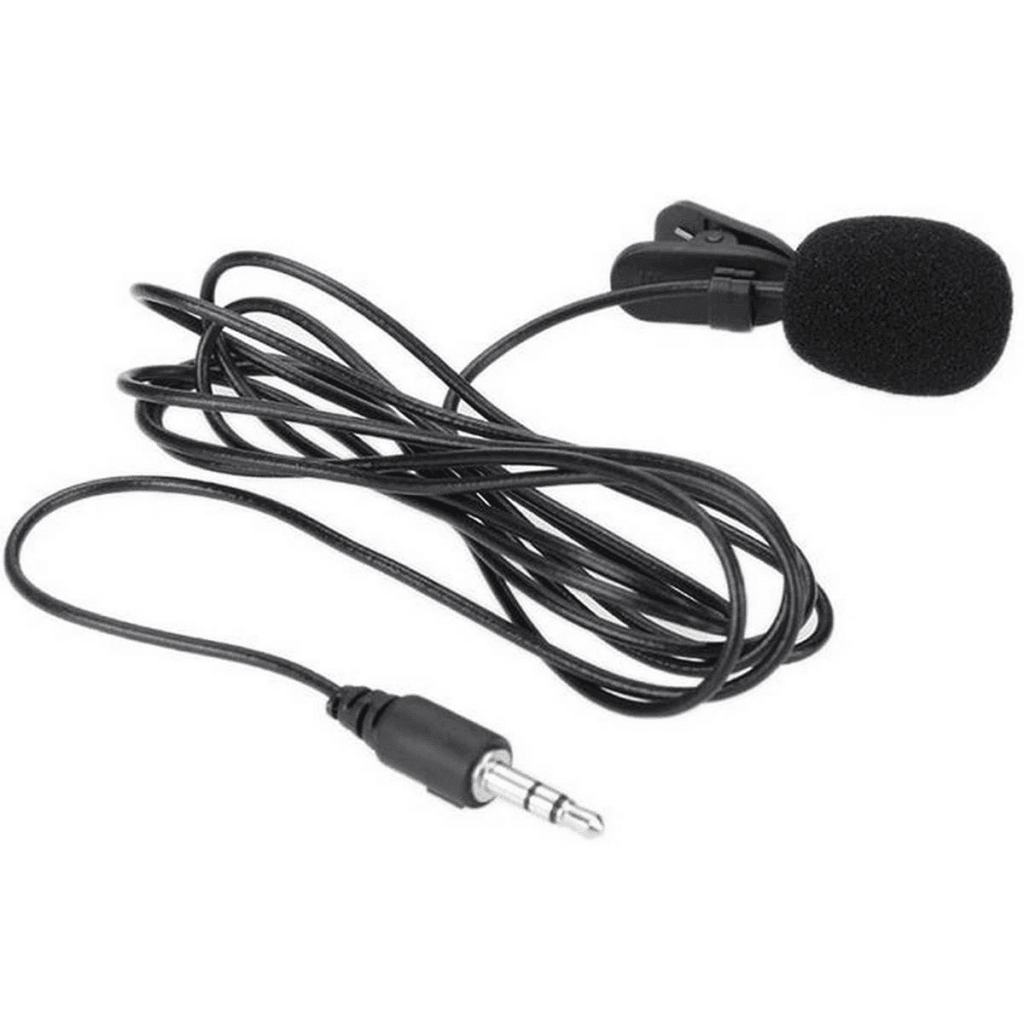
Don’t get confused if you have a lavalier styled wireless microphone kit. For instance, if you are trying to connect the Hollyland Lark M1 to wired speakers, you can use the same steps as you have seen for the handheld wireless mic. However, you will need to use the 3.5mm to 3.5mm cable to connect the receiver of Lark M1 to the wired speaker. And since it operates on 2.4GHz, Lark M1 easily pairs with the transmitter, which means your wireless mic will be connected to your speakers within a few nanoseconds.

Wireless Lavalier Microphone with High-Quality Audio.
Note: Some users complain about the feedback noise when they apply this method. So, if you get a feedback sound at any point, try to adjust the receiver. You can also try changing the 3.5mm connector, as sometimes faulty hardware can cause a lot of signal breakage and noise.
3. How to Connect a Wireless Microphone to Wireless Speaker
The easiest way to connect a wireless microphone to wireless speakers is by getting an entire mic/speaker system. As said earlier, the Karaoke unit is the best option in such a case. Otherwise, you may be unable to connect a separate wireless mic to a speaker. Also, you will need more time and resources in the process.
To make things easy, the JYX Karaoke machine is an example of this tutorial. Apart from its fancy and useful features, compact in a solid body, the main purpose is to show you how easy it is to pair a wireless mic to a wireless speaker when they are pre-paired by the manufacturers.
In other words, you don’t need to struggle to pair both units together, as, by default, they come interlinked. So let’s jump to the tutorial part.
Step-by-Step Setup
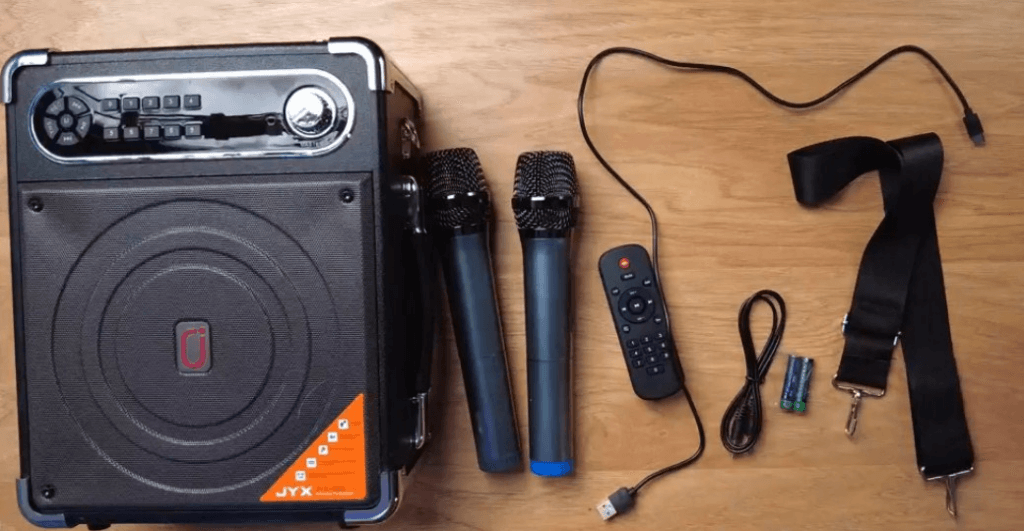
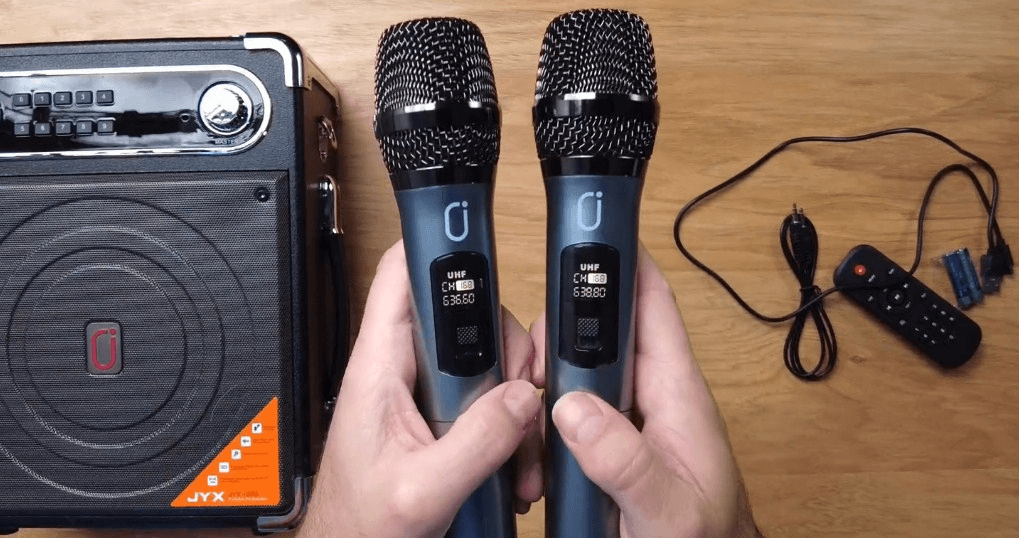
- Step 1: Unbox the contents; you will see a handheld wireless microphone, cables, and a wireless speaker. Since JYX is used for the demonstration, the package includes two wireless handheld mics with a strap, a USB cable to charge the unit, a wireless speaker, and a remote to control the unit.
- Step 2: To turn on the mics and remote, you must put in AAA batteries. Each mic requires 2 batteries. So, open the bottom case of the mic to add batteries to each microphone unit. Then, press and hold the power buttons on both microphones to turn them on.
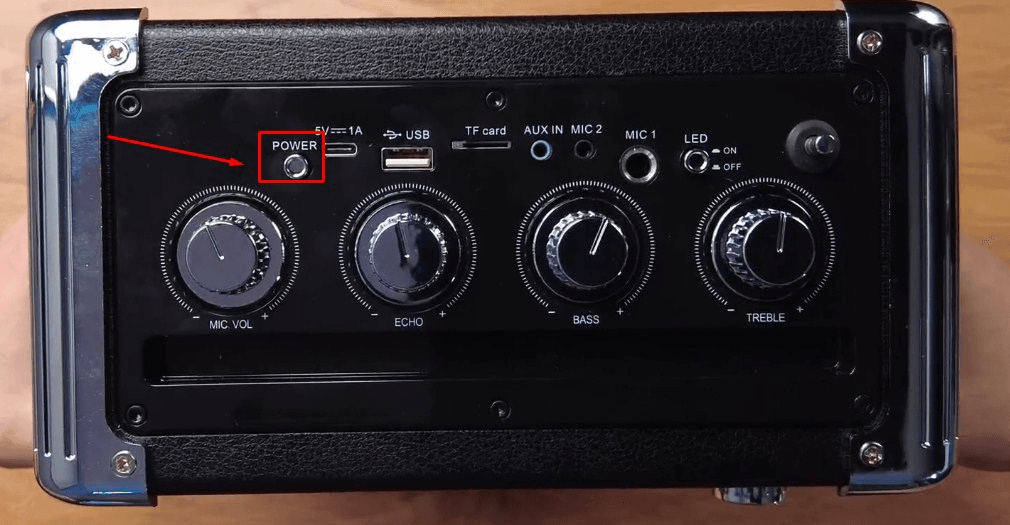
- Step 3: On the top of the speaker, you will find several input options and a small power button along with adjustment knobs, such as mic volume, echo, bass, and treble. Push the power button to turn on the speaker. The microphone will automatically connect to it as soon as you do that.
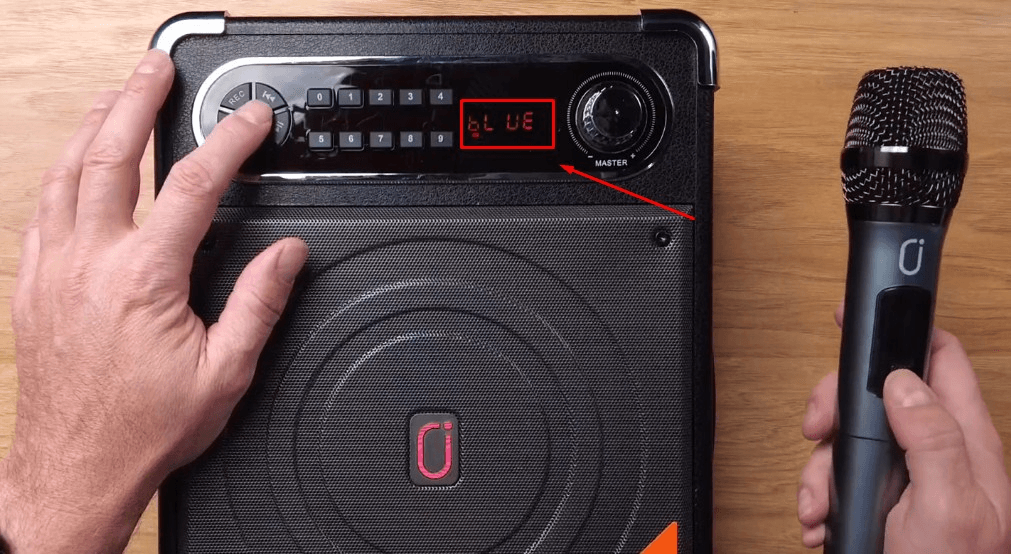
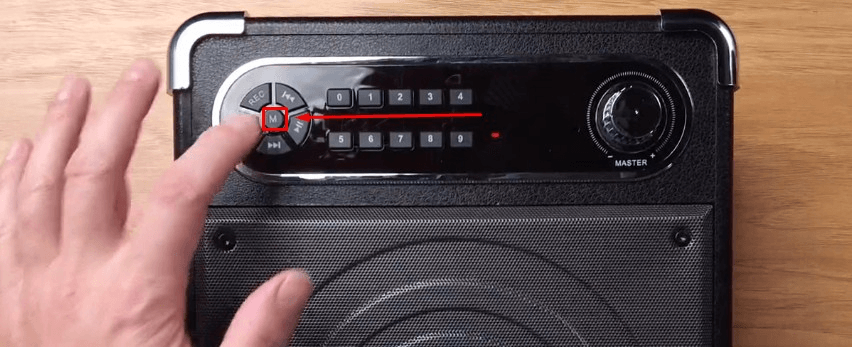
- Step 4: Look at the front panel of the speaker unit. If the mode displays as ‘bLUE,’ you can start using your microphone. Press the ‘M’ button to switch to the mic mode if the panel shows radio frequency.
Conclusion
This article showed three ways to connect your mic to a speaker. You can easily connect a wired microphone to a Bluetooth speaker using a transmitter device and a 3.5mm cable mic.
Similarly, you can pair a wireless microphone to a wired speaker or amplifier by pairing the mic with the receiver. And then connecting the unit to the speaker’s mic input.
And the third way is to connect a wireless mic to a wireless speaker. The best solution for this is to have a complete Karaoke system that automatically pairs the mic with the speaker unit in no time.