.png)
Knowing how to do microphone settings on your iPhone correctly can take your audio clarity to the next level. It is because whether you are capturing memorable moments through videos, recording podcasts, or using Zoom video calls, high-quality audio matters the most. So, this article comprehensively discusses microphone settings for iPhones. You will learn about accessing, adjusting, and fixing microphone settings.
Moreover, the article shares tips for improving the sound quality of your iPhone through the device’s built-in mics and external microphones. Most importantly, you can find answers to some of the most puzzling questions that may have housed your mind for several days. So read from top to bottom because the information is gold!
Note: The iPhone 12 series and iPhone 14 series are used to demonstrate the steps and instructions in each section. Some options can be different on your iPhone due to a different model or iOS version. Nevertheless, these methods will work on all iPhones with the latest iOS.
1. Accessing and Adjusting Microphone Settings on iPhone
If you want to maintain firm control and privacy over your iPhone, you should know how to access the microphone settings of your device. You can barricade unauthorized eavesdropping or recording by managing which applications can access your mic.
This ensures that all your conversations remain secure and free from breach risks. Moreover, accessing the microphone can also save your battery life since you can decide which app should use the microphone, which indirectly saves your battery. So, if you want to learn how to access your iPhone’s microphone settings, follow the methods below.
a. For General Applications
- Step 1: Unlock your iPhone and look for the “Settings” icon on the home screen.
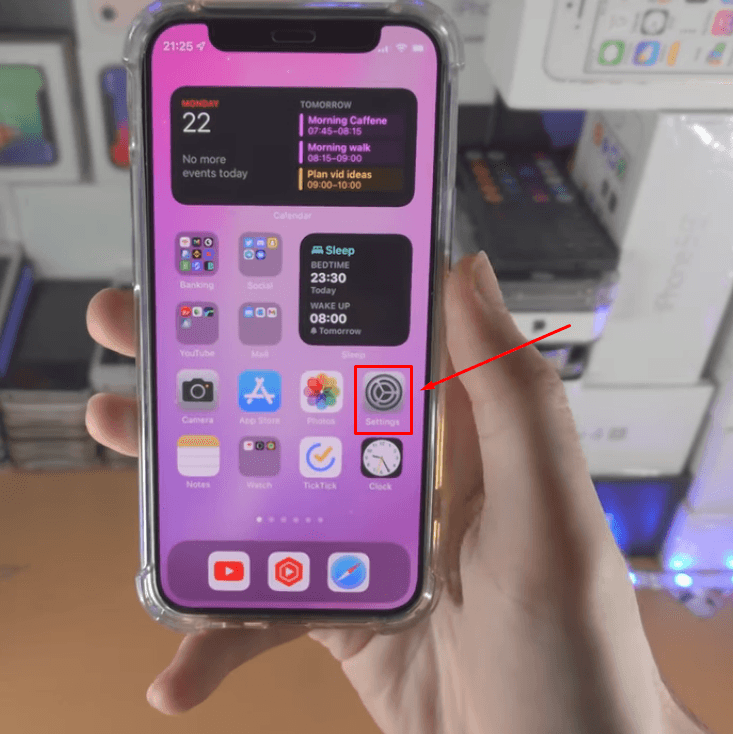
- Step 2: Once you enter ‘Settings,’ you will see a list of options like this.
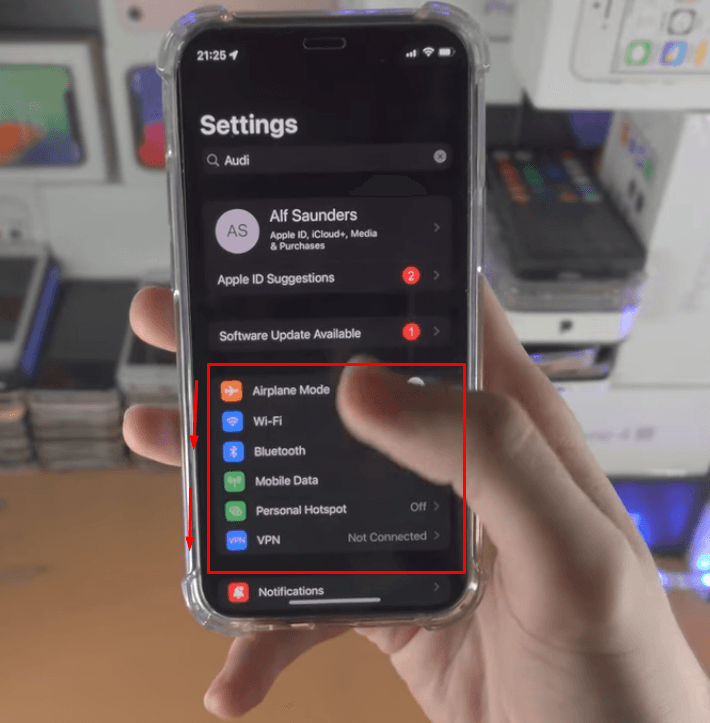
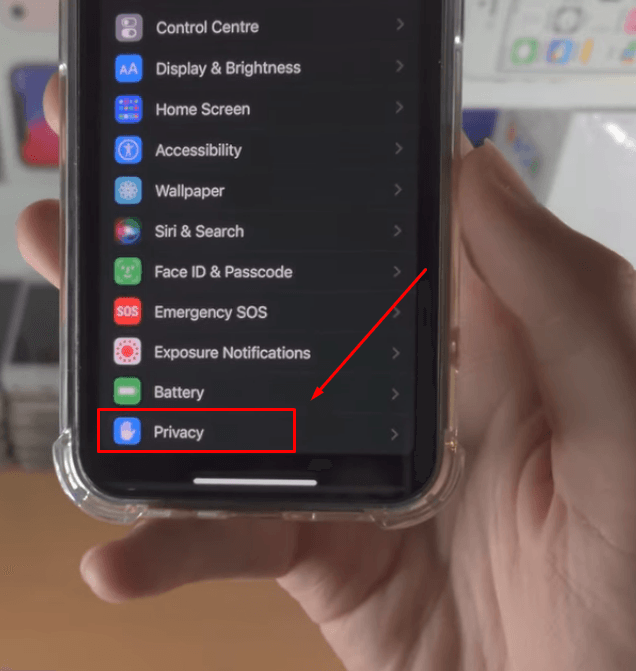
- Step 3: Scroll down, look for the “Privacy” option, and tap on it.
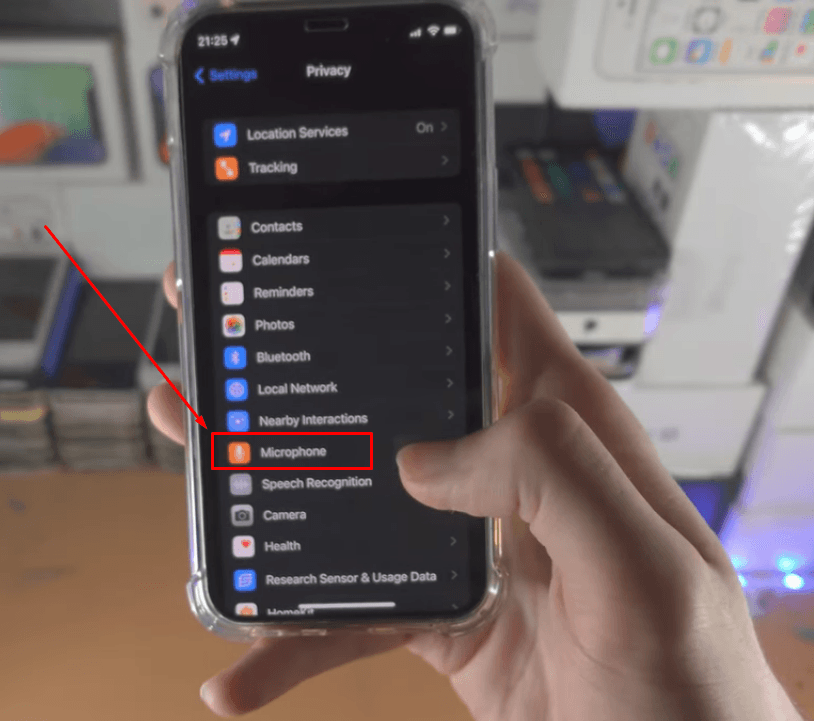
- Step 4: You will see another menu with various applications, such as ‘Contacts,’ ‘Photos,’ and more. From this menu, choose ‘Microphone’ by simply tapping the icon.
As soon as you click the ‘Microphone’ option, you will see various applications with a toggle switch next to each app’s name, like this:

If the toggle is turned on, it will be represented in ‘green.’ If the toggle is turned off, it will be shown in ‘grey,’ meaning the specific application does not allow microphone access.
- Step 5: If the toggle is turned off for any application, tap on it to turn it on. Go back to the home screen and open that particular app. It should now have microphone access.
b. For Web Browers on iPhone
However, some applications, such as internet browsers like Safari, require another method to access the microphone on an iPhone. Giving access to such apps allows you to use the microphone on the browser. So, here’s the step-by-step process.
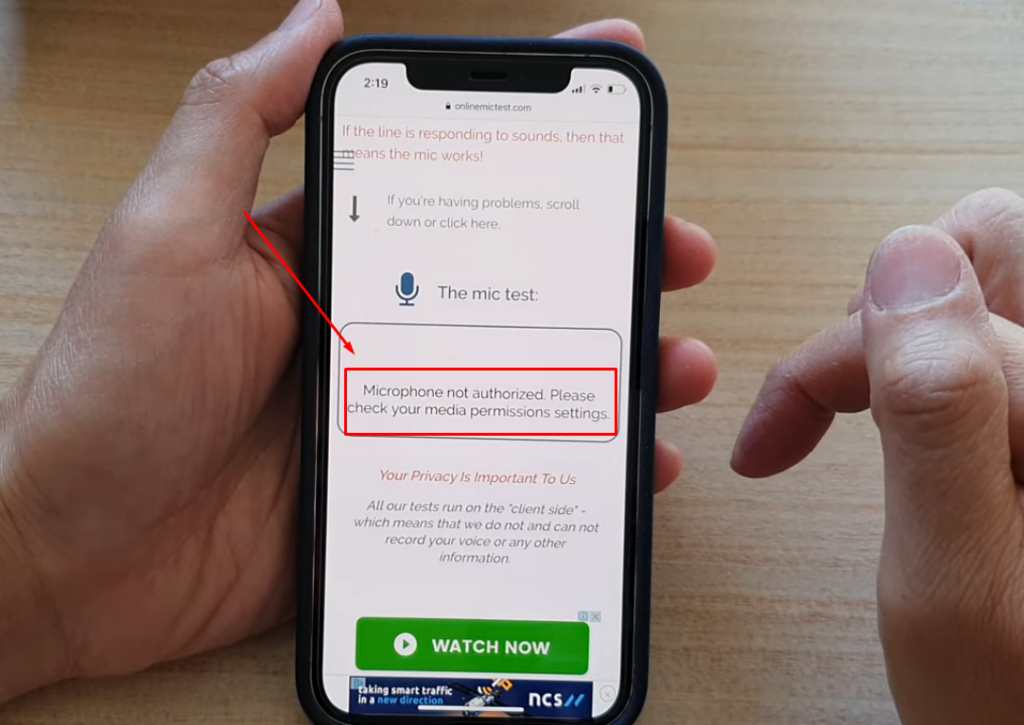
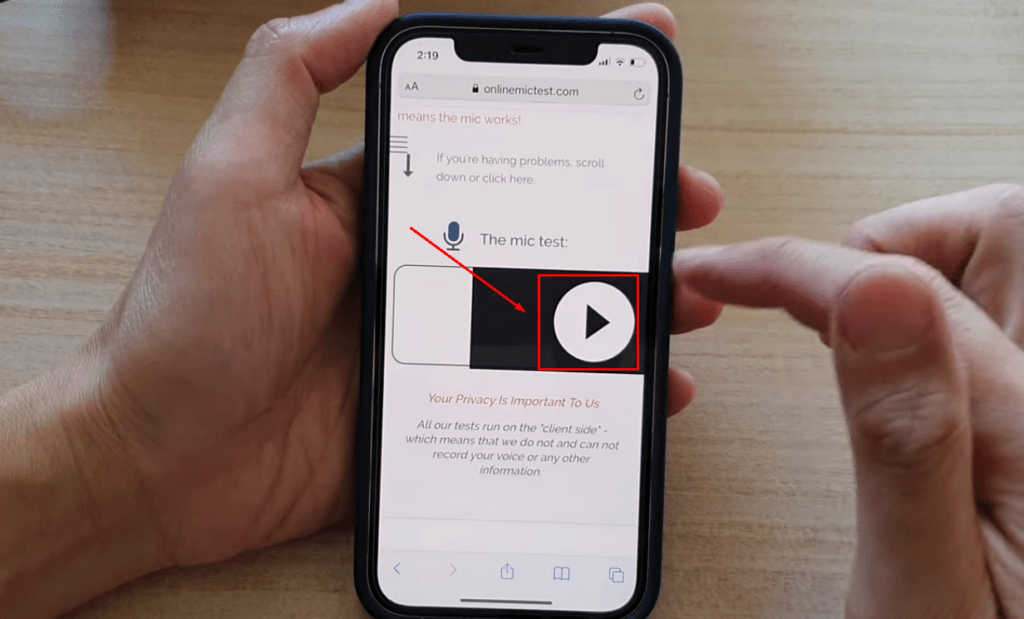
- Step 1: First, search for any online microphone testing service on Google using Safari and visit the site to test the microphone. If you have not given access to Safari, you will not be able to test the mic. The website may prompt a message saying, ‘ Microphone not authorized,’ as seen in the image below.
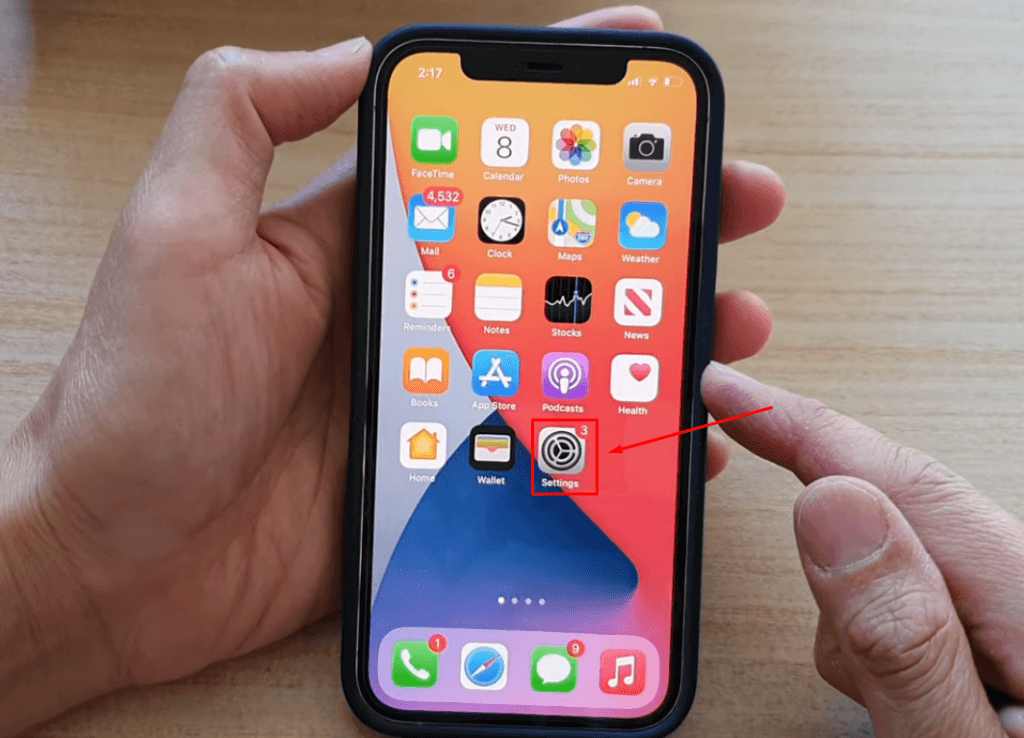
- Step 2: To give microphone access to Safari, tap on the ‘Settings’ icon on the home screen of your iPhone.
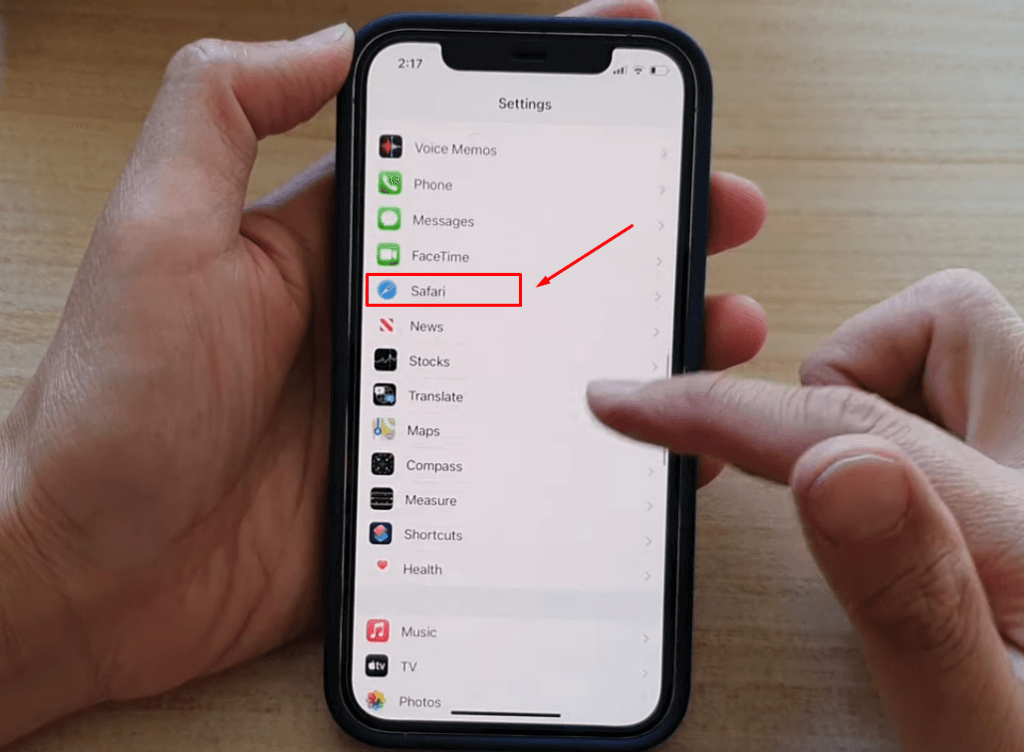
- Step 3: You will find various options under the ‘Settings’ menu. Scroll down until you see the ‘Safari’ option and tap on it.
- Step 4: When you are inside the Safari settings, scroll down to the ‘Settings for Websites’ section and choose ‘Microphone.’
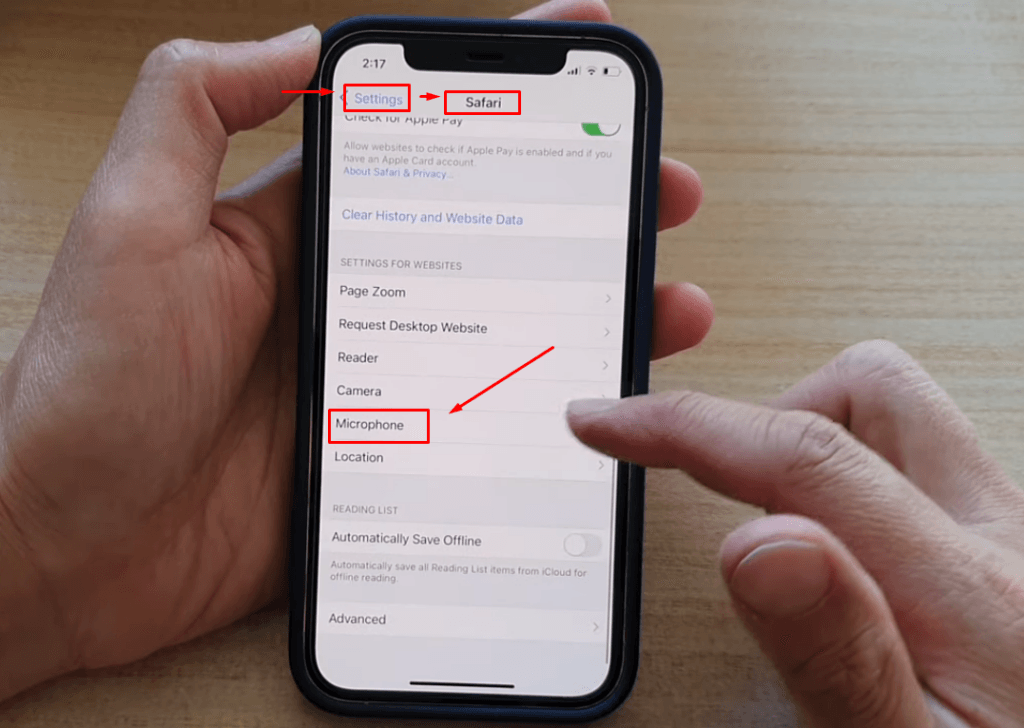
- Step 5: You will see three options, ‘Ask, ‘Deny,’ and ‘Allow,’ in the ‘Microphone Access on All Websites’ section. So, select the ‘Allow’ option.

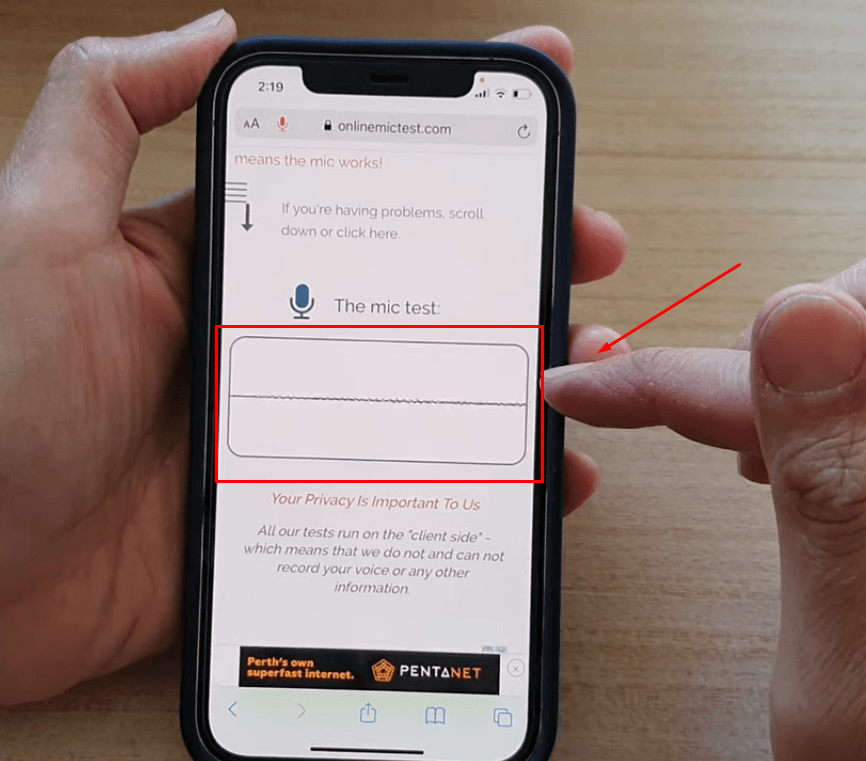
- Step 6: Now open the microphone testing website again on your Safari browser and test the mic by clicking on the ‘Play’ icon (the microphone testing icon may vary depending on the website you are using.)
- Step 7: Since you have allowed the microphone to be used with the Safari browser on all websites, you will be able to test the iPhone mic successfully this time.
c. If You Can’t Find the App to Grant Microphone Permission
Sometimes, you may not see the name of the application in the ‘Privacy’ and ‘Microphone’ settings. That means you will not be able to give microphone access to that specific app. This is a bit challenging task but can be solved easily by following the steps below.
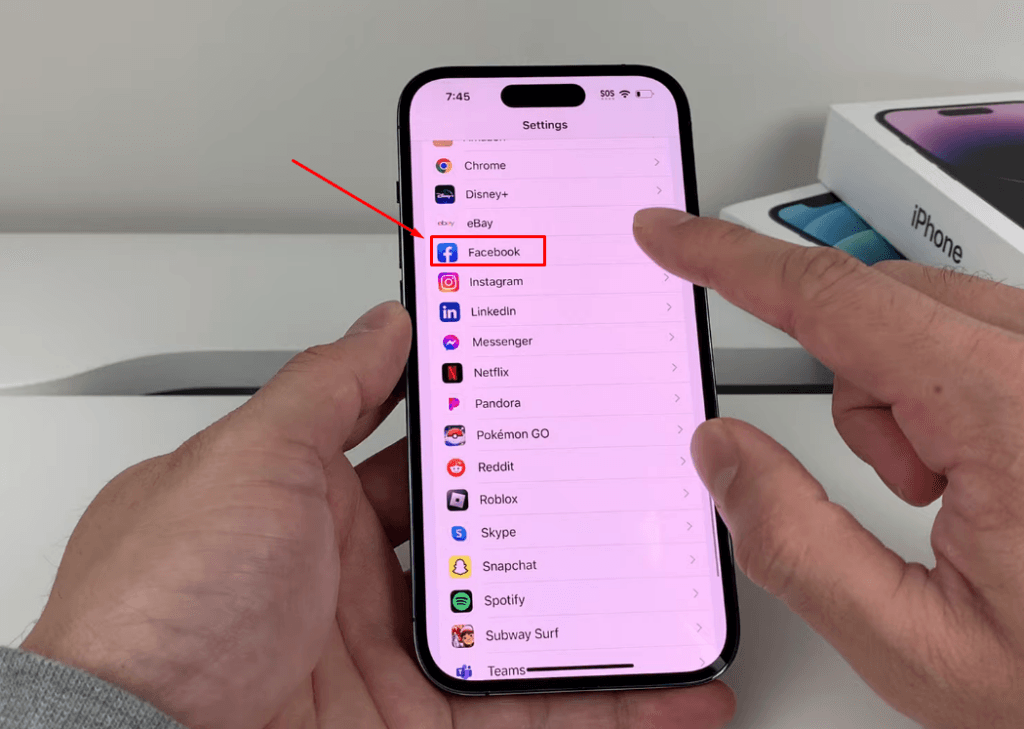
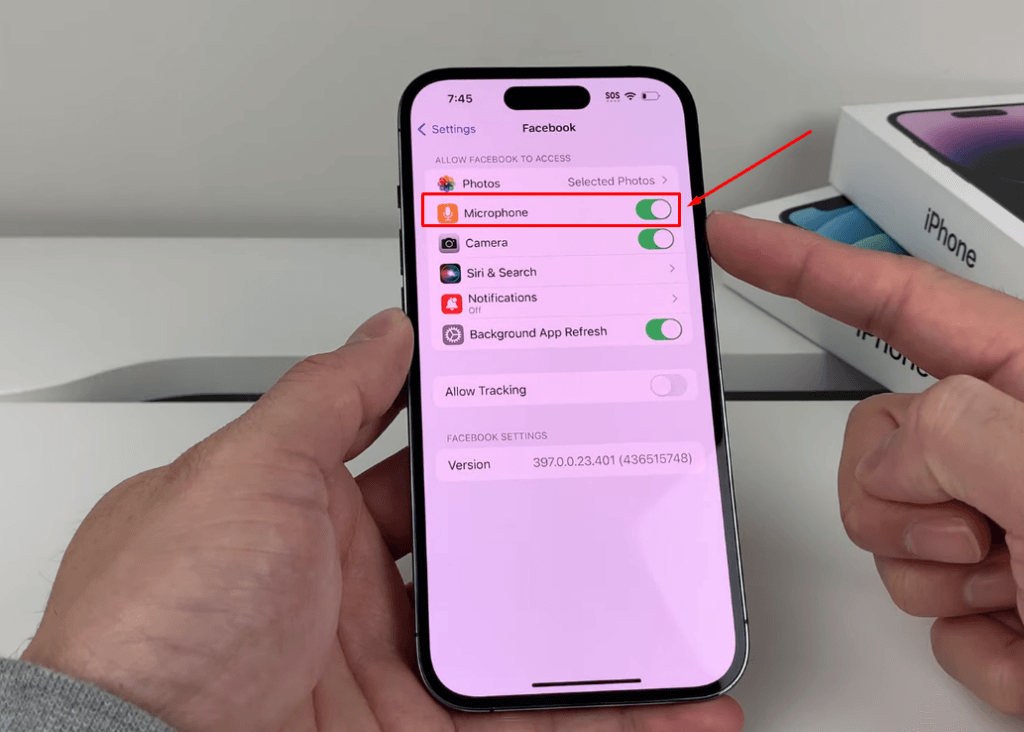
- Step 1: Let’s assume you cannot find ‘Facebook’ in the microphone settings of your iPhone, which is why you can’t grant permission to the Facebook app to use the mic. So, go to the ‘Settings’ menu, scroll down, and tap the ‘Facebook’ icon.
This will help you see what features and hardware can be used with Facebook. For example, in this screenshot, ‘Camera’ is toggled on while ‘Microphone’ is toggled off.
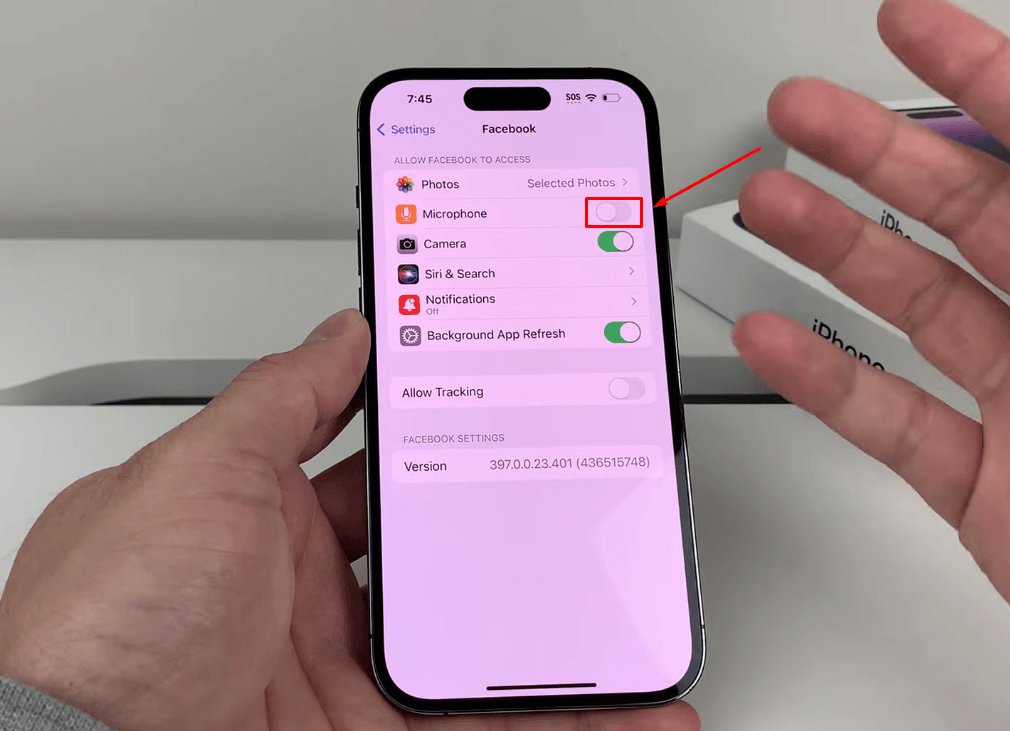
- Step 2: Tap the toggle to turn it on for the microphone and go back to the main ‘Settings.’
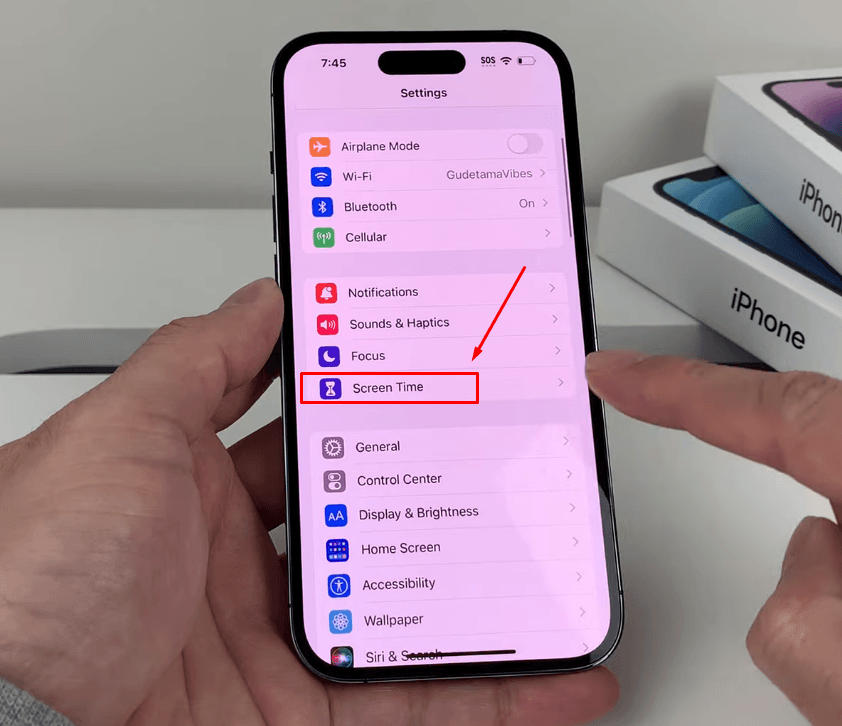
- Step 3: Look for the ‘Screen Time’ option and tap on it.
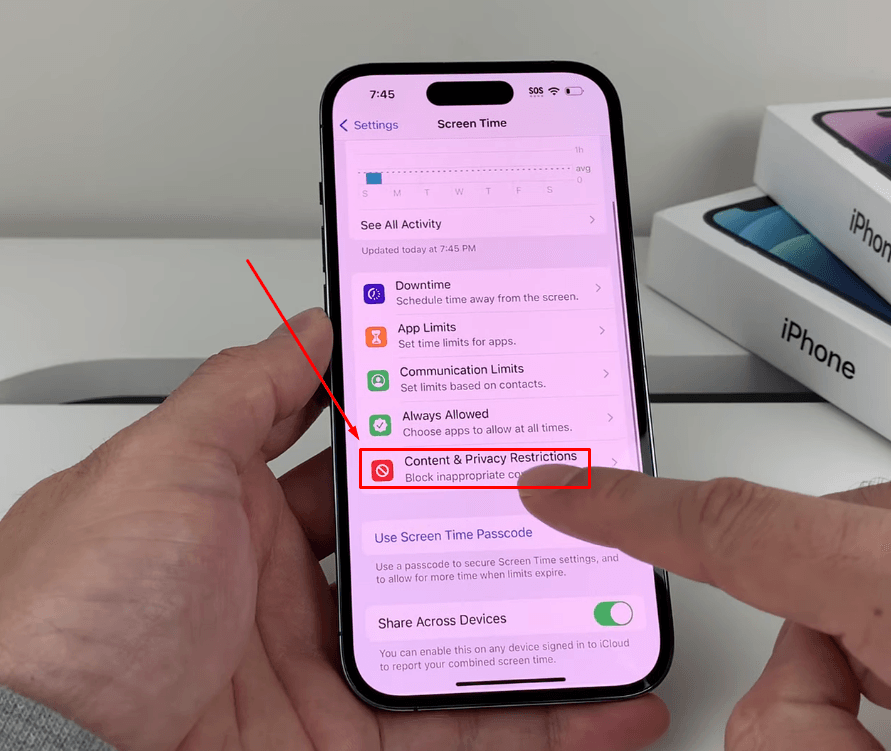
- Step 4: Tap on the ‘Content & Privacy Restrictions’ from the list menu.
- Step 5: Scroll down to the ‘Privacy’ section and tap the ‘Microphone’ option.

- Step 6: Next, select ‘Allow Changes’ and make sure it has a ‘checked’ symbol.
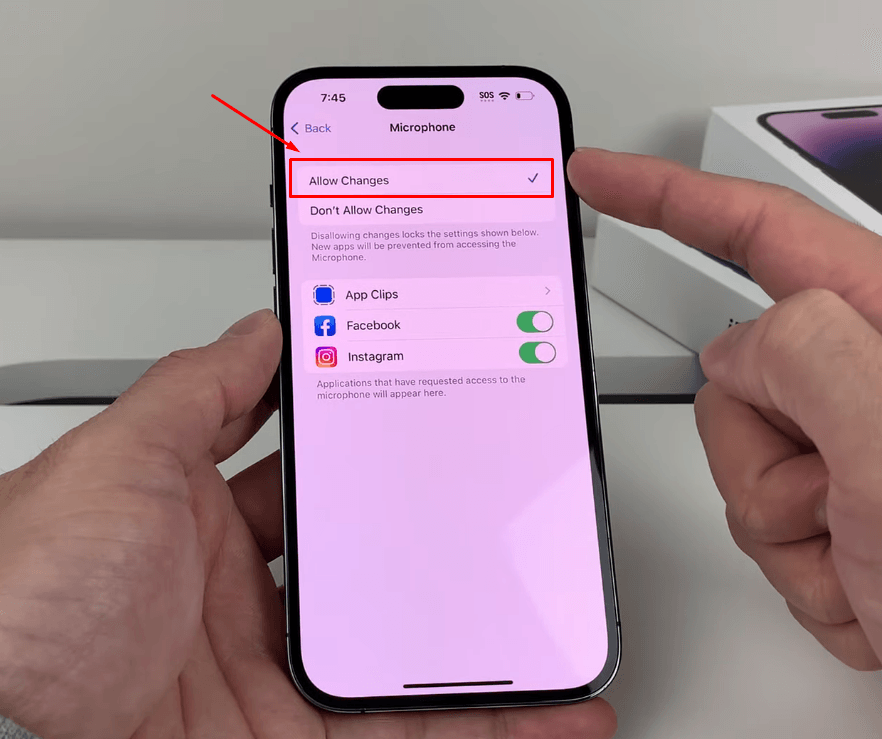
- Step 7: Go back into the ‘Content & Privacy Restrictions’ menu and tap on the ‘Allowed Apps.’
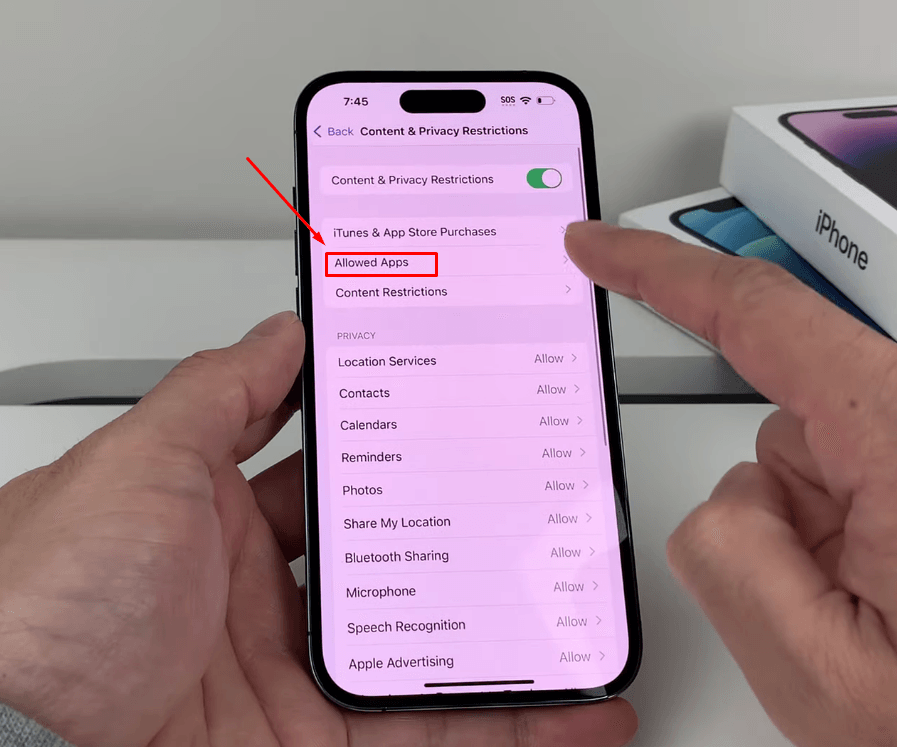
- Step 8: You will see almost all the names of the applications installed on your iPhone with a toggle switch next to each app. So, find the app in this section you wish to have microphone permission and turn on the toggle (in this case, switch on the toggle for the Facebook app).
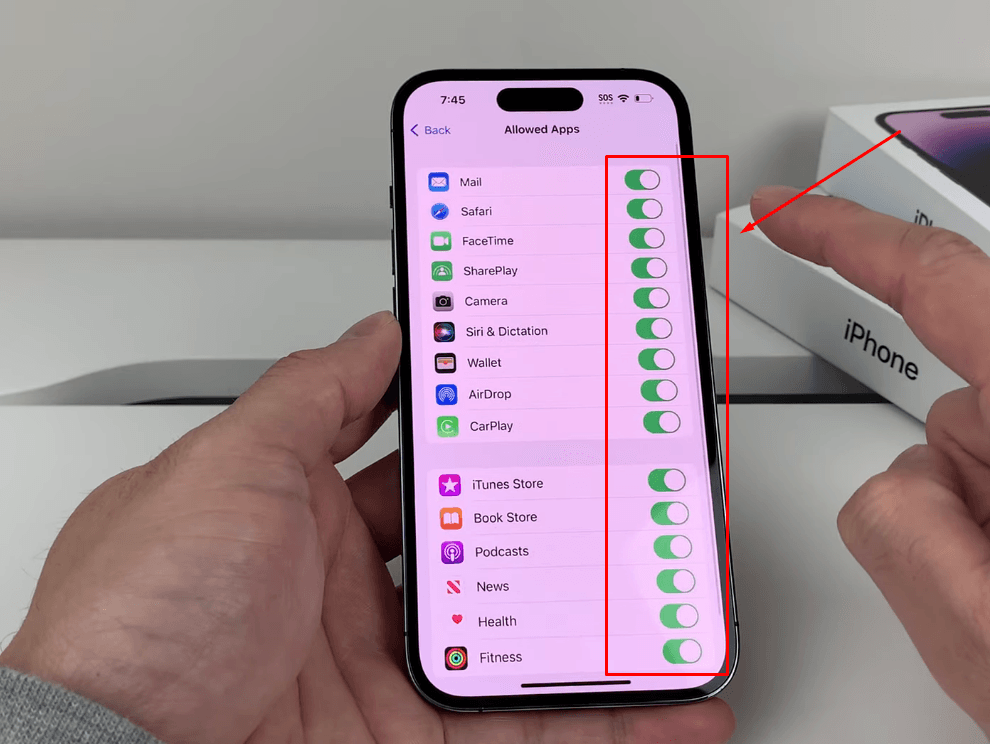
Return to the home screen and open the Facebook application. This time, you will be able to use the iPhone microphone with this app.
2. Improving Microphone’s Quality of Your iPhone
This section of the article is about making your iPhone’s mic perform better for routine activities.
a. Choose the Right Microphone when Recording
All iPhone models, especially from the 12 series and onwards, have multiple microphones. These microphones have a different purpose and help enhance your audio quality. They are placed in three different locations.
First Microphone (Mics at the Bottom)
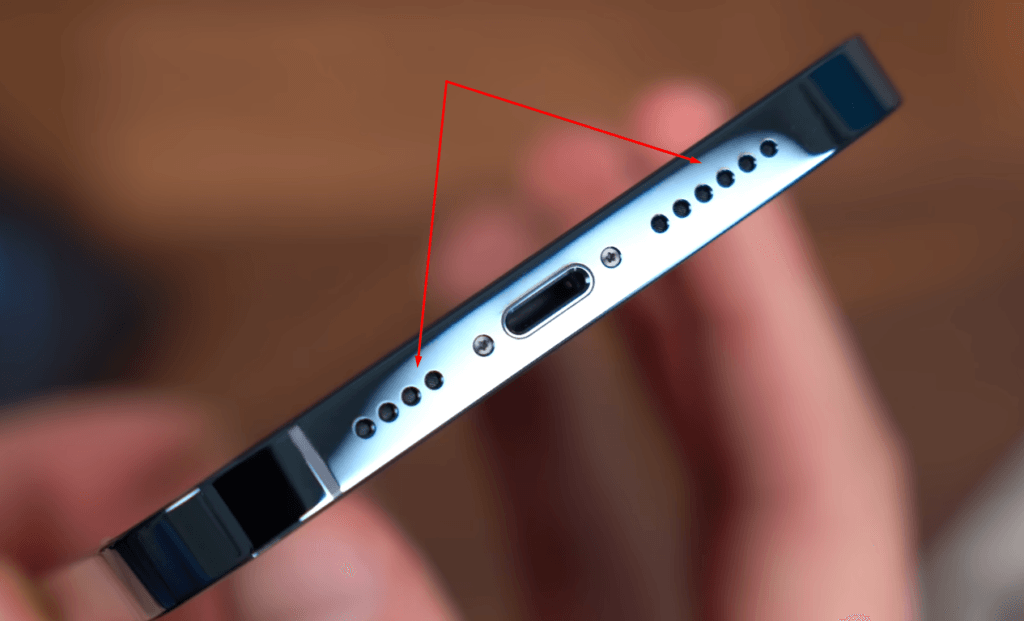
The first microphone comes in a pair. So technically, these are two microphones at the bottom of your iPhone. They are used for voice memos, regular phone calls, and FaceTime calls.
Second Microphone (Mic on the Front Camera)
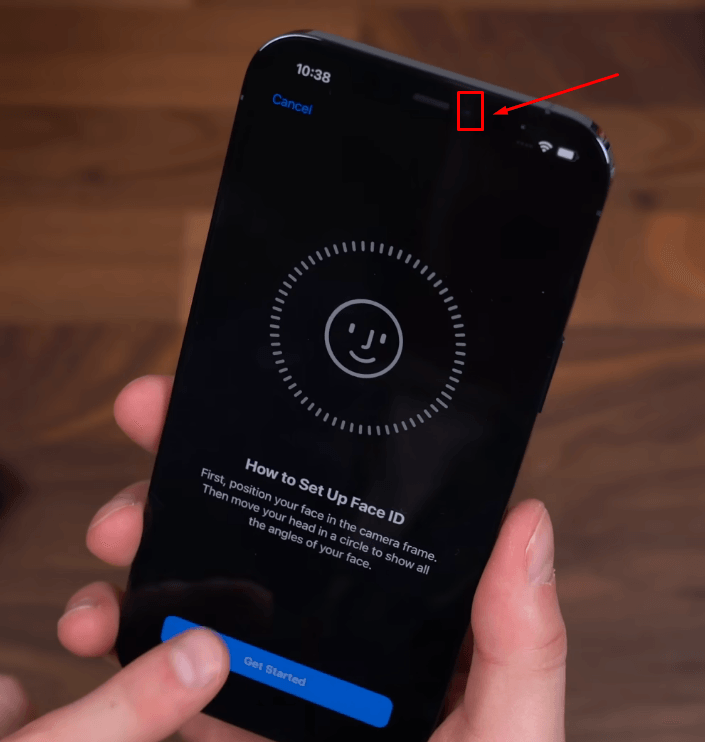
The second mic on the iPhone is located on the front panel near the selfie camera. Its main function is to transfer your voice during FaceTime calls and to give voice commands to Siri. Moreover, it facilitates capturing high-quality audio for all video recordings shot from the front camera. Besides, it is activated when you put your calls on speaker.
Third Microphone (Mic on the Back Camera)
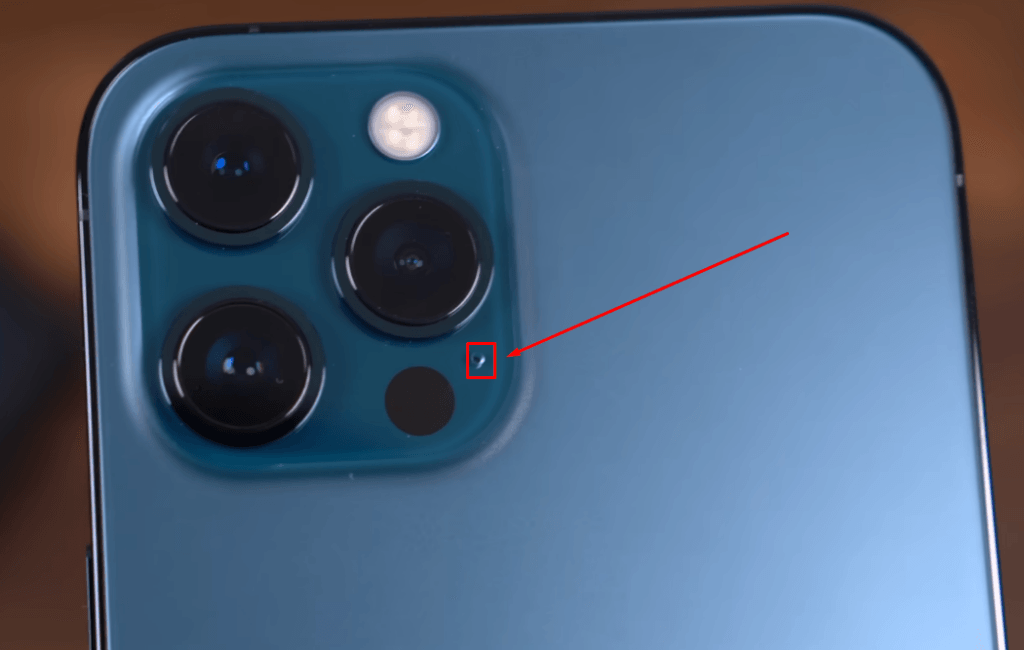
The third camera is positioned on the back side of your iPhone near the back cameras. Its primary function is to enable the Phone call noise-canceling function during the calls. And, like the other microphones, it allows audio for FaceTime, Siri, and video recordings shot through the rear camera.
So, when using the mics, ensure you position them correctly to obtain optimal audio quality. For instance, if you are recording videos with your back camera, make sure the rear mic is not covered by your hand or iPhone case. Otherwise, you will experience poor sound.
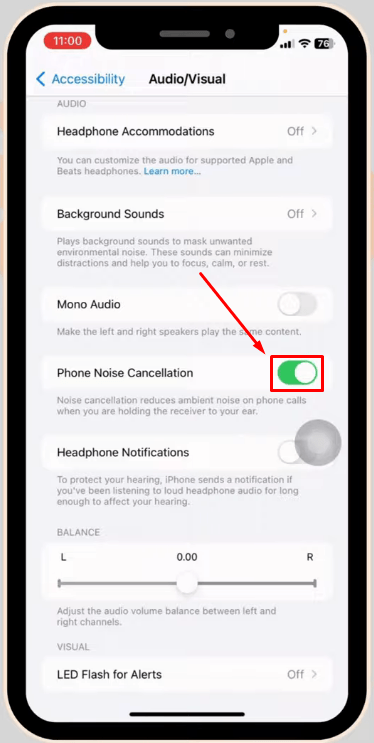
b. Enable Phone Noise Cancellation Feature
The ‘Phone Noise Cancellation’ feature in your iPhone helps reduce ambient noises during phone calls. Follow these steps to activate this feature.
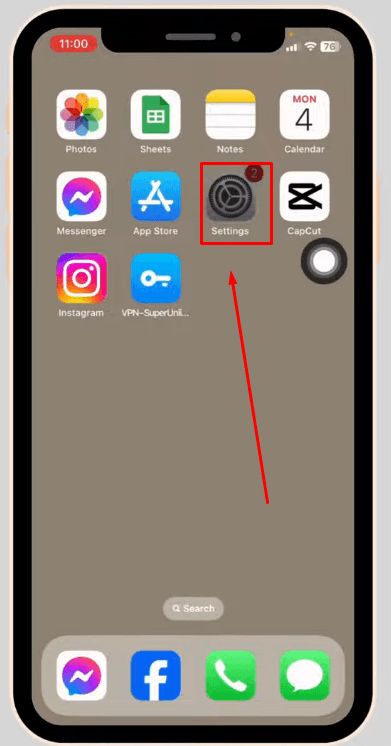
- Step 1: Tap on ‘Settings’ from your home screen.
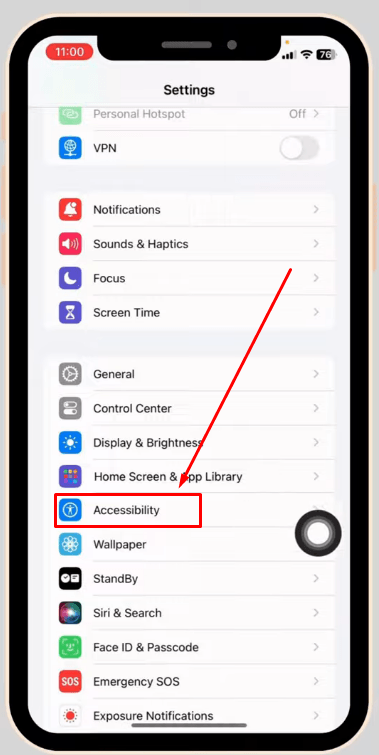
- Step 2: Scroll down to the ‘Accessibility’ option and tap it.
- Step 3: Under the ‘Accessibility’ menu, you will find many options. Look for the ‘Audio/Visual’ under the ‘Hearing’ section.

- Step 4: Scroll down and look for ‘Phone Noise Cancellation.’ Next to this option, you will also find a toggle switch.
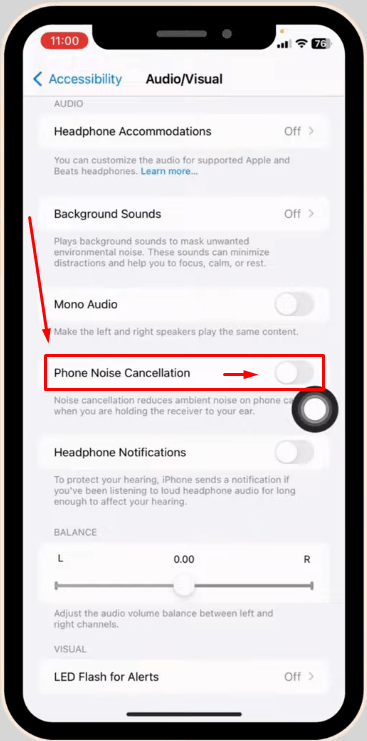
- Step 5: Tap the toggle to turn this feature on.
3. Use External Microphones with Your iPhone
Although your iPhone’s built-in mics are sufficient for recording excellent sound, they may not provide you with professional-grade audio quality. Fortunately, the iPhone allows you to use wired and wireless external microphones to bring more crispness and clarity to the recording of audio and videos. So, let’s learn ways to connect external mics to your iPhone.
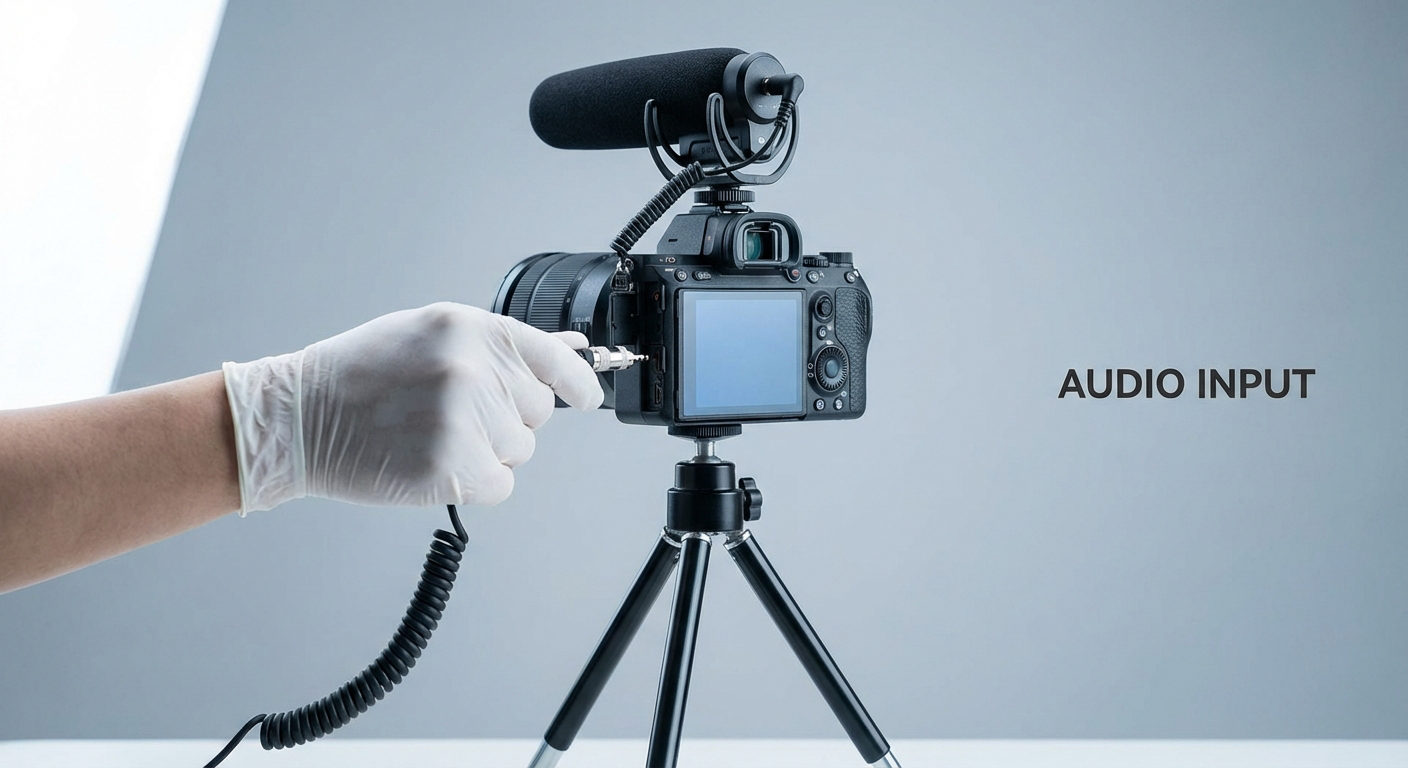
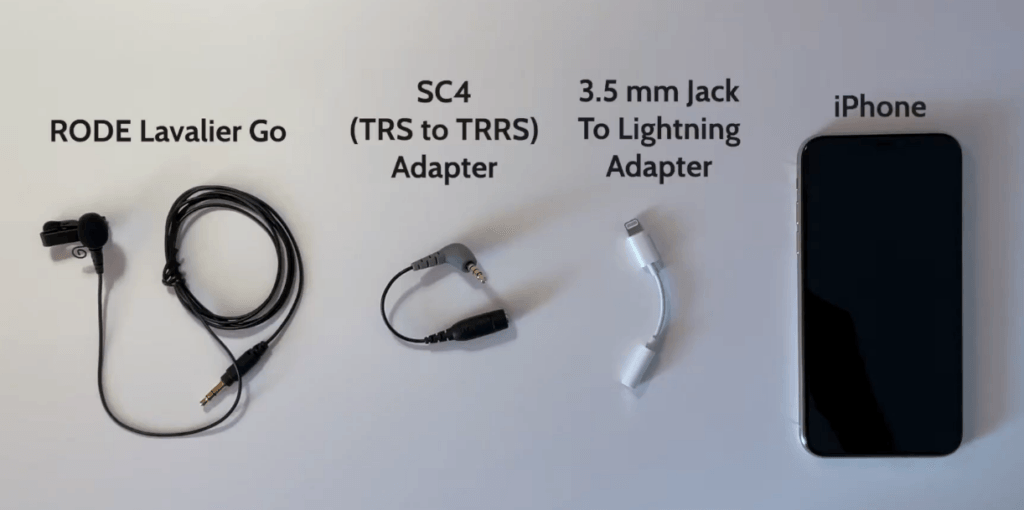
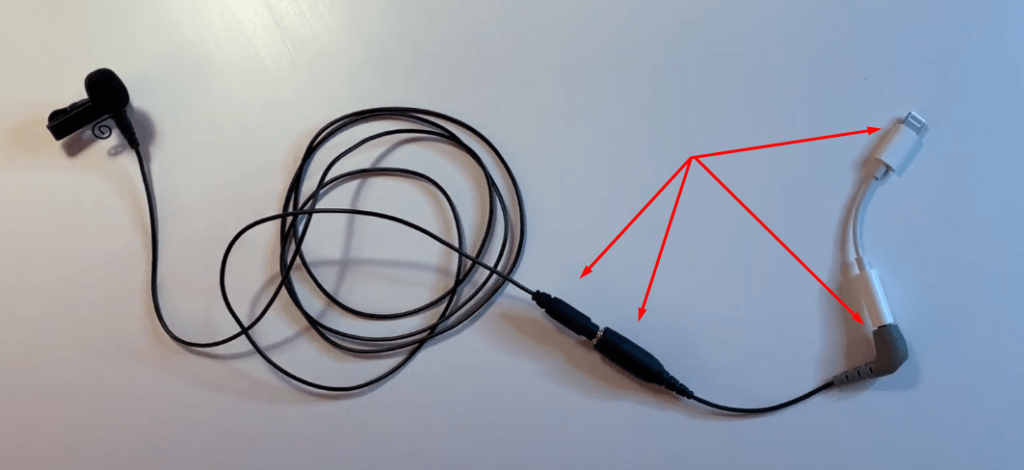
a. Connecting a Wired External Microphone to Your iPhone
To connect a wired microphone, you might need to use adapters if the connector of your external mic does not match your iPhone port. For instance, if the wired mic has a 3.5mm jack but your iPhone has a lightning port. Then, you will need to first connect the wired mic to the TRS to TRRS adapter to convert it into a 3.5mm jack. Then, you will need a 3.5mm jack-to-lightning adapter to connect to your iPhone.
b. Connecting a Wireless External Microphone to Your iPhone
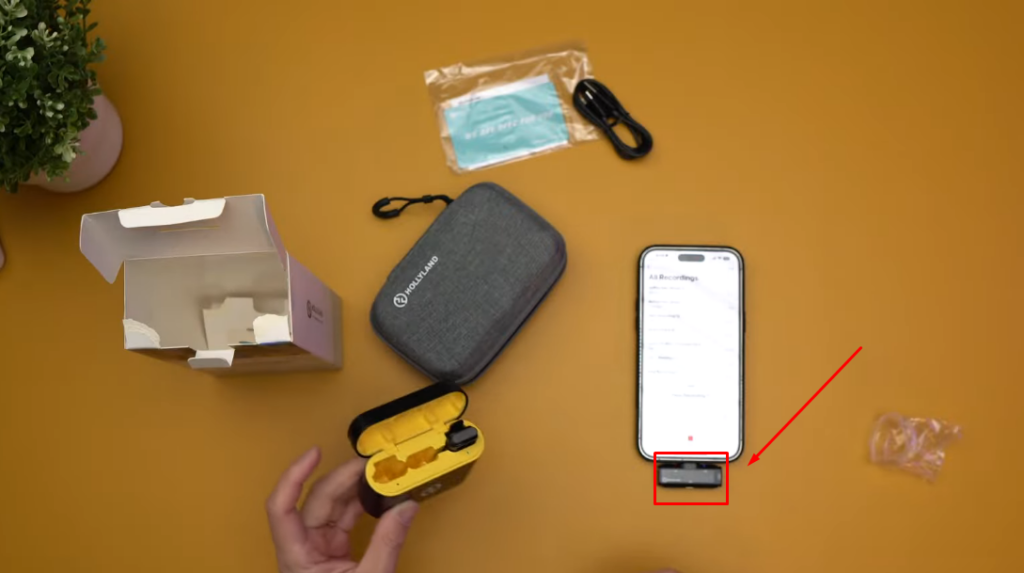
Connecting an external wireless mic to your iPhone is comparatively easier than connecting a wired microphone. However, ensure that you have a wireless mic with a lightning connector receiver, such as the Hollyland Lark C1.
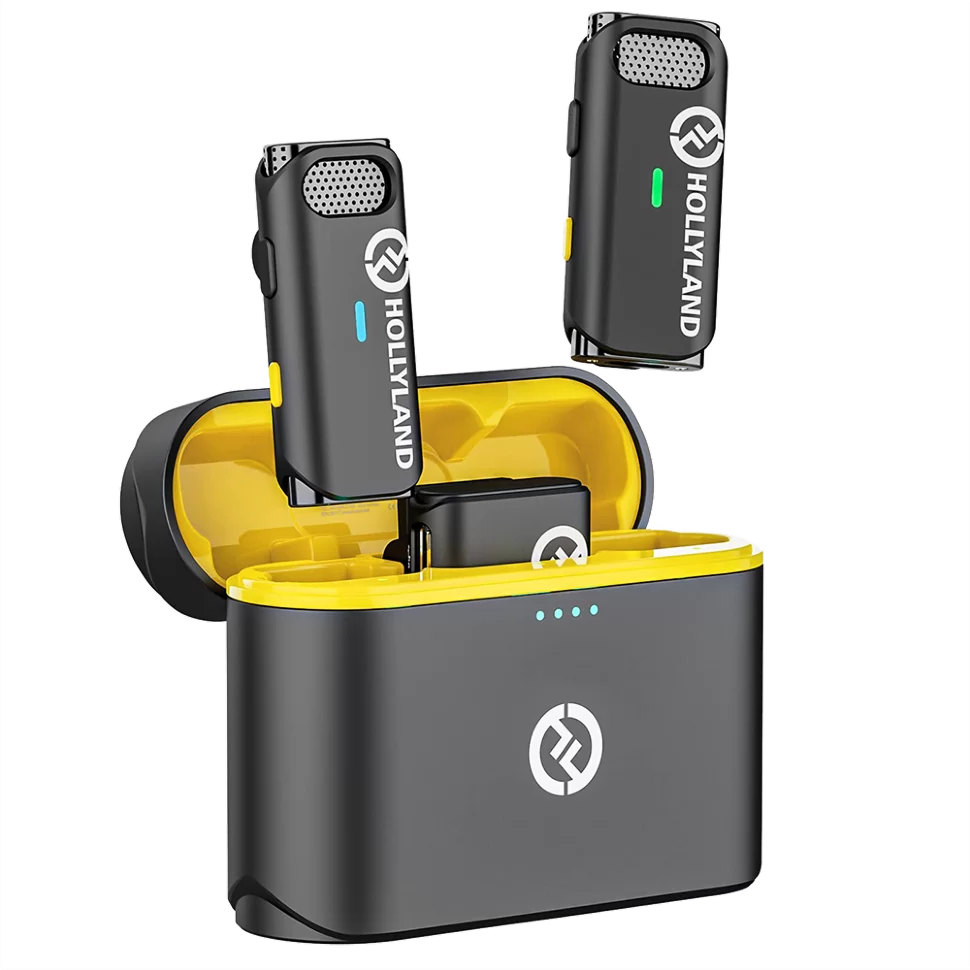

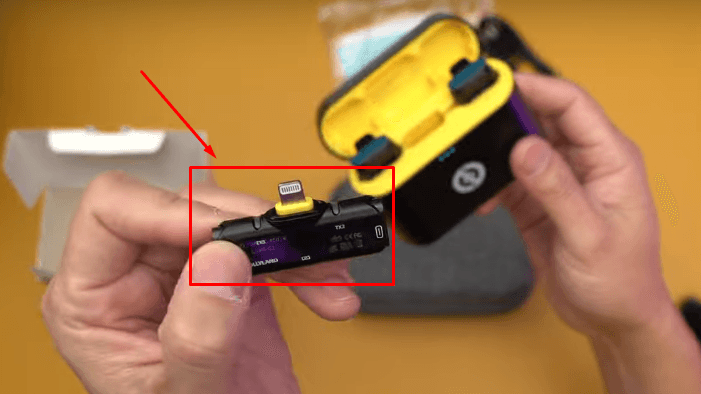
Image of Hollyland Lark C1’s receiver.
The wireless mic has one or two transmitters, which are the microphones usually with omnidirectional polar patterns.
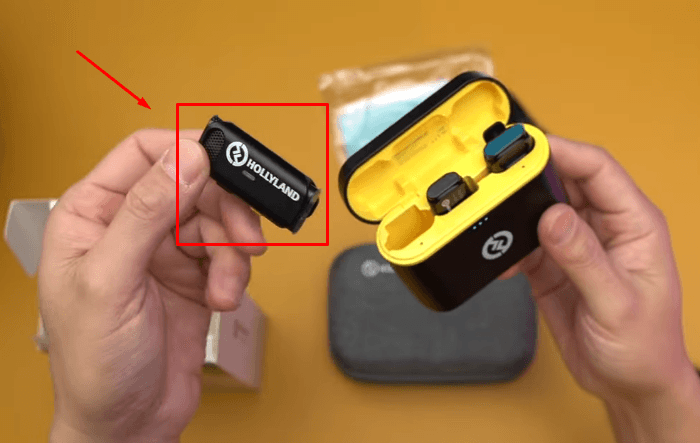
You simply attach the transmitters to your clothing while connecting the receiver to your iPhone to start recording from a broader distance. For instance, the Lark C1 allows a wireless range of up to 650ft.
c. Configuring Wired/Wireless External Microphones on Your iPhone
Once you have connected an external wired or wireless microphone, your iPhone should automatically detect and recognize them and use them as the default microphone. However, some external mics, especially the wireless ones, may have their own mobile applications for fine-tuning the audio.
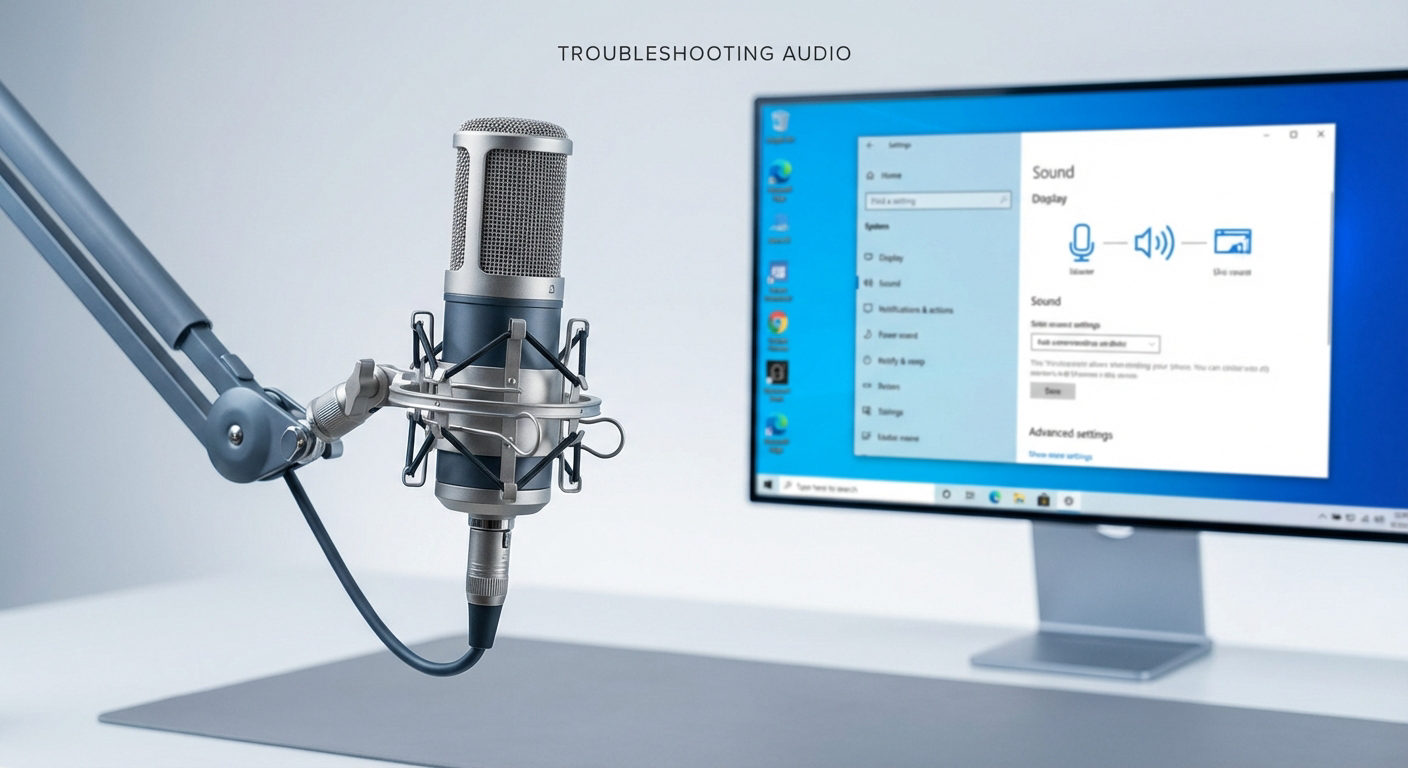
4. Troubleshooting Microphone Issues in iPhone
If you have tried all the above methods. However, the internal iPhone microphones are still creating problems. Then, here are a couple of ways to try to fix the issues.
a. Check for Blockages Covering the iPhone Microphone Holes
As established earlier, some iPhone cases may cover the mic holes, contributing to poor functionality. In such scenarios, you should check whether the case is compatible with your iPhone and use the one that is made according to the size and specifications of your model.
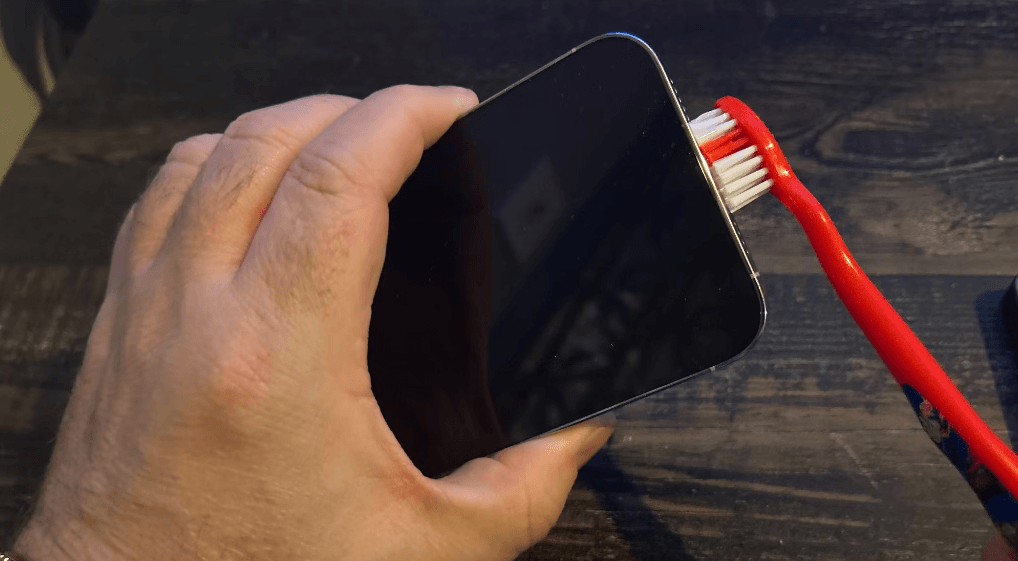
But if the iPhone case is not the problem, try removing dust particles from the microphone openings with a soft brush.
b. Restart Your iPhone
Many times, simply restarting your iPhone can fix hardware and software issues. What happens is that some applications create problems that affect your phone’s functionality, leading to microphone issues. While the older models can be restarted by just pressing the power button, newer models like the iPhone 12 series and iPhone 14 series require long-pressing of volume and power buttons at the same time.
Here’s a quick tutorial.
- Step 1: Unlock your iPhone. Keep one finger on the ‘Power’ button and another on the ‘Volume Up’ button.
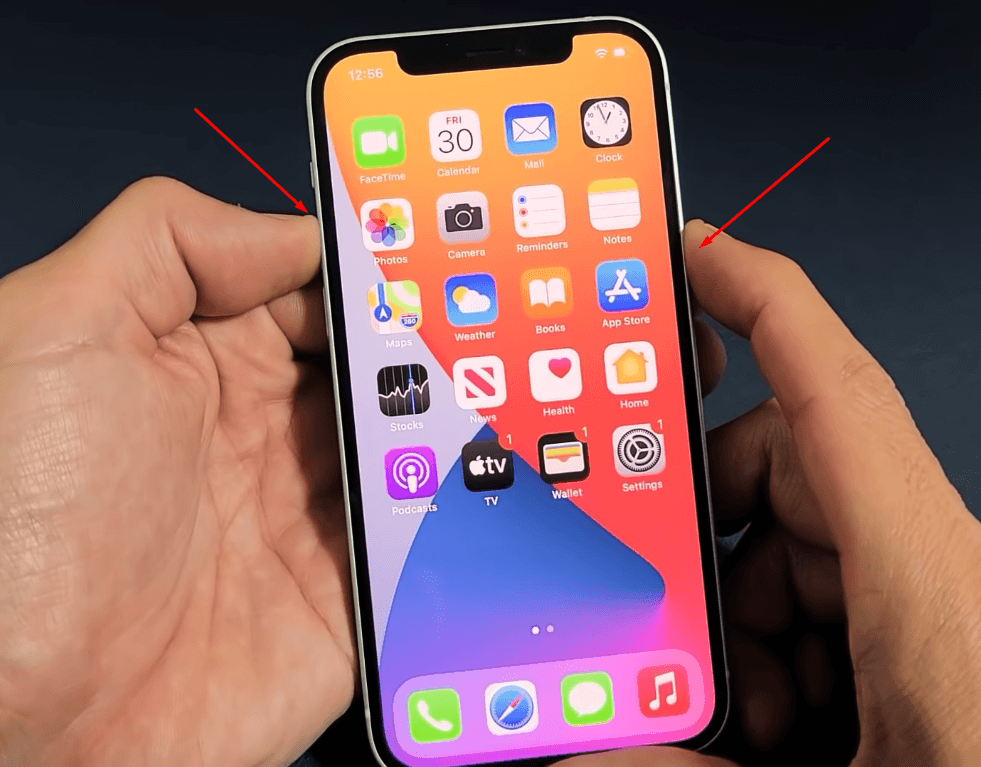
- Step 2: Long-press both buttons simultaneously until you see the power off menu. Next, use your finger to press and slide the ‘Slide to Power Off’ option.
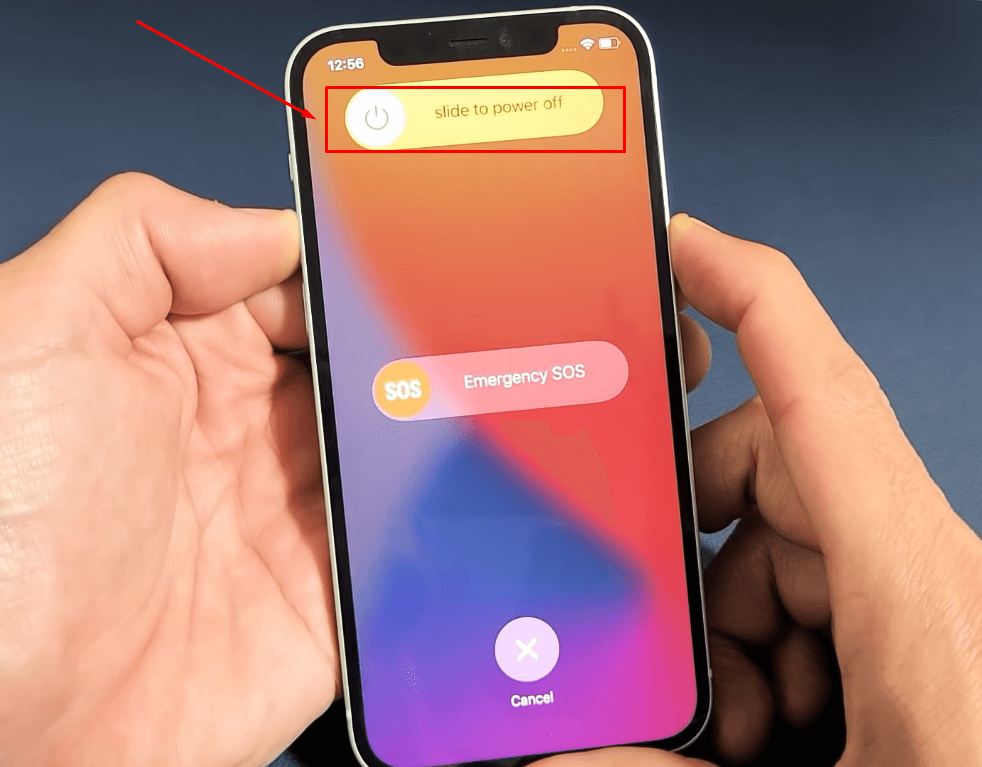
- Step 3: Once the phone is completely turned off, long-press the ‘Power’ button to turn the device on.
c. Update Your iPhone to the Latest iOS
If your iPhone is running an old iOS version, it is possible that microphone issues are arising due to the outdated software. You can follow the steps below to update your iPhone to the newest iOS.
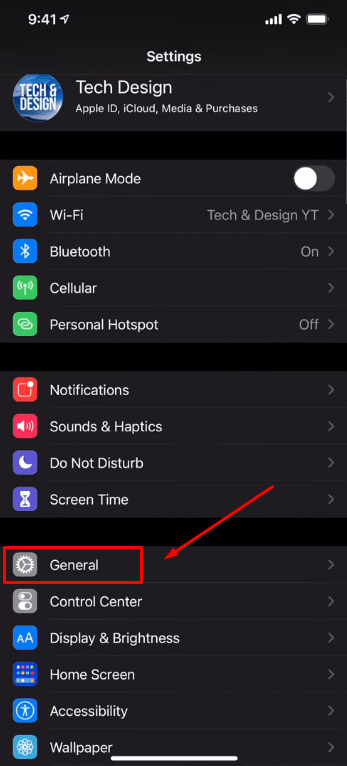
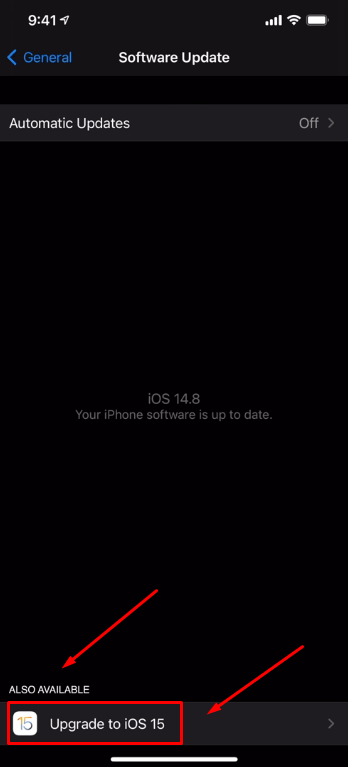
- Step 1: Go into your iPhone ‘Settings’ and tap ‘General.’
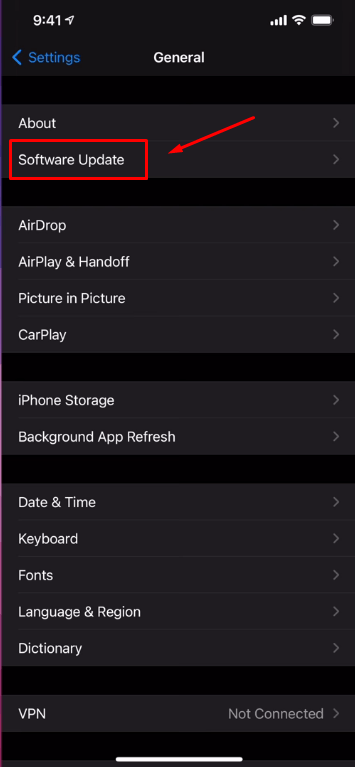
- Step 2: Tap on the ‘Software Update’ option.
- Step 3: Look at the bottom of the screen under the ‘Also Available’ section to confirm if there’s any latest upgrade available.
Note: You may see a different iOS version when performing these steps practically on your iPhone.
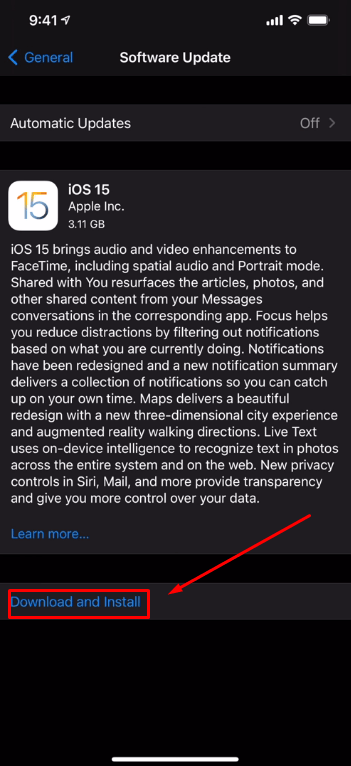
- Step 4: After tapping on the latest version of iOS, you will see details about the new update followed by the ‘Download and Install’ option. Tap this option to begin the update.
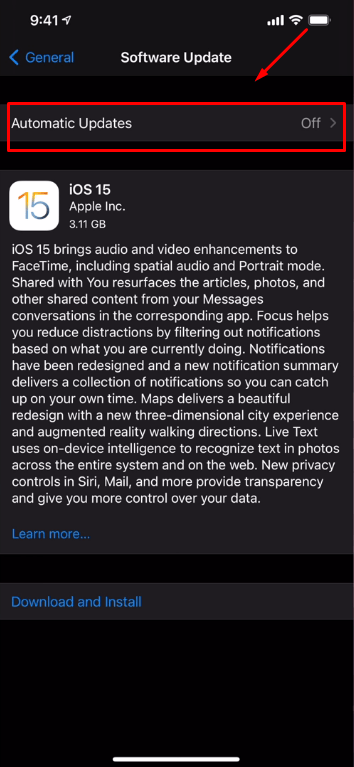
Tip: You can also turn on the ‘Automatic Updates’ option to allow your iPhone to install the latest upgrade automatically.
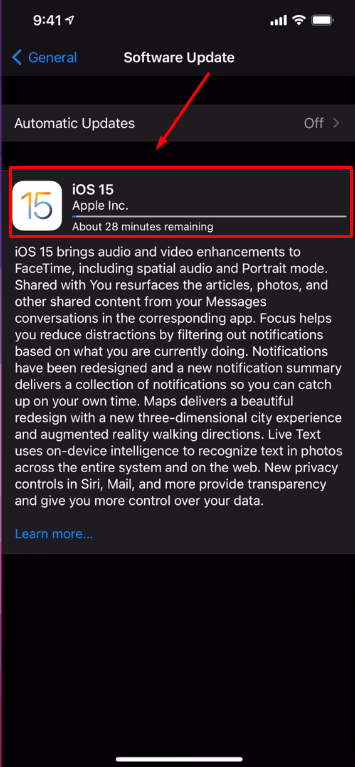
- Step 5: Enter your passcode (if you have set any) to allow the update process.

- Step 6: The update will be completed within a few minutes.
5. Reset Your iPhone Settings
If you have made any changes to the microphone settings but still have problems, you can try resetting all settings at once. However, doing so will not delete any of your personal data, like photos, videos, voice memos, and more, or applications from your iPhone.
- Step 1: Go to ‘Settings.’
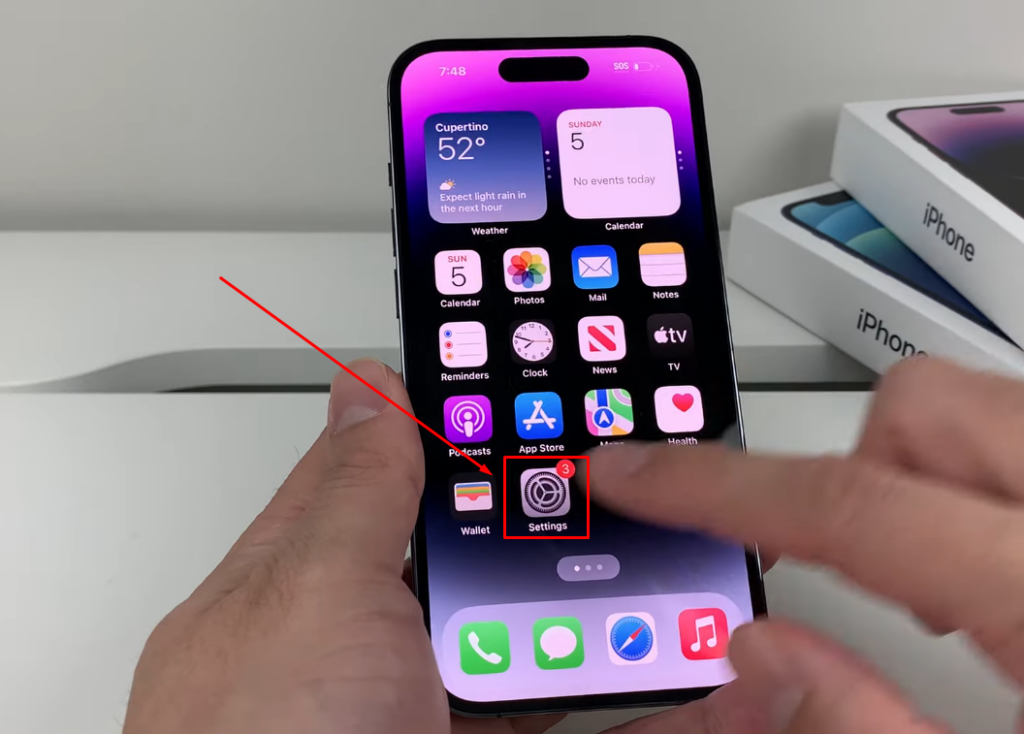
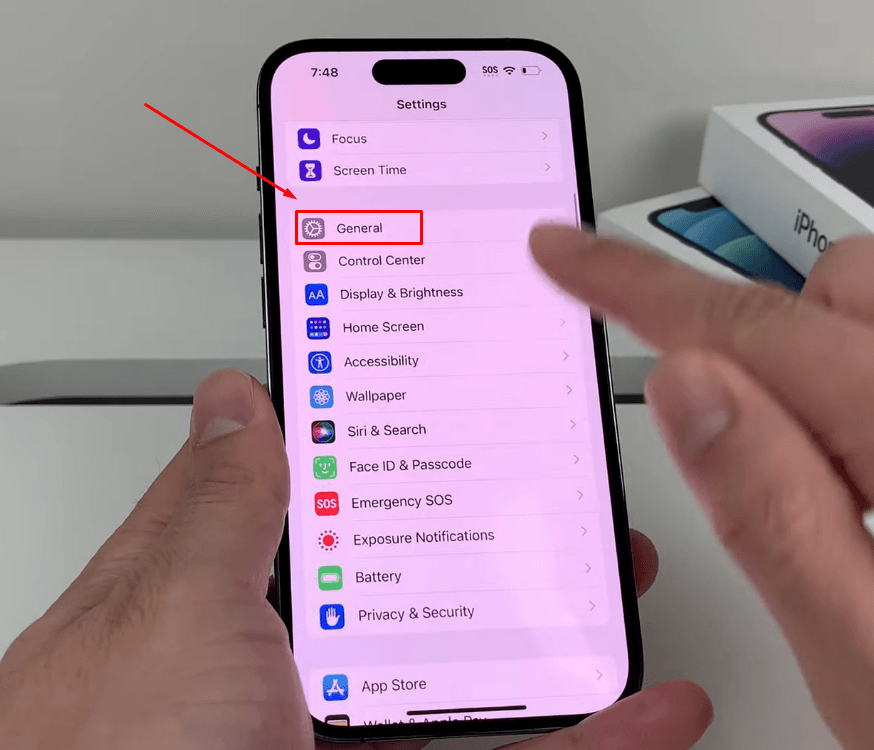
- Step 2: Tap on the ‘General’ icon.
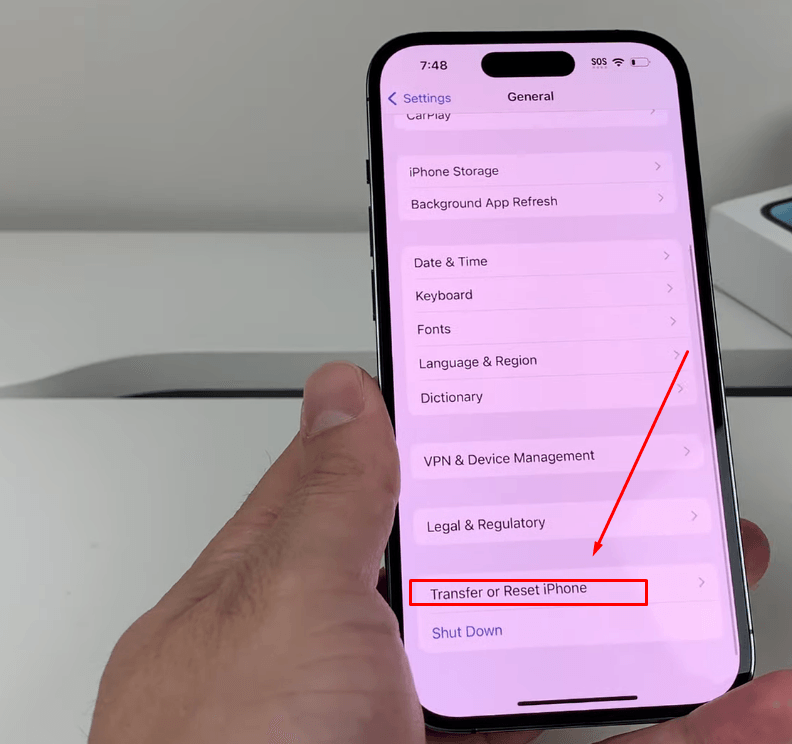
- Step 3: Scroll and tap on the ‘Transfer or Reset iPhone’ option.
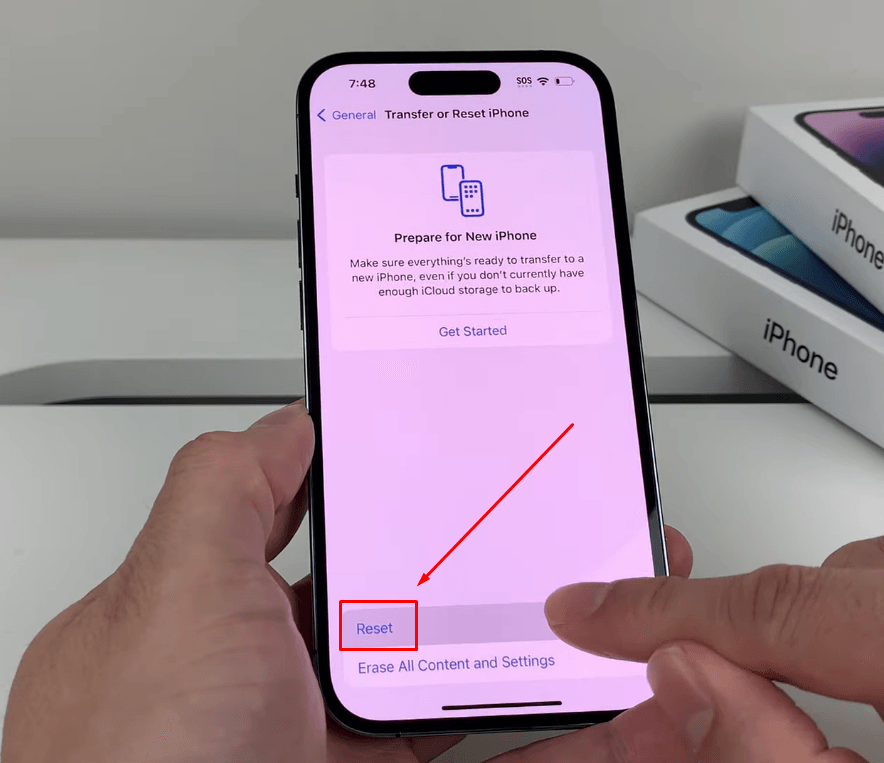
- Step 4: Tap ‘Reset.’
- Step 5: Choose the ‘Reset All Settings’ option.
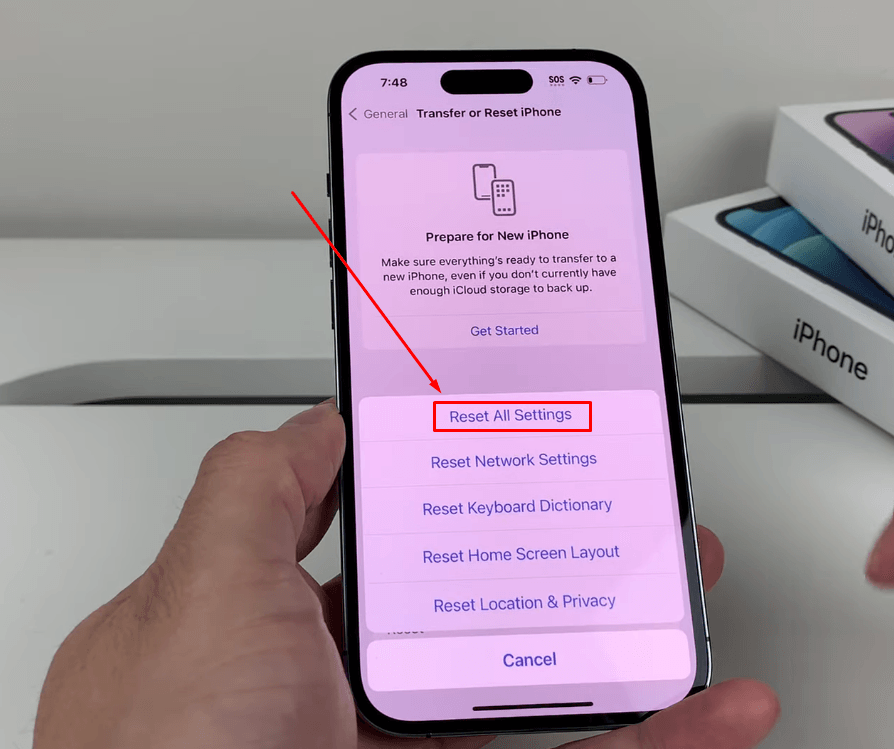
This will reset all your network, keyboard, privacy, and microphone settings back to default.
Conclusion
The primary microphone settings for iPhone revolve around the app’s permission to use the mic. Restricted applications cannot use the microphone. For example, if your iPhone camera is not permitted to use the mic, it won’t record audio in the clips. The same goes for Instagram, Facebook, and all other mobile applications. But you can always change these settings for each application from the main ‘Settings.’ If you wish to improve the audio quality, the iPhone even permits you to use external microphones. If nothing works to fix the microphone permission issues, you can always reset the settings to the default and try again.
Frequently Asked Questions about Microphone Settings for iPhone
Q1. How do I give an app microphone access on my iPhone?
Go to ‘Settings’ and choose ‘Privacy.’ Next, tap on the ‘Microphone’ option from the menu, and turn on the toggle switch next to the app name you want to give microphone access to.
Q2. Why can’t people hear me on my iPhone?
When another person cannot hear your voice on your iPhone, turn on the ‘Airplane Mode’ and turn it off after a minute. Then, go to ‘Settings,’ tap ‘General,’ and choose ‘About.’ Next, install any available carrier upgrades. If this doesn’t fix the issue, try resetting your network settings from the ‘Transfer or Reset iPhone’ option in ‘General.’
Q3. Can I use an external microphone with an iPhone?
Yes, you can. Many brands manufacture MFi-certified external microphones, like the Hollyland Lark C1 or Rode Lavalier Go. These microphones can capture high-quality audio on your iPhone during audio or video recordings, Zoom meetings, and regular calls.
Q4. How do I improve the sound quality of my iPhone microphone?
To enhance the sound quality of your iPhone’s built-in microphone, ensure the case is not blocking the mic openings. Also, dust and debris should be removed. Most importantly, position the mic correctly to capture excellent quality audio.
Q5. Why is my iPhone microphone not working for video recordings?
You may not have given your camera or video recording app permission to access your iPhone mic. To allow the app to use your internal mic, go to ‘Settings,’ tap ‘Privacy,’ and select ‘Microphone.’ Now, look for the video recording app and turn on the toggle.
Q6. How can I clean my iPhone microphone?
To clean your iPhone’s microphone openings carefully, use a wooden pick covered in a microfiber cloth, soft plastic, or a soft brush. Avoid using metal objects or compressed air.
Q7. Is it possible to adjust the microphone sensitivity on an iPhone?
To adjust microphone sensitivity on your iPhone, enter device settings and navigate to ‘Sounds’ or ‘Sounds & Haptics.’ You will find several options, like noise cancellation, automatic gain control, and microphone sensitivity. Feel free to play with the levels.
Q8. Can I disable the microphone access for all apps at once?
You can enable or disable microphone access for apps individually by going to ‘Settings,’ tapping ‘Privacy & Security,’ and choosing the ‘Microphone’ option to see the list of apps with a toggle switch.
Q9. How do I test my iPhone microphone?
There are various ways to test all the microphones on your iPhone, such as calling or FaceTime a person, recording a voice memo, giving voice commands to Siri, and video recording through front and back cameras.
Q10. What should I do if my iPhone settings are grayed out?
If your iPhone settings are greyed out, go to the ‘Screen Time’ option in ‘Settings.’ Tap the ‘Content & Privacy Restrictions’ option and scroll down to ‘Allow Changes. Tap ‘Changes/Account Changes’ and select ‘Allow.’ This will disable all the greyed-out settings on your iPhone.