.png)
The Blue Yeti microphone has rightfully earned its place as a preferred choice among content creators, podcasters, and musicians. Its versatility, coupled with high-quality audio reproduction, sets it apart in a competitive landscape. However, to truly harness the power of this exceptional microphone, one must navigate through a myriad of settings, tailoring them to the unique demands of various recording scenarios.
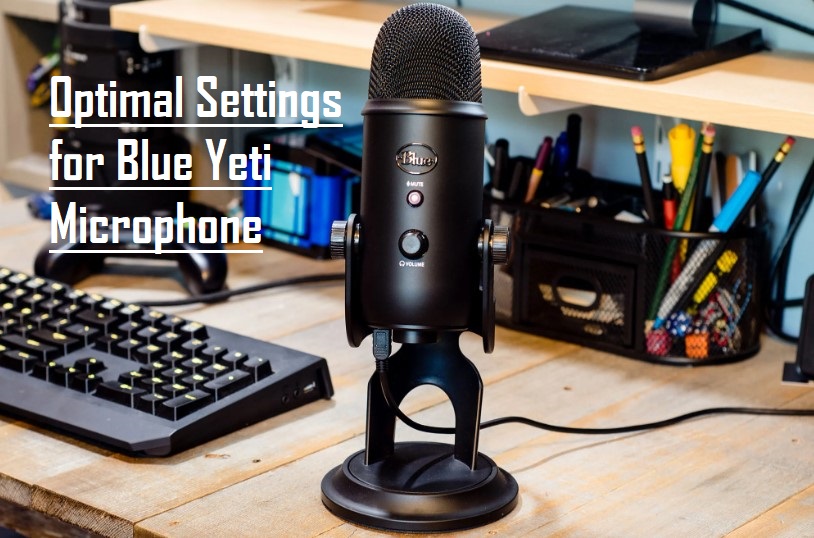
As we delve into the specifics of the Blue Yeti’s optimal settings, we aim to empower you with practical insights and actionable tips. Whether you’re a solo content creator, engaged in dynamic interviews, hosting group discussions, or capturing the nuances of a live musical performance, this guide will serve as your compass, navigating you through the polar patterns, gain controls, and advanced features that distinguish the Blue Yeti.
Gain Control Settings
The concepts of gain and volume are frequently interchanged, leading to confusion among individuals. It’s essential to recognize the clear distinction between them: volume pertains to the output level, whereas the gain setting is associated with the input level. In essence, gain provides the capability to regulate the sound prior to its processing, enabling you to refine the tone of your audio output.
- Adjust the gain knob while maintaining a standard speaking volume. Strive for a level that ensures clear audibility without encountering issues such as peaking or distortion.
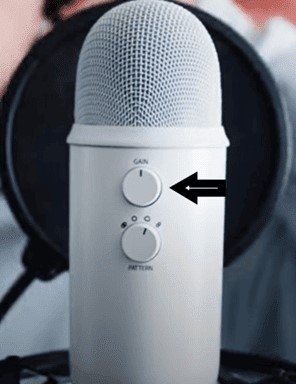
- When confronted with noisy surroundings, diminish the gain to mitigate the pickup of unwanted background noise.
Selecting Pickup Patterns
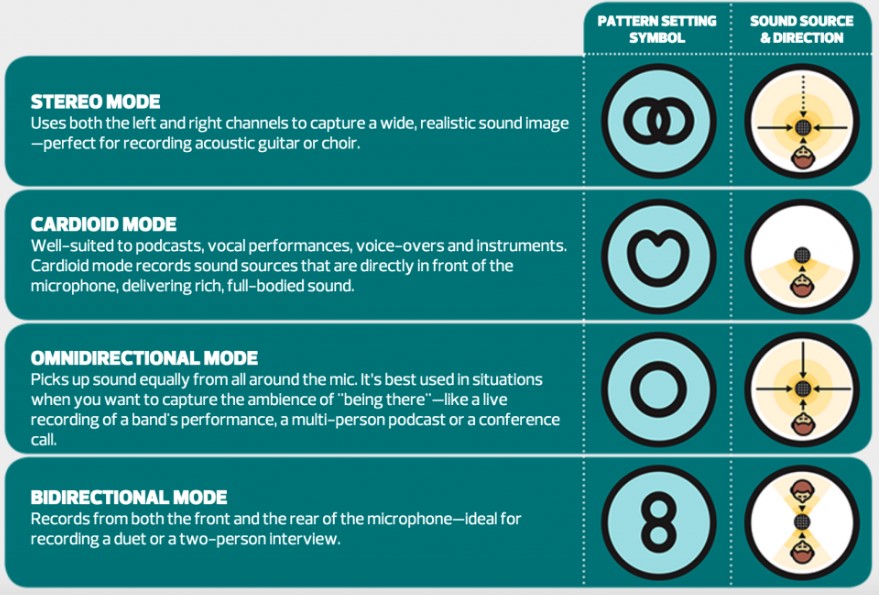
Beneath the gain knob, you’ll find the pattern knob. This dial alters the recording pattern your microphone employs, offering four distinct types: cardioid, stereo, omnidirectional, and bidirectional.

- Cardioid Mode: Suited for podcasting, vocal recording, or streaming, this mode captures audio directly in front of the microphone, effectively minimizing interference from the surrounding environment.
- Omnidirectional Mode: Optimal for scenarios requiring sound capture from all angles, such as conference calls or recording group discussions, this mode ensures comprehensive audio coverage.
- Bidirectional Mode: Tailored for interviews or two-person podcasts, this mode adeptly captures sound both from the front and rear of the microphone, facilitating dynamic conversations.
- Stereo Mode: With a focus on creating a broad and authentic audio landscape, this mode excels in recording musical instruments or capturing the ambiance of a diverse soundscape.
Microphone Placement
Make certain there is an appropriate separation between yourself and the Blue Yeti microphone, preferably within the range of 6-12 inches. This helps avoid unwanted sounds like popping or hissing. The Blue Yeti microphones exhibit a “proximity effect,” accentuating low-end frequencies, such as the robust bass in broadcasters’ voices. Therefore, maintaining the correct distance is essential for optimal audio quality.
- Proximity to the Sound Source: To achieve the best sound quality, position the microphone approximately 6-12 inches from your mouth. Employ a pop filter to reduce the impact of plosive sounds.
- Speaking Direction: Ensure direct communication into the microphone’s front section, marked by the Blue logo, when in cardioid mode. Adjust the positioning according to the selected pickup pattern.
- Elevation and Orientation: Maintain the microphone at or slightly below mouth level, with a slight upward tilt towards your mouth.
Leveraging Software for Enhanced Audio Quality
In the pursuit of achieving impeccable audio quality, the strategic use of software tools for below described purposes, plays a pivotal role.
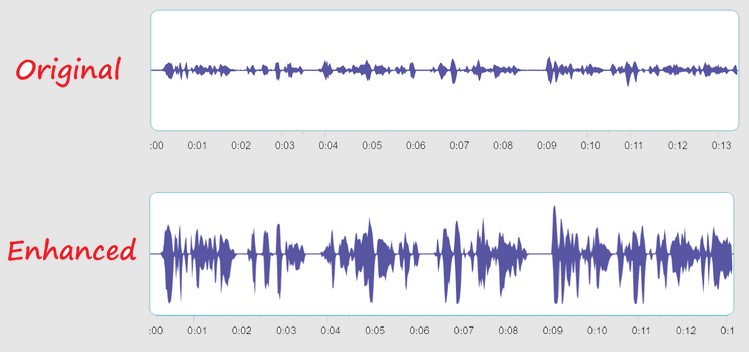
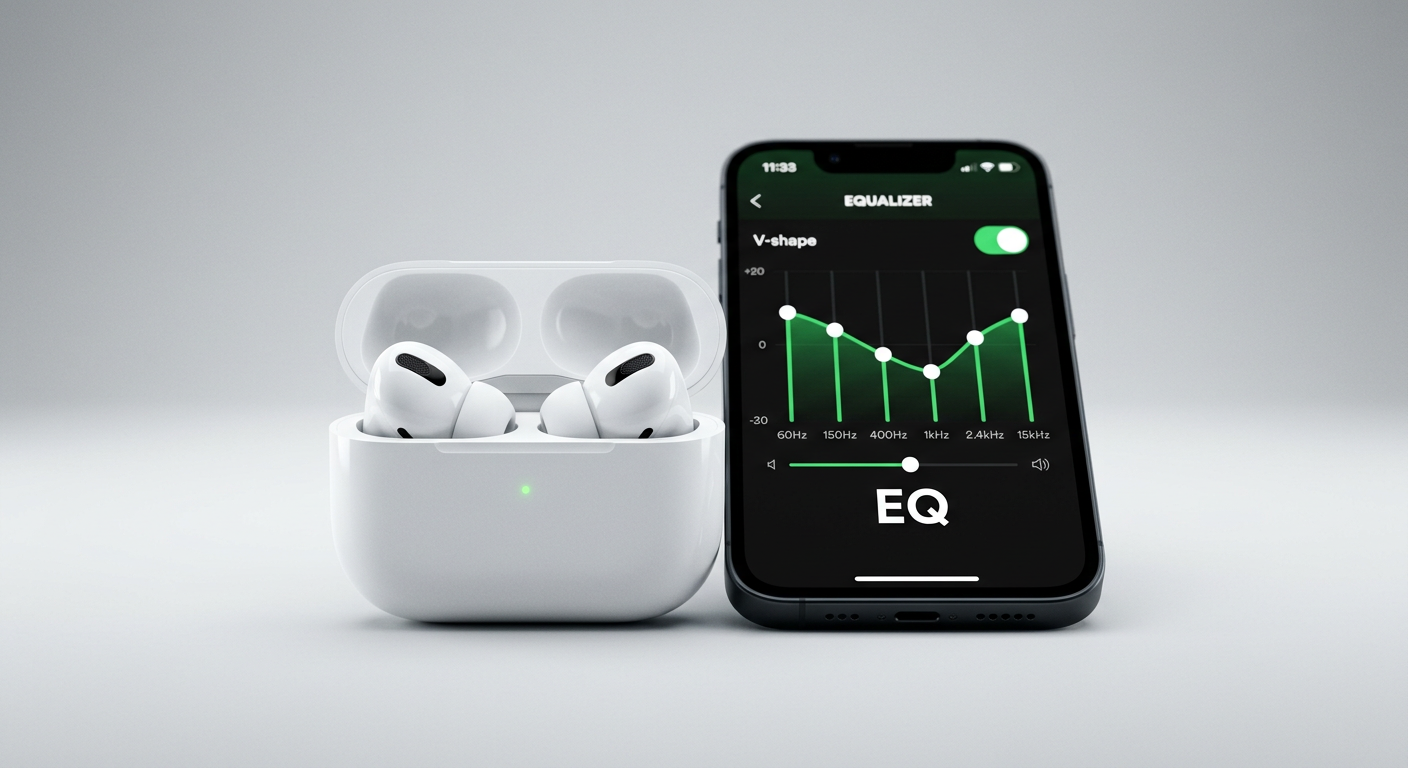
- Equalization (EQ): Enhance clarity by introducing a subtle boost to high frequencies, while diminishing low frequencies effectively reduces unwanted rumble. Consider employing software like Adobe Audition or Audacity, where you can precisely boost high frequencies for enhanced clarity.
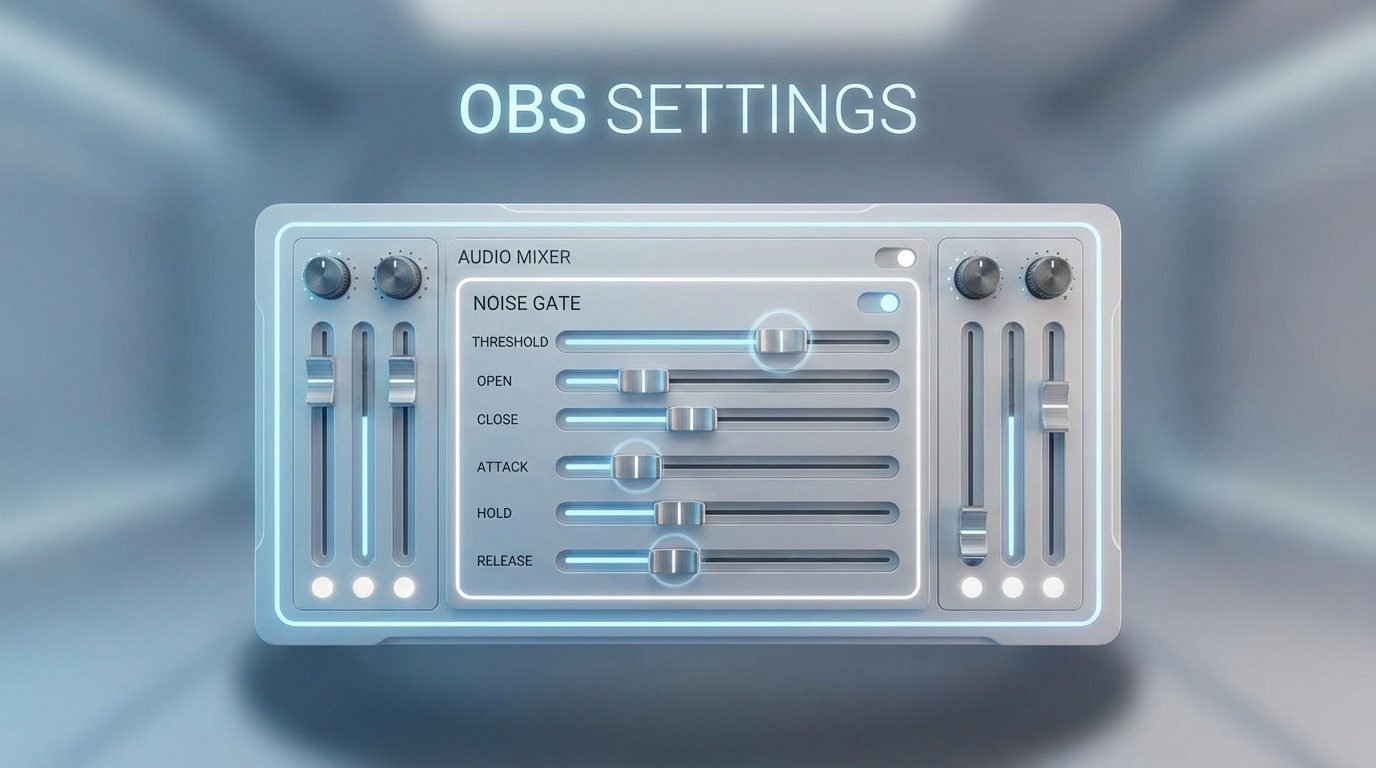
- Noise Reduction: Employ software tools to eliminate background noise, preserving the integrity of your voice without compromising quality. Utilizing sophisticated software tools such as iZotope RX or Audacity’s noise reduction feature enables the removal of unwanted ambient noise.
- Compressor: Level out audio dynamics by utilizing a compressor, ensuring a more consistent volume across both loud and soft sounds. Achieving a balanced and consistent audio experience becomes possible through the application of a compressor. Software like Ableton Live or Cakewalk offers effective compression tools.
Audio Monitoring
In the pursuit of audio perfection, adeptly monitoring your recording environment is paramount.
- Immediate Audio Feedback: Employ the Blue Yeti’s headphone jack for instantaneous, zero-latency monitoring. Ensure the headphone volume is adjusted to a level that is both comfortable and conducive to accurate assessment.
- Vigilance Against Distortions: Regularly audit your audio for any unwarranted noises or distortions, promptly adjusting your settings as required.
Understanding Environmental Factors
The significance of environmental conditions cannot be overstated, the surrounding space in which you record plays a pivotal role in determining the quality of your audio output.
- Echo Mitigation: Optimize your recording environment by choosing rooms with soft surfaces or incorporating acoustic panels to diminish echo.
- Interference Prevention: Safeguard your microphone from potential interference by maintaining a distance from mobile phones and other electronic devices during recording sessions.
Bonus Tip: Want to Opt for an External Microphone Instead of Blue Yeti with Enhanced Performance?
When contemplating your audio recording setup, the choice of a microphone can be pivotal. While the Blue Yeti is a popular and reliable option, exploring alternatives can lead to enhanced flexibility and performance. One such notable contender is the Hollyland Lark 150, a wireless lavalier microphone that offers a compelling set of features.
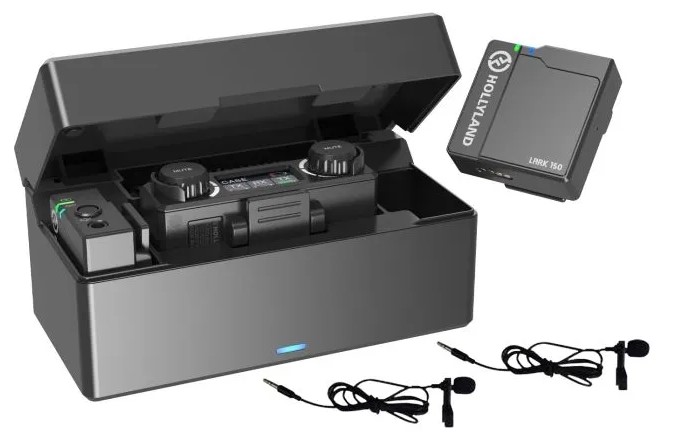
Exploring alternatives like the Hollyland Lark 150 in place of Blue Yeti, you open the door to a world of possibilities that align more closely with your unique recording requirements.
Conclusion
As we conclude this comprehensive guide to optimal Blue Yeti microphone settings and explore alternatives such as the Hollyland Lark 150, it becomes evident that achieving audio excellence is a dynamic journey. From mastering the intricacies of the Blue Yeti’s settings to considering external microphones for enhanced versatility, each step plays a crucial role in sculpting your audio recordings.
Remember, the key lies not only in technical proficiency but also in understanding your unique recording environment and preferences. Whether you choose to fine-tune your Blue Yeti settings or venture into the realm of wireless lavalier microphones, the ultimate goal is to create audio experiences that resonate with your audience.
We value your insights and experiences. Have you found this guide helpful in optimizing your microphone settings? Are you considering the transition to an external microphone like the Hollyland Lark 150? Your feedback is invaluable in shaping future content and addressing the diverse needs of our community.
Frequently Asked Questions
What is the best Blue Yeti setting for streaming?
For streaming, the optimal Blue Yeti setting is typically the Cardioid mode. This mode focuses on capturing sound from the front of the microphone while minimizing background noise. Adjust the gain to a level that ensures your voice is clear without distortion, and position the microphone around 6-12 inches from your mouth for the best results.
How do I reduce background noise in my Blue Yeti recordings?
To minimize background noise in Blue Yeti recordings, consider lowering the gain setting and utilizing the Cardioid mode. Additionally, record in a quiet environment, use a pop filter to reduce plosive sounds, and consider post-processing tools like noise reduction features in editing software.
Why is my Blue Yeti picking up so much background noise?
Excessive background noise can be attributed to high gain settings, suboptimal microphone positioning, or recording in noisy environments. Ensure the gain is set appropriately, position the microphone closer to your mouth, and record in a quiet space to reduce unwanted background noise.
How can I make my Blue Yeti sound better?
Enhance your Blue Yeti’s sound quality by adjusting settings such as gain, polar patterns, and distance from the microphone. Experiment with post-processing techniques like equalization and compression, and consider using acoustic treatments in your recording space to improve overall audio quality.
Can I use a Blue Yeti for professional recording?
Yes, the Blue Yeti is suitable for professional recording in various contexts, including podcasting, voiceovers, and music production. With proper settings and techniques, the Blue Yeti can deliver high-quality audio that meets professional standards.
How do I fix the echo in my Blue Yeti recordings?
To address echo in Blue Yeti recordings, record in a room with soft surfaces or use acoustic panels to absorb sound. Additionally, ensure your microphone is appropriately positioned, and consider post-processing techniques like adding reverb or using software tools to eliminate echo.
What software works best with Blue Yeti microphones?
Blue Yeti microphones are compatible with a range of recording software. Popular choices include Audacity, Adobe Audition, GarageBand, and OBS Studio. Choose software based on your specific needs, whether it be simple audio recording or more advanced audio production.
How do I set up my Blue Yeti for the first time?
Setting up your Blue Yeti for the first time involves connecting it to your computer via USB, selecting the microphone as your input device in system settings, and adjusting the gain control. Ensure the microphone is positioned correctly, and choose the appropriate polar pattern for your recording needs.
Is there a difference in sound quality between the different Blue Yeti models?
While the core sound quality remains consistent across Blue Yeti models, variations in features and additional functionalities exist. For instance, the Blue Yeti Pro offers higher bit depth and sample rate options, potentially providing a slight advantage in certain professional recording scenarios.
How do I clean my Blue Yeti microphone?
Clean your Blue Yeti microphone by using a soft brush or compressed air to remove dust and debris. Wipe the microphone body with a gentle, damp cloth, and avoid using harsh cleaning agents that could damage the microphone’s finish. Regular maintenance ensures optimal performance over time.