.png)
Let’s face it, when it comes to online learning, how we hear matters just as much as what we learn. Whether you’re a teacher recording lectures or a student submitting a project, crystal-clear audio can make or break the message.
While various platforms demand external software and complex setups, Canvas simplifies the process with a convenient, built-in media recorder.
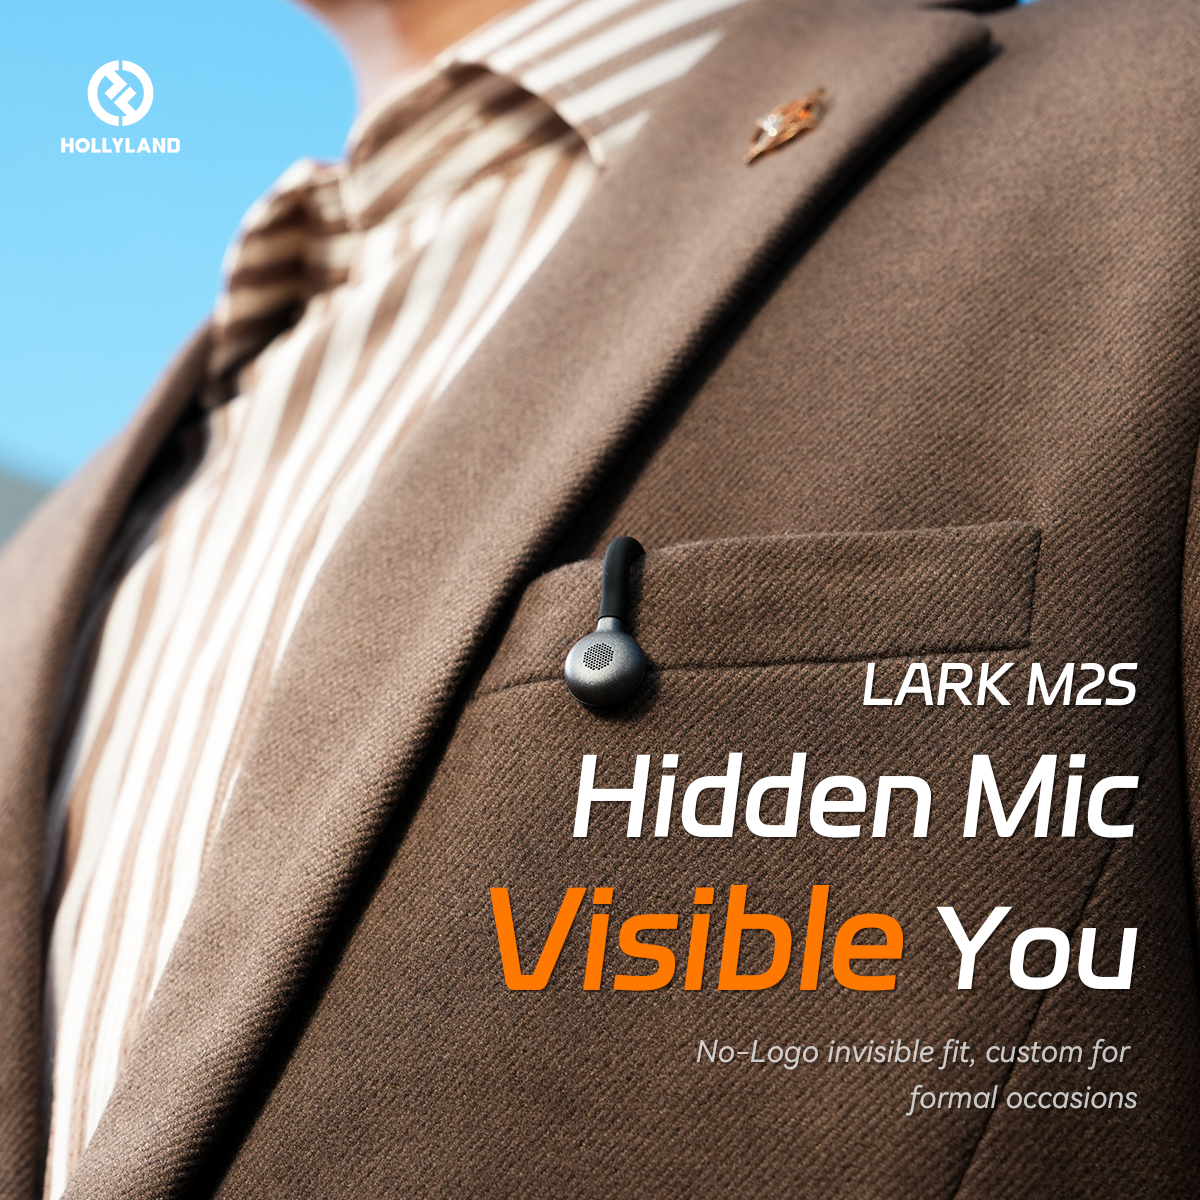
However, to truly elevate your audio from standard to exceptional, pairing this tool with a dedicated wireless microphone like the Hollyland LARK M2S can be transformative. Its studio-grade sound quality and remarkable portability offer a professional edge.

Methods to Record Audio in Canvas
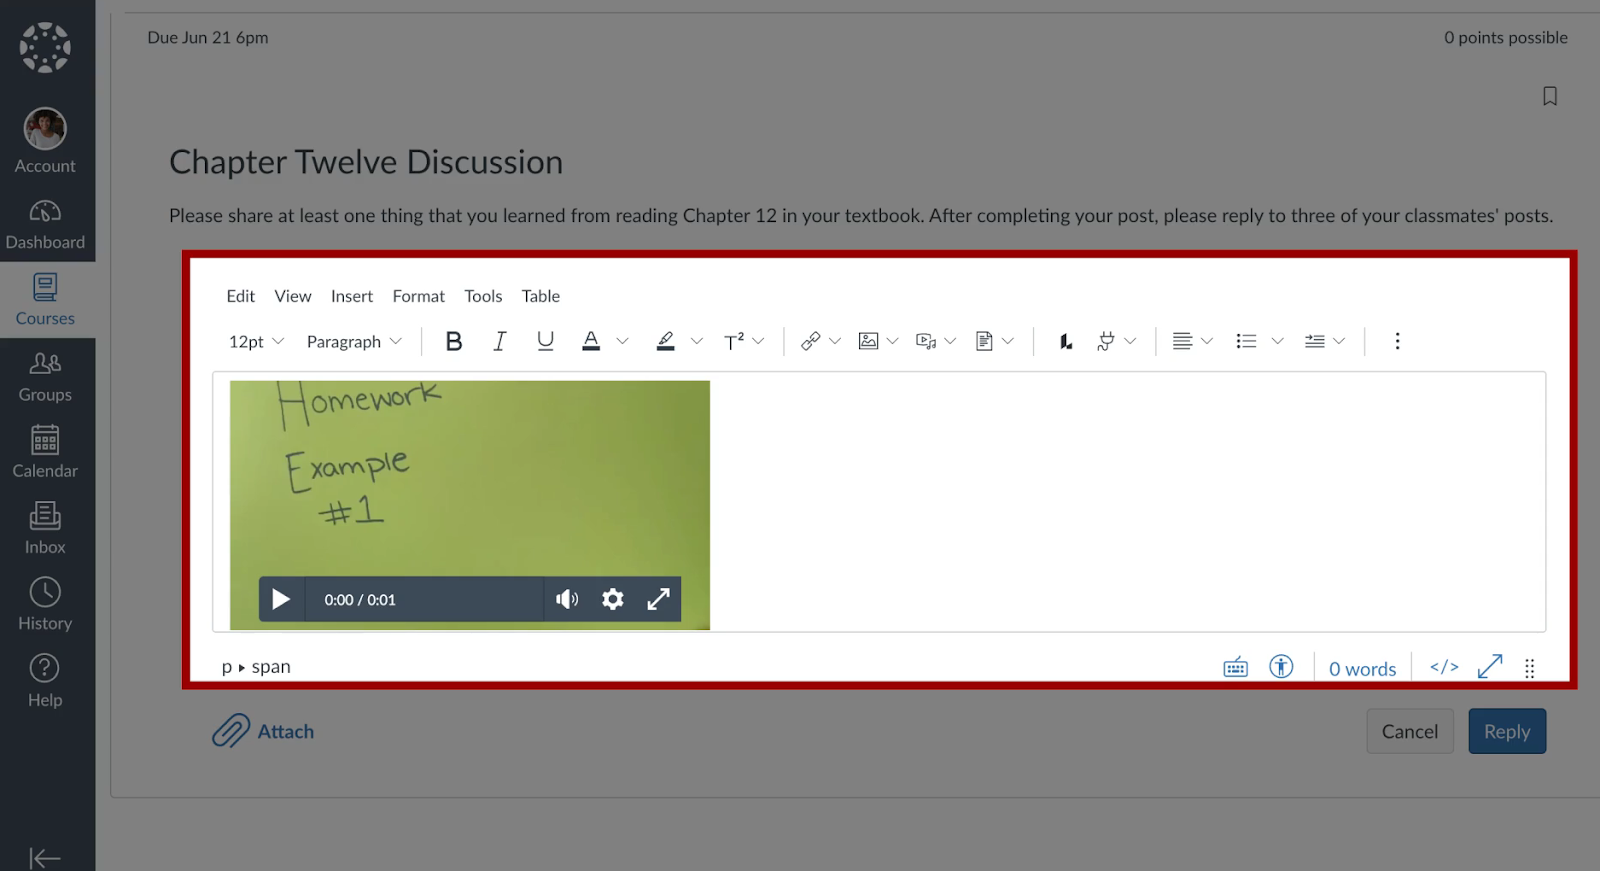
Canvas has integrated its audio and video recording capabilities directly into the platform via the Rich Content Editor. This powerful tool is accessible across most Canvas features, including Announcements, Assignments, Discussions, Pages, and even Quizzes.
Method 1: Using the Rich Content Editor
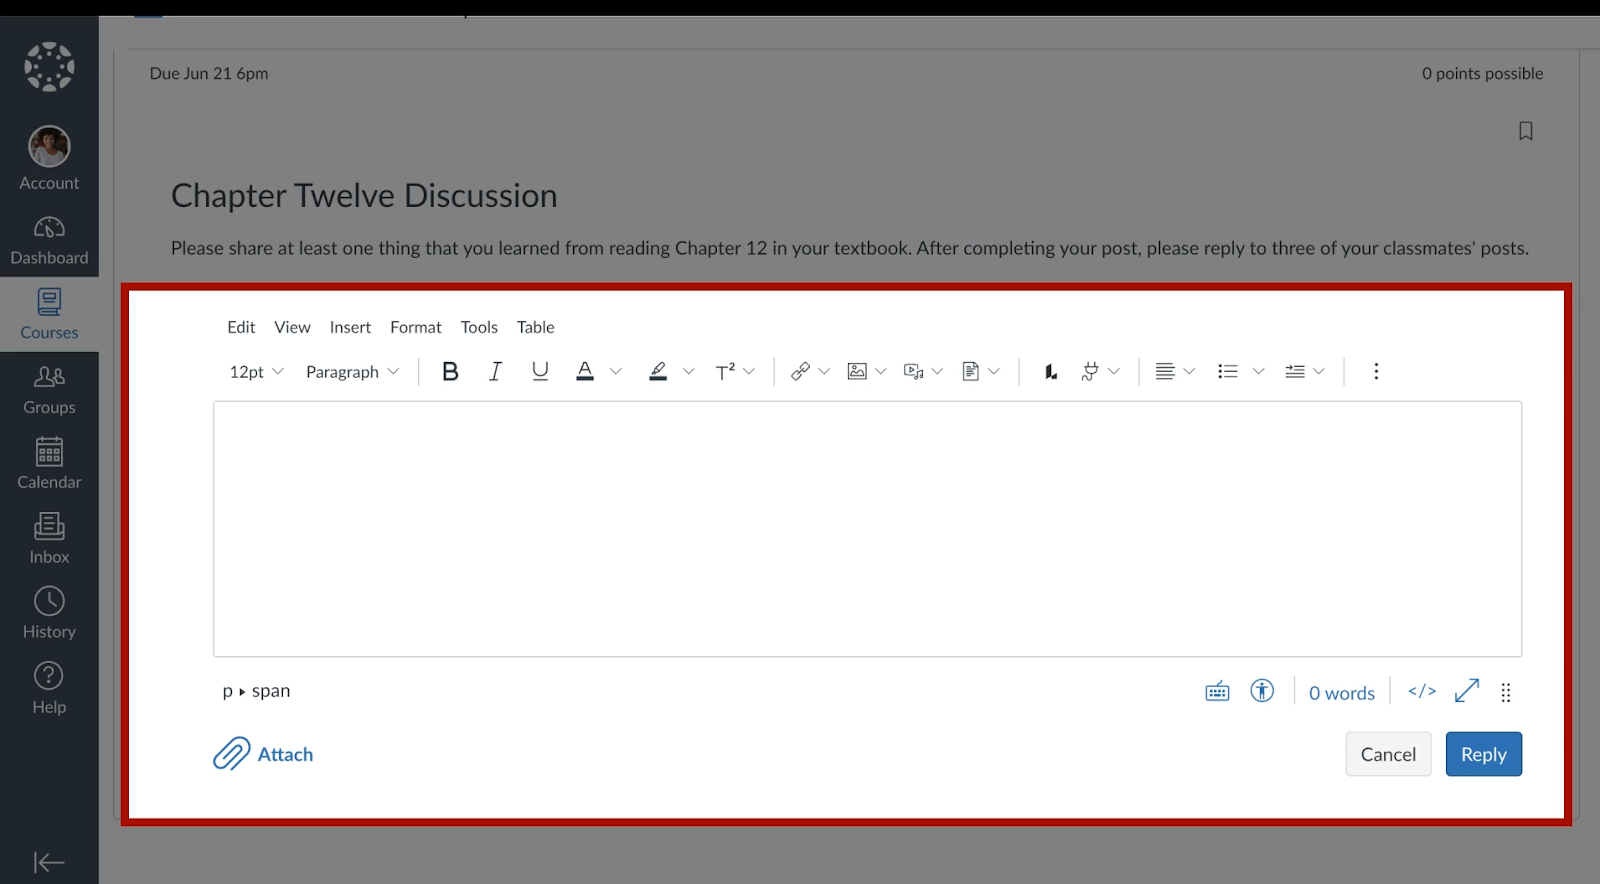
The Rich Content Editor is the toolbar that provides formatting options for your text. This is the most common method for instructors to add audio instructions or for students to contribute to discussions.
- Begin by accessing the Canvas feature where you wish to embed your audio.
- This could be by creating a new Announcement, editing a Page, or replying to a Discussion post. Now, to start, navigate to the Rich Content Editor.
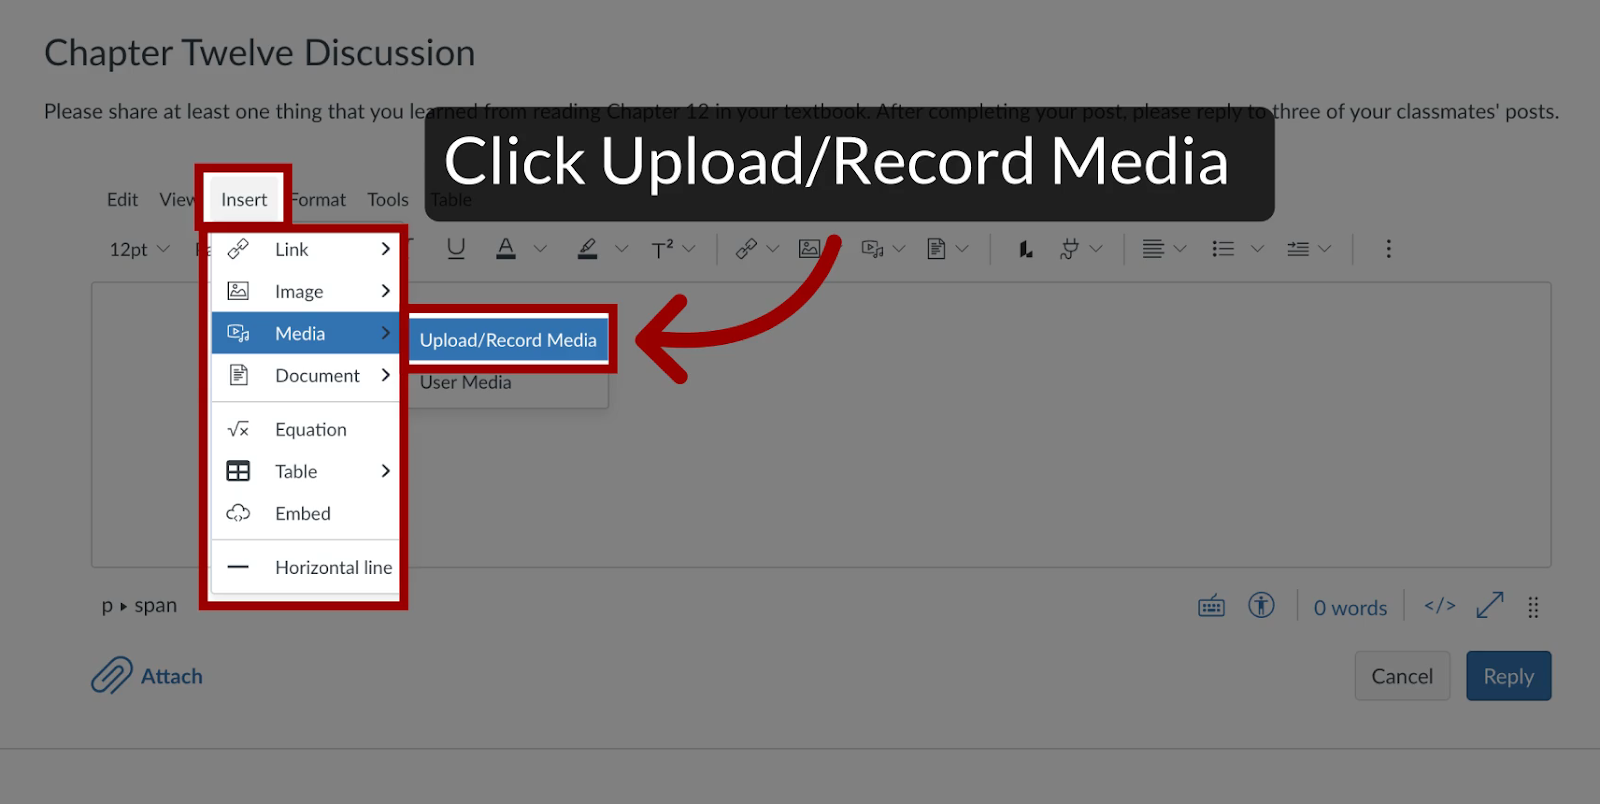
- In the toolbar, find and click the “Upload/Record Media” icon. It typically appears as a play button icon, sometimes alongside a musical note.
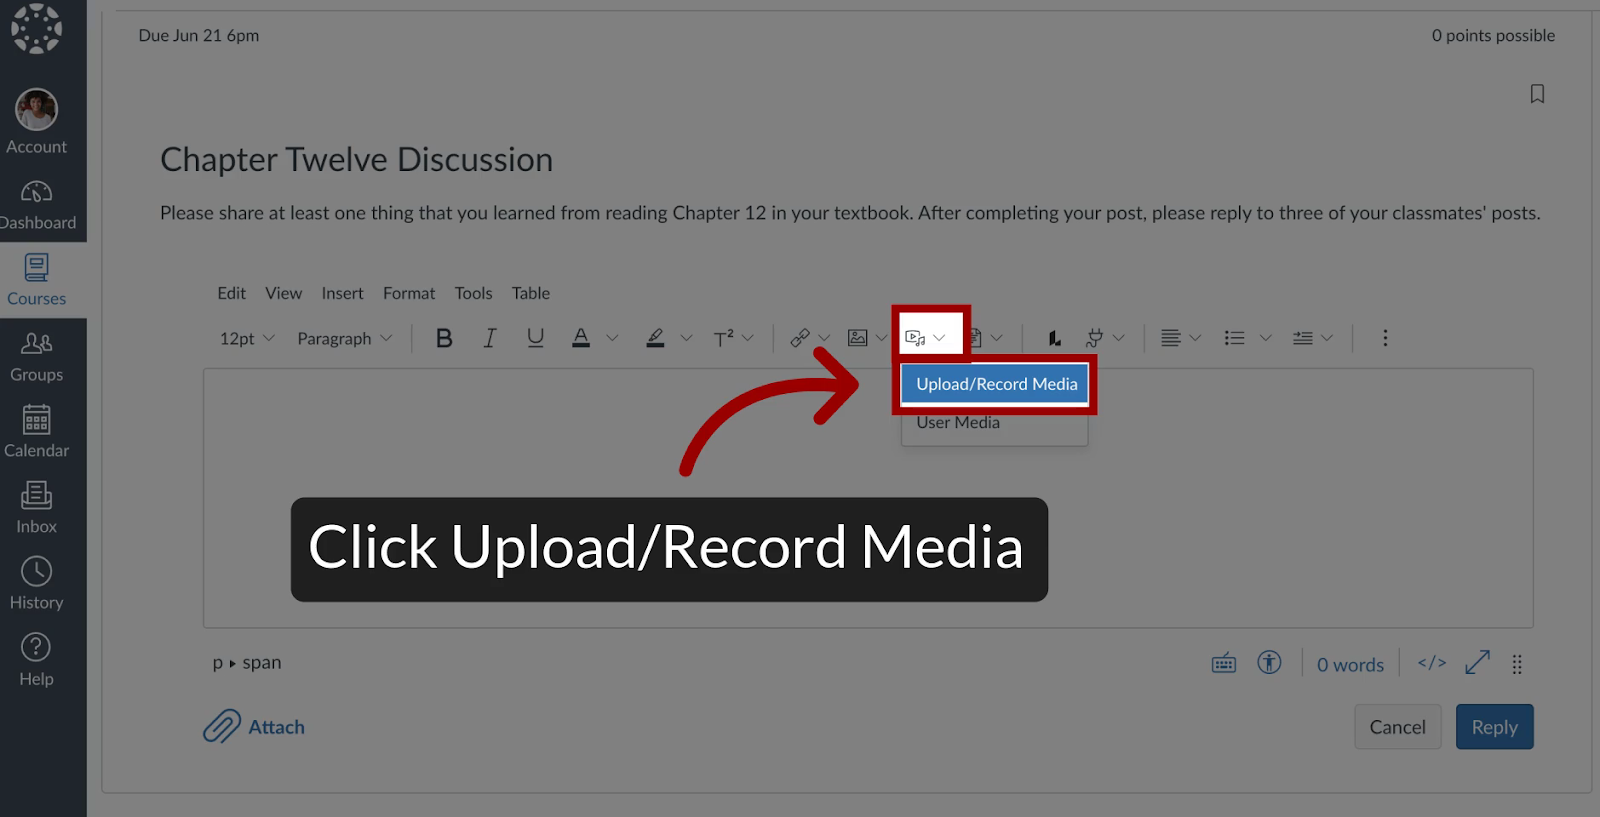
- Or, you can click on Insert > Media > Upload/Record Media.
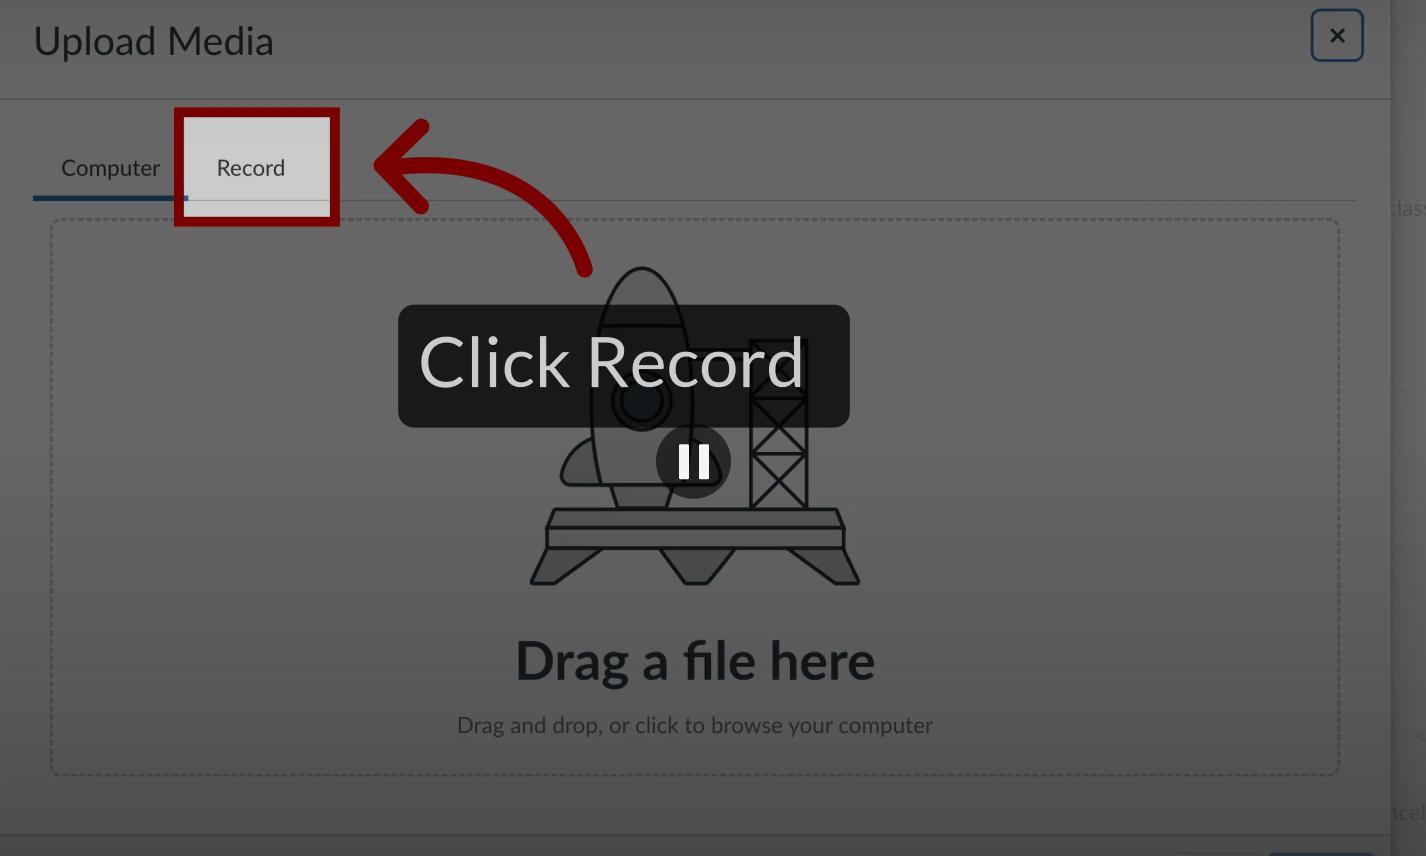
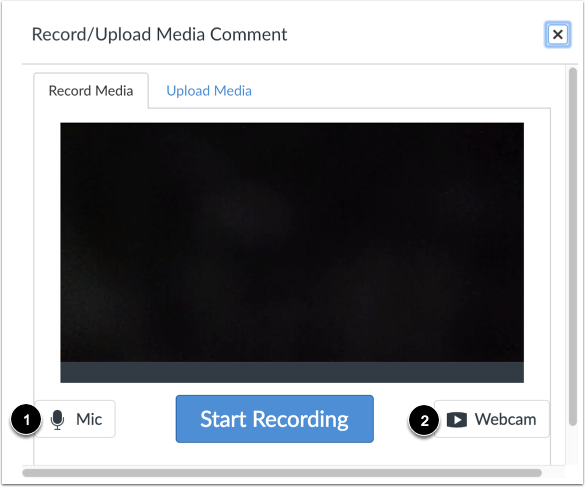
- A new window will pop up. Ensure you are on the “Record” tab.
- If it’s your first time using this feature, your browser (Chrome, Firefox, Edge, etc.) will prompt you for permission to access your computer’s microphone and camera. You must click “Allow” to continue.
Configure Your Audio Settings:
- Video: To record audio only, click the “Webcam” button and select the “No Video” option. This ensures that only your voice will be captured.
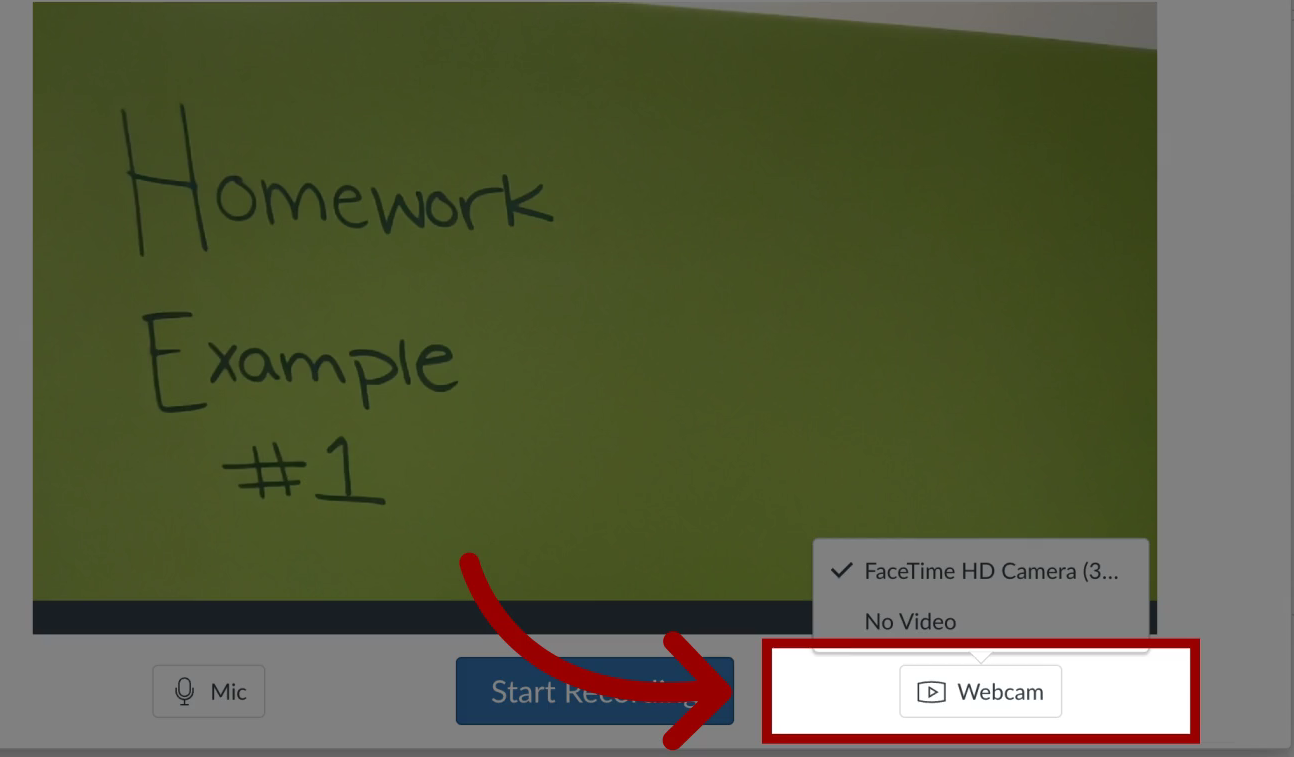
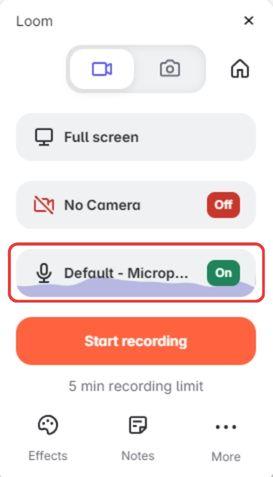
- Microphone: Click the “Mic” button to see a dropdown list of available microphones. Your computer’s default built-in microphone will likely be selected.
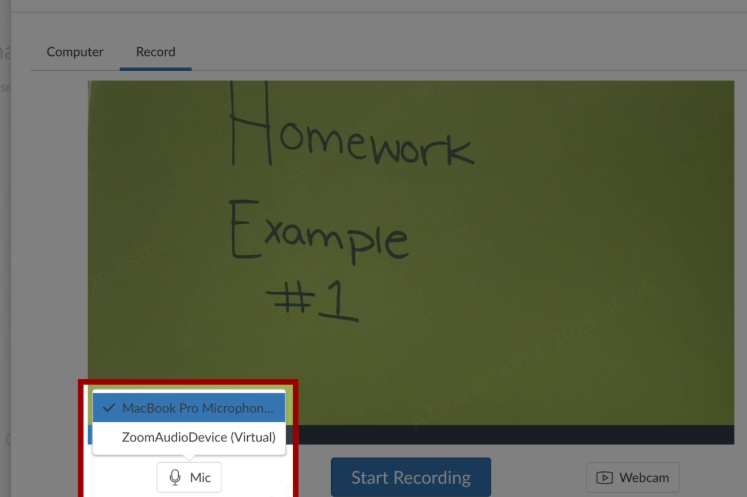
- Connect and Select an External Microphone (Recommended): For a significant leap in audio quality, an external microphone is the best choice. If you are using a wireless system like the Hollyland LARK M2S, connecting it is incredibly simple.
- The combo kit includes a camera-mount receiver as well as plug-in receivers with both USB-C and Lightning connectors, making it compatible with laptops, tablets, and smartphones.
- Simply plug the appropriate receiver into your device, and it should appear in the microphone list in Canvas. Its advanced Environmental Noise Cancellation (ENC) feature is a major advantage, effectively filtering out distracting background sounds, and ensures your voice remains the central focus.
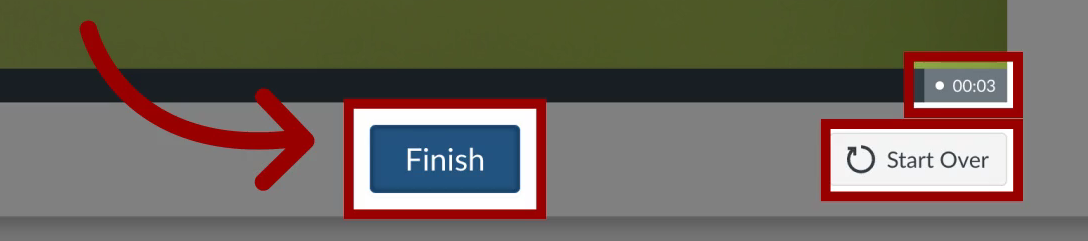
- Once your microphone is selected, click the large “Start Recording” button.

- Canvas will display a 3-2-1 countdown, and then the recording will begin. A timer will show the duration of your recording.
- When you’ve finished speaking, click the “Finish” button. You will now be able to preview your entire recording. If you are not satisfied, you can click “Start Over.”
- If the recording is good, enter a descriptive title in the “Title” field and click “Save Media.”
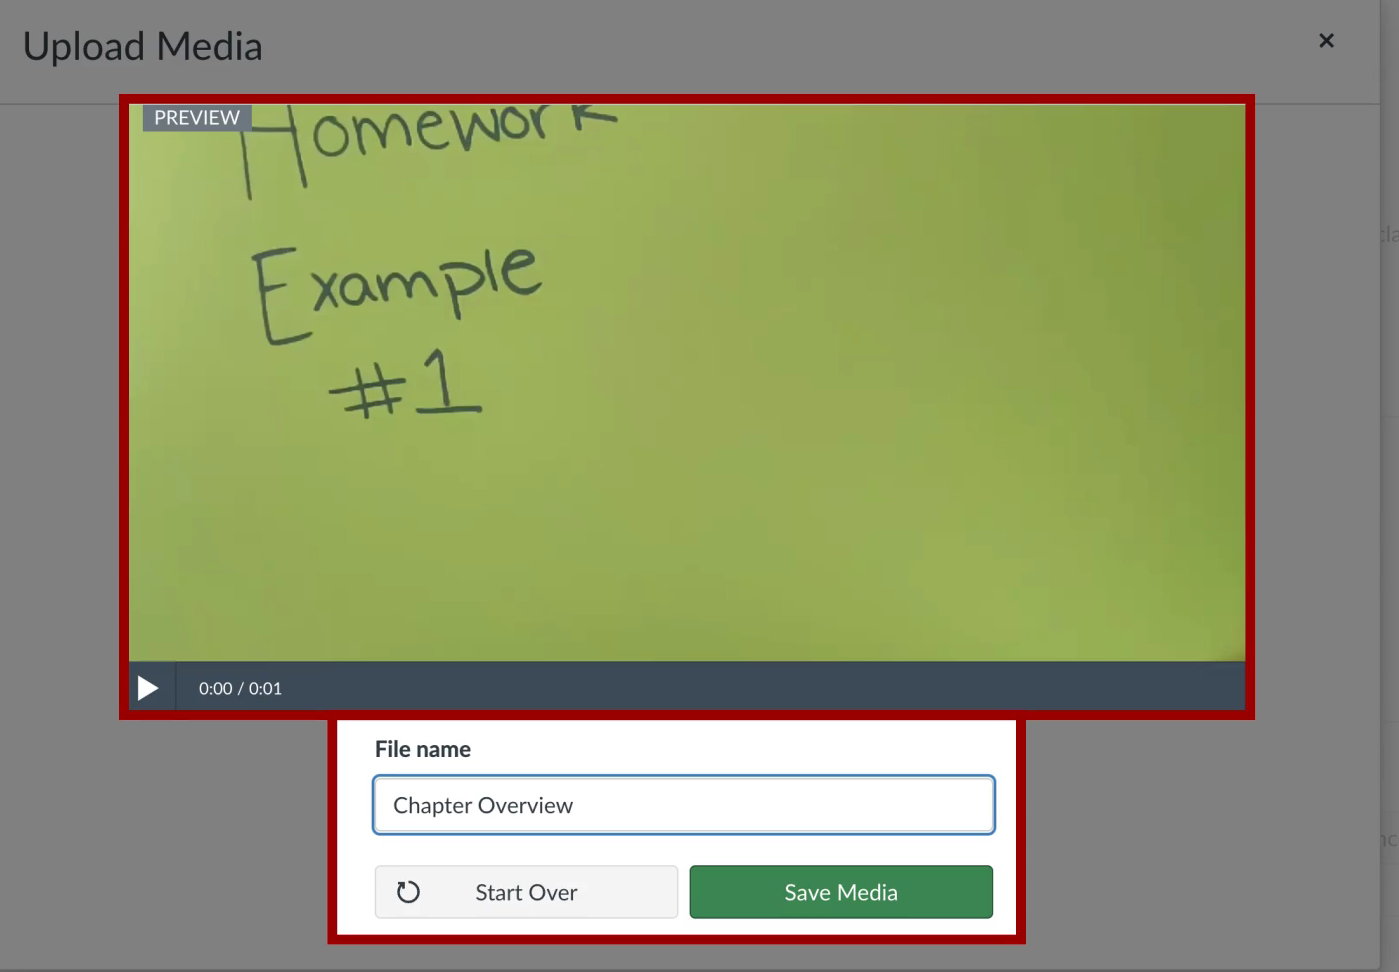
- The audio clip will be automatically embedded into the Canvas editor.
Method 2: Submitting an Audio Assignment as a Student
Students can use the same built-in tool to record and submit audio directly for an assignment. Follow the given steps to proceed further:
- Firstly, open the Assignment from your course dashboard on the right side of Canvas.
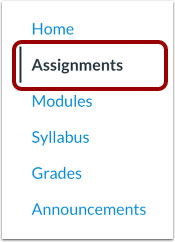
- Navigate to the specific assignment from the given options that you need to complete.

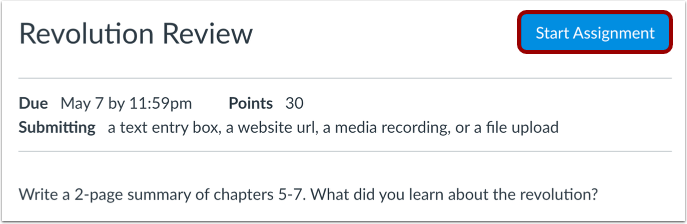
- Click the “Start Assignment” button, which is typically located in the upper-right corner.
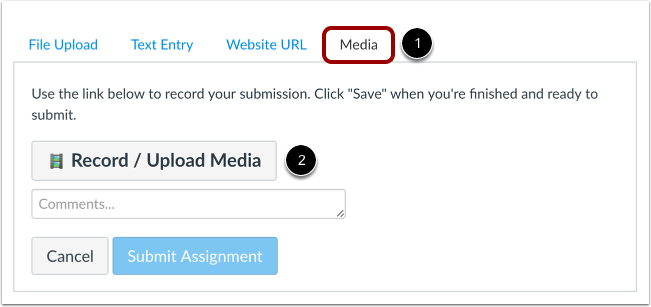
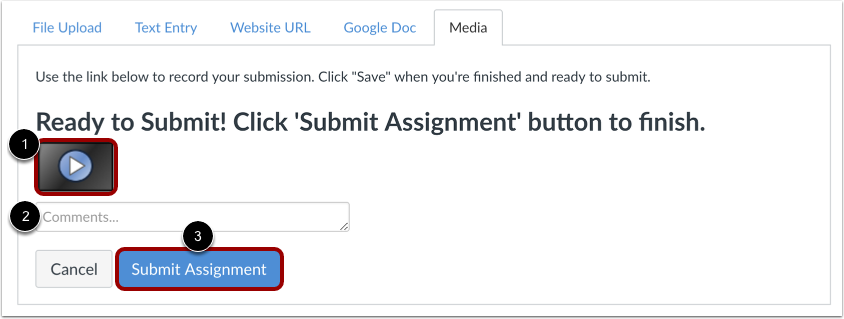
- Select the Recording Option: In the submission panel that appears, you will see several tabs for different submission types (e.g., File Upload, Text Entry). Click on the “Record/Upload Media” tab.
- Record Your Audio: Follow the exact same steps outlined above (from Method 1) to configure your microphone, record your content, review it, and save it.
- After saving, the audio media will appear as your submission file. You can add any necessary comments for your instructor in the provided text box and then click the final “Submit Assignment” button below to complete the process.
Method 3: Uploading a Pre-Recorded Audio File
This method is perfect if you prefer to record your audio using external software (like Audacity, GarageBand, or Adobe Audition) to allow for editing before uploading.
- Use your preferred software to record and edit your audio. This allows you to trim dead air, remove mistakes, apply noise reduction, and normalize the volume for a professional sound.
- Export the final audio as an MP3 file for the best balance of quality and file size.
- Access the Media Tool in Canvas: As in the previous methods, navigate to the Rich Content Editor and click the “Record/Upload Media” icon.
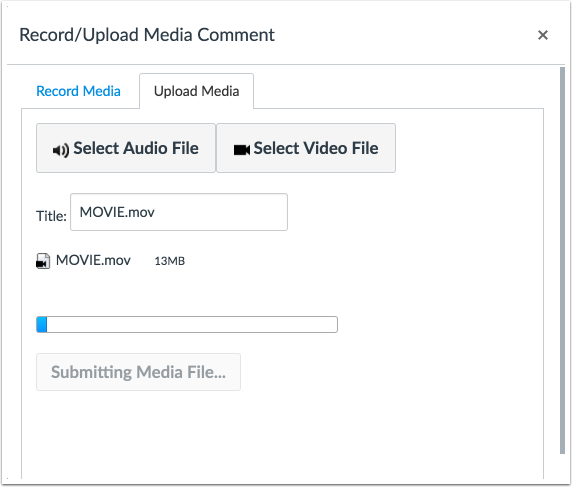
- Choose the Upload Option: In the pop-up window, select the “Upload Media” tab instead of the “Record” tab this time.
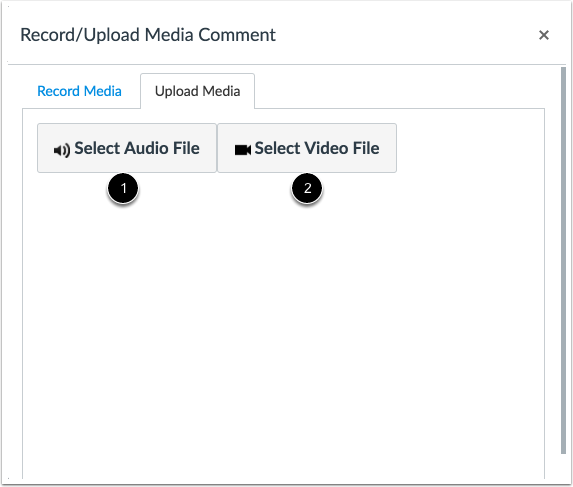
- Click the “Select Audio File” button.
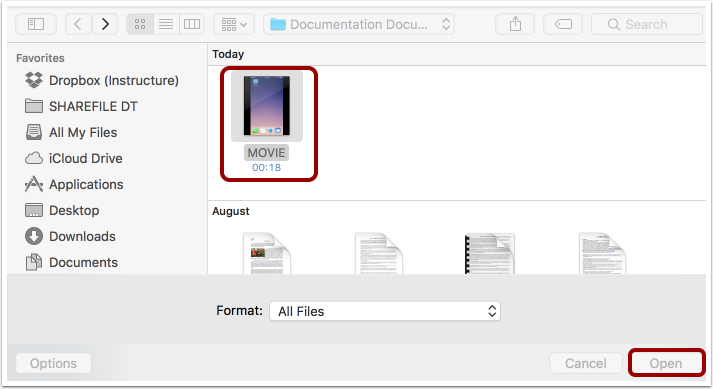
- A file browser window will open. Locate the audio file on your computer and select it, and click on “Open”.
- The file will be uploaded to Canvas and then embedded into the editor or attached to your assignment submission.
Pro Tips for Crystal-Clear Audio Recordings in Canvas
To create high-quality audio, you require more than just pressing “record.” Following these tips will dramatically improve the clarity and professionalism of your recordings.
1. Prepare Your Recording Environment
- Choose a Quiet Space: Record in a room where you can minimize ambient noise. Close doors and windows, turn off fans and air conditioners, and silence notifications on your phone and computer.
- Soften the Room: Hard, flat surfaces like walls and desks cause sound waves to bounce around, creating echo and reverb. Recording in a room with soft furnishings like a carpet, curtains, or a couch can help make your voice sound cleaner.
2. Master Your Microphone Technique
- Maintain Proper Distance: The ideal distance from your microphone is typically 6–12 inches. Being too close can cause a “proximity effect” that makes your voice sound boomy and can lead to plosives (harsh ‘p’ and ‘b’ sounds).
- Speak Across, Not Into: To further avoid plosives, position the microphone slightly to the side of your mouth and speak across the front of it, rather than directly into it.
- Use a Pop Filter: If you are using a traditional condenser microphone, a pop filter is an inexpensive but essential accessory.
3. Follow Recording Best Practices
- Script Your Content: Reading from a script or at least a detailed outline helps you stay on track, avoid filler words (“um,” “ah”), and ensure a smooth, confident delivery.
- Do a Test Recording: Before your main take, record a 30-second test. Listen back with headphones to check for volume levels, background noise, and clarity.
- Stay Hydrated: Drink room-temperature water before and during your recording session to avoid mouth clicks and vocal fatigue.
Conclusion
Recording audio in Canvas is a straightforward process that can significantly enhance the learning experience. By using the Rich Content Editor, both instructors and students can easily create and share audio content without needing to be tech experts or use external software. If you follow these steps and tips, you can confidently produce excellent audio for all your educational needs.
FAQs
1. Can I edit my audio recording within Canvas?
No, Canvas’s native recorder does not include editing functionalities. Once you click “Finish,” your only options are to preview the recording, save it as is, or discard it and start over.
2. Why isn’t my microphone being detected by Canvas?
This is almost always a browser permission issue. You must explicitly grant your web browser permission to access your microphone. To fix this, go into your browser’s settings, typically found under “Privacy and Security” or “Site Settings.” Look for the “Microphone” section and ensure that your Canvas instance is on the “Allowed” list.
3. What is the best audio file format to use for uploading to Canvas?
Canvas supports several common audio file formats, including MP3, WAV, M4A, and FLAC. For the vast majority of use cases, MP3 is the recommended format.