.png)
Adding a voiceover in CapCut is one of the fastest ways to turn a raw clip into polished content, but the option is buried a few taps deeper than most creators expect. This guide helps you learn three main methods. You can record live voice on mobile devices like iOS and Android. It also shows Text-to-Speech for voiceovers without a microphone. And lastly, the desktop method works on both PC and Mac.
What CapCut’s Voiceover Tool Actually Does
CapCut gives two ways to add voice. You can record your own voice or use Text-to-Speech. Both options create a separate voice track. This keeps it apart from the video sound. You can mute or edit the original audio easily. You can also add music without changing the voice.

How to Record a Voiceover on CapCut? (iPhone and Android)
On CapCut mobile, voiceover recording works in real time. The video plays while you speak. This helps match your voice with on-screen action. Once you know the option, it is easy to use.
Step-by-Step Instructions (Mobile)
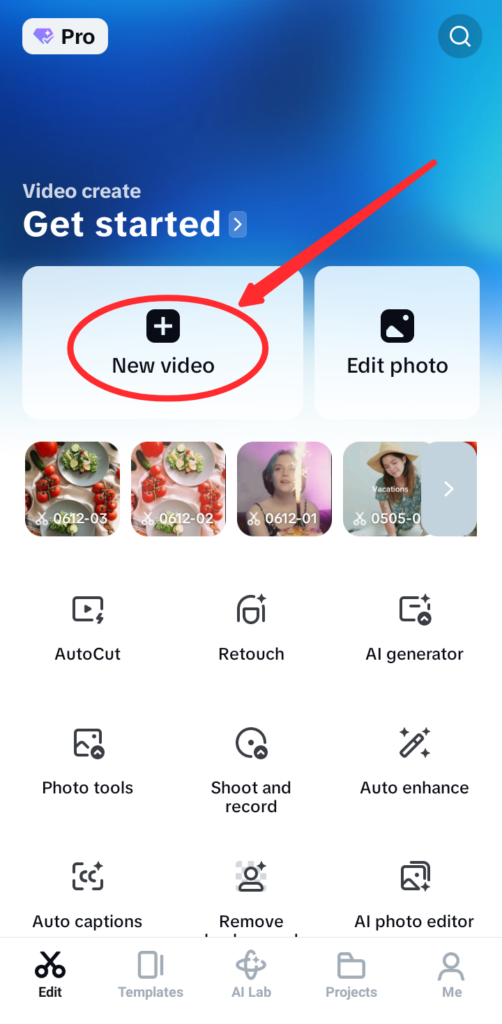
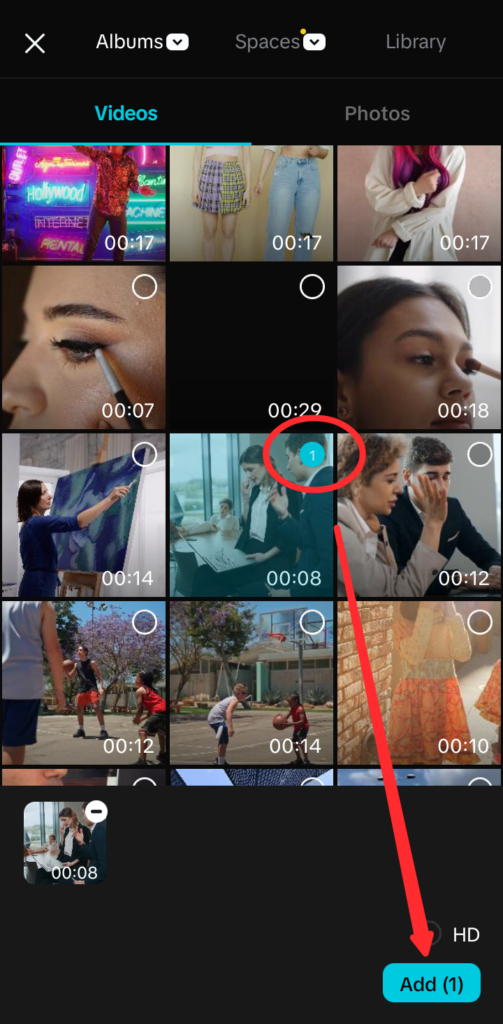
- Open CapCut and tap New video, then select your video clip from the gallery.
- Once the clip is loaded in the editing timeline, tap Audio in the bottom toolbar.
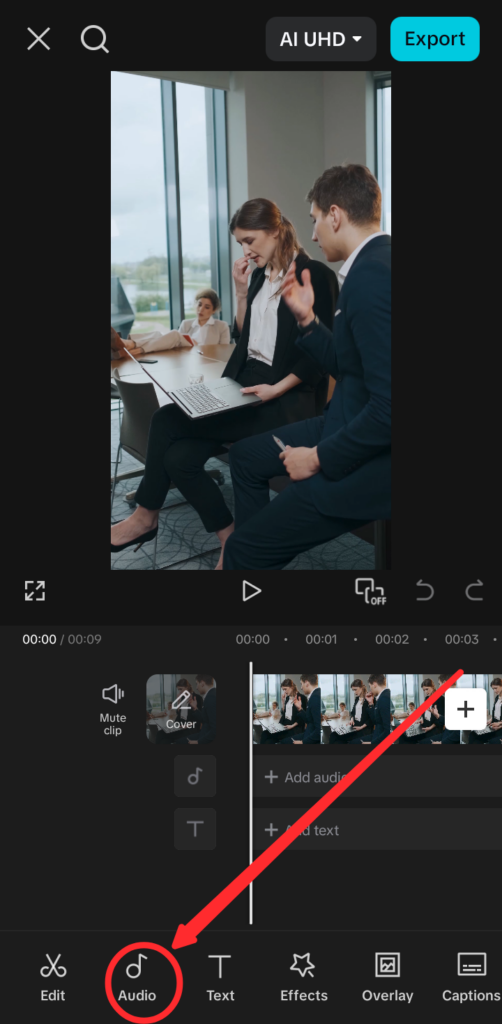
- In the audio submenu, select Record (microphone icon).

- Drag the playhead to the exact point in the timeline where your narration should begin.
- Press the record button. Speak after the countdown and tap the same button to stop.

- Tap the checkmark icon to save the voiceover clip to the timeline.

- Repeat steps 4 through 7 to add additional narration segments at different points.
Note: If CapCut does not prompt you for microphone access the first time, go to your phone’s Settings, find CapCut under Apps or Privacy, and enable the microphone permission manually. Without it, the record button will be greyed out.
How to Mute the Original Video Audio
If your video has ambient sound or dialogue you want to remove, here is the quickest approach:
- Tap the video clip in the timeline to select it.

- Tap Volume and drag the slider to 0.

Alternatively, tap the clip and select Detach Audio to pull the original sound out as a separate track, then delete that track. Detaching gives you more control if you want to keep certain portions of the original audio intact.
How to Use Text-to-Speech as a Voiceover in CapCut?
Text-to-speech is the right choice when you want a voiceover without recording your own voice. It is useful for faceless content or when you are in a noisy environment with no way to record cleanly. CapCut’s built-in TTS engine converts a typed script into an audio clip that behaves exactly like a recorded voiceover on the timeline. Voice quality varies by language; English voices currently offer the widest range and most natural output.
- Tap Text in the bottom toolbar, then tap Add Text.


- Type the full script for your voiceover segment.
- Tap the text layer to open its settings, then select Text-to-Speech.

- Browse the available AI voices and tap each one to preview it. Select your preferred option and tap the checkmark.


Once you do that, CapCut automatically converts text into speech, and the audio file is visible on the audio timeline.

- Reposition or adjust the clip on the timeline if you need it to align with a specific on-screen moment.
- If you do not want visible captions, tap the text layer and delete it. The audio clip stays on the timeline separately.


How to Do a Voiceover on CapCut Desktop? (PC and Mac)
The desktop version of CapCut gives you a larger screen and finer timeline control, but the voiceover option is in a different location than on mobile. If you have a headset or USB microphone plugged into the computer, CapCut will detect it automatically with no extra configuration required.
- Open CapCut desktop and start a new project or open an existing one.
- Import your video clip into the timeline by clicking Import in the media panel.

- Move the playhead to the spot in the timeline where the narration should start.
- On the timeline’s toolbar, look for the Voiceover button (a mic icon) and click on it. As soon as you do that, a new window will appear with a red recording button.

- Click the button and speak once the countdown ends. You will notice that your voice will be recorded on the timeline.

- Once done, click the same record button to stop recording.
- Use the timeline editor to trim, reposition, or layer additional narration segments as needed.
Note: The desktop version also supports text-to-speech through the Text panel. The steps mirror the mobile process, and TTS clips behave identically on both platforms.
How to Edit and Sync Your Voiceover After Recording?
Once your voiceover is on the timeline, a few targeted edits will tighten the sync and clean up the audio. All of these adjustments are non-destructive, so you can undo any change without re-recording.
- Trim: Drag the left or right edge of the voiceover clip on the timeline to shorten it without splitting the original recording.
- Split: Move the playhead to the cut point, then tap or click Split to divide one clip into two. This is useful for removing a stumbled word or a long pause in the middle of a take.
- Move: Press and drag the clip horizontally to shift it forward or back until the narration lines up with the correct on-screen moment.
- Volume balance: Tap or click the voiceover clip and adjust its volume slider. Then select the background music track separately and lower it so speech stays clearly audible above the music.
- Fade In / Fade Out: Tap the voiceover clip, go to Audio, and enable Fade In or Fade Out for smoother transitions – especially useful when the voiceover begins over existing ambient sound from the video.
Tips for Better Voiceover Quality in CapCut
The steps above handle the recording process. What determines whether your voiceover sounds good comes down almost entirely to your environment and microphone. These five habits make a consistent difference.

- Record in a quiet environment: Phone microphones pick up HVAC hum, refrigerator noise, and room echo very easily. A small room with soft items helps reduce echo. Carpet, curtains, or clothes in a closet absorb sound reflections before they reach the microphone.
- Upgrade your microphone: The phone’s built-in mic is one of the most common reasons CapCut voiceovers sound muffled or noisy. A clip-on wireless mic solves the problem without adding bulk or complicating the workflow. The Hollyland LARK M2 (9 g, up to 40-hour battery, built for short-form creators) clips to your collar and feeds clean audio directly to your phone, which is a significant improvement over recording with the phone held at arm’s length. If you prefer a direct plug-in option with zero pairing setup, the Hollyland LARK A1 connects via USB-C or Lightning and includes three-level intelligent noise cancellation right out of the box.
- Use CapCut’s built-in Noise Reduction: Tap the voiceover clip, go to Audio Effects, and enable Noise Reduction. This suppresses steady background hiss after recording and works well for mild room noise.
- Keep a consistent distance from the mic: Moving toward or away mid-sentence causes volume spikes that are difficult to fix in editing. Aim for roughly 8 to 12 inches from a phone mic. For clip-on microphones, stay within their recommended wireless range.
- Script before you record: Even a rough bullet-point outline of what you plan to say cuts retakes significantly. Long pauses and false starts are the most common editing headache for creators new to voiceover work.
Frequently Asked Questions
Why can’t I find the voiceover button on CapCut?
The voiceover tool is found inside the Audio menu. It does not appear on the main toolbar. You must add a video clip before audio tools become available. A blank project will not show those options. If the tool is still missing, update CapCut first. Older versions may have a different menu layout.
Can I have background music and a voiceover playing at the same time?
Yes. CapCut supports multiple audio tracks simultaneously. Add your music through Audio > Music and your narration through Audio > Voiceover, and both will play at once. Tap each track individually to adjust its volume level so the music does not overpower the narration.
How do I stop the original video’s sound from playing under my voiceover?
Tap the video clip in the timeline, select Volume, and drag the slider to 0. If you want more control, use Detach Audio to move the original sound to its own track, then delete that track while keeping all other elements in place.
Does CapCut’s text-to-speech sound natural?
Quality depends on the voice and language. English voices are currently the most polished and offer the widest selection. For consistently natural-sounding narration, recording your own voice with a decent microphone will outperform any TTS option CapCut offers, but TTS is a practical fallback for creators who prefer to stay off-microphone entirely.
Can I add voice effects to my CapCut voiceover?
Yes. Tap the recorded voiceover clip in the timeline, then tap Effects to browse options including “Deep,” “Chipmunk,” and “Echo.” All effects are applied non-destructively, so you can swap or remove them at any time without re-recording. Voice effects also work on TTS-generated audio clips.
Conclusion
You can create voiceovers in CapCut on both mobile and desktop. Another option is typing your script and using Text-to-Speech. CapCut can read your text using different AI voices. For better results, record or write in English. This helps with clearer pronunciation and word recognition.