


.png)
How to Do the Whoosh Effect at the Beginning of a Clip in CapCut (Step-by-Step)
Adding a whoosh effect at the start of a clip is one of the fastest ways to give your TikTok, Reel, or Short a polished, energetic opening. CapCut makes it possible in just a few taps, but the menu structure can be confusing the first time. This guide explains two methods in simple steps. One method adds only the whoosh sound. The other method combines it with a matching visual effect. This gives the full look many creators want.
What the Whoosh Effect Means in CapCut
In CapCut, the “whoosh effect” is a short whoosh sound placed at the very start of a clip, optionally layered with a quick visual motion such as a zoom burst or blur flash. The sound lives inside the Audio panel, not in Transitions or Video Effects.
Clarification: Transitions in CapCut appear between two clips on the timeline. To place a whoosh at the start of a single clip, the Audio section is the right option. From there, go to Sound Effects instead of Transitions.
Method 1: Add a Whoosh Sound Effect at the Clip Start
Step-by-Step Instructions
- Open your CapCut project and load the clip you want to edit.
- Tap Audio in the bottom toolbar.
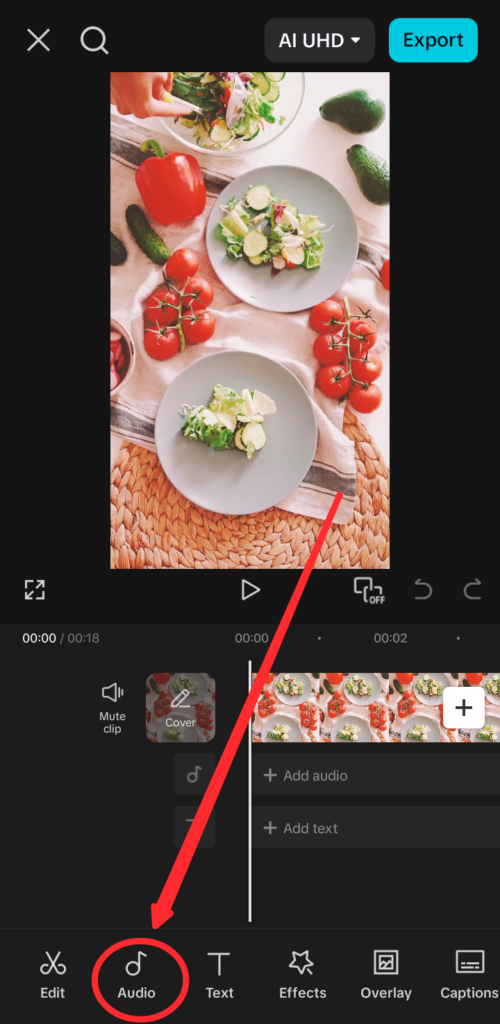
- Select Sound effects (Sound FX) from the Audio menu.
- Type “whoosh” in the search bar at the top of the panel.
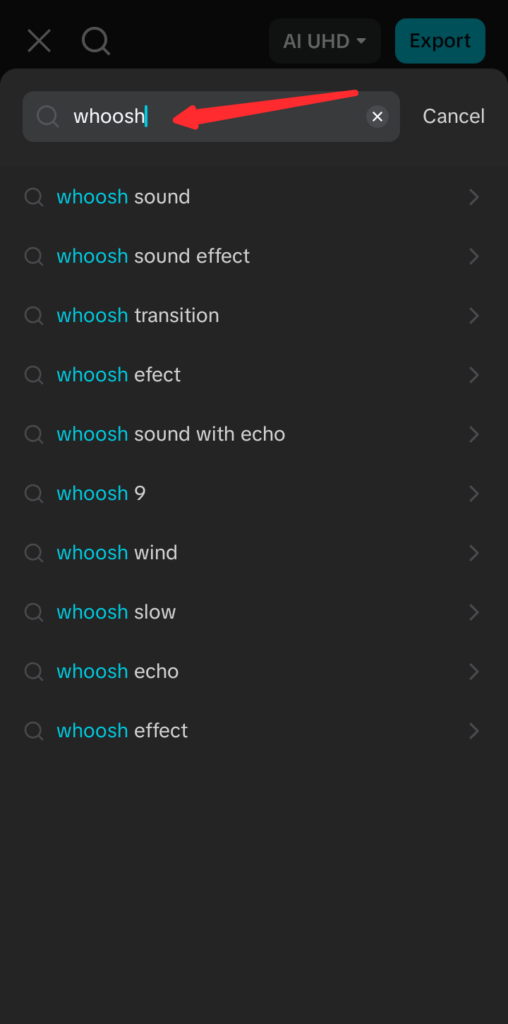

- Tap a result to preview it. When you find one you like, tap “+” to add it to your timeline.

- The whoosh now appears as a separate audio track below your clip.

Drag it to the left so that its starting edge lines up with the very first frame of your clip.
- If the sound effect runs longer than the opening beat, tap the clip and drag its right edge inward to trim the tail.

Positioning Tips
- Zoom into the timeline by pinching outward with two fingers. This gives you frame-level precision when dragging the audio clip.
- Use the playhead (the vertical white line) as a visual anchor. Scrub to frame 0, then nudge the audio clip’s left edge right up to that line.
- The sharpest whoosh peak usually lasts 0.3–0.5 seconds. Trim anything beyond that so the sound does not muddy the rest of your clip.
- Tap the audio clip once to reveal volume and fade controls if you need a cleaner exit.
Method 2: Combine a Visual Effect with the Whoosh Sound for Full Impact
Many creators expect the whoosh to feel visual, not just audio. A quick zoom-in or blur effect synced with the sound creates a matching visual hit. This makes the opening feel more intentional and clean. Complete Method 1 first, then follow the steps below.
Adding a Matching Visual Effect
- With your clip selected on the timeline, tap Effects in the bottom toolbar.

- Choose Video effects, then browse the Basic category, or search for “zoom,” “shake,” or “blur” to find a motion-style effect.


- Apply the effect on the first 0.3 to 0.5 seconds of the video. To do that, use the Split tool to a specific timeframe of the footage.

- Tap Play to preview. The visual burst should hit on the same frame as the loudest point of the whoosh audio.
- If the effect has an Intensity slider, reduce it slightly if the motion feels too aggressive for your content style.

Syncing Audio and Visual Precisely
Getting the visual and audio to land on the same frame is what separates a polished intro from a sloppy one. Pinch the timeline to zoom in until you can see the audio waveform clearly. The waveform spike shows the loudest part of the whoosh. It appears as the tallest point in the wave shape. That spike should line up with the start of your visual effect bar.
To scrub frame by frame, tap the timeline and slide your finger slowly left or right. CapCut advances one frame at a time at this speed, so you can find that specific frame where the effect should start. Tap Play at full speed after each adjustment to check how it feels in real time rather than relying on the frozen timeline view alone.
Quick Fixes for Common Whoosh Problems
| Problem | Likely Cause | Fix |
|---|---|---|
| Whoosh plays too late | Audio clip not dragged to frame 0 | Zoom in and drag the audio clip’s left edge to the clip’s first frame |
| Whoosh plays through the whole clip | Wrong layer selected for trimming | Tap the sound effect track specifically, then drag its right edge inward |
| Visual and audio feel out of sync | Video effect starts after the audio spike | Shift the video effect’s left handle left until it aligns with the waveform peak |
FAQs
Where is the whoosh sound in CapCut?
Go to Audio in the bottom toolbar, then select Sound effects and search for “whoosh.” It is not located under Transitions or Video Effects. CapCut offers several whoosh variations in the results, so tap each one to preview before adding.
Can I use the whoosh effect on just one clip without affecting others?
Yes. The sound effect stays on its own audio track and only plays where it is placed. You can trim it to match the start of your selected clip. It will not affect nearby clips unless you move it over them.
How do I make the whoosh effect louder or softer in CapCut?
Tap the sound effect clip on the timeline to select it, then use the Volume slider that appears. A setting between 80 and 100 percent delivers a punchy, noticeable hit without overwhelming the background music or voiceover on your project.
Conclusion
The whoosh effect in CapCut uses two layers. The audio clip is placed at frame zero through Audio > Sound Effects. A visual effect can also be added and trimmed to match the peak. Together, they create a strong opening feel often seen in short videos.


Subscribe us
to get the latest news!


