When recording with OBS, capturing audio sources separately gives you more flexibility in post-production. Whether you’re adjusting volume levels, removing background noise, or syncing clips, multi-track audio makes editing cleaner and faster.
OBS Studio is a free and flexible tool that supports this feature. In this guide, you’ll learn a tested step-by-step method to record audio tracks separately using OBS.
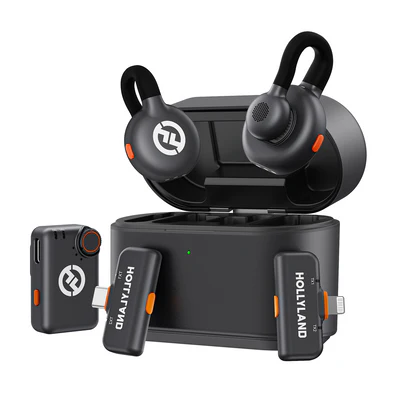
Using a reliable mic like the Hollyland LARK M2S makes the process even smoother. Its logo-free design and titanium clip-on offer stable, high-quality audio capture without disrupting your setup.


Hollyland LARK M2S - Wireless Hidden Microphone
An ultra-discreet wireless microphone featuring a clip-on transmitter for an “invisible” fit.
Key Features: No-Logo Fit | Ti+ Design | 48 kHz/24-bit

Methods to Separate Audio in OBS
Separating audio in OBS isn’t complicated, but it does require the right setup. By assigning each audio source to its own track, you’ll gain more control in post-production. Follow these steps to configure OBS for clean, track-specific recordings.
Step 1: Set Up Your Audio Inputs
Start by launching OBS and opening the Settings menu. Navigate to the Audio tab, where you’ll find slots for audio sources such as Mic/Auxiliary Audio and Desktop Audio. These are the core inputs that OBS will monitor during your recording session.

Your mic slot is used for any external or built-in microphone, while desktop audio captures system sounds like video playback, game audio, or browser sound.
You can also connect more advanced setups—such as virtual audio cables or browser-specific capture sources—depending on what you want to isolate. This is the stage where OBS begins listening to what you want to separate later. Be sure to select only the devices you plan to control individually.
If your recording involves more than two speakers or apps, consider creating a naming system for each input. This not only helps inside OBS but makes your post-production workflow smoother, especially when using editing software that lists audio channels by default names.
Step 2: Enable Multi-Track Recording
Next, go to the Output tab in the settings menu and switch to the Recording section. Here, change the recording format to MKV, which is more reliable for multi-track recording. Unlike MP4, MKV won’t corrupt your file if OBS crashes or stops unexpectedly. If needed, you can remix MKV files to MP4 later using OBS’s built-in converter.

Now look for the audio track checkboxes and enable Track 1, 2, and 3. These will be used to record different sources separately—like desktop audio, microphone, and optional apps.
OBS allows up to 6 tracks, which is useful for creators handling multiple input types. This setting ensures each track is saved individually instead of combining them into one file.
Step 3: Assign Each Audio Source to a Track

In the main OBS interface, locate the Audio Mixer section. Click the small gear icon next to any audio source and select Advanced Audio Properties. This will open a table layout where you can assign each audio source to a specific track.

Start by unchecking all default boxes to prevent unintended overlaps. Then, map each source to its own track:
- Track 1: Combined mix (used for streaming or previewing)
- Track 2: System/desktop audio
- Track 3: Microphone input
- Track 4–6: Optional inputs like Discord, Zoom, or background music apps
Assigning each source to its own track ensures cleaner results and makes editing faster and more precise, especially when handling multiple sound inputs. Save your test recordings in a separate folder with clear names so you can compare setups over time and improve consistency.
Step 4: Record and Test Your Setup
Once everything is configured, click Start Recording in OBS to run a short test. After the clip is recorded, open it in a media player like VLC or import it into software like Audacity or Adobe Premiere. Use the track selector or timeline to verify that each audio source was recorded on a separate track.

Listen carefully to each one—make sure nothing is missing, overlapping, or muted. If a track didn’t record properly, go back and double-check your assignments. Doing a 10–15 second test recording is always a good idea before starting longer sessions.
This avoids wasted recordings and helps you spot issues in real time. Once confirmed, you’re ready for full production.
Step 5: Set Recording Format and Audio Tracks
Go to Settings > Output, then click the Recording tab.
Choose a Recording Path (where your files will save) and set the Recording Format to MKV—it’s safer if OBS crashes.

Under Audio Tracks, tick the boxes you’ll use. For example:
- Track 1: Mic
- Track 2: Desktop Audio
This helps if you want separate audio files later. Also, select NVIDIA NVENC H.264 as the encoder if available—it’s faster and smoother.
Tips for Better Audio Separation
- Name your audio sources clearly: In OBS so you can easily match them during editing. For example, label them as “Mic – Host,” “Desktop – System,” or “Discord – Guest.”
- Always run a short test recording: Before going live or starting your session. This helps confirm that each source is mapped correctly and no track is missing.
- Record in a quiet space: To prevent background noise from bleeding into your mic input. Even with good equipment, a noisy room makes editing harder.
- Avoid echo-prone environments: Use curtains, carpets, or foam panels to reduce sound reflections that could appear across multiple tracks.
- Keep your mic and desktop volume levels balanced: Uneven audio levels can make post-production more difficult, especially when separating voices from system sounds.
- Monitor live levels while recording: Keep an eye on OBS’s audio meter to catch peaking or dropped input in real time. Adjust on the go to avoid distortion or silence in final tracks.
Conclusion
Recording separate audio tracks in OBS gives you more editing freedom and a cleaner final result. With the right setup and a short test before you begin, you can avoid common issues. Whether you’re creating content or streaming, a well-organized audio workflow saves time and improves overall quality.
Frequently Asked Questions
Why record audio separately in OBS?
It gives you more control during editing. You can adjust, mute, or clean up each source without affecting the others. It’s especially helpful when dealing with background noise or uneven volume levels.
How many tracks can OBS record?
OBS supports up to six audio tracks for recording. You can assign different sources—like mic, system audio, or voice chat—to separate tracks depending on your setup.
Which format supports multiple tracks?
Use the MKV format for multi-track recording. It’s more stable and won’t corrupt if OBS crashes. You can later convert MKV to MP4 if needed using OBS’s built-in remix option.
Can I separate tracks after recording?
No, tracks must be assigned before you start recording. OBS does not allow audio to be split into separate tracks after a session is complete.
Is this method suitable for podcasts or interviews?
Yes, it’s ideal. Each participant’s voice can be recorded on a separate track, making it easier to balance volumes and remove noise during editing.


.png)


