.png)
 Español
 Recording a podcast sounds fun until you sit down and realize your audio sounds messy, unclear, or full of noise. The truth is, good content needs good sound. If your voice isn’t clear, listeners won’t stay. But don’t worry, you don’t need a fancy studio or expensive gear.
With the right microphone, a quiet space, and a simple setup, you can record great audio even from home. In this guide, we’ll walk you through it step by step. Whether you’re using your phone, computer, or recording with a guest, tools like the Hollyland LARK A1 make it easy to sound like a pro.

Best Microphones for Recording Podcast Audio
Not all mics are the same. Some are built for phone use, others for desktop. Some catch too much background noise; others focus only on your voice. Here are some of the best options for all levels.
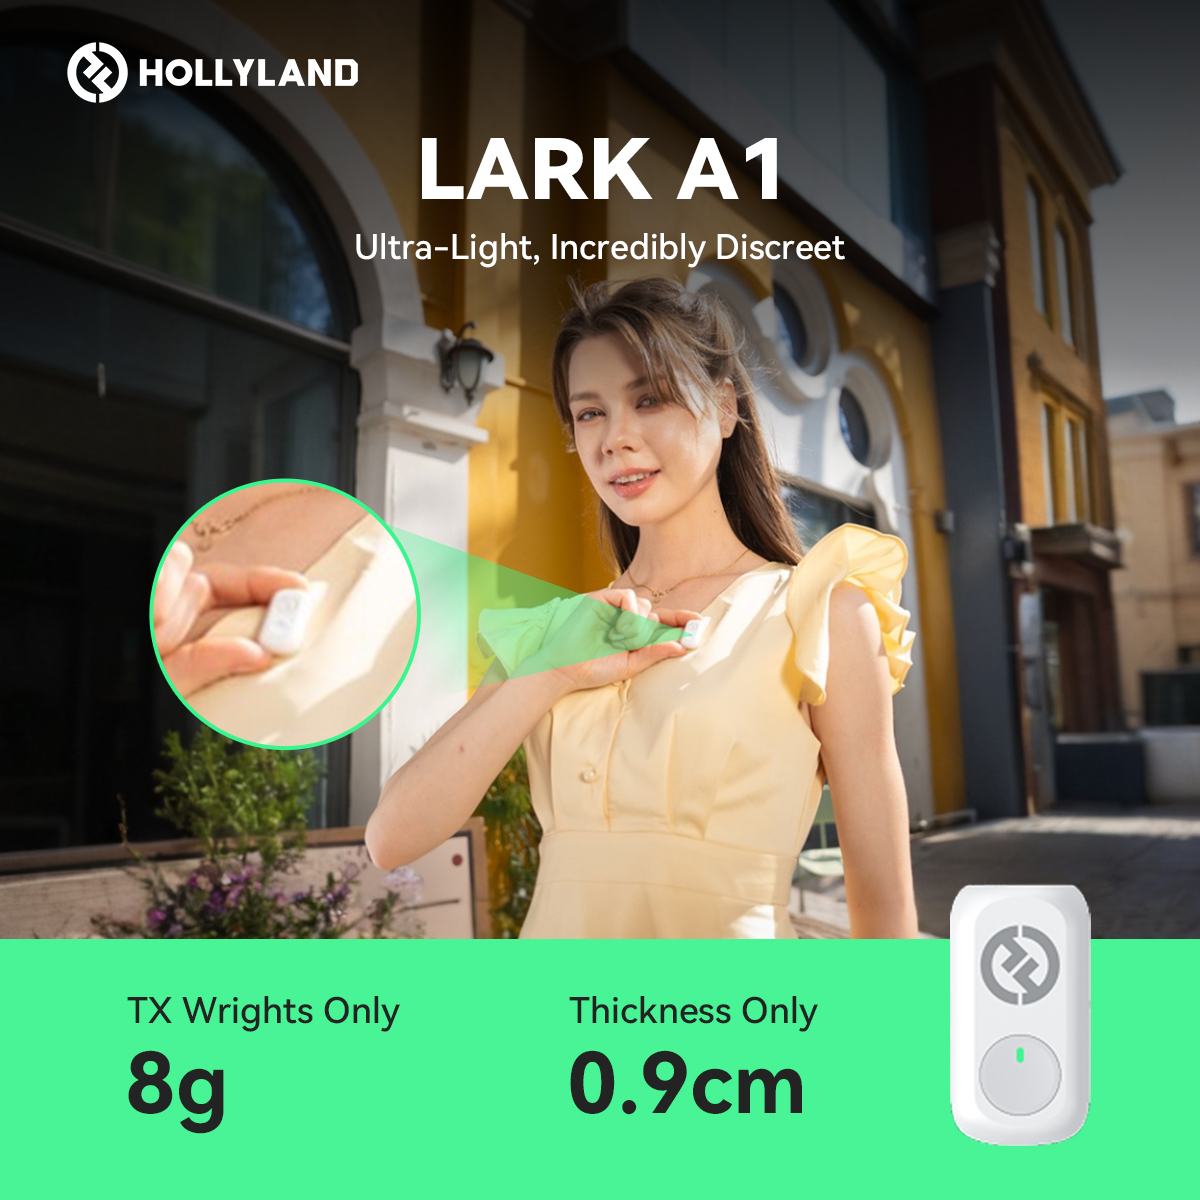
1. Hollyland LARK A1 (Best Overall)

A compact wireless microphone that clips to your shirt and works with both iPhones and Android devices. Ideal for creators who want studio-quality sound without bulky gear.
Pros:
- 48 kHz/24-bit high-fidelity audio for crisp, clear sound
- 3-level intelligent noise cancellation removes background noise
- Up to 54 hours of use with charging case and dual transmitters
- Adjustable EQ, reverb, and 6-level gain for custom sound control
Cons:
- Not ideal for desktop-only users who prefer USB/XLR mics
- Limited onboard display or visual controls compared to pro studio mics
2. Samson Q2U (for beginners)

A mic that gives you both USB and XLR connections, making it perfect for beginners who want to upgrade later without buying a new mic. It provides you with warm, broadcast-style voice quality with a simple plug-and-play setup for any podcasting level.
Pros:
- Dual USB/XLR ports offer flexibility for beginners and pros
- Warm, broadcast-like voice clarity
- Includes stand, cables, and windscreen, plug-and-play ready
- Excellent background noise rejection for clean recordings
Cons:
- The design looks basic compared to newer models
- USB audio quality is slightly lower than high-end mics
3. Blue Yeti Nano (for beginners)
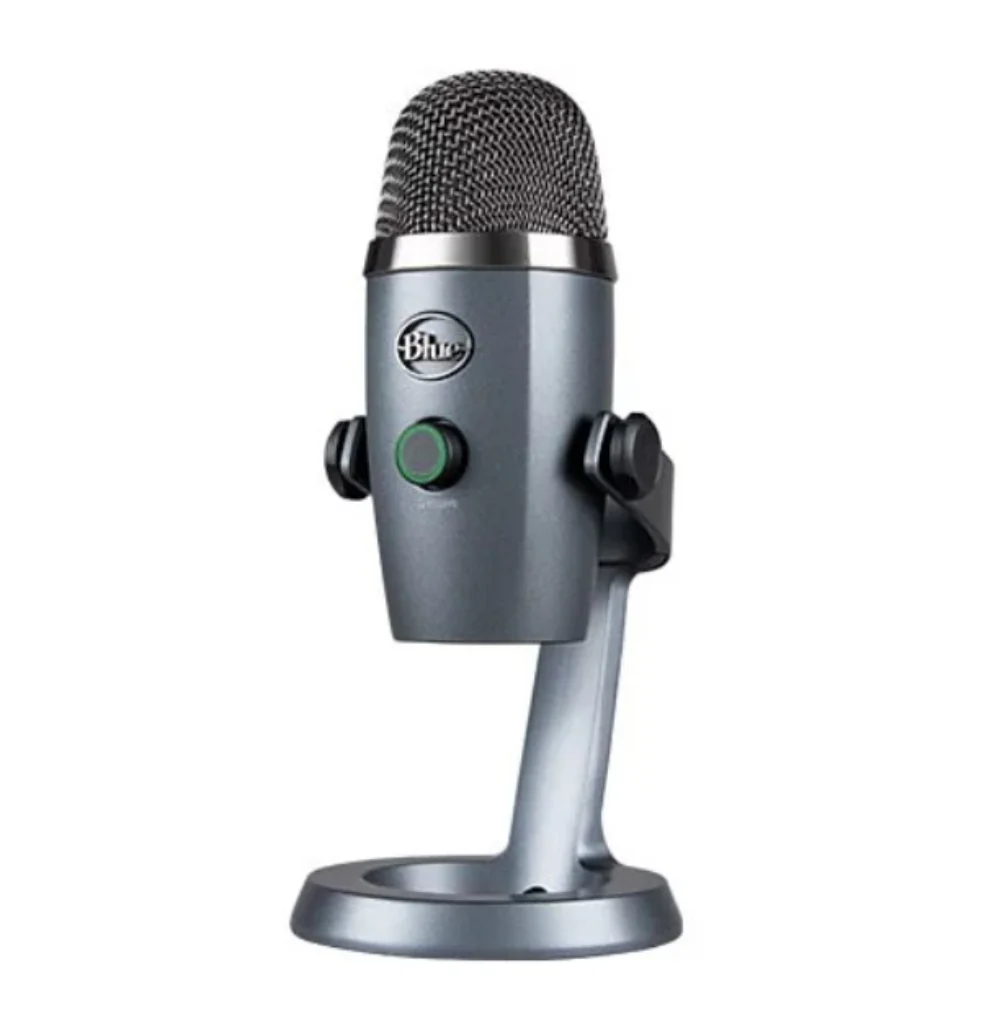
This USB mic delivers rich, smooth audio that’s perfect for solo podcasters, streamers, or voiceovers in quiet environments. It’s easy to use; just plug it into your computer and hit record with no extra setup.
Pros:
- Smooth and full-bodied audio ideal for voice work
- Simple USB plug-and-play with all software
- Compact, stylish design fits any desk setup
- Two pickup patterns for flexible recording
Cons:
- Sensitive to room noise in untreated spaces
- No XLR option, limiting upgrade path
4. Audio-Technica ATR2100x (for intermediate)

It is for creators who want pro-quality sound and long-term flexibility; this microphone combines clean, crisp audio with both USB and XLR connections. It’s perfect for solo recording, interviews, or growing into a studio setup over time.
Pros:
- Crisp, clear audio with strong noise rejection
- Dual USB/XLR outputs for flexible use
- Strong build with a professional look
- Handheld design makes it easy to transport for on-location recording
Cons:
- Slightly bulkier than entry-level USB mics
- No bundled software or editing suite included
Best Software for Recording Podcast
Now that you’ve got your mic ready, it’s time to choose the right software. These tools help you record, edit, and improve your podcast, whether you’re using a computer or a phone.
For Desktop Users
- Audacity (Free – Windows, Mac, Linux)

A simple and powerful tool for beginners. You can record, edit, and clean your audio easily. It’s great for solo podcasters or basic guest interviews.
- GarageBand (Free – Mac only)

Built into every Mac, GarageBand is user-friendly and works well for podcasting. It has easy drag-and-drop editing and sound effects.
- Adobe Audition (Paid – Windows & Mac)

A professional-level editor with advanced tools. Best for podcasters who want full control over sound quality. It comes with noise reduction, multitrack support, and more.
For Mobile Users
- Dolby On (Free – iOS and Android)

Perfect for quick and clear mobile recordings. It auto-improves your voice by reducing noise and adjusting volume levels.
- Anchor by Spotify (Free – iOS and Android)
Anchor lets you record, edit, and publish your podcast, all from your phone. Ideal for beginners who want an all-in-one mobile solution.
How to Record Podcast Audio (Step-by-Step Guide)?
Now that you’ve picked a microphone and software, let’s set it up and record your first episode.
Pick a Quiet Recording Environment
Pick a small and quiet room where you can record without distractions. Try to choose a place with soft things like curtains, rugs, blankets, or a couch. These help stop your voice from bouncing around and sounding echoey. A guest room or even a walk-in closet can work really well because clothes and soft surfaces absorb sound.
Before you start, turn off noisy things like fans, air conditioners, fridges, or anything that hums or buzzes. Don’t forget to put your phone on silent or do not disturb so nothing interrupts your recording. If you have headphones, wear them while you record. You’ll catch background sounds you might not notice otherwise.
Solo Podcast Recording (Mobile setup)
If you are using the Hollyland LARK A1, use these steps:
- Clip the microphone to your shirt, close to your mouth

- Plug the receiver into your phone’s charging port.
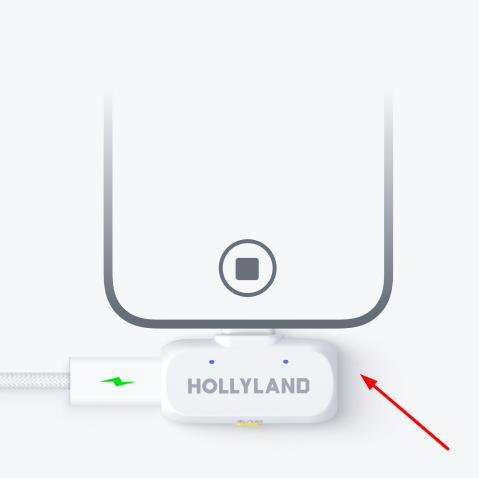
- Press the mic’s button once to enable noise cancellation, double-click to mute, and triple-click to start recording.

- Open a voice recording app (like Dolby On or Anchor)
- Do a short test recording and listen back
- If it sounds good, start your podcast
- If your phone battery is low, you can charge your phone and record at the same time using the receiver’s side port.
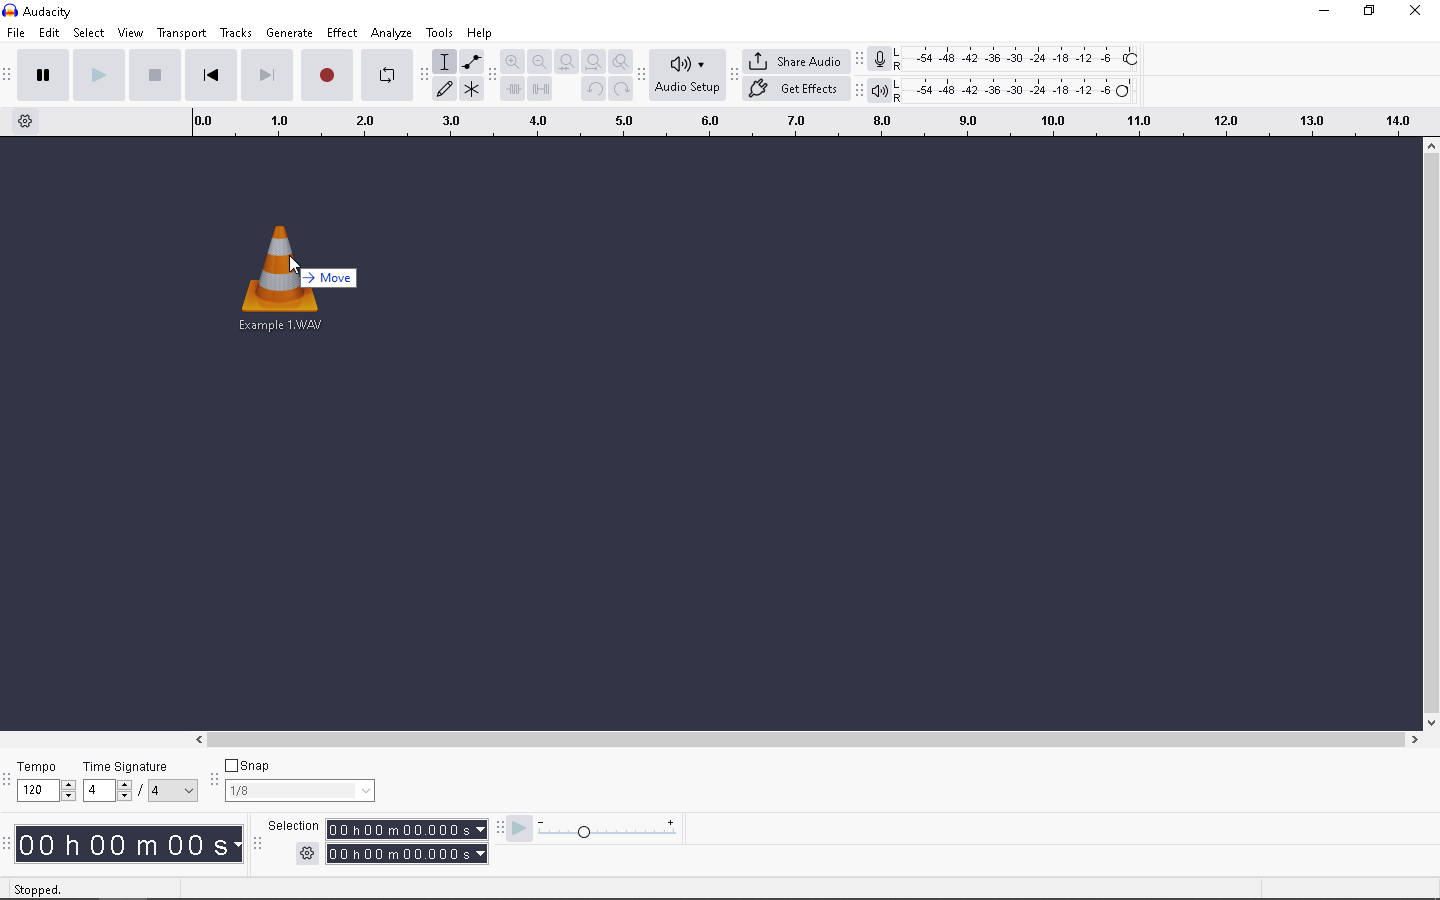
- After recording, play back your audio without unplugging the mic.
- Once you finish recording, play it back and listen.
- Save your file in WAV format. It is uncompressed and easier to upload. Always keep a backup copy.
Solo Podcast Recording (Desktop Setup)
If you’re recording alone on your computer, setting up your mic and software is simple. Just follow these steps to start capturing clear audio from your desktop.
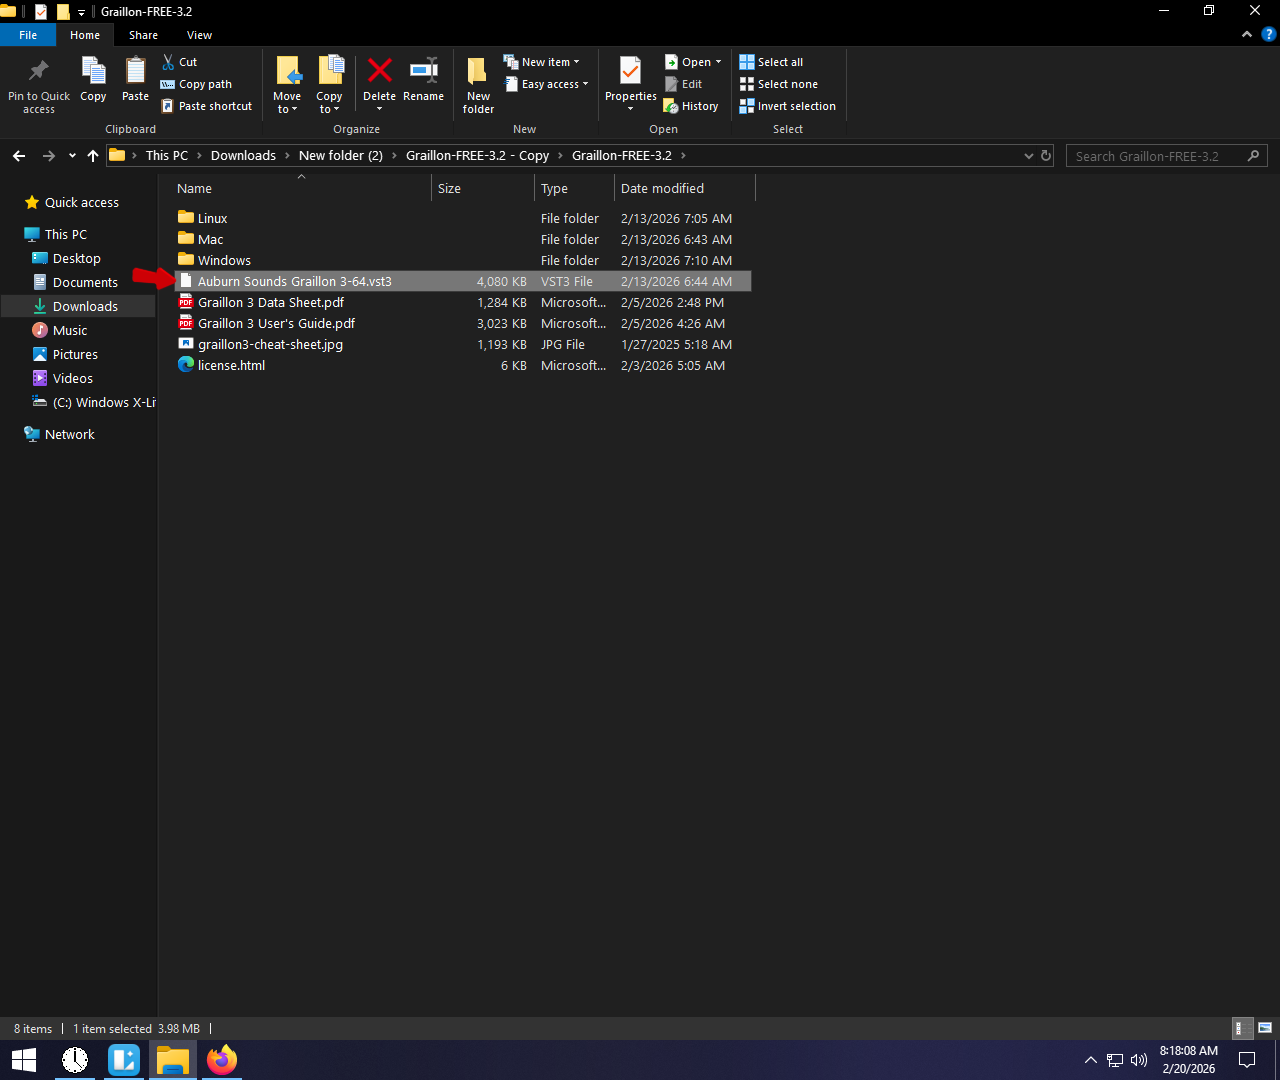
- Use a USB mic like Samson Q2U
- Plug one end into your mic and the other into your computer.
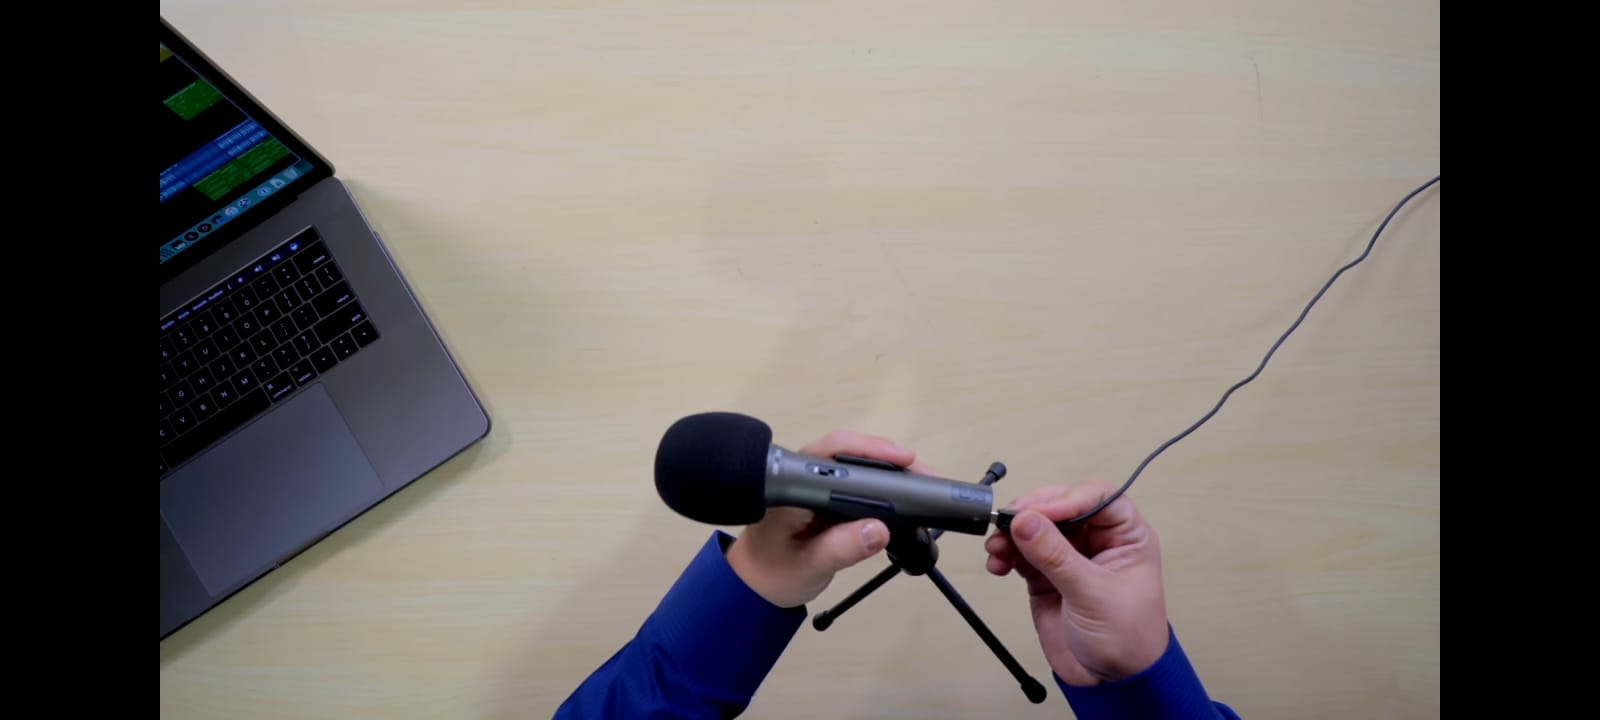
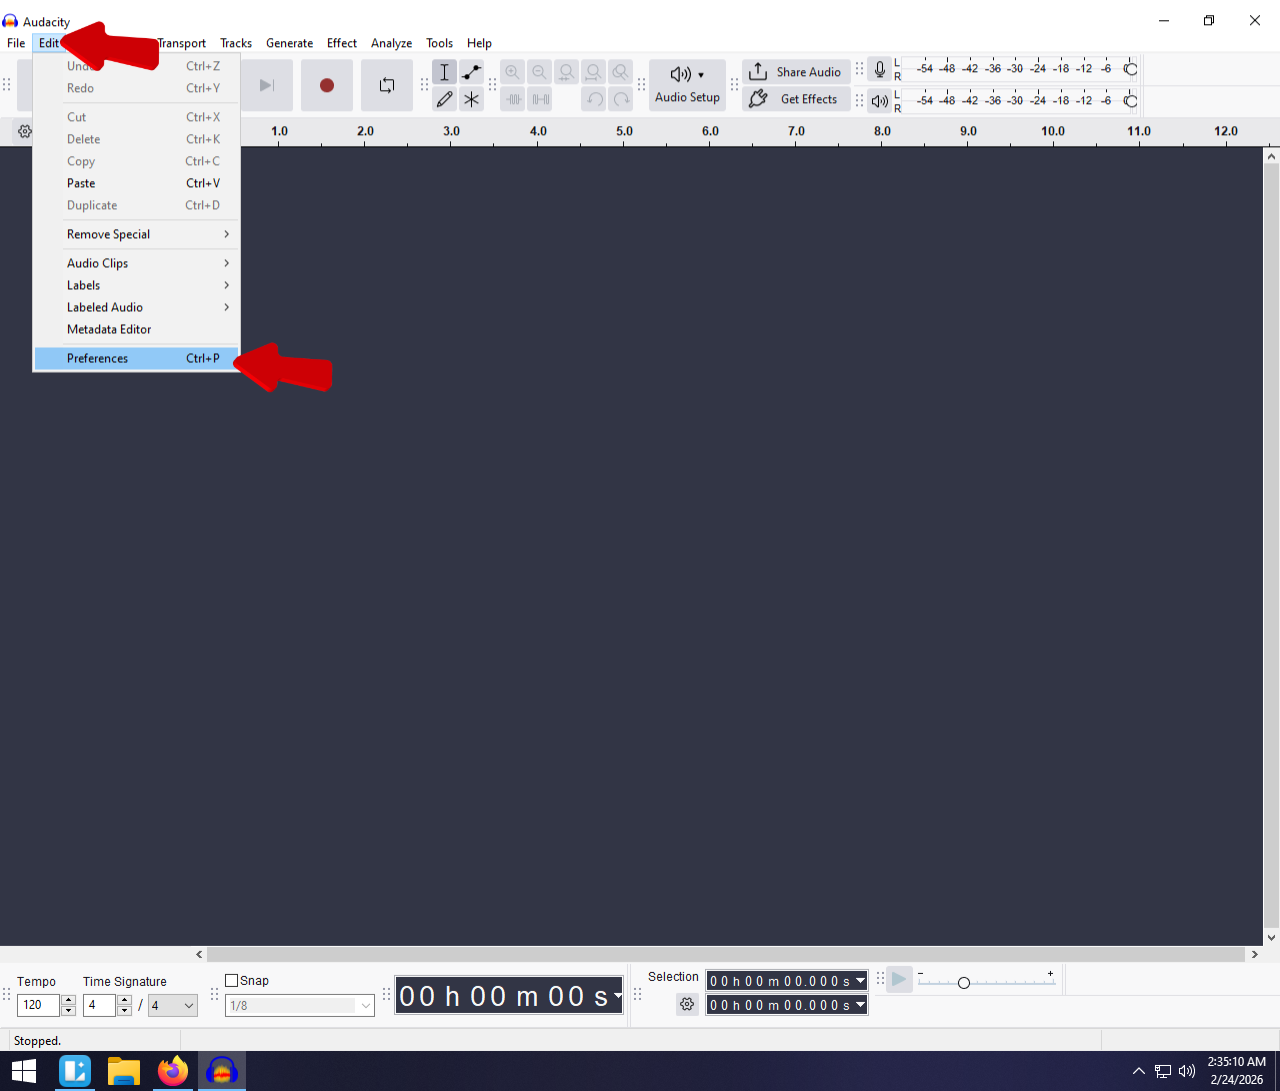
- Open software like GarageBand
- A little notification bar will pop up. Click to continue.

- Go to preferences, click on Audio/MIDI, and select the mic as your input.
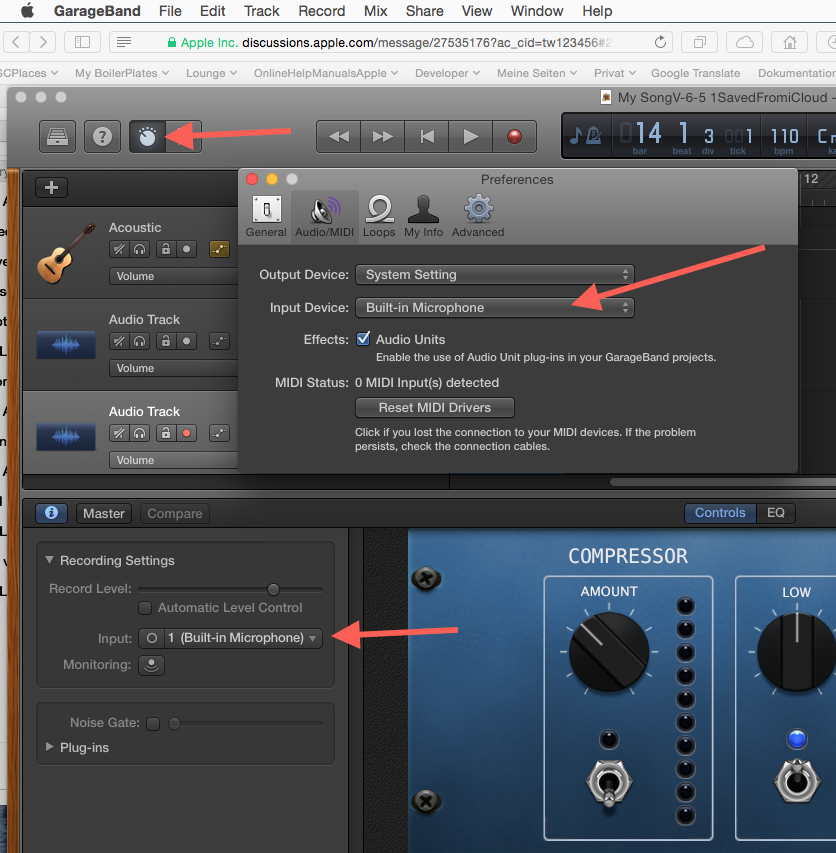
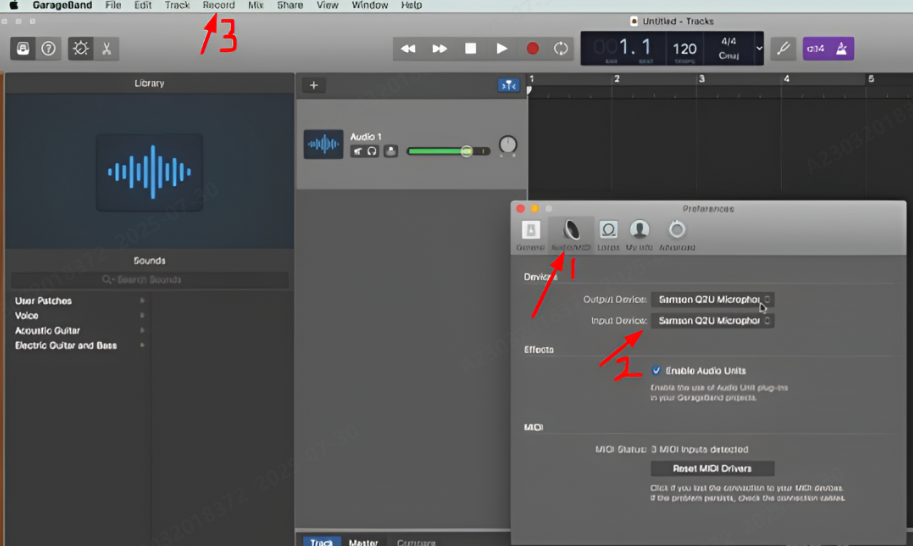
- Test the sound, and click on record
- Save in WAV
Guest Podcast Recording (Same Room)
If you’re recording with someone sitting next to you, you’ll need a setup that captures both voices clearly. Follow these steps to record a smooth in-person podcast with a guest.
- Use two mics (like 2x LARK A1 or dual-input interface)
- Clip each mic on each speaker
- Use software that supports 2 mic inputs (or use an audio interface)
- Record in separate tracks if possible
- Keep mics spaced to avoid cross-talk
Remote Podcast Recording (Zoom, Riverside, Zencastr)
When your guest isn’t in the same room, don’t worry; you can still record a great episode online. Here’s how to set up and capture clear audio during a remote podcast.
- Choose a platform that records separate tracks
- Wear headphones to avoid echo
- Make sure guest also uses a mic (built-in mics sound bad)
- Ask guest to record locally if possible
- Download files after the call
Tips for Better Podcast Recording
Before you hit record, a few simple habits can take your podcast from average to professional. Keep these tips in mind to sound better and save yourself time during editing.
- Always wear headphones while recording to hear background noise in real time.
- Sit up straight and stay still. Movement can cause mic rubbing or volume changes.
- Do a 10-second test before every session to catch problems early.
- Avoid speaking too close or directly into the mic to prevent harsh “P” or “S” sounds.
- Keep water nearby to stay hydrated; your voice will thank you.
- Save multiple backups of your audio files. One on your device, one in the cloud.
- Edit gently, remove long pauses and loud breaths, but don’t make it sound robotic.
Conclusion
A good podcast isn’t just about what you say; it’s also about how it sounds. When your audio is clear, your message feels more real and professional. Even small changes like sitting in a quieter space, using headphones, or recording in short parts can make a big difference.
The key is to start simple, stay consistent, and improve as you go. Don’t wait for everything to be perfect. Record your first episode, learn from it, and keep going. That’s how every great podcast begins, one step at a time.
FAQs
How do I start an audio podcast?
Start by picking a topic you care about. Set a clear goal. Do you want to teach, entertain, or share stories? Choose a format, like solo, guest, or group. Then plan your first episode and record it. Add a short intro and outro. Edit to remove mistakes. When you’re happy with it, upload your episode and share it with the world.
What kind of audio file should I use for a podcast?
Use the WAV format. It works on almost all podcast apps like Apple Podcasts and Spotify. It also keeps the file size small and easy to upload. Some platforms also accept MP3, but WAV is the safest choice.
Can I add music and sound effects to my podcast?
Yes, you can! Many podcasters add short music at the start and end of their episodes. It helps people recognize your show. You can also add sound effects if they fit your style. Just keep it short and simple. You can mix music in later while editing or play it live if your gear supports it.