.png)
Some sounds just stick with you — a punchline from a favorite show, a few seconds of a song that hits perfectly, or the voice of someone special. Now imagine hearing that moment every time your phone rings. The good news? You can, and it’s easier than you think.

In this guide, you’ll learn how to turn video audio into a ringtone on both Android and iPhone using tools you probably already have. From selecting the right clip to extracting, trimming, and converting it, I’ll walk you through every step so your ringtone feels personal, unique, and crystal clear.
Step 1 – Select the Video and Identify the Audio Segment
Start with a video you genuinely enjoy — maybe it’s a clip you recorded, a movie scene, or a live performance. The clearer the sound, the better your ringtone will turn out. Avoid anything with loud background chatter, static, or distortion since those flaws will stand out when the file is trimmed.

Step 2 – Extract Audio from the Video
You’ve got your video — now it’s time to grab only the sound. This step is all about isolating the audio track so you can work with it separately.

On your phone:
- Open CapCut, InShot, or any editor you prefer.
- Load the clip and look for Extract Audio or Detach.
- Tap it, and the soundtrack will appear separately.
- Save the audio file.
On a computer:
- VLC Media Player: Convert the video to an audio file by setting the output to MP3.
- Audacity: Drag in the video, view the waveform, and export only the sound.
Tips:
- Use a common audio type like MP3, WAV, or M4A so your phone accepts it as a ringtone.
- If the extracted audio is too quiet, you can raise the volume during editing — just avoid distortion, as it’s difficult to fix later.
Step 3 – Edit and Trim the Audio
Now you’ve got the audio, the next move is to shape it.
Open your file in whatever editor you’re using. Slide the markers or cut tools until you’re left with the exact part you like.

Sometimes the middle of a clip works better than the start. Try adding a quick fade-in to avoid a sudden jump, and a fade-out to ensure a clean end.
Step 4 – Convert Audio to Ringtone-Compatible Format

Here’s the part where you turn your neat little audio clip into something your phone actually agrees to use as a ringtone.
On Android:
- Save the file as MP3.
- Export at around 128 kbps bitrate — no need to go higher.
- Keep the file name short and clear for easier browsing later.
On iPhone:
- Ringtones must be in M4R format.
- GarageBand method: Drop in your clip, make sure it’s under 30 seconds, then Share as Ringtone.
- iTunes/Music app method: Import the clip, convert to AAC, change “.m4a” to “.m4r,” and sync.
You can do this with free tools like VLC, Audacity, or a trusted online converter if you’re fine with uploading. Just double-check the final format matches your phone’s needs before moving on.
Step 5 – Transfer the Ringtone to Your Phone
Now that your file is in the right format, it’s time to move it to your phone. Once it’s there, you’ll be ready to set it as your ringtone.

On Android
You can transfer the file in two ways. The first is by connecting your phone to a computer, opening the phone’s internal storage, and finding the Ringtones folder. Drag and drop your file there, and it will appear in your ringtone options.
If you don’t want to use a computer, simply save the file to Downloads, then open Settings → Sound → Phone Ringtone and select it from the list.
On iPhone
If you use GarageBand, you can share the finished file directly to your ringtone list from inside the app. For iTunes or the Music app, sync the .m4r file to your device, then open Settings → Sounds & Haptics → Ringtone to set it. Another method is through the Files app: save the .m4r file there, tap it, and assign it as your ringtone.
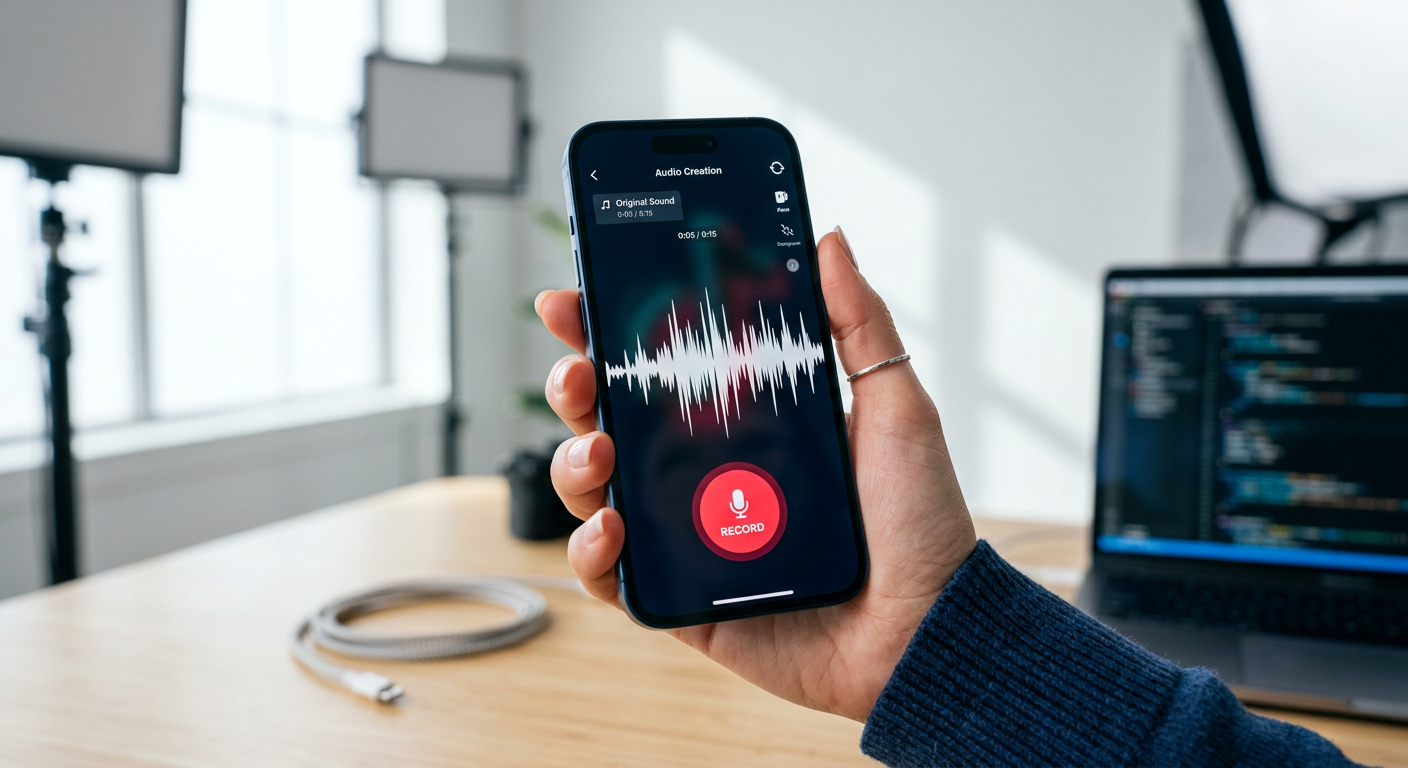
Step 6 – Record Custom Audio for Ringtone
You don’t always have to pull sound from a video — sometimes the quickest route is just recording your own. Maybe you want your child to say hello, a friend’s laugh, or a quick guitar riff you played yourself.
Open the voice recorder on your phone, or use any audio app you’re comfortable with, and capture the moment. Aim for a quiet space so the background doesn’t compete with your sound.
If you want professional clarity without the hassle, especially when creating content on your phone, the Hollyland LARK A1 makes this part easy. It’s a compact, wireless mic system with 3-level noise cancellation and 6-level gain control features.

Hollyland LARK A1 - Affordable Wireless Microphone
A perfect starter mic for creators on a budget. It’s simple to use and features effective noise cancellation.
Key Features: 48kHz/24-bit | 3-Level Noise Cancellation | 54-Hour Battery

Once you’ve got the perfect take, trim it to 20–30 seconds, export in the right format (MP3 or M4R), and you’re ready to set it just like any other ringtone.
Step 7 – Set Your New Ringtone
Time to use it. Once your file is ready, all that’s left is to assign it as your ringtone. Follow the steps below for your device.
On Android:
- Open Settings → Sound & vibration → Phone ringtone.
- If your file is listed, select it. If not, tap Add (or Choose local ringtone) and browse to Ringtones or Downloads.
- Dual-SIM phones: choose a tone per SIM here.
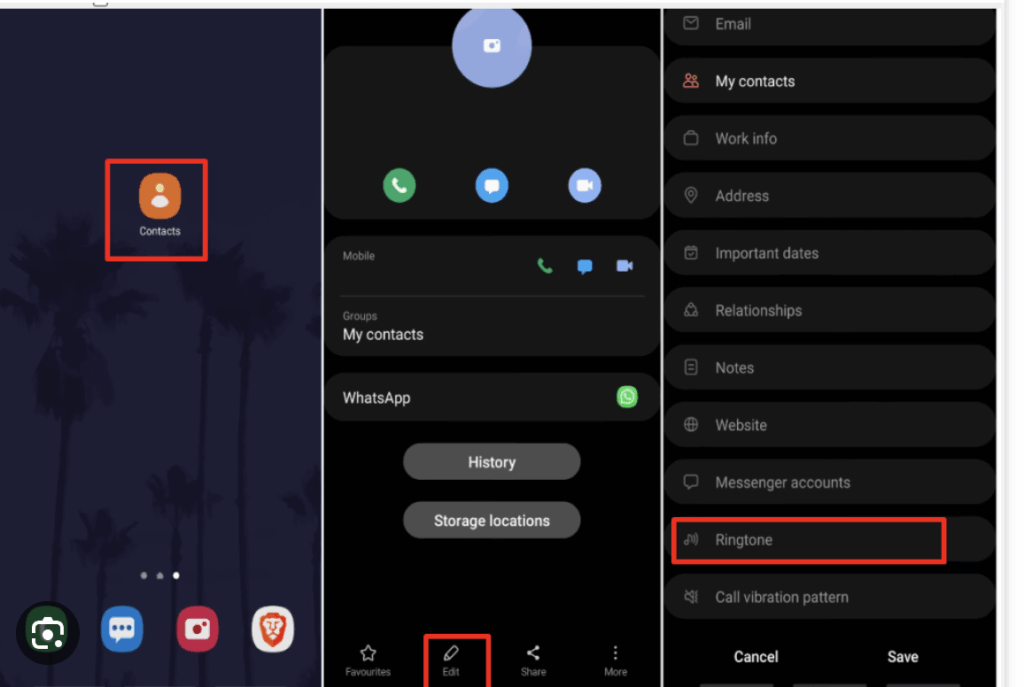
- For one contact: open Contacts, pick the person, tap Edit → Ringtone (sometimes under More), and select your file.
On iPhone:
- Go to Settings → Sounds & Haptics → Ringtone.
- Custom tones (M4R) appear near the top; tap to set.
- For a contact: open Phone or Contacts, choose the person, tap Edit → Ringtone (and Text Tone if needed), then pick your tone.
Quick fixes:
- If tone doesn’t show: restart the phone.
- iPhone: clip must be under 30 sec, M4R format.
- Android: file must be in /Ringtones.
- Place a test call to check volume and ensure Focus/Do Not Disturb is off.
Conclusion
Learning how to turn video audio into a ringtone is simpler than most people think. You choose the clip, pull the audio, trim it to a short, neat section, and save it in the right format. The process doesn’t take long, and with free tools, anyone can do it.
FAQs
Can I turn any YouTube video audio into a ringtone?
You can, but first you’ll have to download the clip. Stick to personal use so you don’t run into copyright trouble. Once it’s saved, just pull the audio, trim it, and format it like any other sound.
What’s the maximum ringtone length allowed on Android and iPhone?
Most Android phones are fine with tones up to about 40 seconds. iPhones cut it shorter — keep it under 30 seconds or it won’t show in the list.
Do I need special software to convert audio for ringtones?
Not really. Many people use free tools like VLC or Audacity. On the iPhone, GarageBand works well. You could even try an online converter, but offline keeps your files private.
How can I make a ringtone louder without distortion?
Turn the volume up in an editor, but do it slowly. If you see the waveform flattening at the top, that’s distortion creeping in — drop it back a bit.