.png)
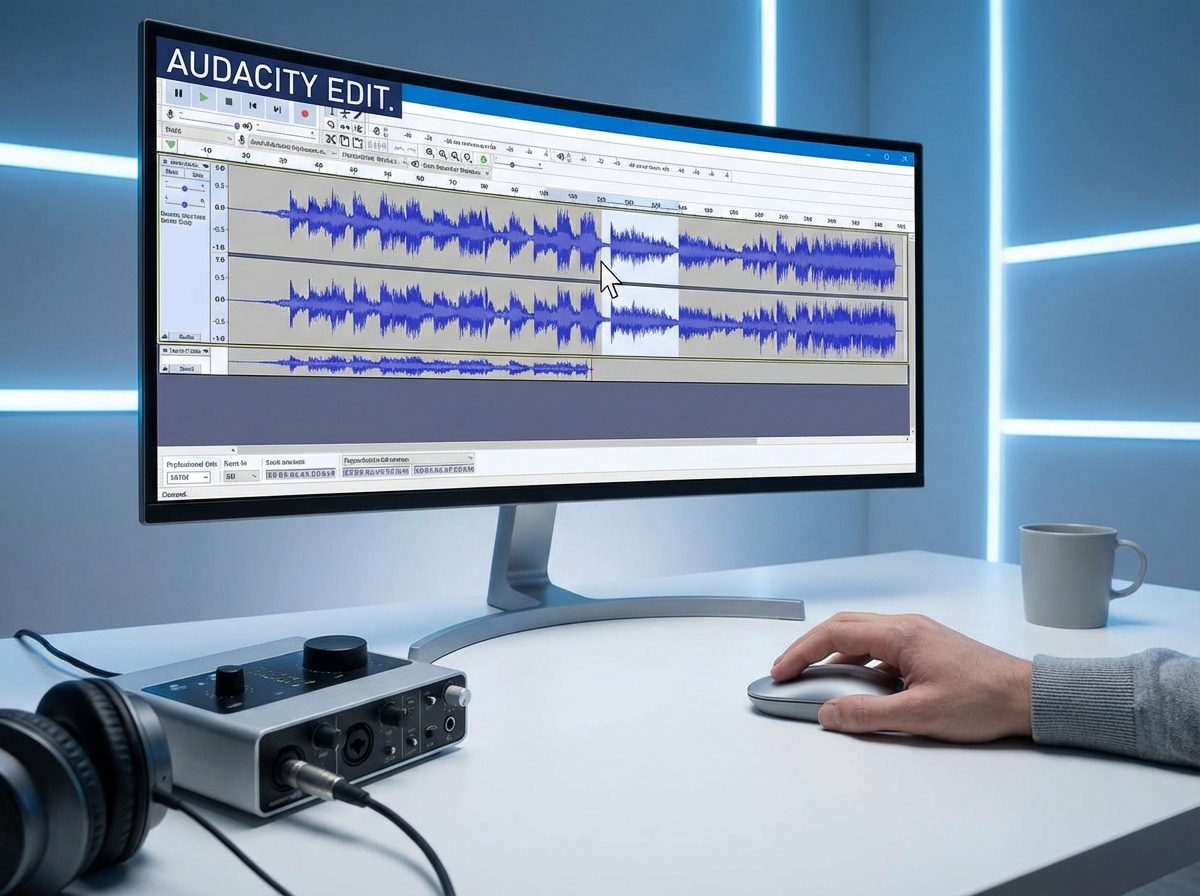
Learning how to record YouTube audio with Audacity is technically straightforward, but before you hit that red button, you need to understand the rules of the road. You also need to ensure your software is actually ready to capture high-fidelity sound without background noise.
Before You Hit Record: The Legal & Technical Basics
The “Elephant in the Room”: Fair Use vs. Piracy
Let’s be clear: Audacity is a tool, not a license. While the software allows you to record any sound passing through your sound card, copyright laws still apply to the content on YouTube.
- Fair Use: If you are recording a clip to use in a video for commentary, criticism, news reporting, or education, this generally falls under “Fair Use.” This is the standard legal defense for reaction videos and video essays.
- Piracy: If you are recording a song to download it for free, or ripping a podcast to re-upload it on your own channel, that is copyright infringement.
Rule of Thumb: If you are adding value (your voice, analysis, or face) to the clip, you are likely safe. If you are just duplicating the content, you risk a copyright strike.
Technical Prep: Update Audacity
If you haven’t used Audacity in a while, update it now. Older versions often struggle with modern Windows audio drivers (WASAPI) or macOS permission settings.
- Open Audacity.
- Go to Help > Check for Updates (Windows) or Audacity > Check for Updates (Mac).

- Ensure you are running version 3.4.0 or later for the most stable internal audio routing.
The “Ready to Record” Checklist
Before you dive into the settings, make sure your workspace is prepped. This prevents common errors like feedback loops or empty audio files.
- Audacity is Installed & Updated: You have the latest version running.
- YouTube Video is Queued: Open the video in your browser and pause it at the start point. Do not mute the YouTube player; Audacity needs the sound to be playing to “hear” it.

- Headphones are Plugged In: This is crucial. If you listen through speakers while recording, your microphone (if active) might pick up the sound again, creating a painful echo.
- System Sounds are Muted: Turn off notifications (Slack, Discord, Email chimes). Audacity captures everything coming from your computer, and you don’t want a notification ping ruining your perfect take.
Method 1: The Best Way for Windows (WASAPI Loopback)
If you are using Windows 10 or 11, the “Windows WASAPI” driver is the best method for recording internal audio. Unlike older methods that relied on “Stereo Mix” (which is often disabled on modern PCs), WASAPI Loopback captures the audio stream digitally before it leaves your computer.
This results in a perfect copy of the YouTube video’s audio with zero background noise or room echo.
Step-by-Step Guide
Follow these steps to configure Audacity for clear internal recording:
- Open Audacity and close other audio programs (like Spotify) to avoid driver conflicts.
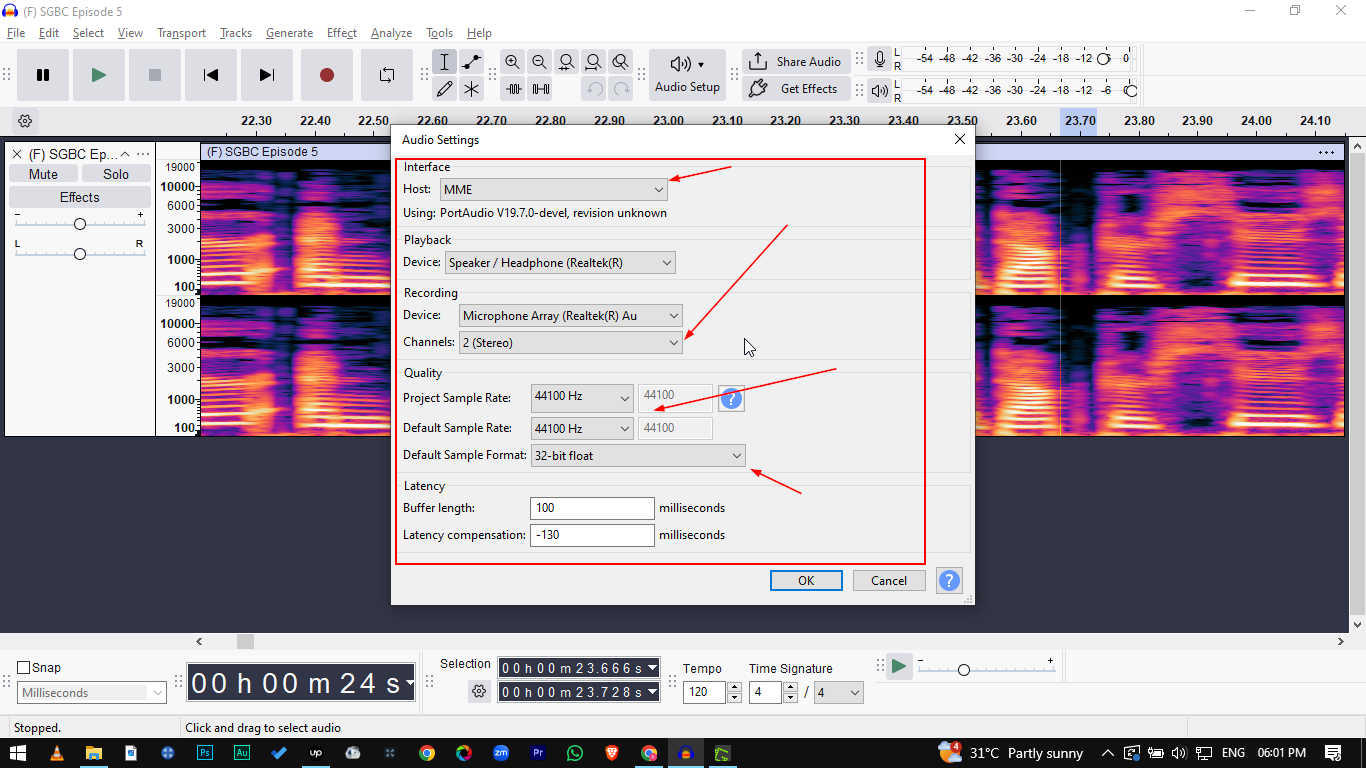
- Locate the Audio Setup toolbar (usually at the top). Set the Audio Host to Windows WASAPI.

- Set the Recording Device to the output device you are currently using to listen, followed by (loopback).
- Example: If you are listening through speakers, select Speakers (loopback).
- Example: If using headphones, select Headphones (loopback).

- Press the Record button (red circle) in Audacity. The cursor will start moving, but you will see a flat line (silence).
- Switch to your browser and press Play on your YouTube video. You should immediately see sound waves appear in Audacity.
- Once you have captured the clip, stop the recording in Audacity before stopping the YouTube video to ensure the end isn’t cut off.
Pro Tip: Why WASAPI?
You might see options like MME or Windows DirectSound. Avoid these for internal recording. WASAPI Loopback bypasses the Digital-to-Analog conversion process, meaning the audio you record is mathematically identical to the source on YouTube.
Method 2: The Best Way for Mac (Audacity + BlackHole)
If you are a Mac user, you have likely noticed that Audacity cannot “see” your computer’s audio by default. This is because macOS strictly separates input and output channels to prevent feedback loops. Unlike Windows, there is no native “Loopback” feature.
To bypass this, you need a virtual audio driver. This acts as a fake cable that connects your system’s sound output directly into Audacity’s microphone input.
We recommend BlackHole (specifically the 2-channel version). It is free, open-source, and offers lower latency than older alternatives like Soundflower.
Step-by-Step Setup Guide
Follow these steps to route YouTube audio into Audacity on macOS:
- Install the Driver: Download and install BlackHole 2ch (you do not need the 16ch version for simple stereo recording).
- Note: If Audacity was already open, restart it so it can detect the new driver.
- Route Mac Audio: Go to System Settings > Sound > Output. Select BlackHole 2ch from the list.
- Important: Once you select this, your speakers/headphones will go silent. Your Mac is now sending audio to the virtual driver, not your ears. (We will fix this below).
- Configure Audacity:
- Open Audacity.
- Click the Audio Setup button (or check the Device Toolbar).
- Set Recording Device to BlackHole 2ch.
- Capture: Press Record in Audacity first, then press Play on your YouTube video. You should see the waveforms moving, even though you cannot hear the sound.
How to Hear Audio While Recording (Multi-Output Device)
The biggest frustration with the method above is that you cannot hear the YouTube video while it records. If you need to monitor the audio (e.g., for a reaction video), you must create a “Multi-Output Device.”
Here is how to route sound to both Audacity and your headphones simultaneously:
- Open the Audio MIDI Setup app (found in the Utilities folder).
- Click the + icon in the bottom left and select Create Multi-Output Device.
- In the right panel, check the boxes for BlackHole 2ch AND your physical device (e.g., External Headphones or MacBook Pro Speakers).
- Go back to System Settings > Sound > Output and select this new Multi-Output Device.
Now, your Mac splits the audio signal: one path goes to Audacity (via BlackHole) for recording, and the other goes to your headphones for monitoring.
The “Reaction” Workflow: Mixing YouTube Audio with Your Voice
Most users reading this guide aren’t just archiving audio; they are creating content. If you are making reaction videos or breaking down a clip for a podcast, capturing the YouTube audio is only Step 1. Step 2 is recording your voice.
Crucial Workflow Rule: Never record your microphone and the YouTube audio onto the same track. If you “bake” them together, you cannot lower the volume of the video clip later if it overpowers your voice. You must record your commentary on a separate, isolated track.
Why Hardware Matters for Reactions
Reaction videos are notoriously difficult to mix because of the dynamic range. You might be listening intently (silence) one moment, and laughing hysterically or screaming at a jump scare the next.
Standard USB microphones often “clip” (distort) during these loud moments, ruining the take. Additionally, you need to hear the YouTube video clearly without your microphone picking up the sound from your speakers (which causes echo).
For professional reaction workflows, we recommend the Hollyland LARK MAX 2. It solves the three biggest pain points of recording commentary over video clips:

Hollyland LARK MAX 2 - Premium Wireless Microphone System
A premium wireless microphone for videographers, podcasters, and content creators to capture broadcast-quality sound.
Key Features: Wireless Audio Monitoring | 32-bit Float | Timecode
- Safety from Distortion (32-bit Float): When you scream at a scary video or laugh loudly, standard microphones hit a “ceiling” and distort. The LARK MAX 2 features 32-bit float recording, which captures such a massive dynamic range that it is virtually impossible to clip. You can simply lower the volume in post-production, and the audio remains crystal clear.
- Zero-Latency Monitoring: To react effectively, you need to hear the YouTube video and your own voice simultaneously. The LARK MAX 2 supports Wireless Audio Monitoring via its new OWS (Open Wearable Stereo) earphones. This allows you to monitor the mix in real-time without the delay that confuses your speech.
- Matching Fidelity: YouTube audio is standardizing around high-quality playback. If your voiceover sounds thin or robotic, the video feels amateur. The LARK MAX 2 records in 48kHz/24-bit studio quality, ensuring your commentary matches the high fidelity of the source material you are reacting to.
Pro Tip: When setting this up in Audacity, record the System Audio (YouTube) first. Then, create a New Mono Track (Tracks > Add New > Mono Track) and set your input device to the LARK MAX 2 to record your commentary while listening back to the clip.
Troubleshooting Common Recording Issues
Even with the correct setup, audio drivers can be finicky. If you hit record and see a flat line, or if your audio sounds robotic, don’t panic. Here are the quick fixes for the three most common errors.
Flatline: Why is Audacity Recording Silence?
If the recording cursor is moving but the waveform is a flat line, Audacity isn’t “hearing” the audio stream.
- Check the Source Volume: Ensure the YouTube video is not muted and the volume slider is up. Audacity captures the signal after the browser’s volume control.
- Verify the Input Device: Go to Audio Setup > Recording Device. If you unplugged headphones or changed speakers, your computer might have switched audio IDs. Ensure the device selected matches exactly what you are listening through.
- Restart the Audio Engine: Sometimes the WASAPI driver hangs. Go to Transport > Rescan Audio Devices to refresh the connection without restarting the app.
The Dreaded Echo (Feedback Loop)
If you hear an echo that gets progressively louder, or if the audio sounds like it is doubling up on itself, Audacity is likely trying to play the sound back to you while it is recording it.
The Fix:
- Go to the top menu bar and click Transport.
- Select Transport Options.
- Uncheck “
Software Playthrough of Input.” (Uncheck “Enable audible input monitoring”)
Note: When using WASAPI Loopback, you don’t need Audacity to play the sound for you; you are already hearing it directly from the browser.
Low Quality or “Robotic” Glitches
Does your recording sound “crunchy,” distorted, or slightly faster/slower than the original video? This is almost always a Sample Rate Mismatch.
YouTube standard audio is typically 44100 Hz or 48000 Hz. If your system is outputting at 48000 Hz but Audacity is trying to record at 44100 Hz, artifacts will occur.
How to match them:
- Check the bottom-left corner of the Audacity window for Project Rate (Hz).
- Set this to 48000 Hz (the standard for video).
- If the issue persists, check your Windows Sound Settings to ensure your output device format matches the Audacity Project Rate.
Frequently Asked Questions (FAQ)
Can I monetize a video with recorded YouTube audio?
Generally, no—unless your usage qualifies as Fair Use.
Simply recording a song or a clip and re-uploading it is a copyright violation and will likely result in a Content ID claim or strike. This demonetizes your video and sends revenue to the original owner.
However, you can often monetize reaction videos or educational content if your use is transformative. This means you are adding significant value through commentary, criticism, or parody. To stay safer:
- Keep clips short: Only use what is necessary to make your point.
- Add constant commentary: Do not let the audio play for long stretches without your input.
- Credit the original creator: While this doesn’t legally protect you, it is good etiquette.
(Note: This is not legal advice. When in doubt, consult a legal professional regarding copyright laws in your jurisdiction.)
Why can’t I use “Stereo Mix” on my computer?
Stereo Mix is a legacy recording method that is often disabled by default—or completely removed—on modern Windows 10 and 11 computers. It relied on the sound card’s driver to route audio, which often led to driver conflicts or lower-quality recordings.
Windows WASAPI (Loopback) is the modern replacement. It is superior because it captures the audio stream digitally before it hits your sound card, requires no driver installation, and provides higher fidelity.
Does Audacity reduce the audio quality?
No, Audacity does not reduce quality if you use the correct settings.
When using WASAPI Loopback (Windows) or a virtual cable like BlackHole (Mac), Audacity captures a bit-perfect digital copy of the stream.
To ensure there is no quality loss:
- Match the Sample Rate: If the YouTube video is 48,000Hz (standard for video), set your Project Rate (Hz) in Audacity to 48000.
- Export as WAV, not MP3: When you save your file, export it as a WAV (Microsoft) signed 16-bit or 24-bit PCM. Exporting as MP3 compresses the file and permanently removes audio data.

Conclusion
Capturing high-fidelity audio from YouTube directly into Audacity is a fundamental skill for content creators. It creates a safer and higher-quality alternative to risky “YouTube to MP3” converter sites.
To recap the workflow:
- Windows Users: Stick to the Windows WASAPI (Loopback) method. It provides a pure digital copy of the stream with zero analog signal loss.
- Mac Users: Since macOS blocks internal routing, installing a virtual driver like BlackHole is the most reliable, free solution to bridge your browser audio into Audacity.
Now that you have your high-quality source clips, ensure your commentary matches that standard. If you are producing reaction videos or podcasts, a mismatch between crisp system audio and a muddy voiceover will kill viewer retention.
For a professional, wireless solution, check out the Hollyland LARK MAX 2. It features 32-bit float recording, which acts as a safety net for your audio—ensuring that sudden laughter, screams, or loud commentary never distort, delivering a studio-grade reaction setup every time.