.png)
You want to strip vocals from a song to create a karaoke track, a remix, or a backing track for practice. You have Audacity installed, but you aren’t sure which buttons to click.
How to remove vocals from any song in Audacity depends entirely on the quality of your source file and the method you choose.
In this guide, we will break down the three most effective workflows: the quick built-in effect, the “old school” manual method, and the new, professional-grade AI method.
Can Audacity Truly Remove Vocals? (Managing Expectations)
Before you start editing, you need to know how Audacity actually works. Standard vocal removal isn’t magic—it is math. Unless you are using the AI plugins (covered in Method 2), Audacity relies on a technique called Phase Cancellation.
In a typical studio mix, the lead vocals are placed “dead center” (equal volume on both Left and Right channels). Instruments like guitars and synths are often panned to the sides for width. Audacity’s standard tools work by subtracting one channel from the other. Since the vocal data is identical on both sides, it cancels itself out, leaving only the side-panned instruments.
The Reality Check
Because this process is subtractive, it is rarely perfect.
- The “Hollow” Sound: Bass guitars and kick drums are also usually center-panned. Removing vocals often removes the “punch” of the track, making the music sound thin.
- Ghost Vocals: You will likely still hear faint echoes. Reverb and delay effects are usually stereo (spread across the sides), so the center cancellation logic misses them.
To save you time, here is a quick breakdown of success rates:
- Works Best On:
- High-quality stereo files (WAV/FLAC).
- Studio tracks with “dry” vocals (little to no reverb).
- Classic rock or pop mixes where instruments are hard-panned left and right.
- Struggles With:
- Mono tracks: If the Left and Right channels are identical, phase cancellation will silence the entire song.
- Live recordings: The acoustics of a venue spread vocals across the stereo field, making them impossible to isolate.
- Side-Panned Vocals: Duets or backing vocals panned left or right will not be removed.
Method 1: The “Vocal Reduction and Isolation” Effect (Easiest Way)
For most users, the native plugin is the best starting point. It is built-in, non-destructive, and allows you to tweak settings before committing to the change. This tool automates the math for you, targeting center-panned frequencies where lead vocals typically sit.
Step-by-Step Workflow
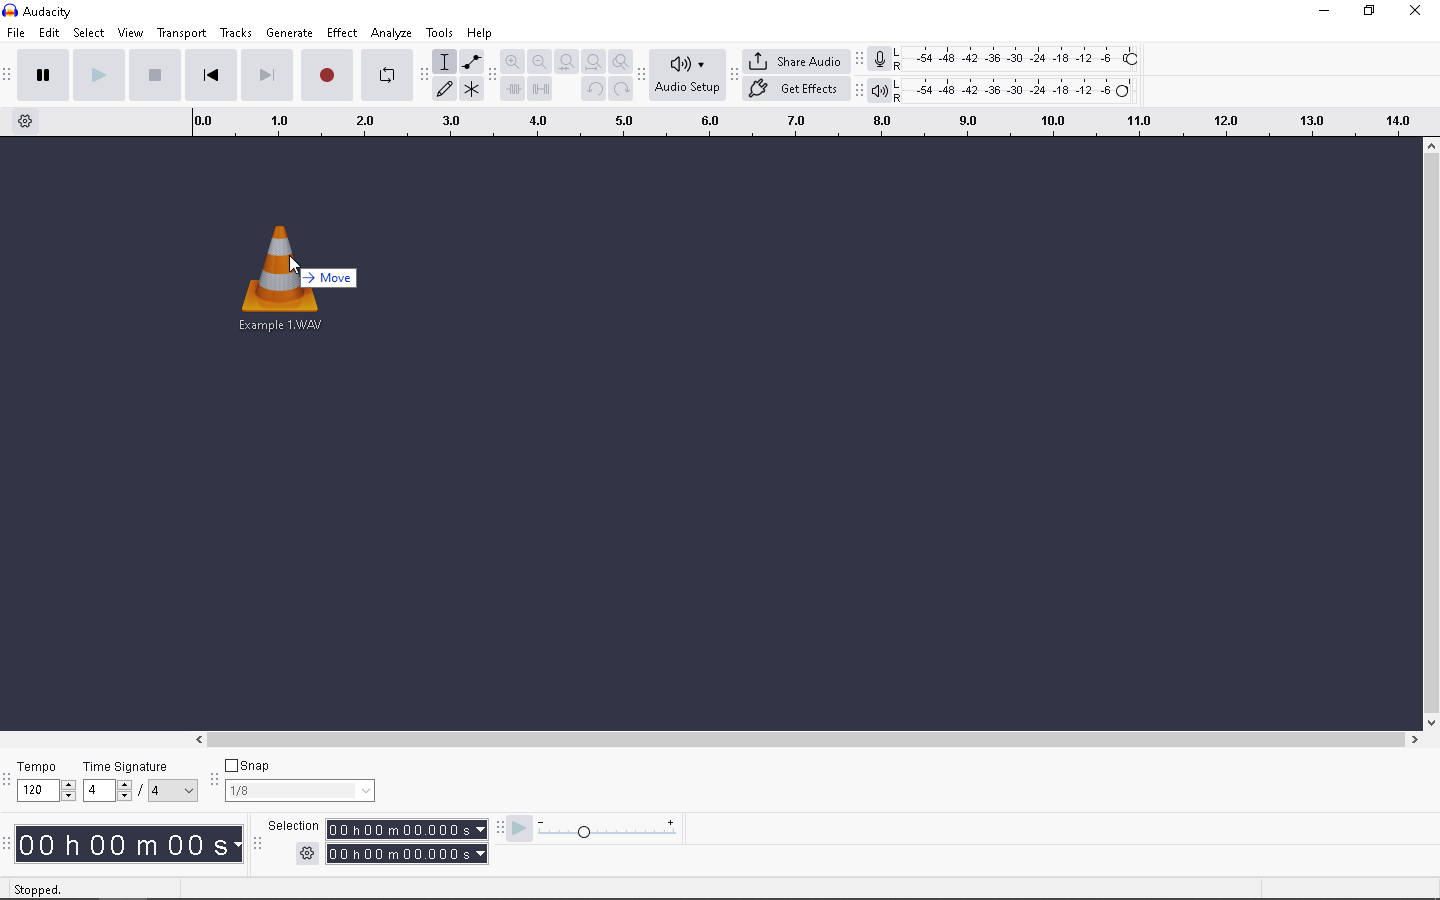
- Import your audio: Drag your music file (MP3 or WAV) into the Audacity timeline.
- Select the track: Click the track header on the left, or press Ctrl + A (Cmd + A on Mac) to select the whole song.
- Open the Effect: Go to Effect > Special > Vocal Reduction and Isolation.
- Select the Action: In the dropdown menu, choose Remove Vocals.
- Adjust Strength: Keep the “Strength” slider near the default (1.0) for your first attempt.
- Apply: Click Apply.
Understanding the Settings
- Strength: Controls how aggressively the effect removes the center audio. Higher strength removes more vocals but can make the music sound “underwater.”
- Low Cut for Vocals: This protects your bass. Since kick drums and bass lines are often center-panned like vocals, a standard removal tool might erase them. Increasing this value (e.g., to 120Hz) tells Audacity to ignore low frequencies, keeping the rhythm section intact.
Pro Tip: Use the Preview button before applying. It plays a 6-second snippet of the result. If the vocals are still too loud, adjust the “Strength” slider and preview again. This saves you from constantly undoing (Ctrl+Z).
Method 2: The AI Method (Best Quality with OpenVINO)
If the built-in effect left your track sounding hollow or missing the drums, this is the solution you need.
For years, Audacity was limited to simple phase cancellation. Now, it supports Intel OpenVINO AI plugins. These plugins use deep learning to perform true Stem Separation, similar to paid tools like Lalal.ai or Izotope RX.
Instead of just hiding the center channel, the AI analyzes the audio and physically separates the vocal frequencies from the instrumental. This keeps the drums and bass intact while removing the voice.
How to Set It Up
These AI tools are not pre-installed due to their file size. You must add them manually:
- Download: Visit the official Audacity website or the Intel OpenVINO GitHub page and download the Audacity OpenVINO Module.
- Install: Run the installer and restart Audacity.
- Enable: Go to Edit > Preferences > Modules. Find mod-openvino, change the status to Enabled, and restart Audacity again.
Step-by-Step: Removing Vocals with AI
- Import Your Track: Drag your song into the timeline.
- Open the Effect: Select the track (Ctrl + A) and go to Effect > AI Tools > Music Separation.
- Choose Separation Mode:
- Select 2 Stem. This splits the file into two tracks: Vocals and Instrumental.
- Note: Choose “4 Stem” if you want to isolate drums and bass specifically.
- Apply: Click Apply. This is heavy on your CPU and may take a minute or two.
The Result
You will see two new tracks appear:
- Track 1 (Instrumental): A clean backing track with stereo width and drums preserved.
- Track 2 (Vocals): An isolated acapella.
Simply mute the Vocal track and export the Instrumental track.
Method 3: The Manual “Invert & Subtract” Technique
Before automated plugins existed, audio engineers used this manual method. While Method 1 automates this, doing it manually is great for learning how audio works or troubleshooting specific files.
This relies on the same Phase Cancellation logic: separating the stereo channels, flipping the polarity (phase) of one, and playing them together to silence identical center information.
Step-by-Step Workflow
1. Split to Mono
Import your song. Click the downward arrow next to the track name to open the menu. Select Split Stereo to Mono.

- Crucial: Do not choose “Split Stereo Track.” You must choose “Split Stereo to Mono” to ensure both resulting tracks are panned to the center.
2. Select One Channel
Click the Select button on only one of the two separated tracks. It doesn’t matter which one.
3. Invert the Phase
With one track selected, go to Effect > Special > Invert. You might see the waveform flip upside down visually.

4. Playback
Press Spacebar. Because both tracks are Mono and one is inverted, the vocals (and anything else in the center) will cancel out.
The Trade-Off: The result is a Mono track. You lose the stereo width, and the drums/bass may sound weak.
Now You Have a Backing Track: How to Record Your Own Vocals
Most people remove vocals for one reason: to replace them. Whether you are making a cover, a remix, or a karaoke video, the quality of your new vocals needs to match the instrumental you just created.
If you record over a clean backing track using a smartphone or a cheap USB mic, the difference in quality will be jarring. To get a professional blend, we recommend the Hollyland LARK MAX 2.

Hollyland LARK MAX 2 - Premium Wireless Microphone System
A premium wireless microphone for videographers, podcasters, and content creators to capture broadcast-quality sound.
Key Features: Wireless Audio Monitoring | 32-bit Float | Timecode
Here is why this wireless system is the ideal companion for Audacity users:
1. Capture Dynamics with 32-bit Float
Singing is unpredictable. You might whisper a verse and belt the chorus. With standard mics, a loud note can cause distortion (clipping). The Hollyland LARK MAX 2 uses 32-bit Float Recording, which provides massive headroom.
- No Clipping: You can sing as loud as you want without distortion.
- No Hiss: You can boost quiet whispers in post-production without raising the noise floor.
- Benefit: You don’t need to stress about setting perfect gain levels. Just hit record and sing.
2. Studio-Grade Fidelity (48kHz/24-bit)
When you strip vocals from a WAV file, you are working with high-fidelity audio. The LARK MAX 2 records in 48kHz/24-bit, the industry standard for production. This ensures your vocal stem has the same depth and resolution as your backing track, allowing them to mix seamlessly.
3. Latency-Free Monitoring
To sing in key, you need to hear the backing track and your own voice at the same time. Many wireless mics have a delay (latency) that throws you off beat. The LARK MAX 2 supports real-time monitoring via the receiver, so you can hear yourself instantly and lock into the groove.
Troubleshooting Common Issues
Removing vocals is rarely perfect. Here are the most common artifacts and how to fix them.
Problem 1: “I can still hear the echo of the singer.”
The main vocal is gone, but a “ghostly” reverb remains.
- Why: Reverb effects are usually stereo, while the dry vocal is mono. Audacity removed the dry vocal but missed the stereo reverb.
- The Fix: Use a Noise Gate (Effect > Volume and Compression > Noise Gate). This silences the track when the volume drops below a certain level, cutting out the faint reverb trails between beats.
Problem 2: “The drums and bass disappeared too.”
- Why: Kick drums and bass are mixed to the center, just like vocals. Phase cancellation removes everything in the center.
- The Fix: You cannot fix this with standard effects. You must use the OpenVINO AI Method (Method 2). The AI distinguishes between the sound of a voice and a drum, removing one while keeping the other.
Problem 3: “The audio sounds underwater.”
- Why: This happens when you try to strip vocals from a low-quality MP3 (128kbps). The compression artifacts mess up the phase information.
- The Fix: Always start with a high-quality WAV or FLAC file. If you must use an MP3, ensure it is at least 320kbps.
Frequently Asked Questions (FAQ)
Is removing vocals in Audacity legal?
Generally, yes, if it is for personal use (practicing, analyzing, or private karaoke). However, uploading your edit to YouTube or SoundCloud likely violates copyright law. Even without vocals, the composition belongs to the original artist. Distributing it can lead to takedowns.
Why does the song sound “mono” after removing vocals?
Standard removal (Method 1 & 3) works by subtracting the Left channel from the Right. This deletes the stereo separation, collapsing the signal into a single mono track. To keep the stereo image, you must use AI Stem Separation (Method 2).
Is there a one-click button to remove vocals perfectly?
No single button works on every song. However, the OpenVINO AI plugin is the closest thing to magic. Unlike the standard effect, it separates the audio sources rather than just canceling frequencies.
Conclusion
Removing vocals in Audacity has evolved from a simple math trick into a sophisticated workflow.
- For Speed: Use the Native Effect (Method 1). It works in seconds but may sound hollow.
- For Quality: Install the Intel OpenVINO AI plugins (Method 2). This provides true stem separation, keeping your drums and bass intact.
Your Next Step: Recording the Cover
Once you have your instrumental, don’t let a bad microphone ruin the final mix. Use a tool like the Hollyland LARK MAX 2 to capture your vocals with 32-bit float precision, blend them with your new backing track, and create a cover worth sharing.