.png)
Learning how to cut and trim audio in Audacity is the specific skill that separates a messy recording from a polished podcast. However, beginners often get tripped up by the terminology. Using the wrong tool can accidentally delete the parts you wanted to keep or throw your entire track out of sync.
Before you touch that delete key, it is crucial to understand the three main ways to edit audio in Audacity:
- Cutting: Removes a section (like a cough) and closes the gap. The audio on the right shifts left, shortening the total track length.
- Trimming: The opposite of cutting. It keeps the selected section and deletes everything else. Use this to isolate a specific take.
- Splitting: Separates a track into two clips without deleting anything. This allows you to create a gap to insert music or move segments around.
Important: Audacity is “Destructive”
Unlike some professional software, standard editing in Audacity is destructive. Once you cut a file, save it, and close the program, that audio is gone forever.
The Golden Rule: Always create a backup before you start. Go to File > Save Project > Save Project As, or simply duplicate your track (Ctrl + D) and mute the original so you have a safety net.
Method 1: How to Cut Audio (The Basic Delete)
This is the function you will use 90% of the time. Use “Cutting” when you need to remove a mistake—like a long pause or a stumbled sentence—and want the rest of the conversation to flow smoothly together.
Follow these steps to remove unwanted audio:
- Select the Selection Tool (I-Beam icon) from the top toolbar or press F1.
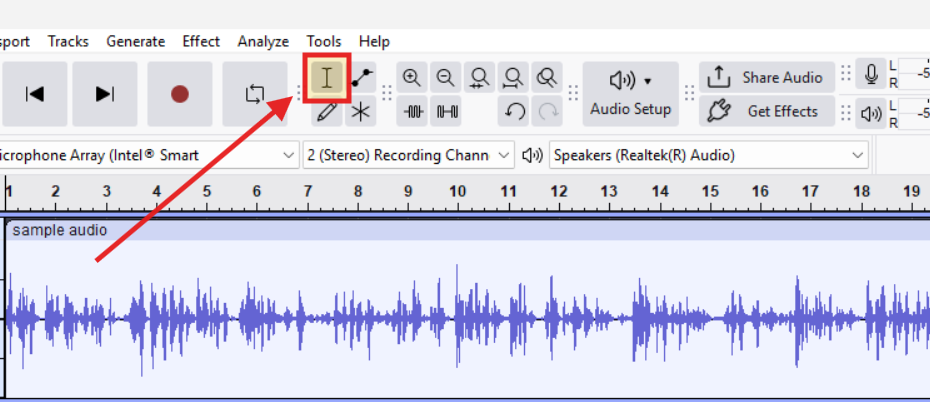
- Click and drag across the waveform to highlight the section you want to remove.
- Press the Delete or Backspace key.
- (Optional) Press Ctrl + X (Windows) or Cmd + X (Mac) to “Cut” the selection. This removes the audio but saves it to your clipboard so you can paste it elsewhere.
Watch Out for the “Ripple” Effect
Because this is a destructive edit, the audio to the right of your cut automatically shifts left to fill the empty space.
- The Risk: If you have multiple tracks (like a voiceover and background music), cutting just the voice track will cause it to go out of sync with the music. To fix this, make sure you select both tracks before pressing delete, or use the Split method below.
Method 2: How to Split Audio Tracks (Non-Destructive)
While “cutting” removes audio, splitting simply breaks the track into separate clips. This is the best method if you need to create space for an ad break or sound effect without deleting any of the original conversation.
How to split and move audio:
- Position the Cursor: Click the waveform exactly where you want the split.
- Execute the Split: Go to Edit > Audio Clips > Split.
- Windows Shortcut: Ctrl + I
- Mac Shortcut: Cmd + I
- Verify: You will see a thick black line appear. The audio is now two separate clips.
- Move the Audio:
- Newer Audacity Versions (3.1+): Hover over the Clip Handle (the title bar at the top of the waveform). Your cursor will turn into a hand. Click and drag the clip to create space.
- Older Versions: You must select the Time Shift Tool (Double-arrow icon or F5) to drag clips.
Pro Tip: Split by mistake? Click the split line to merge them back, or select both clips and press Ctrl + J (Join).
Method 3: How to Trim Audio (Isolating the Good Take)
If cutting removes the bad parts, Trimming isolates the good parts.
This is essential when you have a long recording file but only need a specific segment. For example, if you recorded a 10-minute interview but only want to use a 30-second soundbite, manually deleting the 9 minutes of audio surrounding it is tedious. Trimming does it in one click.
How to Trim:
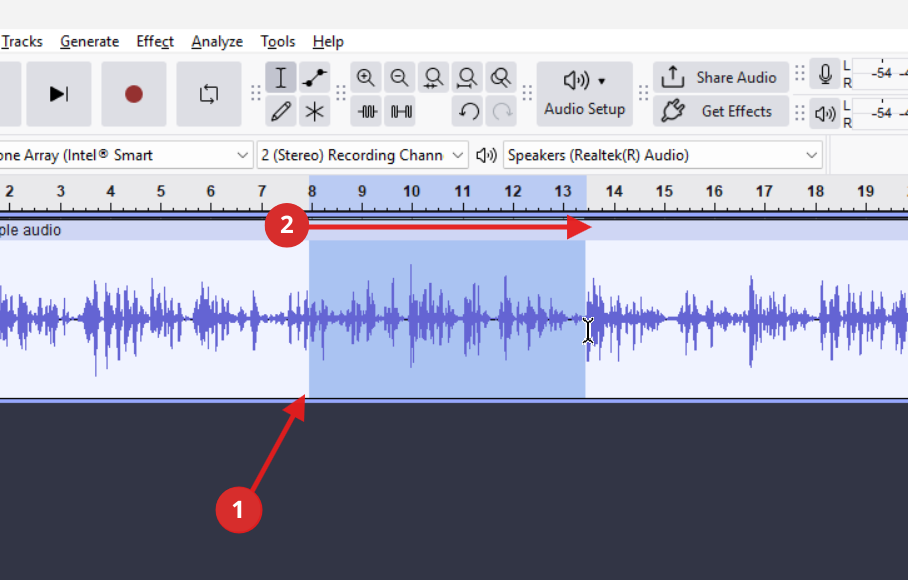
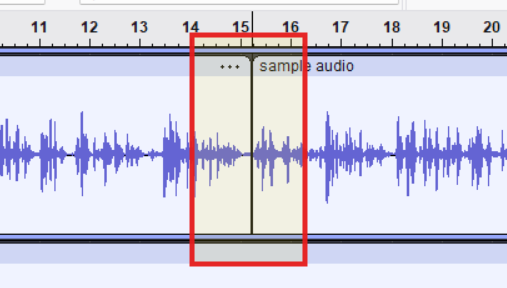
- Select the “Keeper”: Use the Selection Tool (F1) to highlight the exact section you want to save.
- Execute the Trim:
- Windows: Press Ctrl + T
- Mac: Press Cmd + T
- Menu: Edit > Remove Special > Trim Audio.
The Result: Everything outside your highlighted box disappears instantly.

3 Pro Tips for Cleaner Cuts (Avoid the “Clicking” Sound)
There is nothing worse than finishing an edit and hearing a robotic “pop” or “click” at every cut point. These glitches happen when you cut the waveform abruptly, causing a sudden jump in voltage.
Here is how to smooth out your workflow.
1. Always Cut at “Zero Crossings”
If you cut audio while the wave is high or low, the playback drops to silence instantly, creating a click. You want to cut exactly where the wave meets the center line (zero volume).
Audacity can automate this:
- Make your selection.
- Press the Z key (or go to Select > At Zero Crossings).
- Perform your delete.
Audacity will slightly adjust your selection edges to the nearest silence point, eliminating most clicks.

2. Zoom In for Accuracy
You cannot fix what you cannot see. Beginners often edit while looking at the entire 30-minute track, leading to accidental cuts where you snip off the start of a word.
- Zoom In: Hold Ctrl + Mouse Wheel Up.
- Zoom Out: Hold Ctrl + Mouse Wheel Down.
Get in the habit of zooming in until you see the individual vibrations before you cut.
3. The “Prevention” Strategy (Better Source Audio)
The most frustrating edits involve trying to fix “clipped” audio—parts where the speaker got too loud and the waveform flattened out (distorted). In standard recording, once audio clips, that data is lost, and you are forced to cut that section out.
Professional editors avoid this headache entirely by using hardware with 32-bit Float Recording, such as the Hollyland LARK MAX 2.

Hollyland LARK MAX 2 - Premium Wireless Microphone System
A premium wireless microphone for videographers, podcasters, and content creators to capture broadcast-quality sound.
Key Features: Wireless Audio Monitoring | 32-bit Float | Timecode
Why 32-bit Float Matters for Editing:
- The Old Way: You record a laugh that is too loud. It distorts. You have to cut the laugh out in Audacity, potentially ruining the flow of the conversation.
- The 32-bit Float Way: With the LARK MAX 2, the audio physically cannot clip. Even if the waveform looks distorted, the detail is preserved. Instead of cutting, you simply apply the Amplify effect in Audacity and lower the volume (e.g., -10dB). The audio restores perfectly.
Using the right gear means you spend less time fixing broken audio and more time being creative.
Specialized Edits: Silencing and Smoothing
Standard cutting shifts your timeline to the left. If you are editing audio to match a video file, a standard delete will destroy your sync. To fix mistakes without moving the rest of the track, use Silencing.
How to Silence Audio (Keeping Sync)
Use this to remove a breath or background noise while keeping the surrounding audio locked in place.
- Select the Noise: Highlight the section containing the unwanted sound.
- Apply Silence: Click the Silence Audio Selection button in the toolbar (looks like a flat line).
- Shortcut: Press Ctrl + L (Windows) or Cmd + L (Mac).
Result: The section becomes absolute silence, but the total duration of the track stays exactly the same.
Smoothing Edits with Fades
Even with perfect cutting, the transition between silence and sound can feel abrupt. Fading makes edits sound natural.
- Fade In: Smooths the start of a clip. (Highlight the first 0.5 seconds > Effect > Fading > Fade In).
- Fade Out: Softens the end of a clip. (Highlight the last few seconds > Effect > Fading > Fade Out).
Frequently Asked Questions (FAQ)
What is the shortcut for cutting in Audacity?
- Cut (remove and copy): Ctrl + X (Cmd + X).
- Delete (remove permanently): Delete or Backspace key.
- Trim (keep selection only): Ctrl + T (Cmd + T).
How do I cut audio without moving the rest of the track?
If you delete a section normally, Audacity shifts the remaining audio, which ruins video sync. To avoid this:
- Silence Audio: Select the bad take and press Ctrl + L. This replaces the noise with silence.
- Split Delete: Press Ctrl + Alt + K. This deletes the audio but leaves a gap, preventing the timeline from shifting.
Can I undo a cut in Audacity?
Yes. Press Ctrl + Z (Cmd + Z) to reverse your last action. However, Audacity clears your undo history once you close the software. Always save a project file (.aup3) if you aren’t finished.
Conclusion
Mastering the cut is the foundation of audio editing. While Audacity can feel intimidating at first, you really only need to memorize three things: the Selection Tool, the Split command (Ctrl + I), and the Delete key. These handle the vast majority of podcast and music editing tasks.
To get comfortable, duplicate a raw audio file and spend 15 minutes just testing these shortcuts. Try making a Split Cut without looking at the menu, or use Silence Audio to mute a breath without losing sync.
Finally, remember that the best way to speed up your workflow is to capture cleaner audio at the source. If you find yourself constantly cutting out distorted peaks, consider upgrading to a 32-bit float microphone like the Hollyland LARK MAX 2. Being able to recover loud audio instead of cutting it out will save you hours of frustration in the long run.