.png)
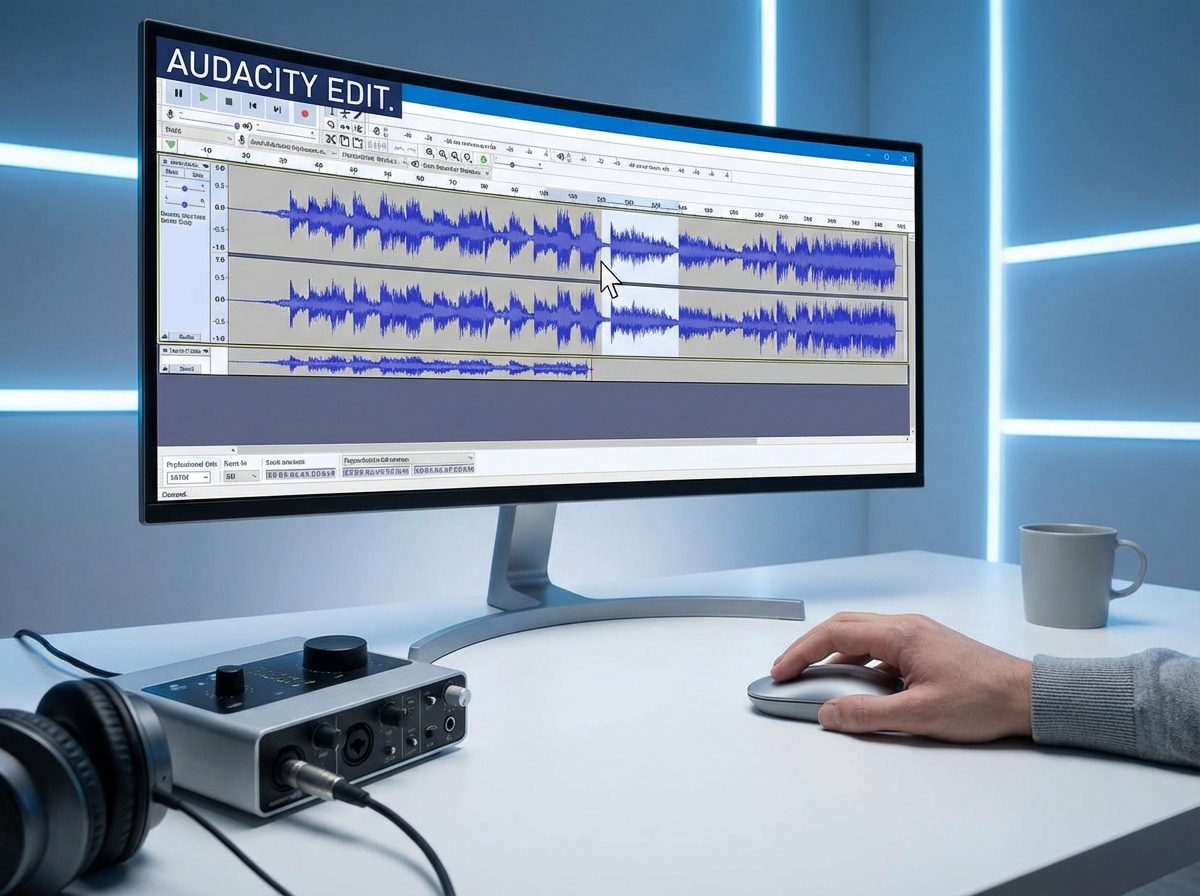
Nothing screams “amateur production” quite like a hard audio cut. When a voice track starts abruptly at full volume, it jars the listener. Conversely, when background noise cuts off instantly at the end of a clip, it breaks immersion and draws attention to the edit itself.
Learning how to apply fade out and fade in effects in Audacity is the quickest way to fix this. Mastering these transitions allows you to control the listener’s experience:
- Fade In: Gradually increases volume from silence, letting the ear adjust gently to the new sound.
- Fade Out: Smoothly reduces volume to absolute silence, signaling a natural conclusion.
However, software effects have their limits. While fades add polish, professional audio starts at the source. If your input audio is clipped or distorted, a smooth fade won’t save the recording. Using a microphone with 32-bit float recording (like the Hollyland LARK MAX 2) ensures your raw files are captured without distortion. This gives you a clean canvas, allowing you to focus on creative transitions rather than trying to hide bad audio with editing tricks.

Hollyland LARK MAX 2 - Premium Wireless Microphone System
A premium wireless microphone for videographers, podcasters, and content creators to capture broadcast-quality sound.
Key Features: Wireless Audio Monitoring | 32-bit Float | Timecode
Method 1: Using the Effects Menu (The Quickest Way)
This is the most straightforward method for beginners. It applies a standard Linear Fade, meaning the volume increases or decreases at a constant rate. This is perfect for quickly smoothing out the beginning of a voice recording or silencing background noise at the end of a clip.
Follow these steps to apply a fade in seconds:
- Select the Selection Tool from the top toolbar (look for the I-beam icon or press F1).

- Click and drag your mouse over the section of the waveform you want to fade.
- For a Fade In: Highlight the first few seconds of the track.
- For a Fade Out: Highlight the last few seconds of the track.

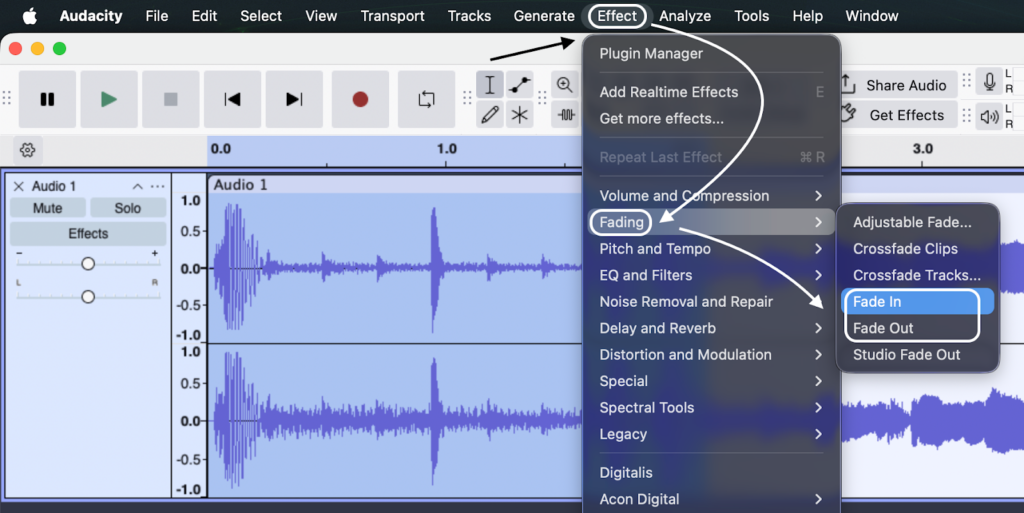
- Navigate to the top menu bar and click Effect.
- Select Fading, then click Fade In or Fade Out depending on your needs.
- Press the Spacebar to preview the audio and ensure the transition sounds smooth.
Important: Understanding Destructive Editing
Keep in mind that using the Effects menu is a form of destructive editing. This means Audacity permanently alters the waveform data for that specific file.
Unlike “non-destructive” methods (like the Envelope Tool below), you cannot simply toggle the fade off later. If you change your mind after applying the effect, you must use Undo (Ctrl + Z / Cmd + Z) immediately, or you will be stuck with the change.
Method 2: Using the Envelope Tool (The Professional Way)
While the Effects menu is fast, the Envelope Tool offers a non-destructive alternative. This gives you total control to shape the volume over time without permanently altering the original file.
This method is ideal for podcasters who need to lower background music while speaking (auto-ducking) or create custom fade curves that don’t follow a straight line.
Step-by-Step Guide
- Select the Envelope Tool
Locate the Tools Toolbar at the top of the interface. Click the icon that looks like two dots connected by a line (or press F2). You will see the blue lines bordering your audio track highlight.

- Create Control Points
Click anywhere on the blue amplitude border (the top or bottom edge of the waveform). This creates a Control Point (a small white dot). These dots act as anchors for your volume levels.
- Tip: To create a fade, you typically need at least two points: one where the volume change begins, and one where it ends.
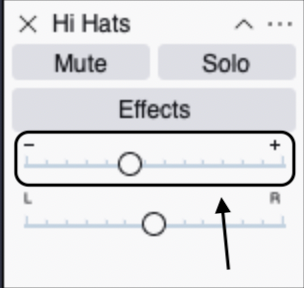
- Adjust the Volume
Click and drag a Control Point down toward the center of the track to lower the volume, or up toward the edge to return it to 100%.
- For a Fade Out: Place a point where you want the fade to start. Then, place a second point at the very end of the clip and drag it all the way down to the center line (silence).
- For a Fade In: Start with a point at the beginning of the clip dragged to the center. Place a second point further in at normal volume.

- Shape Custom Curves
Unlike the standard linear fade, the Envelope Tool lets you create specific shapes. By adding multiple intermediate points between your start and end, you can create a smooth S-curve or a slow-then-fast drop-off. Simply click along the line to add as many points as necessary to get the exact feel you want.
Why Use Non-Destructive Editing?
The biggest advantage here is flexibility. If you listen to your edit and decide the fade is too fast, you don’t have to “Undo” and start over. You simply grab the Control Point and slide it left or right to adjust the timing instantly. The underlying audio remains untouched.
Method 3: Studio Fade Out vs. Linear Fade Out
Not all fades sound the same. While the standard “Fade Out” gets the job done, Audacity offers a variation called Studio Fade Out that changes the “feel” of your ending. Understanding when to use each is a key part of mixing.
Linear Fade Out (The Standard)
When you select Effect > Fading > Fade Out, Audacity applies a Linear Fade. Visually, this looks like a straight diagonal line going from full volume to silence.
- The Feel: Consistent and mechanical. The volume drops at a constant rate.
- Best For: Voice recordings, short sound effects, or trimming breath noises. It is efficient and predictable.


Studio Fade Out (The Musical Approach)
The Studio Fade Out applies an S-Curve to the audio. Instead of a straight line, the volume drops slowly at first, accelerates in the middle, and then tapers off quickly at the very end.
- The Feel: Musical and natural. It creates a lingering effect that feels smoother to the human ear than a sharp linear drop.
- Best For: Music tracks, song outros, and background ambience.


Pro Tip: If you are fading out a music bed at the end of a podcast episode, always use Studio Fade Out. The S-curve mimics how songs fade out on the radio, making your production sound much more high-end.
How to Crossfade Two Tracks in Audacity
Crossfading is the technique of blending two audio files, where the first track fades out exactly as the second track fades in. This is standard practice for professional podcasts (transitioning from intro music to the host’s voice) or DJ-style mixes.
Unlike a hard cut, a crossfade maintains continuity so the listener never encounters “dead air” or jarring silence between segments.
Step-by-Step Crossfading Guide
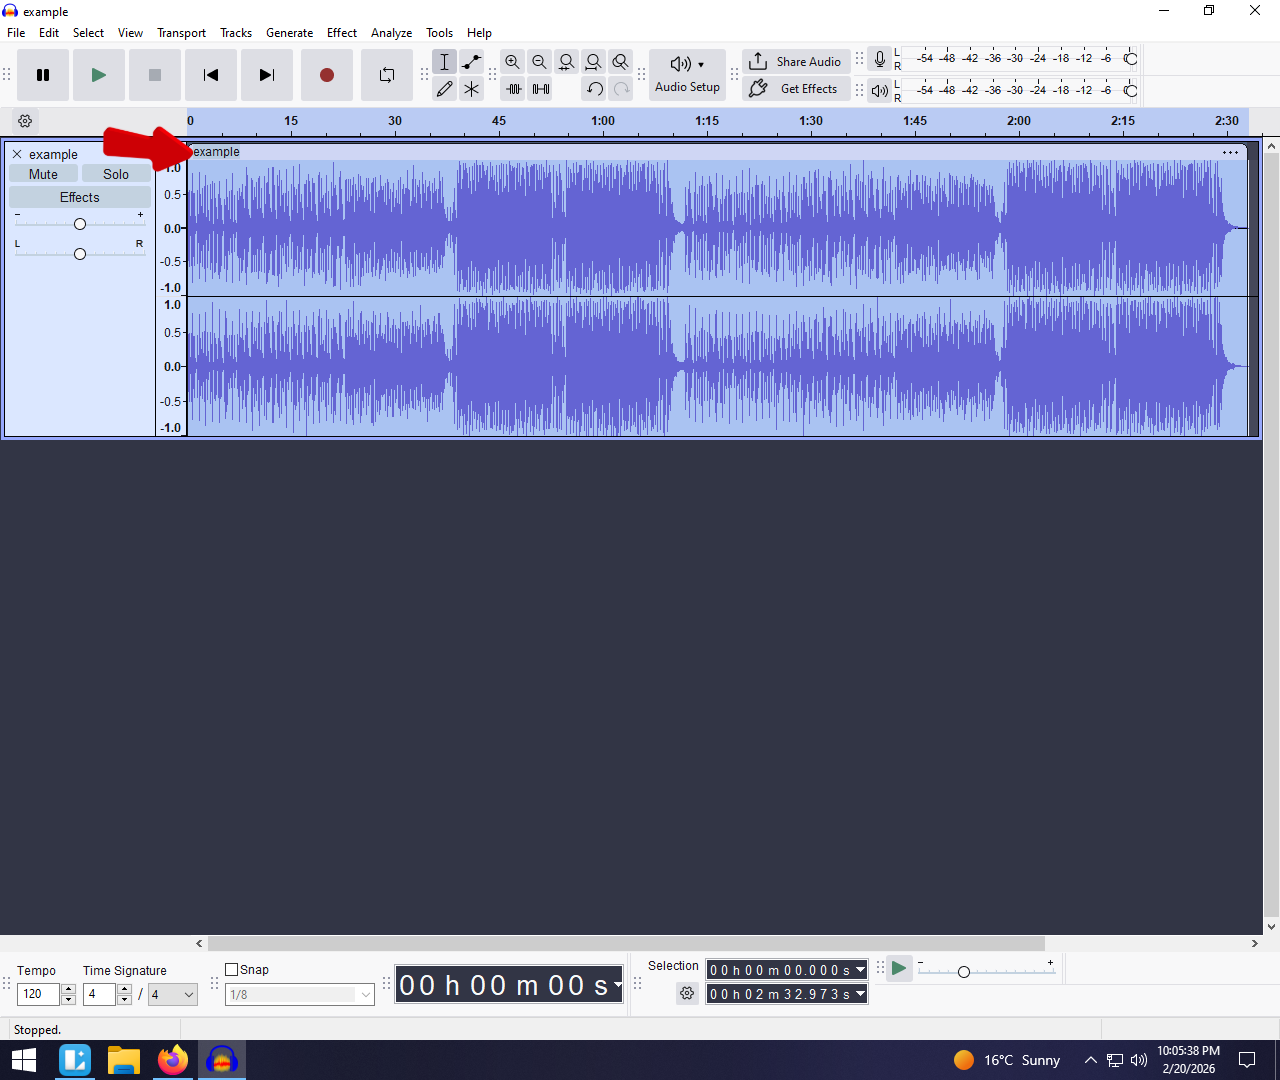
- Prepare Your Tracks: Ensure your two audio clips are on separate tracks (stacked vertically). If they are on the same track, click the clip handle and drag it downward to create a new track layer.

- Position the Overlap: Drag the second clip so it starts slightly before the first clip ends. The length of this overlap determines the duration of your transition (2–5 seconds usually works best).
- Note: In older versions of Audacity, use the Time Shift Tool (double arrow icon). In newer versions, simply drag the clip header.

- Fade Out the First Track: Highlight the overlapping section of the first track only. Go to Effect > Fading > Fade Out.

- Fade In the Second Track: Highlight the same overlapping timeframe on the second track. Go to Effect > Fading > Fade In.

- Review the Mix: Play back the transition. It should sound like the first track is smoothly “handing off” energy to the second track.

Pro Tip: For a perfectly symmetrical fade without doing it manually, highlight the overlapping sections of both tracks simultaneously and select Effect > Fading > Crossfade Tracks. Audacity will apply a mathematically matched curve to both clips instantly.
Essential Gear for Cleaner Audio Editing
Even the best software has limits. Audacity is powerful enough to smooth out transitions, but it cannot fix audio that was recorded poorly at the source. If your raw file is distorted, clipped, or filled with static, no amount of fading will make it sound professional.
The “garbage in, garbage out” rule applies here. Relying on post-production to fix bad audio is a massive time sink. The most efficient workflow starts with capturing high-fidelity sound that requires minimal cleaning.
The Source Quality Advantage: Hollyland LARK MAX 2
For creators who want to spend less time troubleshooting in Audacity and more time creating, the Hollyland LARK MAX 2 is a strong solution. It addresses the exact problems that usually force you into hours of editing.
- 32-Bit Float Recording: This is a huge advantage for dynamic audio. If you suddenly laugh loudly or shout during a recording, standard microphones will “clip” (distort), ruining the take. The LARK MAX 2’s 32-bit float recording captures such a massive dynamic range that you can simply lower the volume of those loud peaks in Audacity without any distortion. You don’t have to “fix” the audio; you just adjust it.
- Studio-Grade Specs: With a sampling rate of 48kHz and 24-bit depth, the raw audio is already at the industry standard for video and podcast production.
- Real-Time Monitoring: The system supports monitoring via OWS (Open Wearable Stereo) earphones or standard headphones. This allows you to catch background noise or interference before you hit record, ensuring you never have to rely on a fade out to hide a mistake that shouldn’t have been there in the first place.
Troubleshooting Common Fade Issues
Even with a simple tool like Audacity, edits don’t always go according to plan. If your fades aren’t working or sound unnatural, you are likely encountering one of these three common hurdles.
The “Fade In/Out” Option is Grayed Out
This is the single most common frustration for beginners. In Audacity, you cannot perform edits while the track is active or paused.
- The Cause: You likely pressed Pause (two vertical blue lines) instead of Stop.
- The Solution: Press the Stop button (the yellow square icon) or hit the Spacebar. Once playback has fully stopped, the Effect menu will become active again.
The Fade Sounds Too Abrupt (Too Fast)
If your audio vanishes too quickly, it sounds like a mistake rather than a stylistic choice. A linear fade operates over the specific duration you select.
- The Cause: The highlighted section of the waveform is too short.
- The Solution: Undo the current fade (Ctrl + Z). Select a longer portion of the audio file. For a natural-sounding music outro, a fade usually needs 3 to 5 seconds. For voice, 0.5 to 1 second is usually sufficient to soften a breath or cut.
There is a “Click” or “Pop” at the End of the Fade
A digital click occurs when an audio clip cuts off while the waveform is above or below the center line (0 dB), forcing the speaker to snap back to the neutral position instantly.
- The Cause: The fade did not reach absolute silence (infinity dB) before the clip ended.
- The Solution: Ensure your fade covers the very last millisecond of the clip. Zoom in closely on the end of the track and apply the Fade Out effect to the very tail end. Alternatively, use Select > At Zero Crossings before applying your fade to ensure edits happen exactly where the waveform meets the center line.
Frequently Asked Questions (FAQ)
What is the shortcut key for Fade Out in Audacity?
In recent versions of Audacity, there is no default keyboard shortcut for “Fade Out.” You must apply it via the menu (Effect > Fading > Fade Out) or create a custom shortcut.
How to set a custom shortcut:
- Click Audacity > Preferences (or Audacity > Preferences on Mac).

- Select Shortcuts from the left-hand menu.
- Search for “Fade Out.”
- Click Set and press your desired key combination (e.g., Shift + F).
- Click OK.

How do I fade out multiple tracks at once?
You can fade multiple tracks simultaneously by selecting all of them before applying the effect.
- Select the Tracks: Hold Shift and click the specific tracks, or press Ctrl + A (Windows) / Cmd + A (Mac) to select everything.

- Highlight the Region: Use the Selection Tool to highlight the time range at the end where you want the volume to drop.

- Apply the Effect: Go to Effect > Fading > Fade Out. The fade applies to every selected track within that timeframe.

What is the difference between Fade Out and Crossfade?
- Fade Out: Reduces the volume of a single audio clip down to absolute silence. It is strictly used to end a segment or song.
- Crossfade: Overlaps two audio clips. As the first clip fades out, the second clip simultaneously fades in. This is used for transitions, such as blending intro music into a voice track.
Conclusion
Fading audio isn’t just a technical step; it is a stylistic choice that respects your listener’s ears. Whether you are smoothing out a podcast intro or blending music tracks, eliminating abrupt cuts is the hallmark of a polished production.
While the standard Effects menu works well for quick adjustments, mastering the Envelope Tool gives you the flexibility required for professional work. It allows you to tweak volume curves endlessly without permanently altering your original file.
Remember, though, that software can only polish what is already there. If you want to spend less time fixing distorted peaks and more time creating content, the quality of your source audio matters most.
Ready to upgrade your sound?
Check out the Hollyland LARK MAX 2. With its 32-bit float recording, you capture studio-grade audio that never clips, giving you a pristine waveform that requires significantly less editing in Audacity.