.png)
Screen recording lets you create a video of what’s happening on your computer screen. You can also include sound from your computer’s speakers or your microphone. There are tons of reasons why one might benefit from this.
Some of the examples include making tutorials to show someone exactly how to do something on their computer. You can record yourself giving a presentation without going live. Capture your great gaming moments and share them with your friends. Record what’s happening on your screen to help someone figure out a computer problem.
These are the things you can generally do. Now, let’s discover how to screen record on Windows 10 with audio.
Understanding the Built-in Screen Recording Tool on Windows 10
Did you know Windows 10 comes with a tool that lets you record your screen? It’s surprisingly easy to use and has everything you need for basic recordings. The tool is:
Xbox Game Bar
Don’t let the name fool you! The Xbox Game Bar was built to record awesome game moments, but it works just as well for recording anything on your screen. The Game Bar is super convenient. A quick shortcut opens it up, and it has clear buttons to start and stop your recordings.
Compatibility and Limitations
If you have Windows 10, you’ve got the Game Bar. Sorry, older Windows versions don’t have this feature. For the smoothest recordings, you’ll want a reasonably powerful computer. If your computer is a bit older, your recordings might not be as smooth. The Game Bar is perfect for simple recordings. If you need advanced editing features or want to make really polished videos, you might need a more specialized program.
Preparing Your PC for Screen Recording
Before you start recording your screen, it’s good to do a quick checkup! Here’s how to make sure your computer is ready:
- Make sure your computer’s processor (like the brain) and graphics card (which handles the visuals) are strong enough to handle it. You can usually find information about your computer’s hardware online.
- Open your Windows Settings. You can search for “Game Bar” or find it in the “Gaming” section of your settings. Make sure the Game Bar is enabled.
- In the Game Bar settings, you can change things like video quality and how many frames per second are recorded. Higher settings mean better-looking videos, but you’ll need a more powerful computer to keep up.
- Make sure your microphone is plugged in and selected as the input (that’s where the Game Bar gets your voice from).
- You can also adjust how loud the sounds from your computer will be when you record. This is helpful if you want your voice to be louder than a game, for example.
Steps to Screen Record with Audio on Windows 10
Follow these steps to start screen recording with audio on Windows 10:
Opening Xbox Game Bar
Click on the Windows key and the letter G at the same time (Win + G). You can also find the Game Bar by clicking the Start button and searching for “Xbox Game Bar.”

Navigating the Xbox Game Bar Interface
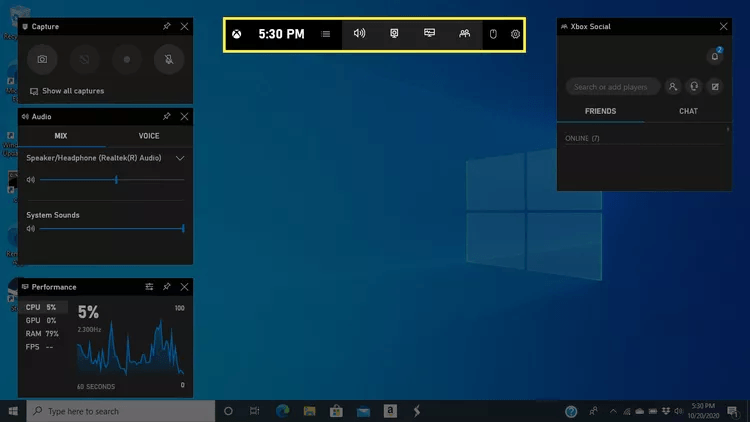
The Game Bar has several little windows called “widgets.” Think of these like apps on your phone. There are widgets for recording, controlling sound, and more!

Some common widgets include:
- Capture: Controls for starting/stopping recordings, audio settings
- Performance: Shows how hard your computer is working (CPU usage, FPS)
- Audio: Adjust microphone and system volume levels
- Gallery: View saved recordings and screenshots
You can move the widgets around to put the ones you use most in easy-to-reach places.

Customize it:
- Move widgets: Drag widgets by their title bars.
- Pin widgets: Click the pin icon to keep frequently used widgets always visible.
- Change widget order: Click the three lines (top left of the Game Bar) to open the menu and rearrange widgets.
Setting Up Audio for Recording
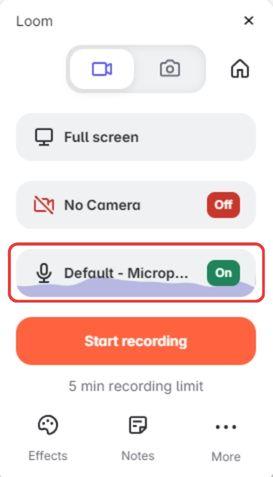
Choose if you want to record your microphone, sounds from your computer (like from a game or video), or both! You can use Lark Max for studio-quality audio with max timbre technology. Use the sliders to make your microphone or computer sound louder or quieter in the recording.


Starting and Managing Your Recording

- How to Start Recording – Click the record button (it looks like a circle) to start.
- Pausing and Resuming the Recording – You can pause your recording and start it again if you need to.
- Stopping the Recording – Press the stop button (a square) to finish your recording.

Accessing and Managing Your Recorded Clips
Default location: Windows usually saves recordings in “VideosCaptures.” You can find your “Videos” folder through File Explorer.

Change save location: You can change where recordings are saved in the Xbox Game Bar settings.
Editing and Sharing:
- Basic edits: The Windows Photos app (included with Windows) has basic editing tools.
- More options: Try third-party software for advanced editing and effects.
Tips for Effective Screen Recording with Audio on Windows 10
Here are some tips for you to make the recordings better:
Optimizing Audio Quality
The microphone already on your laptop or webcam is all right, but it can pick up a lot of background noise. An external microphone, like a small lapel mic or a dedicated USB microphone, will usually sound much clearer. Try to record in a quiet place as much as possible. Also, close any programs you’re not using while recording, as they can generate background noise.
Enhancing Video Quality
In the Xbox Game Bar settings, you can adjust the resolution (how sharp the image is) and frame rate (how smoothly the video plays back). Higher settings equal better quality but require more powerful computer hardware.
Many apps and games let you change them to full-screen mode. This can sometimes help with the quality of your recordings. You can usually find the full-screen option within the Game Bar itself!
Troubleshooting Common Issues
- Dealing with Lag and Performance Issues: This usually means your computer is struggling to keep up. Try closing other programs while recording and lowering the resolution and frame rate in the Game Bar settings.
- Resolving Audio Sync Problems: Sometimes the audio and video can get out of sync. Inspect your audio settings and make sure your microphone and speakers are using the same sample rate. If that doesn’t help, try updating your sound card drivers.
Alternative Methods and Tools for Screen Recording with Audio
The Xbox Game Bar is a great start, but sometimes you need more power and flexibility. That’s where third-party programs come in.
Third-Party Software Options
OBS Studio
- Free and powerful: OBS Studio is open-source, meaning it’s completely free and incredibly versatile.
- Steeper learning curve: OBS gives you tons of control, but it takes time to learn.
Camtasia
- Professional choice: Camtasia is used by pros; it includes everything you need for excellent recordings and powerful editing.
- It costs money: Camtasia is a paid program.
Bandicam
- Simple but effective: Bandicam is known for being easy to use.
- Good for instruction: It has features tailored to making tutorials and presentations.
- Also paid: Bandicam isn’t free, though it’s less expensive than some other options.
Is it Good to Use Third-Party Tools?
| Pros | Cons |
| Advanced editing | Complex |
| Special effects | Not always free |
| Picture-in-picture | Costly |
| Adjust everything from video quality to how your microphone is processed. | Be prepared to spend time learning |
Selecting the Right Tool for Your Needs
Choosing a screen recorder isn’t one-size-fits-all. The best tool for you depends on a few key factors:
Complexity
- Simple & quick: If you need basic recordings with no fancy edits, the Xbox Game Bar might be perfect.
- In-depth control: If you want to tweak every setting, add effects, and have total control over your recordings, a more powerful third-party tool like OBS Studio is the way to go.
Budget
- Free: Great options like OBS Studio won’t cost you a dime.
- Paid: The fanciest programs with all the bells and whistles, like Camtasia, usually come with a price tag.
Editing requirements
- Light editing: For trimming clips or adding basic text, the Xbox Game Bar or free options might be enough.
- Professional-level: If you want to do advanced editing, combine multiple videos, or add fancy effects, a dedicated editing program like Camtasia is a worthwhile investment.
FAQs Related to Screen Recording on Windows 10 with Audio
Why is there no sound while screen recording on Windows 10?
Make sure you’ve selected the correct audio sources when starting your recording (usually in the Game Bar settings). It’s easy to accidentally record without your microphone or system sounds enabled. Outdated or faulty sound drivers can cause trouble. Try going to your computer manufacturer’s website to download and install the latest drivers.
Can I record only a specific window or application with audio on Windows 10?
Yes. In the Capture widget, start your screen recording and then use the shortcut Alt + Tab to select the window you want to record. The Game Bar will adjust automatically. Many third-party screen recorders offer the ability to choose a specific window or area of your screen.
How long can I record my screen with audio using the Xbox Game Bar?
Technically no limit. However, really long recordings will make very large files. Your available hard drive space is the practical limit. Long recordings also put more stress on your computer, which could cause the recording to become choppy.
Are there any free third-party tools for screen recording with audio on Windows 10?
Yes! Here are some popular options:
- OBS Studio: Powerful, but has a steeper learning curve
- FlashBack Express: A good balance of features and ease of use
- Screenpresso: Simple and has built-in image editing to